The Baby Lock Zest sewing machine is a name that comes up a lot when people ask for a great first machine. It's known for being incredibly user-friendly and surprisingly capable, making it a fantastic, reliable partner for anyone just starting their creative journey. Think of it as the perfect tool to turn those crafting ideas into real, tangible projects.
Your Creative Journey Starts Here
Stepping into the world of sewing should feel like an exciting adventure, not a chore. Having the right machine makes all the difference—you want a reliable guide, not a complicated puzzle that leaves you frustrated. The Baby Lock Zest was designed to be that perfect starting companion. It’s approachable, capable, and ready for your very first stitch.

This guide isn't just a dry rundown of specs; it's a "how-to" manual designed to show you what’s possible and unlock your creative potential. Here at bsewinn.com, we are committed to empowering crafters through our custom sewing machine designs and support. We believe that starts with the right tools and the right guidance. The Zest is proof that a beginner-friendly design doesn’t mean you have to compromise on quality or performance.
Built for Beginners and Beyond
The Baby Lock Zest really shines as a portable, entry-level machine built for new sewists and anyone who enjoys casual crafting. It comes loaded with 15 built-in stitches, including a super practical 4-step buttonhole, which is a fantastic feature set for its typical price of $169-$199.
Its compact size and handy carrying handle make it a favorite for taking to classes or sewing meetups. It also has a free-arm design—a must-have feature for sewing tricky cylindrical items like pant hems and sleeves. You just slide off part of the base and you're good to go. This blend of portability and core functionality is what makes the Zest stand out. For a deeper dive, you can find more details about Baby Lock machines and their features.
At its core, the Baby Lock Zest is about building confidence. It removes the common frustrations that trip up beginners, letting you focus on the simple joy of creating, whether you're mending a seam or making your first tote bag.
More Than Just a Machine
When you get a Zest from bsewinn.com, you’re not just getting a machine; you’re getting the support of a community dedicated to helping you grow. At bsewinn.com, our commitment to empowering crafters is at the heart of everything we do. This guide is just the beginning. We offer extensive resources to help you master your machine and expand your skills:
- Online Classes: Our expert-led tutorials are designed to work perfectly with your Baby Lock Zest, covering everything from the absolute basics to creating advanced projects.
- Comprehensive Training: We offer the support you need to understand every dial and feature, making sure you get the most out of your new machine.
- A Community of Crafters: You can connect with fellow sewing lovers, share what you’ve made, and get inspired for your next project.
With the Baby Lock Zest and the dedicated support from bsewinn.com, you have everything you need to bring your creative vision to life. Let's get sewing.
Breaking Down the Baby Lock Zest's Features
A sewing machine's feature list can feel like reading a technical manual. It’s full of jargon that doesn't really tell you what you can do with it. So, let's forget the specs for a second and talk about what the Baby Lock Zest sewing machine actually means for your projects. This machine was built for practical creativity, and every single feature has a purpose.
Think of the 15 built-in stitches as your creative starting lineup. This isn't just about sewing in a straight line. You get a solid collection of utility stitches for strong seams, zigzag stitches for finishing raw edges, and a handful of decorative stitches for when you want to add a little flair. It’s the perfect toolkit for making clothes, simple quilts, and other crafts.
Your Creative Toolkit, Explained
The real magic of the Zest is how it gets out of your way and lets you focus on the fun part—creating something new. It’s packed with simple, thoughtful features that just make sense.
For instance, the front-loading bobbin system is a classic for a reason. It's a reliable, time-tested design that's easy to pop open and switch out. No fiddling required, which is perfect for when you're in the zone and don't want to break your flow.
Then there’s the free arm. Just slide off the little accessory tray, and you’ve got a much smaller sewing surface. This is your secret weapon for hemming jeans, stitching cuffs on sleeves, or working on any small, circular project that would otherwise be a total pain.
- Adjustable Stitch Length: This little dial is your command center for stitch control. Dial it down for a short, tight stitch when you need a super-strong seam, or lengthen it for basting fabric together or creating gathers.
- Four-Step Buttonhole: This feature is a game-changer for anyone who's ever struggled to make a decent buttonhole. It walks you through the process in four simple stages, so you get professional-looking results on your shirts and pillows every single time.

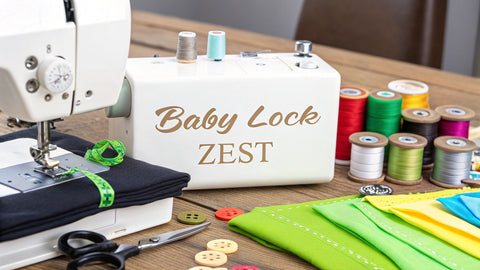
This image really drives home how simple the Zest is to get up and running. It’s one of the big reasons we recommend it for beginners who just want to start sewing without a huge learning curve.
Let's take a closer look at what each key feature brings to your sewing table.
Baby Lock Zest Feature Breakdown
| Feature | Technical Specification | What This Means for You |
|---|---|---|
| 15 Built-in Stitches | Includes utility, decorative, and stretch stitches. | You have the essential stitches for everything from basic repairs and garment construction to adding a personal, decorative touch. |
| Four-Step Buttonhole | A guided, manual process for creating buttonholes. | No more guesswork! This makes adding buttonholes to shirts, dresses, and pillows straightforward and consistent. |
| Front-Loading Bobbin | A traditional Class 15 bobbin system. | This is a reliable and sturdy bobbin setup that's easy to access for quick thread changes. |
| Free-Arm Sewing | Removable flatbed accessory storage compartment. | Easily sew cylindrical items like pant legs, sleeves, and baby clothes without stretching or struggling with the fabric. |
| Adjustable Stitch Length | Dial control for stitch length up to 4mm. | Gives you precise control over your seams—shorter for strength, longer for basting or gathering. |
| Portable Design | Lightweight at 13.0 lbs with a built-in handle. | Perfect for taking to sewing classes, retreats, or simply moving it from the closet to the kitchen table. |
These features come together to create a machine that's not just easy to use but also incredibly versatile for its size.
The beauty of the Zest is that it’s focused. It doesn’t try to impress you with a hundred stitches you’ll never touch. Instead, it nails the essentials, giving you a trusty machine that helps build your confidence with every project you finish.
Here at bsewinn.com, we believe that having a great machine is only half the battle. Our commitment is to empower you with the know-how to make the most of it. That’s why we offer extensive resources like online classes and training designed to help you master every part of your Zest.
We can show you how to apply these features to create beautiful things you’ll be proud of. From learning that four-step buttonhole to experimenting with the decorative stitches, we’re here to help you grow. If you want to see all the specs, head over to the official product page for a closer look at the Baby Lock Zest sewing machine.
Getting Your Machine Ready to Sew
That moment you unbox your new Baby Lock Zest sewing machine is pure excitement. But the real magic happens when you hear that first perfect stitch. Let's get you from the box to that beautiful hum in just a few minutes, turning any first-time jitters into pure creative joy.
We’re going to walk through the two most important first steps: winding the bobbin and threading the machine. Forget the technical jargon. Think of this as a friend showing you the ropes. The goal is to get you sewing smoothly right away and prove just how user-friendly the Zest was designed to be.
Winding Your First Bobbin
Before you can sew anything, your machine needs its bottom thread, which comes from a small spool called a bobbin. Getting this step right is the foundation for a good stitch and helps you dodge a world of tangled-thread headaches later on.
Think of it like this: the bobbin is a tiny reservoir of thread that has to work in perfect harmony with the top thread. A lopsided, messy bobbin is like a bumpy tire—it’ll make for a rough ride. But a nice, evenly wound bobbin? That ensures every seam is smooth sailing.
Here’s how to get that perfect wind every time:
- Position Your Thread: Pop your main spool of thread onto the spool pin at the top of the machine. Slide the spool cap on to keep it snug and prevent it from dancing around.
- Follow the Path: Look for the dotted line on top of your Zest and guide your thread along it. You'll wrap it around a small tension disc made just for bobbin winding. This is the key to getting the tension just right.
- Prep the Bobbin: Poke the end of the thread through the tiny hole on the top of your empty bobbin, going from the inside out. Place the bobbin on the winder pin (top right of the machine) and click it to the right. This engages the winder.
- Get it Started: Hold onto that little thread tail and give the foot pedal a gentle press. The machine will start to spin. After a few winds, pause and snip that starting tail off nice and close to the hole.
- Fill 'er Up: Now, press the foot pedal and watch it go! The Zest is smart; its winder will slow down or stop on its own when the bobbin is full. Just push the bobbin pin back to the left, lift it off, and snip the connecting thread.
Threading the Needle
With a perfectly wound bobbin in hand, it's time to thread the top part of the machine. The Baby Lock Zest makes this part a breeze with a numbered path printed right on its body. It’s basically just connect-the-dots for thread.
Each number is a crucial checkpoint, making sure the thread glides smoothly and has the right amount of tension. I've seen it a thousand times: skipping a step here is the fastest way to get skipped stitches or a "bird's nest" of knotted thread.
The real secret to foolproof threading is to simply slow down. Follow that numbered path like it's a treasure map, making sure the thread is seated snugly in every guide. A few extra seconds here will save you so much troubleshooting time down the road.
Once you’ve followed the path all the way down to the needle, you’ll thread it from front to back. A little pro tip: snip the end of your thread at a sharp angle. It makes it much easier to guide through the eye of the needle.
Last step! Put your wound bobbin into its front-loading case and draw up the bobbin thread. That's it—you are officially ready to sew! And if you're a visual learner, we at bsewinn.com have online classes that show you these exact steps, so you can master your machine with an expert cheering you on.
How-To Guide: Your First Projects on the Baby Lock Zest
Alright, you’ve got the machine threaded and humming. Now for the fun part—actually making something. All the theory in the world can’t replace the feeling of fabric gliding under the needle and turning into something real. This is where you and your Baby Lock Zest sewing machine really get to know each other.
We're going to jump right in with three tangible projects I’ve picked out specifically for new sewists. Think of them as more than just tutorials; they're comprehensive, replicable "how-to" examples that teach you core skills you’ll use forever. We’ll stitch up a simple tote bag, create a set of custom pillowcases, and finally, tackle the ever-useful task of hemming jeans.
Each project builds on the last, giving you a little win and a boost of confidence. You’ll see how a straight seam on a tote bag is the foundation for making a dress, and how finishing an edge on a pillowcase keeps your future projects from fraying. This is our commitment at bsewinn.com—empowering you with the skills to create with confidence, backed by our extensive online classes, training, and resources every step of the way.
Project 1: Simple and Sturdy Tote Bag
A tote bag is the perfect first project, hands down. It's all about straight lines and strong seams, and at the end, you have something you can actually use. You'll get a great feel for the Zest’s no-fuss stitch selection and its steady, reliable power.
- Cut Your Fabric: Grab some sturdy fabric like canvas or a heavy cotton. Cut two rectangles, each 18 inches by 14 inches. These will be the front and back panels of your bag.
- Create the Straps: From the same fabric, cut two long strips, each 4 inches wide and 22 inches long. Fold a strip in half lengthwise (wrong sides together) and press it flat. Open it, then fold the raw edges into that center crease and press again. Fold it in half one more time along the original crease and give it a final press. All your raw edges are now neatly tucked inside.
- Sew the Straps: Time to sew. Pick a basic straight stitch on your Zest (stitch #2 or #3 works great). Sew down both long edges of each strap, staying close to the edge. This is called topstitching, and it makes the straps super strong while giving them a crisp, finished look.
- Attach the Straps: Lay one of your main bag pieces right-side up. Place the ends of one strap about 3 inches in from the side edges and 1 inch down from the top. Pin it down really well, then do the same for the other panel. For extra strength, stitch a small square with an "X" through it where each end of the strap meets the bag.
- Assemble the Bag: Place your two main bag pieces right-sides together, with the straps neatly tucked inside between them. Pin the two long sides and the bottom. Sew these three sides using a straight stitch, leaving about a half-inch seam allowance.
- Finish and Turn: Snip the bottom corners diagonally to get rid of some bulk (this helps them look sharp). Turn the bag right-side out, poke out the corners, and give the seams a good press. That’s it! You just made a fantastic, reusable tote.
Project 2: Custom Envelope Pillowcases
Pillowcases are another fantastic way to practice sewing straight lines, and they let you add a personal touch to your bedroom. We’re going to make an envelope-style closure, which is a clever trick to avoid fiddling with zippers or buttons.
For a standard-sized pillow, you just need one piece of cotton fabric measuring 42 inches long and 21 inches wide.
- Step 1: Hem One End: Take one of the short (21-inch) ends. Fold the edge over by a half-inch and press it. Then, fold it over another half-inch to hide the raw edge. This is a classic double-fold hem. Stitch it down with a straight stitch.
- Step 2: Create the Envelope Flap: Now move to the opposite short end. This time, we’ll make a much wider hem. Fold the fabric over by a half-inch and press. Then, fold it over by a full 4 inches and press again. Stitch this wide hem down along its inner edge.
- Step 3: Fold and Sew: Lay your fabric on your table, right-side up. Fold the end with the narrow hem inward by about 12 inches. Now, fold the end with the wide hem over top of it. The total length of the folded pillowcase should be around 18 inches. Pin the two open sides to hold everything in place.
- Step 4: Finish the Seams: Sew down both open sides with a straight stitch. To keep the inside from fraying after a few washes, it's a great idea to go back over those same seams with a zigzag stitch (stitch #5 on your Zest).
Turn it right-side out, and you've got a beautiful pillowcase with a pro-looking envelope closure. This little project is a great lesson in why measuring carefully and finishing your seams matters.
Project 3: Perfectly Hemming Jeans
There's nothing more practical than knowing how to hem your own pants. This project will introduce you to one of my favorite features on the Zest: the free arm, which is designed for sewing in tight circles like pant legs and cuffs.
The free arm is one of the most useful things on the Baby Lock Zest sewing machine. You just slide off the accessory tray, and it reveals a smaller sewing surface. This gives you amazing control for hemming cuffs or sleeves without accidentally sewing through both layers of fabric. It’s a game-changer.
- Mark the New Hemline: Have the person put on the jeans with the shoes they'll be wearing. Fold the cuff up to the perfect length and secure it with pins or a fabric marker.
- Prepare the Cuff: Take the jeans off. Measure the cuff you just folded up. Add 1.5 inches to that measurement for your hem allowance, and then trim off the extra fabric.
- Press the Hem: First, fold the raw edge up by a half-inch and press it flat. Then, fold it up again by another inch to completely hide that raw edge. Press it again to create a nice, sturdy double-fold hem and pin it all the way around.
- Use the Free Arm: Slide the accessory tray off your Baby Lock Zest to expose the free arm. Now, just slide the pant leg right over it. See how easy that is?
- Stitch the Hem: Select a straight stitch. If you can find a thread that matches the gold or copper topstitching on the jeans, even better! Sew slowly around the cuff, keeping your stitches nice and close to the top folded edge.
This one skill alone will save you a ton of money on alterations. More importantly, it builds your confidence for handling different fabrics and using more of your machine's awesome features.
Simple Care for Long-Lasting Creativity
Think of your sewing machine like a creative partner. And just like any good partnership, it needs a little attention to stay happy and healthy. Your Baby Lock Zest sewing machine is built to last, but a bit of simple care will keep it humming along, project after project.
The best part? You don’t need to be a mechanic to do it. These little routines are incredibly easy, and they make a massive difference in how well your machine runs. Getting comfortable with these basics will build your confidence and keep you sewing, not troubleshooting. We want you to feel empowered to keep your creative journey moving forward, stitch by stitch.
The Lint-Free Zone
Lint is the sworn enemy of a smooth-running sewing machine. Those tiny bits of thread and fabric fluff love to gather in the bobbin area and under the needle plate. Let them build up, and you’re asking for trouble—jams, wacky tension, and skipped stitches are almost guaranteed.
The easiest way to fight back is a quick clean-up after every few projects. Grab the little brush that came with your Zest and gently sweep out any lint you see around the bobbin case. It takes less than a minute, and honestly, it’s the single most important thing you can do for your machine.
A clean machine is a happy machine. Regularly removing lint prevents 90% of common sewing machine problems, like thread nests and inconsistent stitches, ensuring your creative process stays smooth and enjoyable.
Needle Know-How
Here’s a secret that many new sewers miss: needles don’t last forever. They're a consumable, just like thread. A dull needle is a recipe for frustration and can cause a surprising number of headaches.
- Skipped Stitches: When a needle gets dull, it struggles to cleanly pierce the fabric. This can prevent the thread from forming a proper loop for the hook to catch, resulting in skipped stitches.
- Fabric Damage: Instead of slipping neatly between the fibers, a dull needle punches right through them. This can cause snags and pulls, especially on finer fabrics.
- Weird Noises: If your machine suddenly starts making a thumping or clunking sound as it sews, a dull or slightly bent needle is the most likely culprit.
A good rule of thumb is to swap in a fresh needle after about 8-10 hours of sewing, or whenever you start a big new project. It’s such a small, cheap thing that pays huge dividends in stitch quality.
Keeping Your Zest in Top Shape
A little preventative maintenance goes a long way. This simple schedule will help you keep your machine in perfect working order, ready for whatever you throw at it.
| Baby Lock Zest Maintenance Schedule |
| :--- | :--- |
| Maintenance Task | Frequency | Why It's Important |
| Wipe Down Exterior | After each use | Removes dust and keeps your workspace clean. |
| Clean Bobbin Area & Feed Dogs | Every 2-3 projects | Prevents lint buildup, the #1 cause of stitch problems. |
| Change the Needle | Every 8-10 sewing hours | Ensures clean stitches and prevents fabric damage. |
| Check & Tighten Screws | Monthly | Vibration can loosen screws on the needle plate or presser foot. |
| Professional Servicing| Every 1-2 years | A technician can deep clean, oil, and adjust timing for long-term health. |
Following these simple steps is the best way to protect your investment and guarantee a smooth, frustration-free sewing experience for years to come.
Common Troubleshooting Made Easy
Even the best-maintained machine will act up occasionally. Don't panic! Most of the time, the fix is incredibly simple.
| Common Problem | Likely Cause | Simple Solution |
|---|---|---|
| Skipped Stitches | Your needle is probably dull, bent, or in backwards. | Pop in a fresh needle. Make sure the flat side faces the back of the machine. |
| Thread Bunching Under Fabric | The machine isn't threaded correctly. This is almost always the reason. | Unthread the machine completely. With the presser foot up, re-thread everything from the start, following each step carefully. |
| Breaking Needles | You're pushing or pulling the fabric through the machine. | Relax your grip! Your job is just to guide the fabric; let the machine's feed dogs do all the work. |
Once you get the hang of spotting these little issues, you'll feel so much more confident at the controls. And as your skills grow, you might want to give your machine new capabilities. Expanding your collection of presser feet is a great place to start. A kit like the Baby Lock 4pc Foot Kit for Zest can open up a whole new world of techniques for things like zippers and buttonholes, ensuring you and your Zest have a long and happy partnership.
Grow Your Skills with Bsewinn and Baby Lock
Getting the hang of the Baby Lock Zest is such a fantastic first step, but trust me, it’s just the beginning of your sewing adventure. This little machine is a workhorse—its simplicity and reliability give you the perfect foundation to build your confidence and really stretch your skills. It nails the fundamentals, which frees you up to start dreaming bigger.
This is where your creativity truly blossoms. At bsewinn.com, our commitment is to empower you to take that next step. We’ve put together a huge library of online classes, extensive training, and other resources designed to grow right alongside you, taking you from simple seams to complex, beautiful creations.
Your Path from Beginner to Confident Creator
We truly believe learning to sew should be a continuous journey, not a final destination. Our resources are laid out to help you tackle new challenges with the right guidance at the right time, so you never feel like you’re stuck or in over your head. Our community and instructors are here to cheer you on as you find and develop your own unique style.
The goal isn't just to learn how to sew; it's to become the creator you've always wanted to be. The Zest gives you the start, and our community provides the path forward, offering support and inspiration for whatever project you can imagine.
As your projects get a little more intricate, you might find that a few smart tools can make a world of difference in keeping your workspace organized and efficient. For instance, juggling multiple thread colors for a quilting or embroidery project can get messy fast. Investing in a simple accessory like a 2-spool sewing and embroidery thread stand can be a game-changer, keeping your threads untangled and ready to go.
Here's how you can keep moving forward:
- Explore Custom Designs: Dive into our curated collection of patterns and projects, all hand-picked to build on the skills you're learning.
- Join an Online Class: Sign up for a workshop that pushes your boundaries a bit, whether that’s finally learning to install a zipper or giving free-motion quilting a try.
- Connect with a Community: Share your work, ask questions, and get inspired by fellow crafters who are on the exact same journey.
And as you get more comfortable with your Baby Lock Zest, you might even think about sharing what you make online. It can be incredibly rewarding to start a successful blog about your creative projects and connect with a wider audience. We’d be thrilled to continue on this path with you, offering our full support every stitch of the way.
Still Have a Few Questions?
It's totally normal to have questions when you're getting to know a new sewing machine. Think of this section as a quick chat with a seasoned sewing friend—I'm here to give you straightforward answers to the things we hear most often about the Baby Lock Zest. Our whole team at bsewinn.com wants you to feel confident and ready to create from the moment you unbox your machine.
We've pulled these questions right from conversations with fellow crafters and our own expert instructors to tackle the practical stuff new users are always curious about.
Getting the Most from Your Zest
Let's dig into a few common queries we get from sewers who are just firing up their Zest for the first time. Knowing your machine's little quirks and capabilities is the real key to unlocking its potential.
Can the Baby Lock Zest really handle heavy fabrics like denim or canvas?
Yes, it sure can! The Zest is surprisingly tough and has no problem with light to medium-weight denim and canvas. The secret is all in the setup. Just make sure you switch to the right tool for the job—a sturdy denim or size 16 needle—and keep your sewing speed nice and steady. When you hit multiple thick layers, just slow down a bit to keep those stitches looking perfect.
What are the must-have accessories I should buy first for my Zest?
The good news is the Zest already comes with the basics to get you sewing right away, like a few essential feet, bobbins, and needles. To really round out your sewing kit, I'd suggest grabbing these three things:
- A fantastic pair of sharp fabric scissors. Seriously, don't skimp on these.
- Extra universal needles in common sizes like 12 and 14. You'll go through them faster than you think!
- A handful of spools of high-quality, all-purpose thread in basic colors like white, black, and grey.
With just those few extras, you'll be set for a huge range of first projects.
How often does the Baby Lock Zest need to be professionally serviced?
If you're good about at-home maintenance, your Zest will be a happy camper for years. As long as you follow the simple care tips we talked about—like cleaning out lint and swapping your needle regularly—a machine used for hobby sewing typically only needs a professional tune-up every 2-3 years. Now, if you're sewing several times a week, you might want to consider an annual check-up just to keep it running in tip-top shape.
Here at B-Sew Inn, we're all about supporting your entire creative journey, from picking out the perfect machine to cheering you on as you master new skills. The Baby Lock Zest is a wonderful place to start, and we have the community and resources to help you grow from there. Feel free to explore our full range of classes and products over at https://www.bsewinn.com.