

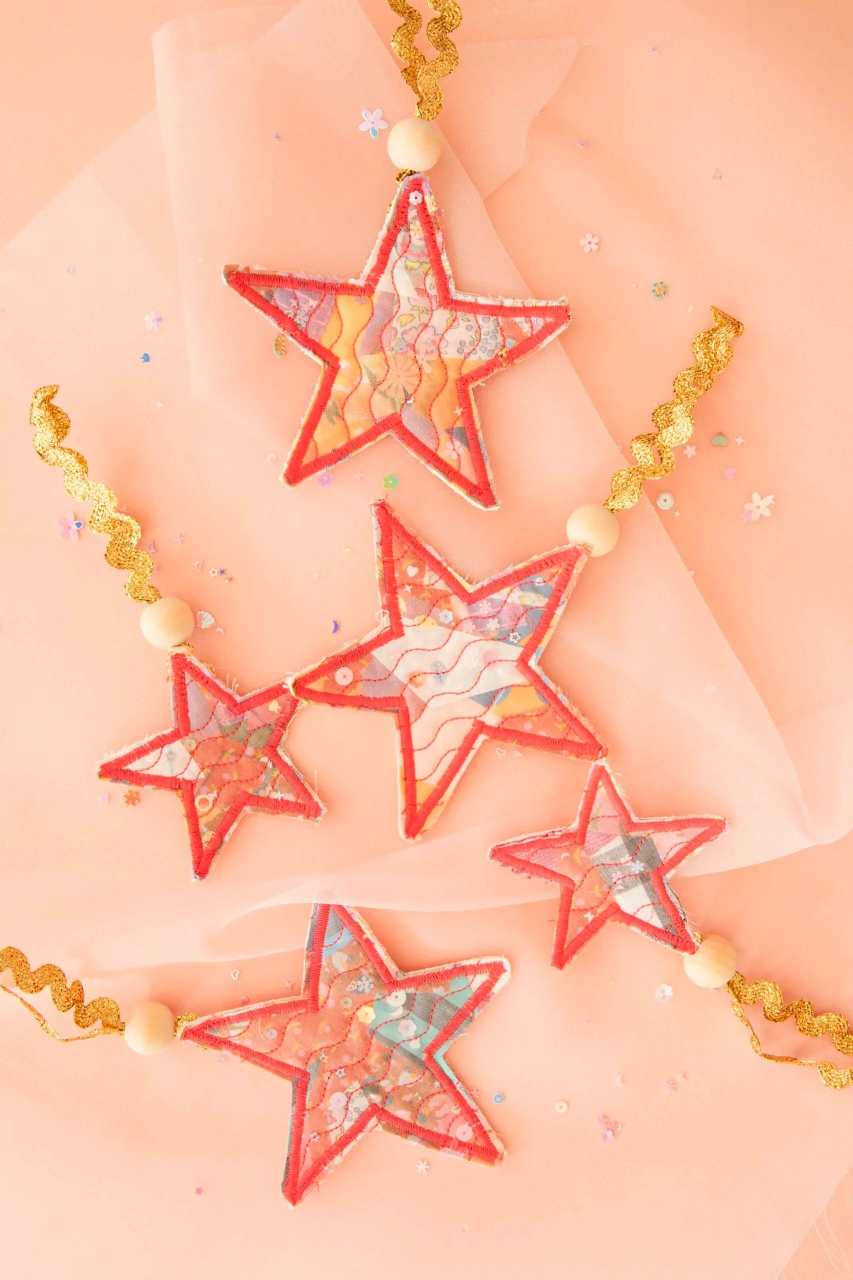
Fabric Scrap Star Ornaments
Baby Lock Ambassador Sarah Hearts loves creating holiday projects! She decided to use the scrap-busting quilting technique by layering scraps under silk organza to create star shaped quilted ornaments.
Click HERE to download the start template.
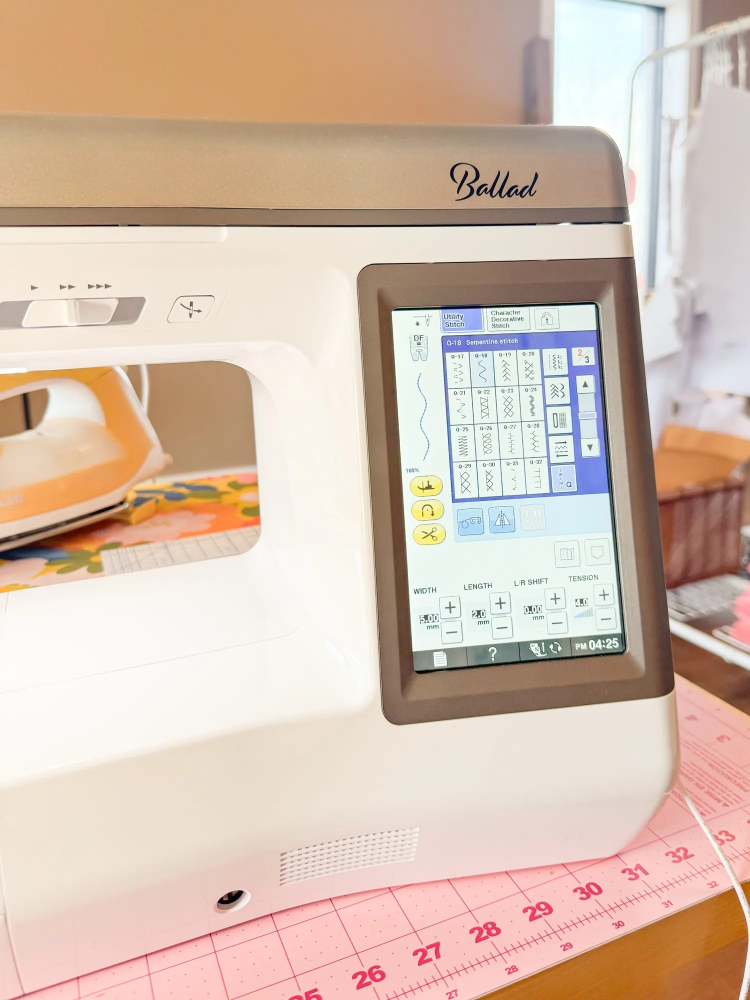
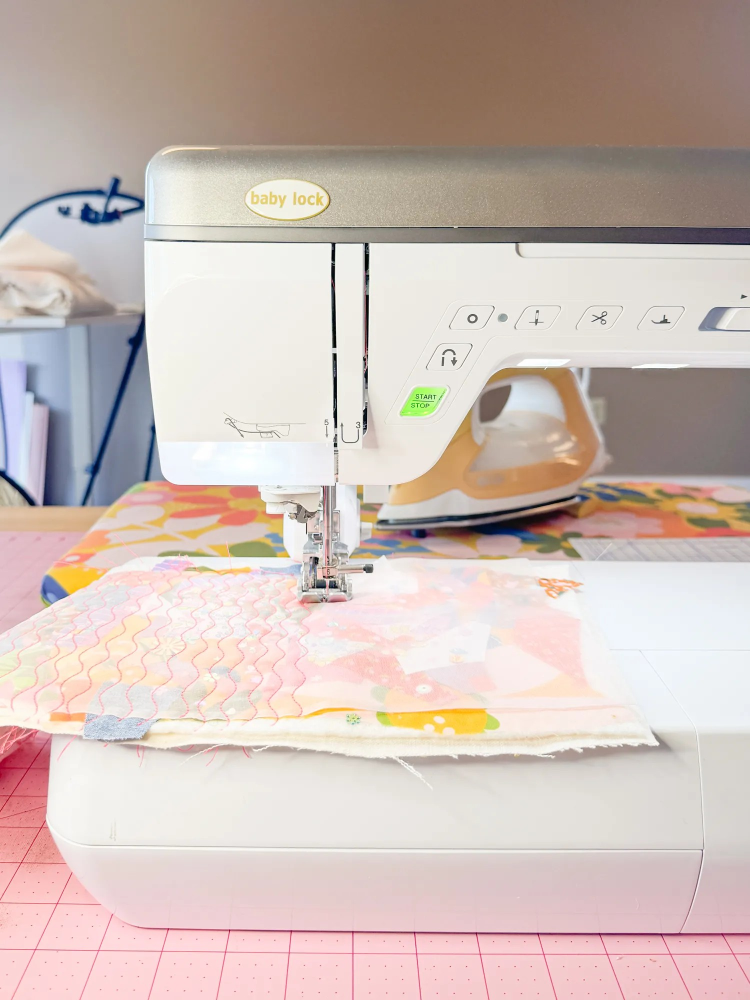
I used my beloved Baby Lock Ballad with the Compact Digital Dual Feed Foot. This machine, and particularly this walking foot, makes quilting on thick and slightly slippery materials like the organza a breeze. Plus, it works with various quilting stitches, so you can play around with other quilting stitches like waves or even stippling.
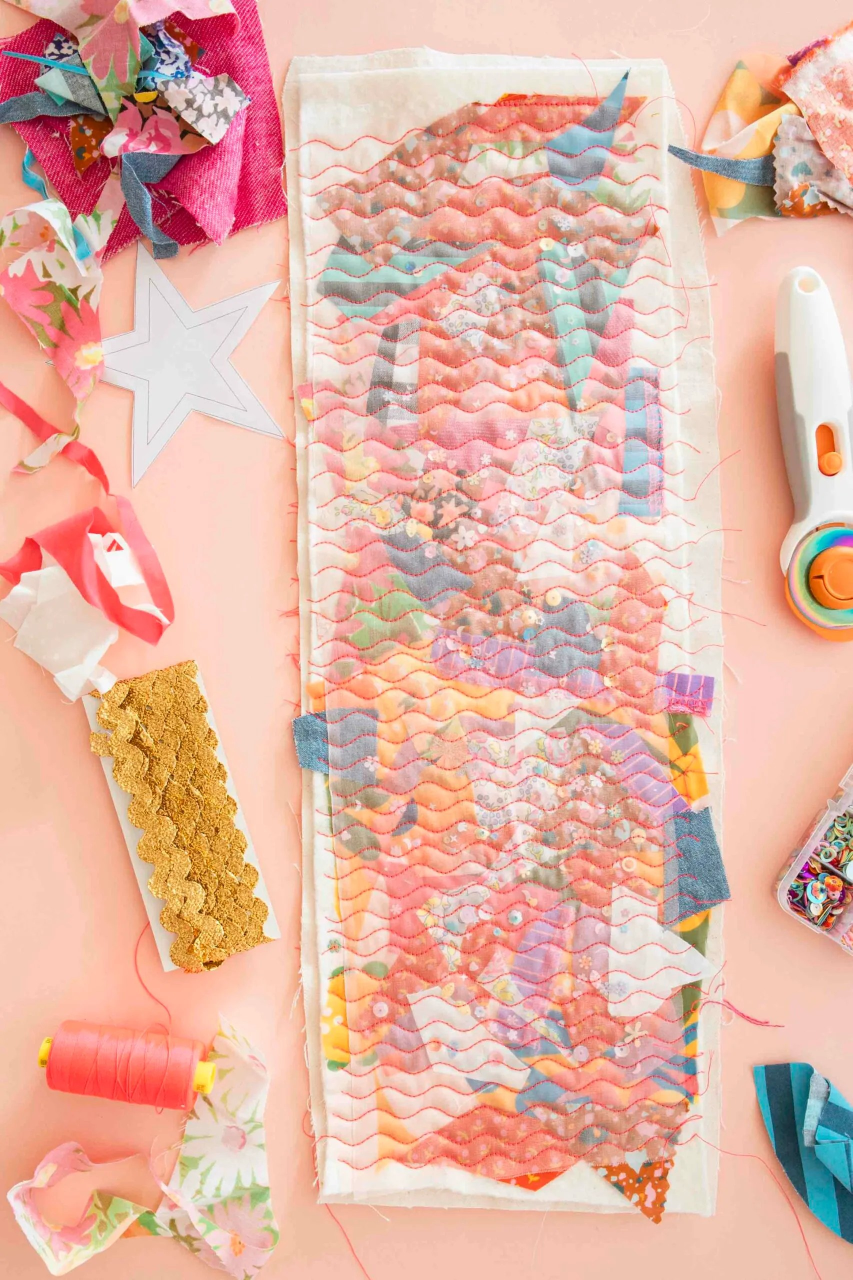
This is truly a scrap-busting DIY; the quilted shape is simply 4 layers:
Quilt back – I used a scrap of undyed denim
Batting
Fabric scraps (I scattered some sequins on top)
Organza – I used a scrap piece of pale pink silk organza, but polyester would work too

When arranging the fabric scraps as your third layer, I recommend using a basting spray as you layer the fabric pieces. Then when you’re done arranging the scraps, lightly spray over the entire piece and place the organza on top.
Once you have completed your “quilt sandwich,” then you can get quilting!
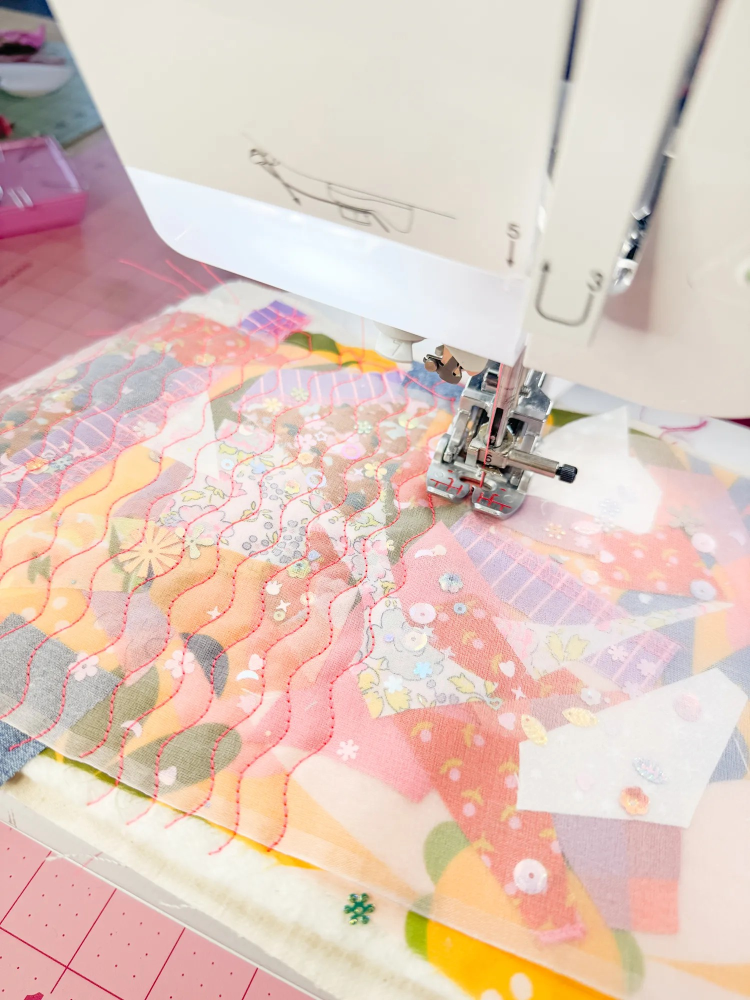
I chose the Serpentine stitch on my Ballad and used neon pink thread. I just love the pop of neon! And since this a fun, scrap-busting project, I didn’t pre-mark my quilt lines. I just went with the flow and used the presser foot to estimate the spacing between lines.
Once you’re done quilting, it’s time to trace the ornament shapes onto the quilted fabric. You can use the star template I created, which includes 2 sizes, or cut any shape you like.
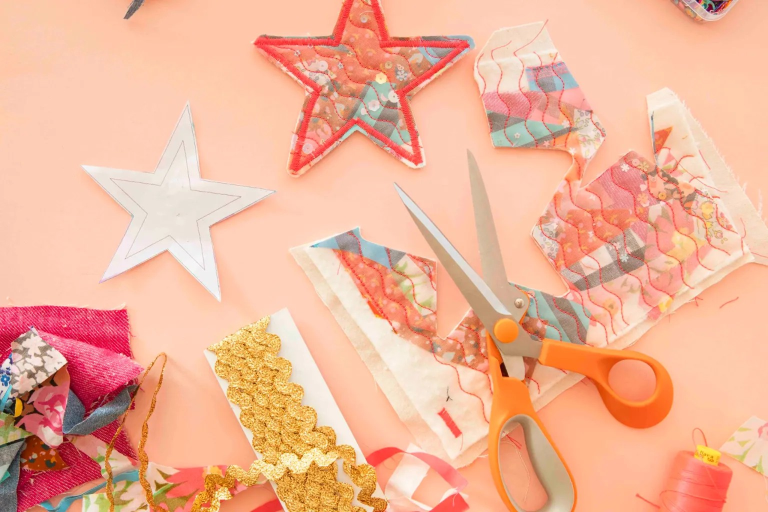
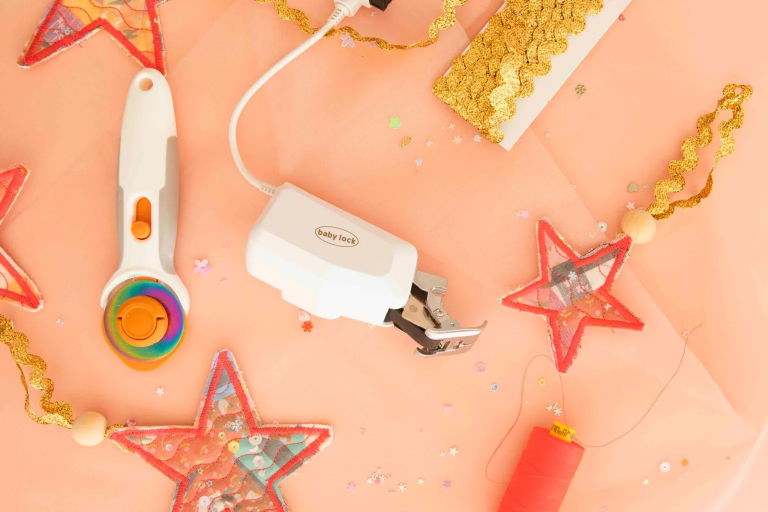
I used a washable fabric marker to trace the star shapes onto the quilted fabric. Then I used a zig-zag stitch (decorative stitch Q-25) — .8mm long x 4mm wide to sew all the way around the drawn edge.
Once stitched, I used fabric scissors to cut out the star shape, cutting about 1/8″ away from the stitched border.
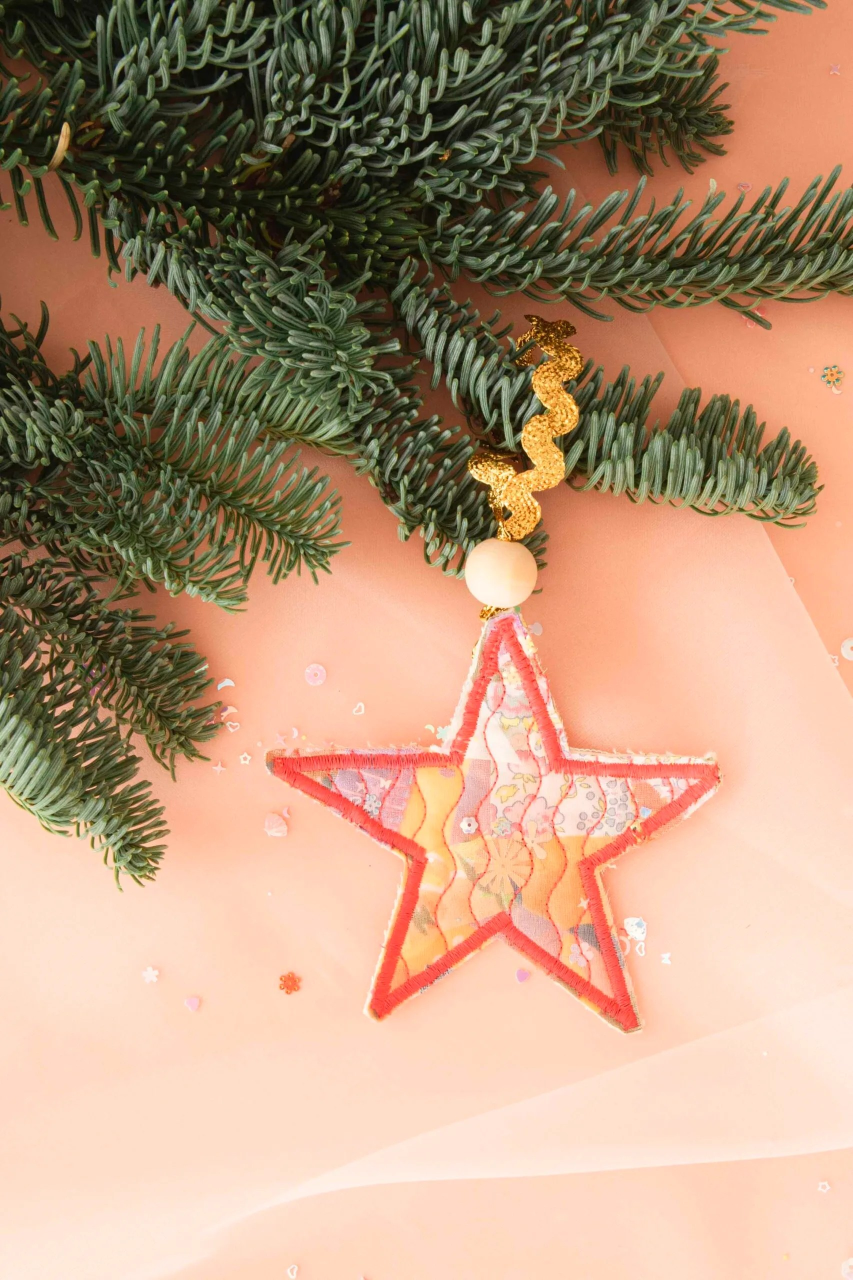
Every ornament needs a string or way to hang it, so I used this glittery thrifted gold rick rack to create a loop. I cut a 12″ piece of rick rack and folded it in half and then used a straight stitch to attach it to the back of each ornament.
The finishing touch is adding a wood bead on top. Simply thread it through the top of the rick rack loop.

