So, you’re ready to dive into the world of embroidery digitizing? This is where the real magic happens. It’s where you take a piece of digital art and teach your embroidery machine how to "paint" it with thread.
This isn’t just a simple file conversion, though. It’s an art form all its own, blending a bit of tech know-how with a genuine feel for fabric, thread, and stitch types. Think of yourself as a choreographer, plotting out every single move your machine will make.
Your Path to Mastering Embroidery Digitizing
Welcome! Whether you're a hobbyist dreaming of making one-of-a-kind gifts or you're looking to start a side hustle selling custom designs, you're in the right place. We're going to break down the entire process from start to finish.
My goal here is to show you that with the right software and a little bit of practice, you can turn just about any idea into a beautifully stitched reality. It’s an incredibly rewarding skill to have.
What to Expect on This Journey
Learning to digitize your own embroidery designs is a total game-changer. It’s what lets you break free from using pre-made patterns and really start developing your own signature style. At bsewinn.com, we’re committed to empowering you on that journey.
The heart of good digitizing is understanding how the design, the thread, and the fabric all work together. Every click you make in the software—from the angle of a satin stitch to the density of a fill pattern—shows up in the final stitch-out.
We’ve put together resources to help crafters at every level build their skills and confidence. This includes:
- Online Classes and Training: Step-by-step lessons to get you comfortable with the software and core techniques, transforming complex concepts into simple, actionable steps you can replicate.
- Extensive Resources: A library of guides and tutorials covering everything from the absolute basics to more advanced tricks.
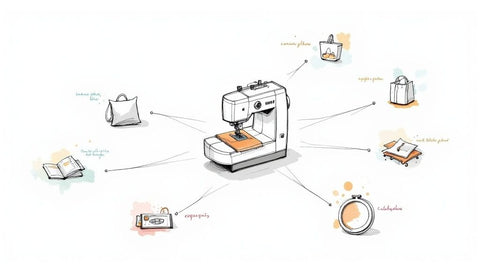
- Custom Sewing Machine Designs: Plenty of inspiration and real-world examples, like creating a custom monogrammed towel or a detailed floral patch, to show you what’s possible.
Of course, once you start creating amazing things, you might want to sell them! Getting the business side right is just as important, and knowing how to price your handmade items is key to turning your passion into a profitable venture.
By the time you finish this guide, you’ll have the knowledge and confidence to tackle your first digitizing project and create embroidery that looks polished and professional.
Choosing Your Digitizing Software and Tools
Think of your software as the digital heart of every embroidery project you create. It’s what translates your ideas into a language your machine can actually understand, so making the right choice here is a pretty big deal—it sets the stage for everything that follows.
The software landscape is huge, with everything from beginner-friendly programs that have slick auto-digitizing features to professional suites that give you granular, manual control over every single stitch.
It's a bit like choosing between an automatic and a manual car. Auto-digitizing is fantastic for getting up and running quickly. You feed it an image, and the software does most of the heavy lifting. Manual digitizing, on the other hand, puts you in the driver's seat, letting you fine-tune every detail for a truly polished, professional result.
Here at bsewinn.com, we're all about empowering you with knowledge. Our online classes and training resources are built to help you master whichever software you land on. We want to shorten that learning curve and get you from novice to confident creator as fast as possible.
Key Software Features to Look For
When you're comparing your options, don't just look at the price tag. Some features are just non-negotiable if you want to produce high-quality work. Think about the tools that will genuinely support what you want to create.
Here are the essentials I always tell people to prioritize:
- Advanced Stitch Editors: The ability to dive in and manually tweak individual stitches or entire sections is crucial. This is how you fix imperfections and really nail the final look.
- Versatile Lettering Tools: Look for a program with a wide selection of built-in fonts and, more importantly, the tools to create your own custom lettering. Good kerning, spacing, and baseline controls are must-haves.
- Intuitive Design Management: A clean interface that lets you easily organize, preview, and manage your design files will save you countless headaches down the road. Trust me on this one.
- Realistic Stitch Previews: A feature that shows you a realistic simulation of how the design will stitch out is invaluable. It’s your best bet for catching potential issues before you ever touch a piece of fabric.
A powerful tool isn't just about having the most features; it's about having the right features that work intuitively. Your software should feel like a natural extension of your creative process, not a barrier to it.
Technology is also pushing our craft forward in some really exciting ways. The rise of artificial intelligence and automation has been a game-changer, with AI-powered software now able to handle complex tasks like optimizing stitch paths and adjusting density all on its own. This stuff dramatically cuts down on manual effort, making top-tier digitizing more accessible to everyone, from hobbyists to small business owners.
Setting Up Your Digital Workspace
Once you've picked your software, the next move is to create a workspace that works for you. This is more than just organizing files; it’s about tailoring the program to your specific needs to create a smooth, predictable workflow.
First thing I always do is customize my toolbars and panels. Most professional software lets you hide tools you rarely touch and bring your most-used functions right to the front. It’s a simple tweak that can save you precious minutes on every single project.
Next, set up some default parameters for different fabrics you use. For instance, a design stitched on a stretchy cotton jersey needs totally different underlay, density, and pull compensation settings than one for sturdy denim. Creating and saving these presets means you don’t have to reinvent the wheel every time you start something new.
Of course, having the right physical tools is just as important. You can learn more about choosing the right stabilizer in our comprehensive guide to make sure your fabric has the support it needs. Getting these foundational pieces right—both digital and physical—ensures your tools are perfectly aligned with your creative vision from the get-go.
Transforming Artwork into Stitches
This is where the magic happens. It’s the part of the process where your artwork—whether it’s a clean company logo or a sketch you doodled on a napkin—starts its transformation into a physical, textured embroidery design. We’re essentially teaching your embroidery machine to "see" the art, one stitch at a time.
The quality of your original image is a huge deal. Think of it like cooking: you can't make a gourmet meal with bad ingredients. Starting with a clean, high-resolution image isn't just a friendly suggestion; it's the foundation for any professional-looking embroidery.
Prepping Your Image for Digitizing
Before you even dream of stitches, you need to clean up your artwork. A few minutes spent here will save you hours of headaches later on. Whether you're starting with a vector graphic (like an AI or SVG file) or a raster image (like a JPG or PNG), the goal is the same: create simple, defined shapes that the software can easily understand.
- Working with Vector Files: These are the gold standard. Since they’re built on mathematical paths instead of pixels, you can resize them endlessly without losing quality. Your main job is to simplify the design—get rid of any extra anchor points and make sure all your shapes are closed loops.
- Wrangling Raster Files: Pixel-based images need a bit more love. You'll have to manually remove stray pixels, sharpen up any blurry edges, and often simplify the color palette. Trust me, a design with 5-7 solid colors is a thousand times easier to digitize than one with gradients and dozens of shades.
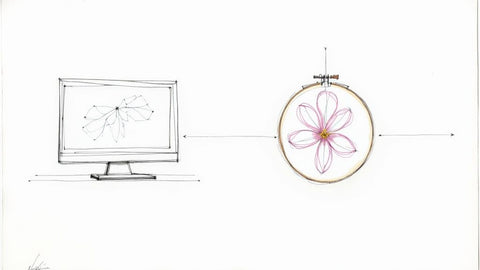
This quick visual breaks down the journey from an idea to something your machine can actually create.
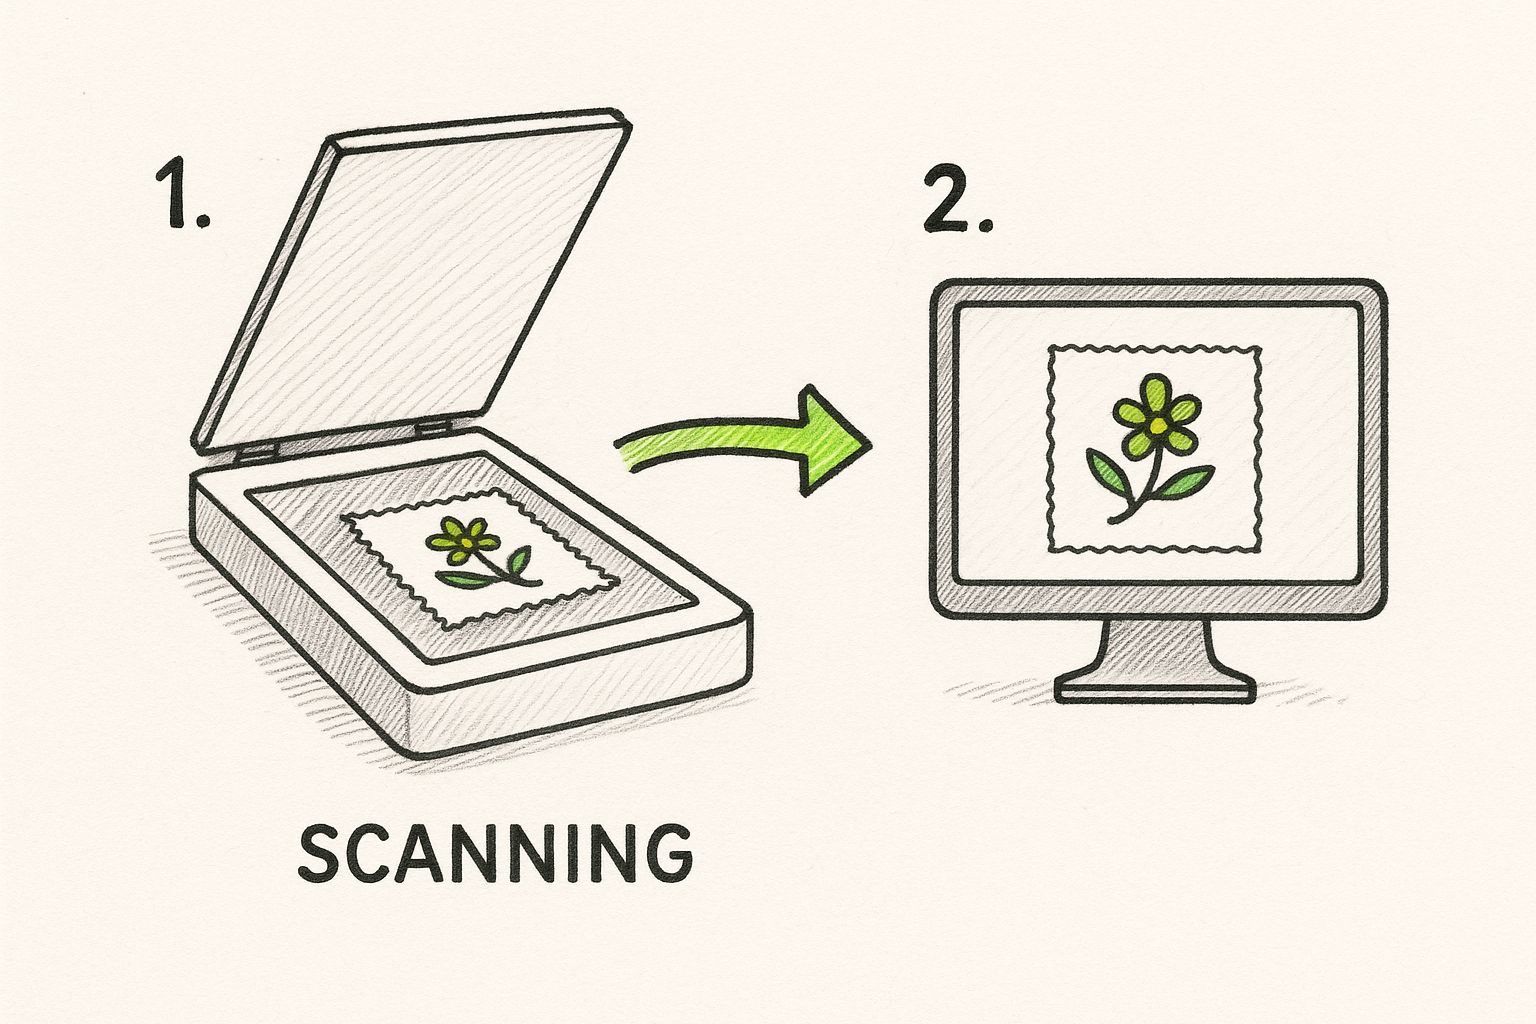
As you can see, digitizing is the bridge between the creative concept on your screen and the data the machine needs to bring it to life in thread.
Assigning the Right Stitch Types
With your artwork prepped and ready, it's time to start assigning stitches. This is where your inner artist really comes out. You’re not just clicking "fill"—you're making deliberate choices about how each part of the design will be sewn. The three workhorses you'll use constantly are the Fill, Satin, and Running stitch.
Each one has a specific job, and knowing when to use them is what separates the pros from the amateurs. For example, if you use a Satin stitch to fill a huge area, you’ll end up with long, loopy stitches that snag on everything. Try to use a thick Fill stitch for tiny letters, and they’ll turn into unreadable blobs.
Choosing the right stitch is like a painter picking the right brush. You wouldn't use a giant roller for fine details, and you wouldn't paint a whole wall with a tiny artist's brush. It's all about matching the tool to the task.
If you’re thinking about turning this into a real business, getting these fundamentals down is non-negotiable. For a deeper dive, check out our guide on how to start an embroidery business for more on making money from your craft.
To make this crystal clear, here’s a breakdown of the three main stitch types and where they shine.
Choosing the Right Stitch for Your Design Element
| Stitch Type | Best Used For | Key Considerations |
|---|---|---|
| Fill Stitch | Large, open areas of solid color. Think backgrounds, solid shapes, and big color blocks. | Can be very dense. You'll need to adjust the stitch density and angle to avoid making the fabric too stiff or causing puckering. |
| Satin Stitch | Outlines, borders, and lettering. It creates a smooth, raised, and glossy finish. | Best for columns between 1.5mm and 7mm wide. Anything wider can lead to long, loose stitches that easily snag. |
| Running Stitch | Fine details, travel stitches between elements, and creating a hand-stitched look. | Used for outlining small details or connecting different parts of a design without adding bulk. It’s the simplest stitch your machine can make. |
Mastering these three stitches will cover about 90% of your digitizing needs. From there, it's all about practice and developing an eye for what works.
Understanding Underlay: The Unseen Hero
Before your machine lays down a single beautiful top stitch, it puts down a hidden foundation called underlay. This is a sparse grid of stitches that goes directly onto the fabric. You won’t see it in the final product, but without it, your designs would be a puckered, distorted mess.
So, what does this invisible hero actually do?
- It stabilizes the fabric, basically tacking it down so it doesn't shift around while being stitched.
- It creates a smooth platform, giving the top stitches a nice, even surface to lie on, which makes them look much more uniform.
- It prevents "show-through," stopping the color of the fabric from peeking through the thread and dulling your design's colors.
Different fabrics call for different underlay styles. For something sturdy like denim, a light mesh or edge-run underlay is plenty. But for a stretchy knit polo, you’ll need a much denser underlay to keep the design from warping when the fabric stretches. Proper underlay is the secret behind crisp, professional embroidery that actually lasts.
Fine-Tuning Your Design for a Flawless Stitch Out
Let’s be honest: a digitized design rarely, if ever, comes out of the software perfectly on the first try. This next phase—the fine-tuning—is where the real magic happens. It's where you elevate a good design into a great one, adjusting all the little details that add up to a professional, flawless stitch out.
Think of it like proofreading a document. Your initial digitizing is the first draft. Now, it's time to go back and check the grammar and flow. Except here, we're tweaking stitch density, pull compensation, and stitch angles. Mastering this is what truly teaches you how to digitize embroidery designs that not only look polished but are built to last.
Mastering Stitch Density and Fabric Interaction
Stitch density is easily one of the most critical settings you'll learn to manage. It dictates exactly how many stitches get packed into a specific area. If it’s too dense, you’ll end up with puckered fabric that’s stiff as a board. Too sparse, and the fabric’s color peeks through, making the whole design look weak and unfinished.
The key thing to remember is that density is never a one-size-fits-all setting. It changes completely depending on your fabric.
- A stretchy polo shirt: You'll want to dial back the density a bit. The fabric’s natural stretch can handle the stitches, but too many will cause it to bunch up and look warped.
- A rigid canvas tote bag: Go ahead and use a higher density. The stable fabric can take much more thread coverage without a hint of puckering, giving you that solid, vibrant look you're after.
Making these tweaks is crucial for preventing common headaches and ensuring the final product hangs and feels just right. For more on getting great results, check out our guide on top tips for beautiful decorative stitches, which gets into similar ideas about stitch quality.
Fine-tuning is all about iteration. Stitch a test swatch, really look at what’s working and what isn’t, then head back to the software to make tiny adjustments. Stitch it again. This cycle is exactly how you develop an instinct for what your machine and fabric need.
Counteracting Fabric Distortion with Pull Compensation
Every time your machine lays down a stitch, the thread pulls on the fabric. It’s a tiny, almost invisible force, but it definitely adds up. This “pull” can turn perfect circles into ovals and make straight lines look a little shrunken. Pull compensation is your secret weapon to fight this, as it makes your digitized shapes just a tiny bit wider.
Imagine drawing a shape on a stretched rubber band. When you let it relax, the shape shrinks. Pull compensation is like drawing that shape a little bigger to start with, so it looks perfect once everything settles. You’ll find yourself using this most often on satin stitches for lettering and borders to keep them looking crisp and true to their intended shape.
Technology is always improving to help with these precise adjustments. Some modern embroidery machines can even optimize thread tension and analyze fabric on their own, which helps cut down on wasted material and ensures a flawless design every time. These smart systems can reproduce complex embroidery with incredible precision, making production more reliable for everyone. You can discover more insights about the global embroidery market and see just how much the industry is evolving.
Optimizing Your Pathing for a Cleaner Finish
Finally, let’s talk about pathing. This is simply the sequence, or path, your machine's needle follows to stitch the entire design. While your software will generate a default path, it’s almost never the most efficient one.
Good pathing is all about creating a logical, smooth flow from one element to the next. The main goal is to minimize jump stitches—those long threads that travel across open areas of your design. Your machine will trim these, but too many trims not only slow down the whole process but also leave little thread tails on the back.
By manually adjusting the pathing, you can direct the machine to travel underneath other stitched areas whenever possible. This hides those travel stitches and creates a much cleaner product, both on the front and the back.
Exporting Files and Solving Common Problems
You've done the hard work—planning, digitizing, and tweaking your design until it's perfect. Now for the final leap: getting that file from your software to your embroidery machine in a language it can actually understand. This last step is pretty straightforward, but knowing the right file format to choose and how to handle the inevitable hiccups is what makes the difference between a beautiful stitch-out and a frustrating afternoon.
This final translation moment is where you can really see how far embroidery software has come. The demand for custom apparel and cool new tech has pushed the industry forward, with the global market for this kind of software expected to hit over $1.5 billion by 2028. It’s all driven by things like e-commerce, AI helping to nail stitch quality, and a genuine resurgence in embroidery as a hobby. You can read the full research about embroidery software market growth if you're curious about how these tools are evolving behind the scenes.
Choosing the Right File Format for Your Machine
Your embroidery machine doesn’t work with the native file from your software (like a .EMB or .BE). It needs a specific machine-readable format that contains just the raw stitch data. Think of it this way: every machine brand speaks its own language, and sending the wrong file type is like trying to speak French to someone who only understands Japanese. It just won’t work.
Here are some of the most common formats you’ll run into:
- .PES: This is a big one, used primarily for Brother and Baby Lock machines.
- .DST: A nearly universal format developed by Tajima. Most commercial and industrial machines can read this.
- .JEF: If you have a Janome machine, this is your go-to format.
- .EXP: This is the format of choice for Melco and Bernina machines.
When in doubt, always, always check your machine’s manual to see which formats it accepts. Saving your design in the right format is the first and most critical step to a successful stitch-out.
A Practical Guide to Troubleshooting Stitch-Outs
Even with a perfectly digitized file, things can still go sideways at the machine. When the design on your screen doesn't quite match the mess of thread on your fabric, don't panic. Most issues are incredibly common and can be fixed with a little bit of detective work.
Frustration is part of the learning process. Every failed stitch-out is a lesson in disguise, teaching you more about the intricate dance between thread, needle, fabric, and machine.
Let's walk through some of the most frequent problems and how to get past them.
Solving Thread Breaks and Bird's Nesting
Thread breaks are exactly what they sound like—your top thread constantly snapping mid-stitch. This is usually a sign of incorrect tension, a dull or damaged needle, or just cheap, fussy thread.
- Check your top tension: If it's cranked up too high, it puts too much strain on the thread. Try loosening it just a bit and run a test.
- Change your needle: A needle can get dull after just 8 hours of use. Seriously. Popping in a fresh one is often an instant fix.
- Re-thread your machine: It's so simple, but a tiny snag somewhere in the thread path is a common culprit. Take the thread completely out and re-thread it from the start, making sure it's seated in every guide.
Bird's nesting is that horrible, tangled mess of thread that builds up on the underside of your fabric. As ugly as it is, this is almost always an issue with your top thread path, not the bobbin. It usually means the top thread isn't sitting correctly in the tension discs, which creates a loose, loopy disaster underneath. The fix? You guessed it: completely re-thread your machine.
Fixing Poor Registration and Fabric Puckering
Poor registration is when your outlines don't line up neatly with the filled areas, leaving you with gaps or sloppy overlaps. This is almost always a stabilization problem. Your fabric is probably shifting around in the hoop while the machine is running. Make sure you're using the right kind of stabilizer for your fabric and that you've hooped it so it’s drum-tight.
Fabric puckering, where the material gets all bunched up and wrinkled around the design, is another classic headache. It usually boils down to one of three things:
- Improper hooping: The fabric needs to be taut, but not stretched out of shape.
- Incorrect stabilizer: Using a stabilizer that’s too lightweight for a dense design is a recipe for puckers. The fabric has nowhere to go but inward.
- Design density is too high: Sometimes the issue is the file itself. Too many stitches crammed into a small area will simply overwhelm the fabric.
By working through these potential causes one by one, you can figure out and fix just about any issue that comes your way. And for those times you're truly stumped, turning to online classes or community resources, like those at bsewinn.com, can give you that extra support to turn those frustrating moments into real learning opportunities.
Got Questions About Digitizing? We've Got Answers.
Diving into digitizing is a blast, but it’s totally normal to have a million questions bubble up as you get started. When you move from watching tutorials to actually clicking around in the software, you’ll hit the same little roadblocks everyone does at first.
Think of this section as a quick chat to clear up some of those early-stage head-scratchers. We’ll tackle a few of the most common questions we hear, giving you the confidence to troubleshoot and understand the why behind what you’re doing.
Can I Just Hit the “Auto-Digitize” Button for Everything?
Ah, the magic button! It's so tempting to just click "auto-digitize" and hope for the best, especially when you're new to the game. While it seems like a shortcut to turning any image into a stitch file, it’s really more of a starting point than a final destination.
Auto-digitizing tools can actually be fantastic for really simple, clean graphics with solid blocks of color. But throw it a complex piece of art with gradients, delicate lines, or fancy text, and the results can get... messy. The software often guesses wrong on the best stitch paths, density, and underlay, which can lead to a tangled, unprofessional-looking final product. It's a helpful assistant, not the lead designer.
The pros often use auto-digitizing to generate a quick base, but then they dive in and manually tweak every single element. This hybrid approach saves a little time upfront but still gives you complete artistic control over the final stitch-out.
Learning how to digitize embroidery designs by hand is what separates the okay from the awesome. It gives you the power to make smart decisions about how thread will actually behave on fabric—a nuanced skill no automated tool can truly match.
What’s the Best Image Format to Start With?
This is a big one, and getting it right from the start will save you a ton of headaches. While you can technically work with pixel-based images like JPGs or PNGs, the undisputed champion for digitizing is the vector graphic.
Vector files (think .AI, .EPS, or .SVG) are built from mathematical paths, not a grid of pixels. Here’s why that’s a game-changer for embroidery:
- Scale It Up (or Down): You can blow a vector image up to fit the back of a jacket or shrink it down for a hat, and it will stay perfectly crisp. No blurriness, ever.
- Clean, Crisp Lines: Vector graphics have perfectly defined edges. This makes it a breeze for your software to trace the shapes and create clean satin stitch borders or neat fill areas.
- A Cinch to Edit: The file is made of distinct objects that you can easily select, change, or delete. It gives you a much cleaner foundation to build your stitches on.
Trust me, starting with a high-quality vector file will cut your prep time way down and make the whole digitizing process feel so much smoother.
How on Earth Do I Digitize Tiny Letters?
Digitizing small text is probably one of the toughest challenges out there. You’re pushing the limits of what a needle and thread can physically do! The secret here is all about simplification and picking the right stitch.
For any lettering under a quarter-inch (around 6mm) high, a standard satin stitch will likely be too bulky. The stitches will pile on top of each other and turn your crisp letters into unreadable little blobs.
Your best bet is to switch to a simple running stitch or a center-run stitch. When it comes to fonts, stick with clean, sans-serif styles that have a consistent thickness. Ditch any fonts with tiny serifs or dramatic thick-and-thin strokes; those beautiful details just get lost in the thread.
It’s also crucial to turn off all underlay for tiny text. Underlay adds bulk, and that’s the last thing you want when legibility is your main goal. For small lettering, readable is always better than bold.
Here at B-Sew Inn, we truly believe that anyone can master the art of digitizing. Our goal is to empower you with not just the best machines and software, but also the practical knowledge to bring your ideas to life. Through our online classes, in-depth resources, and a wonderfully supportive community, we're here to cheer you on at every step.
Ready to jump in? Explore our curated collection of sewing machines, software, and supplies at B-Sew Inn.