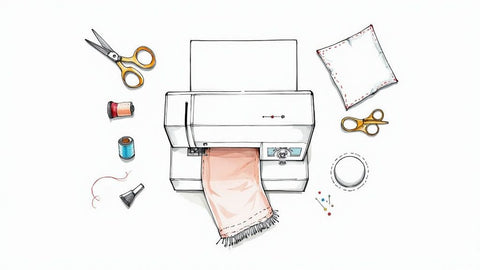
Before you teach your first student how to thread a needle, you need a philosophy. It’s the compass that guides every single lesson, every project choice, and every bit of feedback you give. A solid teaching approach isn't about knowing every obscure stitch; it's about creating a space where creativity can bloom and mistakes are just part of the process. At bsewinn.com, we champion this empowerment, offering custom sewing machine designs, online classes, and extensive resources to help every crafter succeed.
Build Your Foundational Teaching Approach
This philosophy really starts with empathy. Think back to what it was like when you were a beginner. Remember the confusion of threading the machine for the first time? Or the utter frustration of a tangled bobbin? A student-first mindset means you anticipate these hurdles and frame them as totally normal parts of learning, not failures. This is how you build trust and encourage your students to stick with it.
Define Clear and Attainable Learning Goals
Your curriculum should be like a ladder, with each rung building on the one before it. The goal of that first class isn't to walk out with a tailored jacket; it's to hit a few key milestones that build a solid base of confidence.
For a beginner's very first session, think about objectives like these:
- Machine Familiarization: Can they point out the handwheel, presser foot, and stitch selection dial? That's a win.
- Basic Operations: Can they wind a bobbin and thread the machine all by themselves? Huge victory.
- First Stitches: Sewing a straight-ish line on scrap fabric, learning to guide it without pushing or pulling. Success!
Nailing these small goals makes the whole craft feel so much more approachable. It shows them that sewing is just a series of manageable skills, not some insurmountable mountain of technique.
Start with a Confidence-Boosting Project
The best first project is one that delivers a quick, satisfying win. This article will serve as a comprehensive "how-to" guide for creating various sewing machine designs, showcasing tangible examples that crafters can replicate. I'm a huge fan of simple tote bags, pillowcases, or a set of cloth napkins. These projects are mostly straight seams, letting beginners get the hang of the fundamentals without getting bogged down by zippers or buttonholes right away.
The magic of a first project lies in its completion. When a student walks away from their first class with a tangible, useful item they made themselves, it ignites a spark. This sense of accomplishment is the single most powerful motivator for them to return for another lesson.
Here at bsewinn.com, that principle of empowerment is at the core of everything we do. Our custom sewing machine designs are built with the user in mind, making sure that even the fancy features feel intuitive. It’s a philosophy that extends to all our resources, like online classes and training that break down complex techniques into simple, easy-to-follow steps.
This student-first mindset is critical for any instructor. You've also got to have the right gear to support your students' journey. Having a set of reliable tools, for instance, is non-negotiable. Check out our guide on the top sewing tools for beginners to see what every new sewer really needs in their kit.
And as you're building out your teaching approach, some practical guides on starting a coaching business can offer some fantastic insights for setting up your own practice. The interest in home sewing has absolutely exploded, creating a huge market for good teachers. The global sewing machine market hit USD 7.1 billion, fueled by a boom in bespoke fashion and upcycling. This opens up so many opportunities for instructors who can connect with this enthusiastic crowd.
Design Your First Sewing Class Curriculum
Putting together your first curriculum is like drawing a map for your students. It shows them exactly where they're going and all the cool things they'll learn along the way. For someone who’s never even touched a sewing machine, a well-thought-out plan can be the difference between finding a fun new hobby and just getting frustrated.
Your main job is to break everything down into logical, bite-sized pieces that build on each other. You want every student to feel like they're making real progress right from the start.
Start with the Machine Itself
The very first lesson should be all about demystifying the machine. Before a single stitch is even sewn, your students need to feel comfortable with their main tool. I always spend a good chunk of time just walking them through the essential parts—the handwheel, presser foot, feed dogs, and stitch selection dial.
Explaining what each part does in simple terms is huge. This foundational knowledge strips away the intimidation factor and helps them understand why the machine works the way it does. It's a game-changer.
Laying the Groundwork for the First Seam
Once they've got the machine's anatomy down, it's time to get it ready to sew. This is where you introduce two absolutely fundamental skills: winding a bobbin and threading the machine. Treat this part like a hands-on, guided practice session.
I'll demonstrate each step slowly, then let everyone try it on their own machines. Patience is everything here; this is a common sticking point for a lot of beginners, and that's okay! After everyone is threaded up, you can move on to the basics of stitch tension, explaining how the top and bottom threads create that perfect, strong seam.
And don't forget the operational side of things when you're planning. Nailing down the details of setting up class bookings is just as important for a smooth experience. A great class plan deserves an equally great sign-up process.
Structuring a Project-Based Lesson Plan
I'm a firm believer that the best way to teach sewing is to tie every new skill to a real, tangible project. Abstract practice is fine for a bit, but nothing beats the thrill of actually making something.
A simple pillowcase or a basic tote bag makes an ideal first project. Why? Because it relies almost exclusively on sewing straight lines. This lets students focus on mastering seam allowance and guiding the fabric without getting overwhelmed.
Here’s a sample flow for a three-hour beginner class that’s all about making a pillowcase:
- Hour 1: Machine Basics. We'll cover all the machine parts, wind a bobbin, thread the machine, and then practice sewing straight stitches on scrap fabric.
- Hour 2: Project Prep & First Seams. I introduce the pillowcase project, explain the fabric pieces, and then guide everyone through sewing their first long seams.
- Hour 3: Finishing & Celebration! We’ll learn a simple finishing technique (the "burrito" method for pillowcases is always a hit) and the importance of pressing. Everyone leaves with a finished project!
This structure gives the class a clear beginning, middle, and end. Students get to experience the full creation cycle in just one session. That instant gratification is a powerful confidence booster and is usually what gets them hooked for life.
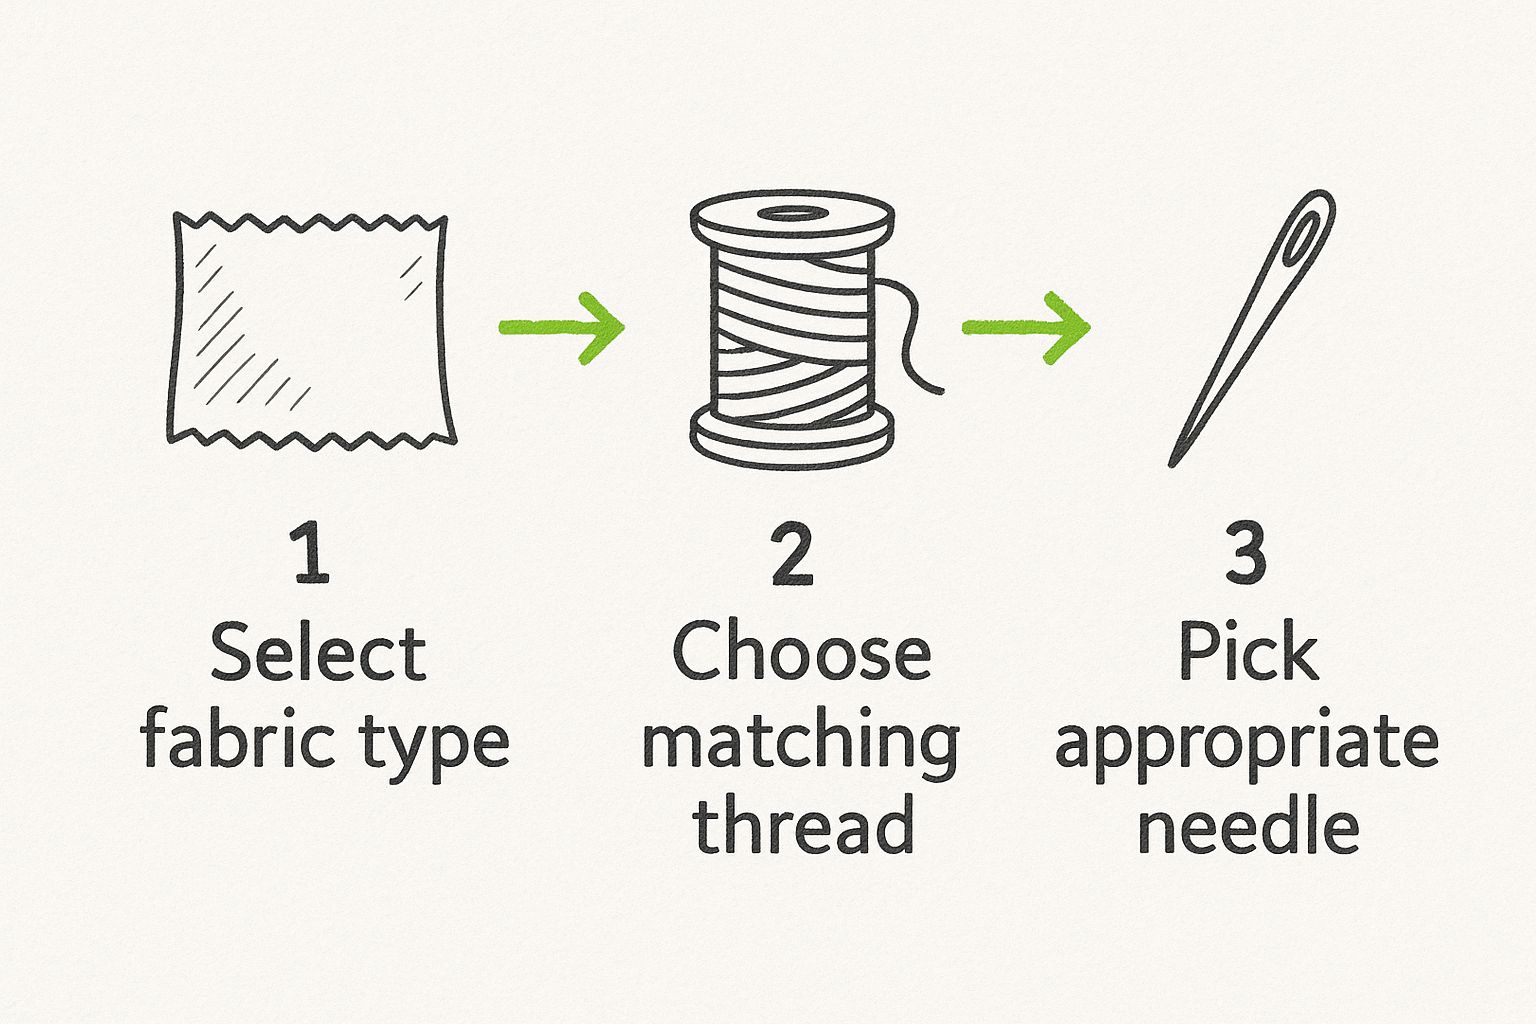
This simple flow—fabric, then thread, then needle—is a great little concept to teach right away. It helps prevent so many common headaches like skipped stitches or broken needles.
For a true beginner course, you want to build skills logically. This table breaks down what I consider the essentials, the order to teach them in, and a project that reinforces each new skill.
Essential Skills for a Beginner Sewing Course
| Skill Module | Key Learning Objectives | Suggested Project |
|---|---|---|
| Machine Familiarity | Identify key parts, power on/off, change the needle. | Sewing straight and curved lines on practice sheets. |
| Threading & Bobbins | Wind a bobbin correctly, thread the top of the machine. | Simple drawstring bag (requires straight seams). |
| Basic Seams | Master a consistent seam allowance, backstitching. | Pillowcase with French seams. |
| Fabric Handling | Learn about grainlines, pressing vs. ironing. | Basic tote bag (introduces corners and topstitching). |
| Simple Finishing | Turn corners, clip curves, finish seam edges. | Lined zipper pouch (introduces zippers and turning). |
Focusing on these core competencies ensures your students walk away with a solid foundation they can build on for years to come.
Adapting to Different Learning Speeds
Here’s the thing: no two students learn at the same pace. You'll have one person who threads their machine perfectly on the first try, while another might need a few attempts and some extra one-on-one guidance. That's why a flexible curriculum is an absolute must.
Be ready with "stretch goals" for your faster learners and simplified steps for those who need a little more support. For our pillowcase project, a stretch goal could be adding a decorative trim. A simplification might be having pre-cut fabric kits ready to go so they can focus purely on the sewing.
This kind of adaptive teaching makes sure no one feels left behind or bored. Your role is to be a facilitator, giving just the right amount of support to help each person succeed. When you create that kind of encouraging environment, you’re not just teaching a skill—you’re building a community of confident sewists who are excited for their next project.
Master Hands-On Sewing Instruction
Teaching someone to sew is so much more than just showing them what to do. It’s an active coaching process where you’re right there with them, guiding their hands and helping them get a feel for the craft—the way the fabric glides under their fingers, the unique hum of a machine running smoothly. This is where the real learning happens, and your ability to give clear, real-time feedback is everything.
The secret to great hands-on teaching is breaking every single action into tiny, manageable steps. Instead of just saying, "Okay, now sew a straight line," you might say, "Rest your hands gently on either side of the needle, and just guide the fabric. Let the machine's feed dogs do all the work of pulling it through." This kind of micro-instruction keeps students from feeling overwhelmed and helps them build that crucial muscle memory.
Creating a 'Sewing Lab' Atmosphere
Think of your classroom as a 'sewing lab'—a safe, experimental space where mistakes are just data points, not failures. You’ve succeeded when a student feels comfortable enough to pipe up with, "My thread is all bunched up underneath," without a hint of embarrassment.
Fostering this kind of atmosphere means reframing the common problems everyone runs into. A tangled bobbin isn't a catastrophe; it's a chance to really understand thread tension. Skipped stitches aren't a sign that they're a "bad sewer"—they're a clue that maybe it’s time to change the needle.
Your goal as an instructor is to troubleshoot in a way that empowers, not discourages. Frame every little hiccup as a puzzle you can solve together. This approach transforms frustration into a valuable diagnostic skill, teaching students how to become independent problem-solvers in their own sewing rooms.
At bsewinn.com, this philosophy of empowerment is at the heart of everything we do. From our custom machine designs to our in-depth online classes and training, we focus on helping crafters understand the "why" behind each technique. This builds a much deeper knowledge and true self-sufficiency.
Real-Time Troubleshooting Techniques
Let’s be real: beginners are going to run into a few common roadblocks. Being ready to walk them through it calmly and effectively is a huge part of being a great sewing teacher.
Here are a few classic issues and how you can guide students through them:
- Bunched Thread (aka "Bird's Nesting"): This is almost always a threading issue. Don't just fix it for them. Instead, have them unthread the machine completely and start from scratch, explaining each checkpoint along the way.
- Skipped Stitches: This is a perfect time to teach them a diagnostic checklist. Ask three key questions: "Is your needle new and sharp? Is it the right type for this fabric? Is it inserted all the way up, with the flat side to the back?"
- Wobbly Seams: This usually happens when they're pushing or pulling the fabric instead of guiding it. Demonstrate a light, hands-off guiding technique and have them practice on scraps until they can feel the machine's natural rhythm.
By turning these moments into learning opportunities, you reinforce how the sewing machine actually works. This practical, hands-on guidance is what really sticks with a student long after they've left your class.
The Economic Power of Sewing Education
Teaching sewing isn't just about sharing a hobby; it’s about passing on a skill with real economic value. When you give someone strong hands-on instruction, you're equipping them with the ability to mend, create, and maybe even start their own small business.
You can see this connection between sewing education and entrepreneurship on a global scale. In Africa, for example, the sewing machine market was valued at around USD 681.5 million and is projected to grow substantially. This isn't just about machines; it's about educational programs training people to use sewing as a tool for economic empowerment, turning a craft into a career. You can discover more about this growing market on cognitivemarketresearch.com.
Ultimately, your hands-on instruction does so much more than teach someone to make a pillowcase. It builds confidence, fosters resilience, and can open doors to new financial opportunities. It’s proof that learning to sew is a powerful skill with a lasting impact.
Incorporate Modern Sewing Technology
Today’s sewing machines are a far cry from the purely mechanical workhorses of the past; they’re powerful creative partners packed with incredible tech. As an instructor, learning how to introduce these modern features opens up a whole new world for your students. It makes the craft more exciting and, frankly, a lot more accessible.
The key is to frame technology as an enhancement, not a replacement for good old-fashioned skill. Features like automatic thread cutters or programmable stitches aren't shortcuts that cheapen the craft. I see them as tools that handle the repetitive stuff, freeing up your students' time and mental energy to focus on the truly creative parts of their projects.
Demystifying the Computerized Machine
First things first, you've got to make these high-tech machines feel less intimidating. I've seen so many beginners get mesmerized by the digital screens and rows of buttons, but they're often too scared to touch anything. A great way to break the ice is to dedicate part of a lesson to a "tech tour."
Walk your students through the digital interface just like you would the physical parts of the machine. Show them how to navigate menus, select all those cool decorative stitches, and adjust settings like stitch length and width right on the screen. This hands-on exploration is what builds curiosity and confidence.
Showcase Technology with Purposeful Projects
The absolute best way to show off what these modern features can do is through projects designed specifically to highlight them. This is where our guides become tangible examples that crafters can replicate. Abstract practice is fine for a bit, but seeing a feature create a beautiful, tangible result is what really makes it click for students.
Here are a few project ideas that put the technology front and center:
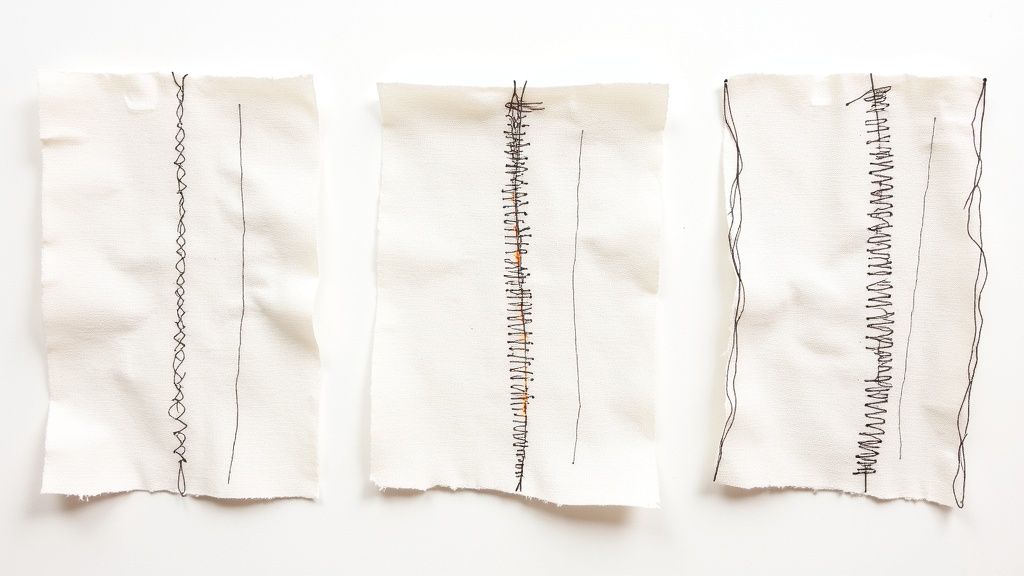
- Embroidered Napkin Set: This is a perfect project for introducing built-in embroidery fonts or decorative stitch functions. Students can personalize a simple set of cloth napkins with their initials, learning how to program and execute precise, beautiful stitches.
- Customized Zipper Pouch: Use this project to showcase an automatic needle threader and thread cutter. Students will immediately appreciate how these features speed things up, especially when they're changing thread colors for a decorative topstitch.
- Quilted Coasters: This is a fantastic opportunity to introduce an intelligent stitch regulator, a feature found on some of our more advanced machines. Students get to experience firsthand how the machine helps maintain perfectly even stitches during free-motion quilting, turning a really challenging technique into something totally achievable.
By baking the technology right into the project, students see the real-world benefits immediately. Their perspective shifts from "this is complicated" to "wow, look what this lets me create!"
Framing Technology as a Creative Partner
Ultimately, the conversation around technology should always circle back to creative empowerment. When you teach these advanced functions, you’re not just teaching button-pushing; you're handing your students a richer artistic toolkit. You're showing them how a machine can become a true collaborator in bringing their vision to life.
The goal isn't just to teach students how to use technology, but how to think with it. When they understand that a programmable stitch sequence can create a unique fabric texture, or that a stitch regulator can help them 'draw' with thread, they begin to see the machine as an extension of their own creativity.
This philosophy is exactly what drives the support we offer here at bsewinn.com. Through extensive online classes, training videos, and a library of digital resources, we aim to empower sewists by making even the most advanced tools feel intuitive and inspiring. A great example of a machine that balances power with a user-friendly design is the Baby Lock Allegro; you can explore the features of the Baby Lock Allegro to see how it's built to support a crafter’s growing skills.
The global sewing machine market, currently valued at USD 4.56 billion, is expected to hit USD 5.53 billion by 2030. A huge part of that growth is fueled by tech advancements like AI-powered stitch guidance. This trend really underscores why it’s so important for educators to adapt and bring these modern tools into their curriculum. You can check out the full research on these market trends at grandviewresearch.com.
And if you're thinking about expanding your teaching beyond in-person classes, looking into effective video marketing strategies for small businesses can open up new avenues for finding and engaging with students. By weaving technology into both your teaching methods and your business practices, you position yourself as a modern, forward-thinking instructor ready to guide the next generation of makers.
Build a Thriving Sewing Community
Teaching sewing is about so much more than just skills. When you create a space where students feel seen, supported, and connected, you’re not just holding a one-off class—you’re planting the seeds for a vibrant, lasting community. It's this network that keeps people inspired and motivated long after they've packed up their machines.
The real magic happens when the learning spills outside the classroom walls. By fostering that sense of belonging, you empower students to keep exploring their creativity, knowing they have a whole crew of fellow makers cheering them on. A simple course transforms into a thriving little ecosystem of creativity.
https://www.youtube.com/embed/V7pl_f2gcqI
Create a Dedicated Space for Connection
One of the best things I ever did was create a private online space just for my students. A simple, dedicated Facebook group or even a group chat can become an incredible hub for sharing progress, asking for help, and celebrating each other's work.
This digital gathering spot breaks down the isolation that often comes with a solo hobby. Think about it: a student is stuck on a tricky step at home, feeling frustrated. They can snap a quick photo, post it in the group, and get advice not just from you, but from classmates who might have just tackled the exact same issue. It's powerful stuff.
Make it a habit to encourage everyone to share their finished projects. This simple act of celebrating a completed tote bag or a perfectly sewn pillowcase creates a positive feedback loop of encouragement. It shows beginners what’s possible and reminds everyone of the simple joy of making something with their own hands.
Use Social Media to Showcase Student Success
Your public social media channels are fantastic for building a wider community around your teaching. With your students' permission, of course, make it a regular practice to feature their amazing projects. A simple "Student Spotlight" post can do wonders for a new sewist's confidence.
When you tag them in the post, you're not just giving them a well-deserved moment of recognition; you're connecting them to a broader audience of fellow crafters. It helps them feel like a genuine part of the larger sewing world.
Here are a few ideas to get you started:
- Weekly Wins: Dedicate one day a week to sharing photos of what your students have created.
- Behind-the-Seams: Post short, fun video clips from your classes (always get permission!) to show the collaborative atmosphere.
- Project Roundups: At the end of a class, create a collage of all the finished projects to celebrate the group's collective achievement.
Organize Engaging Group Activities
To keep the momentum going, plan fun, low-pressure group activities that go beyond formal lessons. Sew-alongs are a perfect example. You can pick a simple, accessible pattern and invite your community to create it together over a set period.
This could be a weekend challenge to make a set of scrunchies or a month-long project to tackle a simple garment. The shared goal creates a wonderful sense of camaraderie. It’s a fantastic way for students to practice their skills in a supportive, non-classroom setting.
A thriving community doesn't just happen; it's nurtured. By actively creating opportunities for connection, you reinforce the idea that sewing is a shared passion. This collaborative spirit turns individual students into a supportive network that learns and grows together.
This community-first approach is central to our mission at bsewinn.com. We believe in empowering crafters not just with custom sewing machine designs and high-quality tools, but with the ongoing support they need to succeed. Our resources, from online classes and training to special events, are all designed to foster this sense of connection and continuous learning.
Guide Students to Their Next Steps
A huge part of your role as a community builder is being a trusted guide for your students' sewing journeys. When they've mastered the basics and are itching for more, you can point them toward reliable resources to help them keep growing.
Your guidance helps them navigate the vast world of sewing and find their next creative challenge. When students are ready to deepen their knowledge, referring them to a curated collection of the best online sewing courses ensures they can continue with high-quality instruction. It's a natural part of their growth, and your support in this phase is invaluable. By connecting them with trusted resources, you empower them to take ownership of their learning, confident they have a whole community behind them.
Common Questions About Teaching Sewing
As you start teaching others to sew, you're bound to have some questions. It happens to everyone! Whether you've been teaching for years or you're just prepping for your very first class, knowing how to handle common classroom situations makes all the difference. Let's tackle some of the biggest questions I hear from fellow sewing instructors.
One of the first hurdles is always the same: what on earth should you make in that first class? The pressure is on to pick a project that's fun, fast, and builds a solid foundation.
What Is the Best First Project for a Beginner Class?
Your ideal first project needs to be simple, rely almost entirely on straight stitches, and—this is the important part—be something a student can actually finish in a single class. The goal here is a quick win. You want them leaving with a finished item in hand, feeling proud and excited to come back for more.
A few tried-and-true winners are:
- A Simple Tote Bag: This is a classic for a reason. It teaches straight seams, how to pivot at corners, and the basics of making straps. Super practical.
- A Pillowcase: I absolutely love using the "burrito" or "hot dog" method for this one. It's a fantastic, almost magical way to introduce enclosed seams without getting too technical.
- Pajama Pants: This is a great first garment. Students get to learn about making an elastic casing, but you skip the intimidating stuff like zippers or buttonholes for now.
Each of these gives students a real taste of success and skills they'll use again and again. That feeling of creating something useful right away is incredibly motivating.
The best first project isn't just about teaching a seam; it's about proving to your students that they can make something amazing from scratch. It’s all about balancing skill-building with a quick, satisfying finish.
How Do I Manage a Class with Different Skill Levels?
It’s the classic scenario, right? You've got one student who’s already zipping through their project while another is still working up the courage to press the foot pedal. Managing a mixed-skill class is all about having a flexible plan.
The secret is to build variations right into your core project. Start everyone with the same base—let's say, the simple tote bag. For your speedier students, have a few "stretch goals" ready. Maybe they can add an interior pocket, sew in a magnetic snap, or topstitch the handles for a more finished look.
And for those who need a bit more time? Have pre-cut fabric kits on hand. This lets them skip the sometimes-stressful cutting phase and focus completely on getting comfortable with the sewing machine. This way, everyone feels challenged at their own level and leaves feeling accomplished.
At bsewinn.com, we live for empowering crafters at every stage. From our custom sewing machine designs to our huge library of online classes and training resources, everything we do is designed to support sewists as they grow—from that very first stitch to their most ambitious project yet.
Here at B-Sew Inn, we’re committed to supporting your creative journey with the best machines, supplies, and education out there. Check out everything we have to offer and get inspired for your next class at https://www.bsewinn.com.