So, you want to learn how to sew. That's fantastic. Getting started is way easier than you might think—it really just comes down to grabbing a few key tools, getting comfortable with a reliable machine, and giving yourself permission to learn something new.
We'll get you going with the essentials: picking out your first fabric, scissors, and thread. Then we'll dive into the basics of your machine, like winding a bobbin (it's not as scary as it sounds!) and practicing a simple straight stitch on some scrap fabric. Before you know it, you'll be creating your first tangible project that you can proudly display.
Your Sewing Journey Starts Here
Jumping into a new craft like sewing is exciting, but let's be honest—it can feel like a lot at first. This guide is here to cut through the noise and get you behind the machine, creating things with confidence. We’ll walk through the gear you actually need and introduce you to the handful of tools that will quickly become your best friends.
We’ll also look at why so many people are picking up sewing again. This isn't just your grandma's hobby anymore; it's a huge global movement, and you're about to join a really creative and supportive community.
Here at bsewinn.com, our whole goal is to empower crafters like you. With our custom sewing machine designs, online classes, and extensive resources, we've created a clear path to get you from feeling a bit hesitant to proudly showing off your first finished project.
This isn't about becoming a master tailor overnight. It’s about taking those first simple, fun steps toward a skill you'll have for life.
The Growing Appeal of Sewing
If you've suddenly got the urge to sew, you're in good company. The global market for sewing machines has been booming, thanks to a huge resurgence in home sewing and DIY culture. The market was valued at around USD 7.1 billion and is expected to climb to USD 10.5 billion by 2033. This isn't just a random spike; it shows a real shift as people get more interested in creating their own unique fashion, upcycling old clothes, and being more sustainable.
So, why is everyone suddenly obsessed with sewing? A few reasons stand out:
- Creative Expression: Sewing gives you the power to turn your ideas into reality. You can make clothes and home decor that are exactly your style, not just what's available in stores.
- Sustainable Living: Being able to mend, alter, and upcycle your clothes is a total game-changer. It cuts down on waste and helps you build a wardrobe that lasts.
- Mindful Craftsmanship: The focus it takes to sew is almost meditative. It's a hands-on, rewarding activity that offers a much-needed break from our digital lives.
Our Commitment to Your Success
We've seen it time and time again: the biggest thing holding new sewers back is a lack of confidence and not knowing where to start. That’s why bsewinn.com is more than just a place to buy a machine. We're your support system, dedicated to empowering you on your creative journey.
Here's how we've got your back:
- Custom Sewing Machine Designs: We’ve designed machines specifically for beginners. They're easy to use and reliable, without all the confusing bells and whistles you don't need yet.
- Online Classes and Training: Our library of online tutorials and classes provides step-by-step guidance through tangible projects that you can replicate at home. You can learn at your own pace, whenever it works for you.
- A Wealth of Resources: From beginner-friendly patterns to guides for when things go wrong (and they will!), we give you the tools to tackle any project with confidence.
Alright, let's get started. Grab your tools, bring a positive mindset, and let's make something awesome together.
Choosing Your First Sewing Machine and Tools
Your sewing machine is the heart of your new hobby, but stepping into a craft store can feel like a lot. Let's cut through the noise. Picking a reliable, beginner-friendly machine isn't about finding the one with the most buttons; it's about focusing on what you actually need to get started without the frustration.
The good news is that modern machines are more intuitive than ever. The industry, valued at USD 4.56 billion and projected to hit USD 5.53 billion by 2030, is constantly innovating. This growth translates into user-friendly features that make once-tricky tasks much simpler for newcomers.
Here at bsewinn.com, we design our custom sewing machines with that exact goal in mind. We want them to feel intuitive and dependable from your very first stitch. Paired with our supportive online classes and training resources, we're here to help you get comfortable with your machine fast so you can start creating tangible designs right away.
Key Features For A Beginner Machine
When you're just starting, simplicity is your best friend. Don't worry about those high-end computerized models with hundreds of stitches. You'll likely only use a handful for your first several projects. Instead, look for a machine that is reliable and easy to use.
Here are the non-negotiable features I always recommend for a first machine:
- Essential Stitches: You need a solid straight stitch and a versatile zigzag stitch. Seriously, that's it. These two will handle 90% of your beginner projects, from hemming pants to sewing a pillowcase.
- Easy-to-Load Bobbin: A top-loading, or "drop-in," bobbin system is a lifesaver for beginners. You can see how much thread you have left at a glance, and it's far less prone to jamming than the older front-loading styles.
- Speed Control: This is a game-changer. A little slider that lets you set a maximum sewing speed helps you sew slowly and accurately without having to nervously tap the foot pedal. It’s all about building confidence and control.
- Sturdy Construction: A machine with a metal internal frame is going to be more durable and will vibrate less than an all-plastic one. Less vibration means more consistent, even stitches.
Choosing the right machine is your first major step toward success. A dependable, easy-to-use machine minimizes frustration and keeps you focused on the fun part: creating. It's about finding a partner for your creativity, not a complicated puzzle to solve.
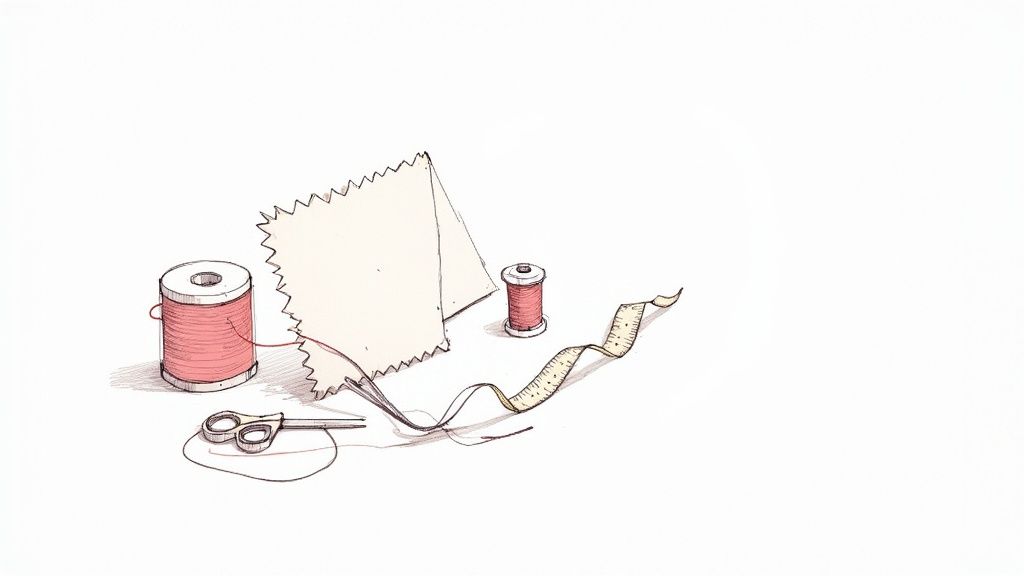
Building Your Essential Toolkit
Once you have your machine, you'll need a small collection of high-quality tools. And just like with the machine, the goal is to get what you need without getting lost in the gadget aisle. The right tools make every step of the process—from cutting to finishing—smoother and way more enjoyable.
There are tons of accessories out there, but you only need a few to really get going. Focus on quality over quantity. Trust me, a single pair of sharp shears is infinitely better than a drawer full of mediocre tools that snag your fabric. For a complete list, check out our guide on the top sewing tools for beginners.
To get you started, I've put together a focused checklist of the core items every new sewer should have on hand.
Your Essential Beginner Sewing Toolkit
This isn't an exhaustive list of every sewing gadget available, but a curated collection of the absolute must-haves. These are the tools you'll reach for again and again.
| Tool | Primary Use | Beginner's Tip |
|---|---|---|
| Fabric Shears | Cutting fabric cleanly and precisely. | Dedicate these scissors for fabric ONLY. Cutting paper or other materials will dull them in a heartbeat. |
| Seam Ripper | Removing stitches and correcting mistakes. | Don’t be afraid to use it! Every sewer, from beginner to expert, keeps a seam ripper handy. It's your do-over tool. |
| Quality Pins | Holding fabric pieces together before sewing. | I love glass-head pins because they won't melt if you accidentally iron over them. It happens! |
| Measuring Tape | Taking body measurements and measuring fabric. | A flexible tape is essential. It's the only way to accurately measure curves on patterns and people. |
| Fabric Marker | Transferring pattern markings to your fabric. | Choose a water-soluble or air-erasable pen so the marks disappear from your finished project. No one will know! |
With a dependable machine and these key tools, you have everything you need to tackle your first project with confidence. Now the fun begins
Getting Comfortable With Your Machine
Unboxing a new sewing machine is a huge thrill, but let's be honest—it can also be a little intimidating. All those dials, levers, and strange-looking ports can make you feel like you're staring at a spaceship control panel.
Think of it less like a complex console and more like a new instrument you're learning to play. The first step is just figuring out where everything is and what it does. This section is your personal, hands-on tour of the machine's key parts, designed to turn the unfamiliar into the familiar.
We’re not just going to name the parts; I’ll explain why they matter and how they work together to create a perfect stitch. Once you understand that, you’ll feel in control, and that’s the first real milestone on your creative journey.
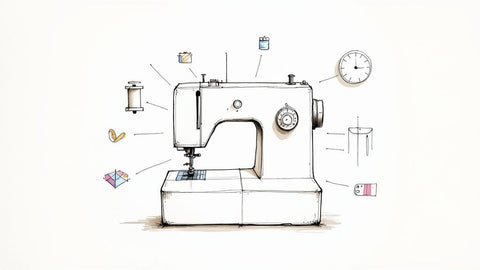
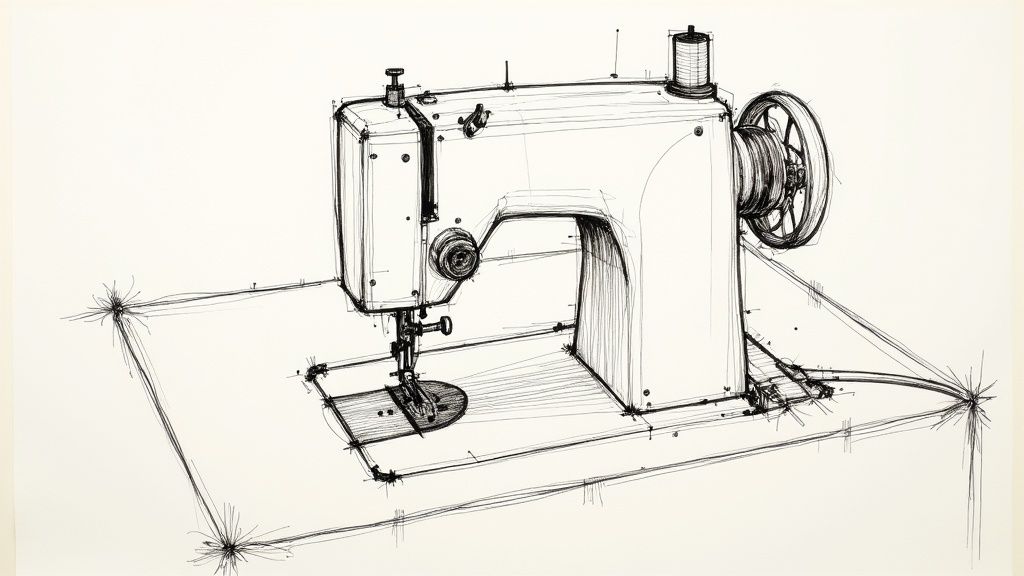
A Quick Tour Of Your Machine
Before you can actually sew, you need to know your way around your equipment. Let's walk through the five most important parts you'll find yourself using constantly. Getting to know them now will make every single project down the road so much easier.
- Spool Pin: This simple little peg holds your spool of thread. It’s mission control for your entire upper thread path.
- Thread Guides: See that series of hooks and channels? Those guide the thread from the spool pin all the way down to the needle. Their main job is to maintain smooth, even thread tension, which is absolutely critical for a balanced stitch.
- Tension Dial: This is the numbered dial that controls how tight the upper thread is. If you set it too high, your fabric might pucker. Too low, and you'll get loose, messy loops on the bottom. Most machines have a standard range, and you’ll usually start with it set somewhere around ‘4’.
- Handwheel: Located on the right side of your machine, the handwheel lets you manually move the needle up and down. A crucial tip: Always turn it towards you. Turning it away can create a tangled mess of thread. It's perfect for placing the needle exactly where you want it when starting a seam or turning a sharp corner.
- Presser Foot: This is the little ski-shaped foot that holds your fabric flat against the machine while you sew. You lower it with a lever, and you must always sew with it in the down position. No exceptions!
Getting a feel for these parts really demystifies the machine. When you know what the tension dial does or why the presser foot has to be down, you’re not just following instructions anymore—you’re actually understanding the process of sewing.
Mastering The Bobbin
Every single stitch your machine makes is formed by two threads locking together: the top thread (from the spool) and the bottom thread. That bottom thread comes from a small component called a bobbin.
Learning to wind a bobbin correctly is one of those non-negotiable, fundamental skills. Trust me, it will prevent countless headaches later on. An unevenly wound bobbin is one of the top culprits for tangled thread and sloppy-looking stitches.
The process itself is pretty straightforward. You'll place your thread spool on the pin, guide the thread through a specific tension disc just for winding, and then onto the empty bobbin. Once the bobbin is on its winder pin, you just press the foot pedal, and the machine does the work, creating a neat, tightly wound bobbin that's ready for action.
The Art Of Threading The Machine
With a full bobbin loaded and ready, the next step is threading the machine itself. This is often the part that trips up new sewers the most, but modern machines have made it incredibly simple. Most beginner-friendly models have a numbered guide printed right on the machine to show you the way.
You just follow the path step-by-step, guiding the thread through the channels, around the take-up lever, and down to the needle. Here’s the key takeaway: always thread the machine with the presser foot UP. This opens the tension discs, allowing the thread to sit properly between them. If you thread with the foot down, the tension won't be applied correctly, and you’ll likely end up with a tangled mess under your fabric.

Winding a bobbin and threading the machine will feel clumsy at first, but I promise it will quickly become second nature. Our goal at bsewinn.com is to empower you with these foundational skills. If you're a visual learner, our online classes feature close-up video tutorials of these exact steps so you can follow along at your own pace.
For even more guidance, you can explore our collection of free sewing lessons designed to build your confidence from the very beginning. Once you've mastered these two tasks, you're officially ready to sew.
Practicing Your First Stitches
Okay, your machine is threaded and you're ready to go. It's time to put the pedal to the metal—literally. But before you even think about touching that beautiful fabric you bought, we need to talk about practice.
The single best thing you can do for your future sewing self is to practice on scraps. This is non-negotiable! This is where you build the muscle memory that will make your first real project a success instead of a headache. We're starting with the most important stitch of all: the straight stitch. It’s the bedrock of pretty much everything, from making clothes to quilting.
Your goal right now isn't perfection. It's just to get a feel for how the machine responds to you. Grab a few pieces of scrap fabric, stack them, lower the presser foot, and just... sew.
Mastering The Straight Stitch
I promise you, your first few lines might look a little wobbly. That's completely normal, so don't sweat it. The real secret is to focus on guiding the fabric, not pushing or pulling it. Your machine has little teeth under the needle called feed dogs, and they do all the work of moving the fabric forward. Your hands are just there to steer.
Try these simple drills to get the hang of it:
- Sewing Straight Lines: Take a fabric marker and a ruler and draw several parallel lines on your scrap. Your mission is to sew directly on top of these lines. Try to keep your speed as consistent as possible.
- Turning Corners: Sew along one of your lines. When you reach a corner, stop with the needle in the down position. Now, lift the presser foot, pivot the fabric 90 degrees, lower the presser foot again, and keep sewing. This "needle down" trick is the key to getting sharp, clean corners.
- Controlling Your Speed: Get to know your foot pedal. See how slowly you can sew while still making even stitches. If your machine has a speed control slider (a lifesaver!), set it to the slowest setting until you feel more confident.
When you're just starting out, consistency is way more important than speed. The goal is to create nice, even stitches that look the same from start to finish. Slow and controlled sewing will always give you a better result than rushing through it.
We know how crucial this practice phase is. That's why at bsewinn.com, we provide tons of online resources, including training videos and tutorials, designed to walk you through these exact exercises. You’ll get close-up views and expert tips to help you build confidence one stitch at a time.
Understanding Seam Allowance
As you're sewing your practice lines, look at the metal plate under the needle. See those measurement guides etched into it? That's your seam allowance guide, and it's one of the most critical tools on your machine. The seam allowance is simply the distance between your line of stitching and the raw edge of the fabric.
Keeping a consistent seam allowance is what makes all the pieces of a pattern fit together like a perfect puzzle. Most patterns will tell you exactly what to use—garments often use 5/8 inch, while quilting typically uses 1/4 inch. For now, just pick a line on the guide (like 1/2" or 5/8") and focus on keeping the edge of your fabric perfectly aligned with it as you sew.
Essential Supporting Stitches
Once you feel good about your straight stitch, there are just two more techniques you need to lock down. Master these, and you'll have a solid foundation for any project.
The Zigzag Stitch
Meet your new best friend: the zigzag stitch. Its main job is to finish raw fabric edges to keep them from fraying and unraveling, especially after a trip through the washing machine. It's easy to do. Just select the zigzag stitch on your machine and sew a line close to the raw edge of your scrap fabric. Play around with different stitch widths and lengths to see what they look like. A clean finish on the inside of a garment is a true sign of quality craftsmanship.
The Art of Backstitching
Finally, you need a way to lock your stitches in place so your beautiful seams don't just fall apart. This is where backstitching comes in. It's simple: at the very beginning of a seam, sew forward two or three stitches. Then, press and hold the reverse button to sew backward right over those first few stitches. Let go and continue sewing the rest of your seam. When you get to the very end, do the exact same thing to secure it. This tiny step is absolutely essential for creating strong, durable seams that will last.
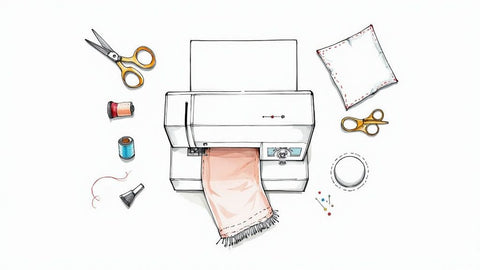
Your First Project: An Envelope Pillow Cover
Okay, theory is great, but sewing is all about doing. There’s a special kind of magic that happens when you take a piece of fabric and turn it into something real and tangible. That's what we're going to do right now with a simple, satisfying first project: the classic envelope pillow cover.
This project is a beginner’s dream and a perfect tangible example that any crafter can replicate. It’s built entirely on the straight stitch you’ve been practicing, so you can really focus on getting your seams neat and tidy. No zippers, no buttons, just a clever overlapping back that gives you a polished look.
When you’re done, you won’t just have a new pillow. You’ll have that amazing feeling of accomplishment that comes from creating something with your own two hands. This is where it all clicks.
Gathering Your Materials
First things first, let's get our supplies in order. Having everything laid out before you start makes the whole process feel less like a chore and more like a fun creative session. This is what makes it such a great "how-to-start-sewing" project—the materials are basic and easy to find.
Here's your shopping list:
- Fabric: For an 18x18 inch pillow, you'll need about 3/4 yard of fabric. Stick with a medium-weight quilting cotton. It’s a dream to work with because it doesn't shift around, it presses beautifully, and the patterns are endless.
- Pillow Form: Grab an 18x18 inch pillow insert. Matching the form to the finished cover size is the secret to a perfectly full, professional-looking pillow.
- Matching Thread: An all-purpose polyester thread that blends with your fabric is perfect.
- Basic Sewing Tools: Your fabric shears, measuring tape, pins, and a fabric marker.
At bsewinn.com, we believe that confidence is built one project at a time. Our online classes and extensive resources are all about giving you clear, supportive guidance so you can build your skills and tackle new creative challenges with success.
Cutting Your Fabric Pieces
The success of any sewing project starts with accurate cutting. Take your time here—the old "measure twice, cut once" saying is famous for a reason. For this pillow, we only need three simple rectangles.
I always recommend drawing your cutting lines directly on the wrong side of your fabric with a marker before you even pick up the scissors.
Cutting Dimensions for an 18x18" Pillow:
- Pillow Front (Cut 1): One 18 x 18 inch square.
- Back Panels (Cut 2): Two 18 x 12 inch rectangles.
These measurements already include a 1/2 inch seam allowance on every side. Those two back panels are designed to overlap, creating that clever "envelope" opening that holds the pillow form snug without any tricky closures.
The scariest moment for most new sewers isn't running the machine—it's making that first cut into a beautiful piece of fabric. My advice? Just go for it. It's only fabric. Every single cut and stitch is a lesson learned.
Sewing Your Pillow Cover
With your fabric cut, it's time to head to the machine! We'll tackle this in a few simple stages, keeping our focus on clean finishes and straight seams.
Hemming the Back Panels
First, let's create a nice finished edge on the two back pieces. These edges will form the opening of your envelope, so we want them to look neat.
- Take one of your 18 x 12 inch back pieces. On one of the long, 18-inch sides, fold the raw edge over 1/2 inch toward the wrong side and give it a good press with your iron.
- Fold it over another 1/2 inch to hide the raw edge. Press it flat again and secure it with pins. This is called a double-fold hem, and it's a super durable finish.
- Stitch close to the inner folded edge to secure the hem.
- Do the exact same thing for the second back panel.
Assembling the Pillow
This is the fun part where it all comes together and starts to look like a real pillow.
- Lay your 18 x 18 inch front piece on your table, right side facing up.
- Place one of the hemmed back panels on top of it, right side facing down. Line up the raw edges with the top and sides of the front piece. The clean, hemmed edge should be running through the middle.
- Now, place the second back panel on top, also right side facing down, aligning its raw edges with the bottom and sides. The hemmed edge will overlap the first panel in the center.
- Pin all three layers together all the way around the outside of the square.
Finishing the Seams
You're in the home stretch!
- Using a 1/2 inch seam allowance, sew all the way around the entire square.
- For extra durability (especially if you plan to wash it), you can go back and sew over the raw edges inside with a zigzag stitch.
- Clip the four corners diagonally. This removes bulk and helps you get sharp corners. Just be careful not to snip through your stitches!
- Turn the cover right side out through the envelope opening. I like to use a chopstick or a point turner to gently poke out the corners so they're nice and crisp.
- Give it a final press, stuff your pillow form inside, and step back to admire what you just made. You did it!
Once you feel the pride of finishing your first pillow, you'll be hooked. You might even feel inspired to try more DIY home decor projects to bring your new skills to the rest of your space.
Working Through Those First Sewing Hiccups
Every single person who learns to sew hits a few bumps in the road. It’s not just you; it’s a universal part of the process! These little hiccups are actually valuable lessons in disguise. Think of them less as frustrating problems and more as your machine's way of telling you what it needs.
This is your quick-start guide to the most common issues that pop up when you're just starting out. Learning these simple fixes will get you back to creating faster and with way less stress.
Why Is My Thread Bunching Up Under the Fabric?
Ah, the dreaded "bird's nest." That tangled mess of thread that suddenly appears under your fabric is probably the number one headache for new sewers. It's messy, it jams everything up, and it can feel like a total mystery.
But here’s the secret I wish I'd known sooner: 99% of the time, the problem is with your top thread, not the bobbin.
The most common culprit is threading the machine while the presser foot is down. When that foot is lowered, the tension discs clamp shut. If you try to thread it then, the thread can't settle properly between them, which causes that awful tangled mess underneath your fabric.
So, the very first thing you should always do is:
- Lift the presser foot up.
- Unthread the machine completely. Seriously, take it all out.
- Rethread everything from scratch, following your machine's guides carefully.
If that doesn't solve it, the next thing to check is your needle. Make sure it's inserted correctly—the flat side should always face the back of the machine.
Choosing the Best Fabric for Your First Project
Walking into a fabric store for the first time can be completely overwhelming. To set yourself up for success, you want to pick a fabric that’s easy to handle and won't fight you every step of the way. Your best bet is a stable, medium-weight woven fabric that doesn't stretch or slide around.
Quilting cotton is the absolute perfect choice for beginners. It's affordable, it comes in thousands of incredible colors and prints, it presses beautifully with an iron, and it behaves exactly how you expect it to. It’s just a joy to work with.
Other great starter fabrics include:
- Chambray
- Flannel
- Linen-cotton blends
I'd recommend staying away from very slippery fabrics like satin or sheer ones like chiffon until you feel more comfortable and confident with your machine. They can be tricky to manage.
Every single sewer, no matter how experienced, makes mistakes. The key is to see them not as failures, but as opportunities to learn. A tangled thread teaches you about tension, and a wonky seam teaches you about guiding the fabric. Be patient with yourself.
For a deeper dive into other common machine issues, our complete sewing machine troubleshooting guide is an excellent resource to bookmark.
How Often Should I Change My Needle?
It’s easy to forget, but a sewing machine needle is a precise tool that gets dull over time. A dull needle can cause a surprising number of problems, like skipped stitches, pulled threads in your fabric, and even a scary clunking noise from your machine.
A good rule of thumb is to replace your needle after every 8 to 10 hours of sewing time, or at the start of any new project. It’s one of the cheapest and easiest things you can do to guarantee better results and protect your fabric. A fresh needle makes a world of difference.
What Resources Can Help Me Succeed?
We are completely dedicated to supporting you on this creative journey. Here at bsewinn.com, we know that learning to sew is about more than just a machine; it's about having the confidence and knowledge to bring your ideas to life.
We empower crafters by offering a rich library of online video classes designed to help you get the most out of our custom sewing machines. These extensive resources include things like:
- Detailed online classes and training covering everything from basic setup to complete project tutorials.
- Downloadable guides and beginner-friendly patterns to get you started.
- A supportive community where you can share your creations and ask questions.
Our goal is to empower you at every step, providing the tools and training you need to grow your skills and truly enjoy the art of sewing.
At B-Sew Inn, we're here to support you with top-quality machines, extensive resources, and expert guidance. Discover everything you need to start your sewing adventure today at https://www.bsewinn.com.