It's a story every sewist knows all too well: you're completely in the groove, fabric gliding perfectly, when suddenly your sewing machine decides it's had enough. Before you get too frustrated, take a deep breath. Most of the time, these issues are surprisingly simple fixes you can absolutely handle yourself.
This guide is here to walk you through it, helping you figure out everything from maddeningly skipped stitches to those dreaded tangled thread nests.
Our blog at bsewinn.com doesn't just troubleshoot — it empowers you to build and customize your ideal sewing setup. Through comprehensive how-to guides, we showcase tangible machine design projects, like crafting a quilt extension table, installing a precision laser guide, or adapting your machine for heavy-duty leatherwork. You get detailed parts lists, diagrams, and step-by-step instructions you can replicate in your own studio. Plus, we back you with online classes, hands-on training, and extensive training resources to turn these designs into reality.
Find Your Sewing Machine Fix Fast
When your sewing machine throws a fit, it feels like more than just a mechanical hiccup—it brings your entire creative flow to a screeching halt. That wonderful momentum is gone, replaced by the nagging task of figuring out what on earth went wrong.
But what if troubleshooting wasn't a chore? What if it was just another skill in your sewing toolbox?
At bsewinn.com, we're all about empowering makers. We design custom sewing machines built for creativity, but we also know that real confidence comes from knowing your tools inside and out. That's why we offer so many resources, from online classes to hands-on training. This guide is built on that same idea: helping you become the master of your machine.
How to Use This Troubleshooting Guide
Think of this page as your on-call sewing machine mechanic. We've laid out the most common problems sewists run into, complete with clear, actionable solutions. No more digging through forums for vague answers.
To get you started even faster, the quick diagnosis chart below is your best friend.
- Spot Your Symptom: Find what's happening with your machine in the first column.
- Pinpoint the Cause: The next column gives you the most likely culprit.
- Jump to the Fix: The last column will take you straight to the detailed, step-by-step solution.
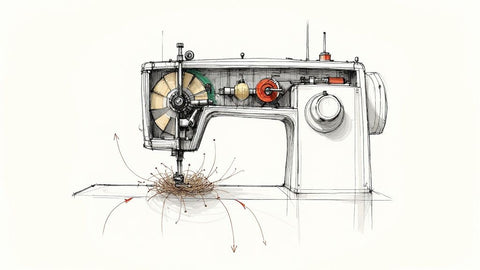
This way, you spend less time guessing and more time sewing. For example, if you see that awful bird's nest of thread under your fabric, the chart will point you directly to tension issues and show you exactly how to sort it out.
Our goal isn't just to help you fix a problem today. It's to give you the knowledge to understand your machine's quirks for a lifetime of happy, confident sewing. Let's make troubleshooting a skill, not a setback.
Use this chart to quickly find your problem and get your project right back on track.
Quick Diagnosis Chart for Sewing Machine Issues
Use this table to quickly find your symptom and jump to the right section for a detailed, actionable solution.
| Symptom | Most Likely Cause | Jump to Section |
|---|---|---|
| Thread bunching under fabric | Incorrect upper thread tension | Solving Thread Nests and Tension Headaches |
| Stitches are not forming | Incorrect needle insertion or type | Eliminating Skipped Stitches for Good |
| Fabric isn't moving | Feed dogs are disengaged or lint buildup | How to Fix Fabric Feed and Puckering Issues |
| Loud clanking or grinding noise | Bent needle or jam in the bobbin area | What Your Sewing Machine Sounds Are Telling You |
Just find your issue in the chart above, click the link, and you'll be on your way to fixing it in no time.
Solving Thread Nests and Tension Headaches
Nothing kills the creative vibe faster than the dreaded "bird's nest"—that awful, tangled mess of thread that pops up on the underside of your fabric. It's frustrating, for sure. But it’s also a clear signal from your machine that something's off, and it nearly always points to an issue with your upper thread tension.
Think of your top thread and bobbin thread as partners in a delicate dance. For a perfect stitch, they need to meet right in the middle of the fabric layers, pulling with equal force. When you see those ugly loops on the bottom, it means the top thread is way too loose and is getting pulled down easily by the bobbin thread.
On the flip side, if you see the bobbin thread peeking through on top of your fabric, your top tension is probably too tight. Getting a feel for this balance is the key to solving most tension headaches.
The First and Most Important Fix: Rethread Everything
Before you even think about touching that tension dial, the number one fix for bird's nesting is to completely rethread your machine. I'm not kidding—over 90% of tension issues I see come from a simple mistake in threading the top thread.
It's a step that's surprisingly easy to get wrong, especially when you're in the zone and rushing to finish a seam. But you have to follow one crucial rule.
Always rethread with the presser foot UP.
When you lift the presser foot lever, the tension discs inside your machine open up. This is what allows the thread to slip correctly between them. If you thread with the presser foot down, those discs are clamped shut. Your thread will just glide right over the top of them, giving you zero upper tension and an instant bird's nest.
Take a deep breath. Unthread everything—the top thread and the bobbin—and start completely fresh. Making this a habit will save you countless hours of frustration. Trust me.
Fine-Tuning Your Tension and Bobbin
If a full rethreading doesn't do the trick, it's time to look a little closer. Sometimes, tiny adjustments and a bit of cleaning can make all the difference. Your machine's manual is your best friend here, as it will have specific diagrams for your model.
- Clean Out the Tension Discs: Lint and tiny bits of thread can get trapped between the discs, keeping them from applying the right amount of pressure. A great trick is to gently "floss" between them with a piece of unwaxed dental floss or the edge of a clean scrap of fabric.
- Check Your Bobbin: Is the bobbin inserted correctly? Is the thread unwinding in the right direction? (When in doubt, check your manual!) An improperly seated bobbin can cause all kinds of chaos.
- Inspect the Bobbin Case: Pop out the bobbin case and check for any lint buildup. Run your finger along the inside to feel for any tiny burrs or scratches, which can snag the thread and lead to inconsistent tension or breakage.
Adapting to Different Fabrics and Threads
Your tension setting isn't a "set it and forget it" deal. You'll need to tweak it based on the materials you're using. For example, sewing delicate silk with a whisper-thin thread needs a much lighter tension setting than stitching through heavy canvas with a thick, sturdy thread.
This is why making a test stitch on a scrap of your project fabric is so important. It lets you see exactly how the stitches are forming and make small, methodical tweaks to the tension dial. Go one number at a time—turning it up if the bottom stitches are loose, or down if they're too tight.
The needle you use also plays a huge role in stitch quality. A needle that's too big or too small for your thread can cause shredding, skipped stitches, and, you guessed it, tension problems. If you want to dive deeper into this, check out our guide on choosing the right needle.
Eliminating Skipped Stitches for Good
A line of skipped stitches isn’t just a cosmetic flaw—it’s a weak point waiting to bust open. It’s one of the most frustrating things to see on a beautiful seam, but the good news is that it’s almost always caused by the smallest, cheapest part of your sewing machine: the needle. Honestly, learning to pick the right needle for your fabric is one of those foundational skills that solves problems before they even start.
Think of it this way: the needle is where your machine first meets your fabric. If that needle is dull, bent, or just the wrong type for the job, it’s going to struggle to create a clean loop for the bobbin thread to catch. That’s where those annoying gaps come from. So, the very first thing to do—always—is to pop in a fresh, new needle.
Matching Your Needle to Your Fabric
I get it. Staring at a wall of needles in the sewing aisle can feel overwhelming, but it’s really simpler than it looks. Most needles fit into a few main types, and knowing the difference is a game-changer. It’s something we drill down on in our online classes at bsewinn.com because it prevents so many headaches.
Here’s a quick rundown of the needles you’ll use most often:
- Universal Needles: These are your go-to, everyday needles. With a slightly rounded point, they work well for most woven fabrics like cotton, linen, and flannel. When in doubt, this is probably where you’ll start.
- Ballpoint/Jersey Needles: Sewing with knits? You absolutely need this needle. Its rounded tip is designed to slip between the fabric fibers instead of piercing them. This prevents those dreaded runs and holes in your stretchy T-shirt or jersey fabrics.
- Denim/Jeans Needles: This one is a total workhorse. It boasts a super sharp point and a tough, reinforced blade that can punch through dense fabrics like denim, canvas, or thick layers of quilting cotton without snapping.
Size matters, too. You’ll see two numbers on the package, like 80/12. The bigger the number, the thicker and stronger the needle. A bigger number is for heavy fabrics, while a smaller number is for delicate stuff like silk or voile. A good rule of thumb is to simply match the needle’s heft to your fabric's weight.
Correct Needle Insertion Is Critical
You can have the perfect needle, but if it’s not put in correctly, you’ll still get skipped stitches. This is a tiny detail that’s so easy to mess up, but it's essential. Take a look at the top of your machine needle—the shank. You'll see it has a flat side.
On virtually every single home sewing machine, that flat side must always face the back.
When you slide the needle up into the clamp, push it all the way to the top, making sure that flat side is pointing away from you. Then, tighten the screw until it’s nice and snug. If it's in backward or isn't pushed all the way up, the bobbin hook will miss the thread loop every single time.
Make it a habit to double-check this every time you change a needle. This simple two-second check is one of the most powerful habits you can build in your sewing practice.
Looking Beyond the Needle
While the needle is the culprit in about 80% of skipped stitch cases, sometimes the problem is a little sneakier. If a new needle doesn't fix it, it’s time to play detective. These are the kinds of deeper diagnostic skills we help crafters build through our extensive training resources.
Threading and Machine Setup Checks
- Rethread From Scratch: Yep, just like with tension issues, a simple threading mistake can cause skips. Take all the upper thread out and rethread your machine from the beginning. Crucially, make sure the presser foot is up so the thread seats properly in the tension discs.
- Check for a Burr: Gently run your fingertip over the hole in the needle plate. Do you feel a tiny nick or rough spot? That burr can snag your thread, causing it to shred or break. You can often smooth it out carefully with an emery board.
- Look at the Bobbin: Pop your bobbin out and put it back in. Is it inserted correctly? Is the thread coming off in the right direction for your machine? A wonky bobbin throws off the entire stitch rhythm.
Learning to "read" what your machine is telling you through its stitches is empowering. It lets you fix small issues before they derail a whole project. This is at the heart of what we do at bsewinn.com—from our machine designs to the support we provide every step of the way.
How to Fix Fabric Feed and Puckering Issues
It’s one of the most frustrating moments in sewing: your fabric suddenly stops moving, or even worse, it starts bunching up into a mess of ugly little puckers. When this happens, it can feel like your machine is actively fighting you. More often than not, this problem comes down to a simple communication breakdown between two critical parts: the presser foot pushing down from the top and the feed dogs pulling the fabric from below.
Getting these two parts to work in harmony is the secret to a beautifully flat, even seam. The feed dogs—those little metal teeth that pop up from the needle plate—are there to grab your fabric and guide it through the machine. Meanwhile, the presser foot holds it down with just the right amount of pressure. When they're in sync, everything glides. When they're not, you get puckers, stalls, and a whole lot of frustration.
Start with the Simplest Checks
Before you start fiddling with tension dials or taking things apart, always check the most common culprits first. It’s amazing how often what feels like a catastrophic failure is actually a two-minute fix. These are the very first things we have crafters check in our hands-on training sessions.
- Are Your Feed Dogs Engaged? Many machines have a switch or lever to drop the feed dogs for darning or free-motion sewing. It is incredibly easy to bump this switch by accident. Find it on your machine—it's usually near the bobbin—and double-check that it's in the "up" position.
- Clean Out the Lint: This is a huge one. Lint, dust, and tiny thread scraps get packed down between the feed dog teeth, literally choking their grip on your fabric. Unplug your machine, take off the needle plate, and give that whole area a thorough cleaning with a small, stiff brush.
Your sewing machine is a precision instrument, and even a small amount of lint buildup can throw off its entire rhythm. Making a quick clean part of your routine troubleshooting is one of the best habits you can develop.
The Critical Role of Presser Foot Pressure
If the quick fixes don’t solve the problem, your next stop should be the presser foot pressure. This is a powerful but often overlooked setting that dictates how firmly the foot holds the fabric. Mastering this adjustment is the key to preventing puckers on lightweight fabrics and stopping stalls on heavy ones.
Too much pressure will stretch and warp delicate materials like silk or chiffon, causing them to pucker up as they're sewn. On the flip side, too little pressure won't be enough to grip and move thick layers of denim or canvas, leaving your fabric stuck in place. While many modern machines handle this automatically, if yours has a manual dial, learning how to use it is a total game-changer.
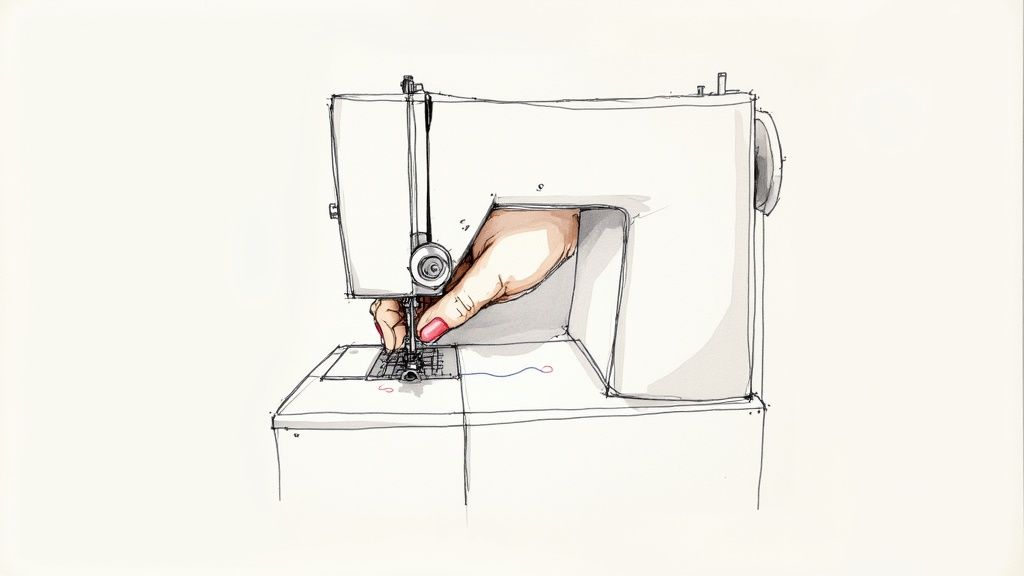
Understanding how each part of your machine functions correctly is foundational to good sewing. The image below, for instance, shows the proper bobbin winding process—another simple step that, if done wrong, can cause a cascade of problems later on.
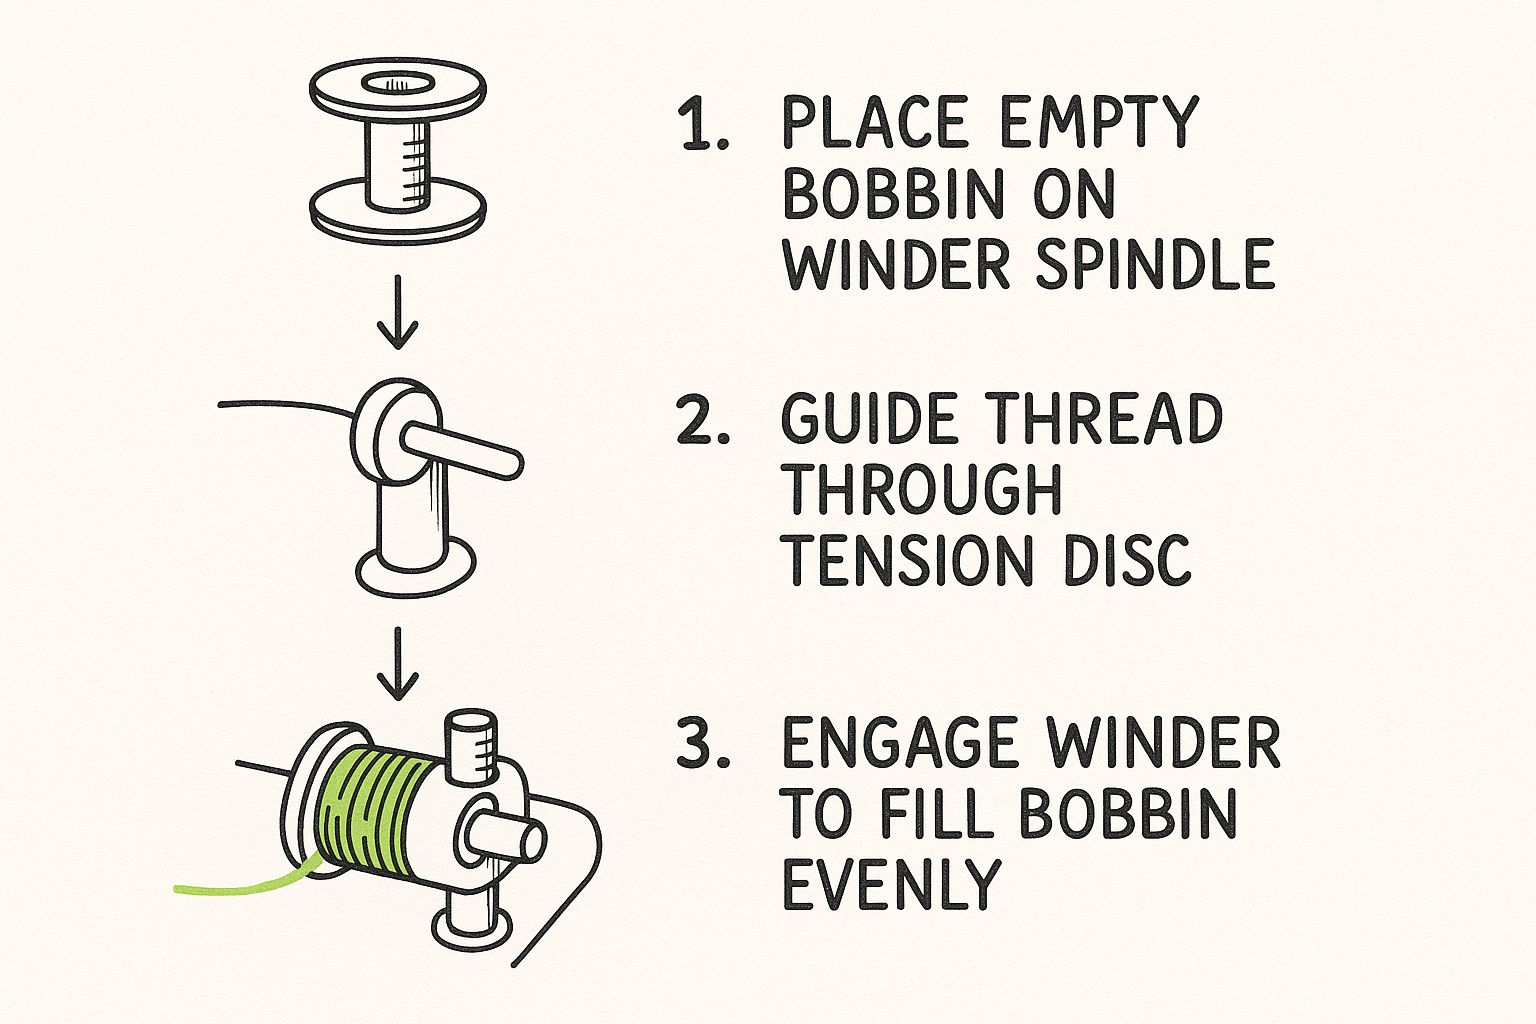
Just like with fabric feeding, each step here—from placing the bobbin correctly to engaging the winder—must be done right to ensure your machine runs smoothly.
To help you systematically diagnose feeding issues, here's a quick checklist to run through.
Fabric Feed Troubleshooting Checklist
This simple table can help you quickly pinpoint the cause of feeding problems by starting with the most likely culprits and moving to more advanced solutions.
| Problem Symptom | First Check | Next Step | Advanced Solution |
|---|---|---|---|
| Fabric won't move at all | Are feed dogs up? | Is stitch length set to 0? | Check presser foot pressure (too low?) |
| Fabric is puckering | Is presser foot pressure too high? | Is the needle old or damaged? | Are you using the correct needle type? |
| Fabric layers are shifting | Using enough pins or clips? | Is a standard foot adequate? | Switch to a walking foot |
| Fabric stalls on thick seams | Is needle appropriate for fabric? | Is machine clean? | Use a hump jumper or even-feed foot |
By working through these steps logically, you can usually identify and fix the issue without much fuss.
Matching Your Foot to Your Fabric
Sometimes, the problem isn't a setting—it's that the standard presser foot just isn't the right tool for the job. Specialized presser feet are designed to handle tricky fabrics, and using the right one can feel like pure magic. This is exactly the kind of expert insight we aim to share in our workshops, empowering you to tackle any material with confidence.
Common Scenarios and Their Solutions
- For Quilting or Slippery Fabrics: A walking foot is non-negotiable. It has its own set of feed dogs on top that move in perfect time with the machine's feed dogs below, pulling both layers of fabric through at the same rate. This prevents that dreaded layer-shifting and is a must-have for quilters. You can dive deeper into this topic in our guide on the 4 easy steps to start quilting.
- For Vinyl or Leather: These "sticky" materials often cling to a standard metal presser foot. A Teflon foot (or non-stick foot) has a slick coating that lets it glide right over these surfaces.
- For Thick Seams: When you sew over a bulky seam, like the hem of jeans, the presser foot can tilt, causing skipped or uneven stitches. An even-feed foot or a simple hump jumper tool keeps the foot level and your stitches perfect.
As fabrics and projects become more complex, so do our machines. In 2024, the global industrial sewing machines market hit a valuation of about USD 3.41 billion and is projected to climb to nearly USD 6.04 billion by 2034. The manuals for these advanced machines are packed with troubleshooting guides for mechanical failures and tension issues, reflecting the need to adapt to a huge variety of modern textiles.
What Your Sewing Machine Sounds Are Telling You
A happy sewing machine has a certain sound, doesn't it? It’s that gentle, rhythmic hum that becomes the background music to your creativity. But when that peaceful sound suddenly shifts to a jarring clank, a heavy grind, or a high-pitched screech, your machine is trying to tell you something important. Learning to interpret those sounds is like learning a new language—one that turns you from a frustrated sewer into a confident troubleshooter.
Think of yourself as a machine detective. Is there a repetitive, sharp clicking noise? I'd bet my favorite seam ripper that’s a bent needle striking the metal bobbin case with every stitch. On the other hand, if you hear a loud, grinding sound that makes you cringe, it’s almost certainly a serious thread jam tangled deep in the hook assembly.
The real goal isn't just to react to these sounds but to prevent them in the first place through good habits. That philosophy is central to how we support makers at bsewinn.com, where our custom machines and resources are designed to empower you to keep your equipment humming along happily for years.
Decoding Common Machine Noises
Before a tiny hiccup turns into a trip to the repair shop, just listen. Different sounds point to different problems, and catching them early can save you a world of trouble. Here are some of the most common auditory clues your machine might be giving you.
- A Sharp, Rhythmic "Clunk" or "Click": This sound, happening once per stitch, almost always points to the needle. The top suspect is a bent needle hitting the bobbin case or needle plate. Stop sewing immediately, unplug the machine, and swap in a fresh needle.
- A Loud, Grinding or "Chewing" Noise: This is the signature sound of a bad jam. Thread has likely formed a nasty tangle around the hook race under the needle plate. Power down the machine completely before you even think about clearing it.
- A High-Pitched Squeal or Screech: This is your machine begging for oil. It’s the sound of metal parts rubbing together without lubrication, which creates friction and can lead to damage. Time to pull out your manual and find your machine’s oiling points.
- A Thumping or Banging Sound: This often means something is loose—maybe the handwheel or something inside the machine's housing. It could also be as simple as the needle not being secured tightly in its clamp.
Always, always, always power down your machine before investigating any unusual noises. Trying to "sew through" a problem, especially a jam, is the fastest way to cause expensive damage to those delicate internal parts. Trust me on this one.
The Power of Proactive Cleaning and Oiling
The absolute best way to maintain that smooth, happy hum is through regular cleaning and oiling. Lint and dust are the arch-enemies of a well-oiled machine. They act like tiny sponges, soaking up lubricant and clogging up all the moving parts.
Start by unplugging your machine. Pop off the needle plate and take out the bobbin case so you can get a good look at the feed dogs and hook assembly area. A small, stiff brush is your best friend here—use it to sweep away all the lint you can see. Pay extra attention around the feed dogs and inside the bobbin case holder, because that’s where the worst buildup happens.
When it's time to oil, remember that less is more. Your machine's manual is the ultimate guide here, showing you exactly where it needs lubrication. As a rule of thumb, you’ll only need one or two drops of high-quality sewing machine oil on any point where metal moves against metal.
This kind of maintenance is non-negotiable for all types of machines, from our favorite home models to heavy-duty industrial units. The global industrial sewing machine market was valued at around USD 3.01 billion in 2023 and is expected to hit about USD 4.79 billion by 2032. For those workhorses, troubleshooting guides are laser-focused on motor health and maintenance to keep production lines running. You can get more industry details by checking out the full report on the industrial sewing machine market.
What to Do When a Jam Happens
Even with the best care, jams happen. We've all been there. When you hear that horrible grinding sound, the most important thing to do is stop and turn off the power.
First, gently try turning the handwheel backward by hand to see if you can release some of the tension. If it moves a little, you might be able to ease the fabric out. If it’s completely stuck solid, don't force it.
Next, remove the needle plate and bobbin case. You'll probably find the culprit: a "bird's nest" of thread snarled around the hook. Use a pair of small scissors or a seam ripper to carefully snip the threads, then pull them out with tweezers. Once it’s clear, reassemble everything, rethread the machine from scratch, and run a test on a scrap of fabric before going back to your project.
Your Sewing Machine Questions Answered
Before you unthread your bobbin in frustration, let’s tackle those nagging issues that can derail a project. I’ve gathered the troubleshooting tips I share most often in my studio. Think of this as your go-to reference for quick fixes and clear answers.
How Often Should I Change My Sewing Machine Needle
I once chased puckered seams on a linen skirt, only to discover the needle was beyond its prime. Since then, I swap in a new needle every 8-10 hours of sewing or at the start of a fresh project.
A dull or bent needle shows up as:
- skipped stitches
- fabric pulls
- irregular stitch quality
Making a habit of fresh needles is one of the simplest ways to keep your machine humming and your seams flawless.
Why Does My Thread Keep Breaking
Thread snapping wastes time and tests patience. These quick checks usually solve the mystery:
- Thread Quality: Old or budget thread can turn brittle. I stick with reputable brands.
- Needle Match: If the needle eye is too small, your thread will shred. Match thread weight to needle size.
- Complete Rethread: Remove top thread and bobbin, then thread both paths carefully with the presser foot raised.
- Tension Adjustment: Over-tight upper tension puts too much stress on the thread. Turn the dial down one notch and test on scrap.
When the thread breaks, resist patching just the end. Taking half a minute to fully rethread often banishes the problem for good.
Can I Use Any Brand Of Bobbin In My Machine
It’s tempting to grab the first bobbin you spot, but trust me, that rarely ends well. Always use the bobbins designed for your machine’s make and model. Tiny differences in size, shape or weight can skew tension, create thread snarls and even damage the bobbin case.
When in doubt, check your machine’s manual or the manufacturer’s website before loading a bobbin.
What Is The Best Way To Clean My Sewing Machine
A clean machine runs smoother and gives you fewer surprises mid-project. Here’s my go-to routine:
- Unplug and remove the needle plate plus bobbin case.
- Use a small, stiff brush to sweep lint away from feed dogs and the hook area.
- Skip compressed air—it can force debris deeper inside.
- Consult your manual for oiling points and use only the recommended sewing machine oil.
Keeping a basic cleaning kit within arm’s reach turns this into a five-minute task, not a weekend marathon. For more essentials to stock in your sewing kit, check out our list of the top sewing tools for beginners.
Looking for inspiration to customize your machine? Browse our how-to series on bsewinn.com and discover designs you can build today — all supported by our online classes, training, and resource library.
At B-Sew Inn, we believe that understanding your machine unlocks your creativity. We hope this guide helps you tackle any issue with confidence. Explore our machines, accessories, and online classes to keep your skills growing. Visit us at https://www.bsewinn.com.