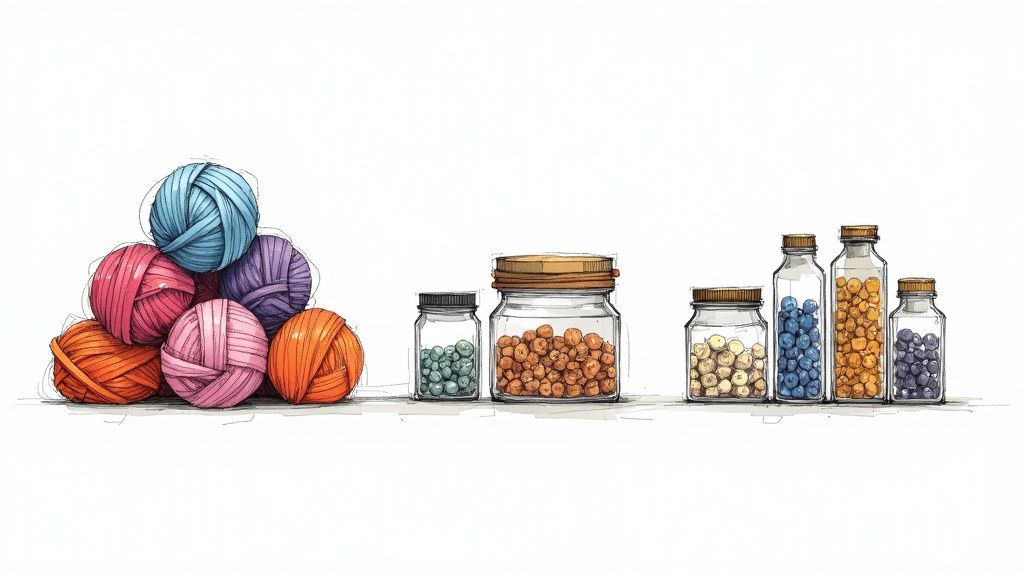
Before you can organize anything, you have to know exactly what you’re working with. I know it's tempting to rush out and buy cute bins and containers, but hold off for just a bit. The first, most crucial step is to take a complete inventory of every single craft supply you own.
This process ensures that the system you create is perfectly tailored to your collection, not some idealized version of one. It saves you from wasting money on storage that doesn't fit what you actually have and love to use.
Tackling the Craft Clutter with a Clear Plan
Staring at a mountain of yarn, fabric, and half-finished projects can feel completely overwhelming. I've been there. The key is to break it down into a manageable plan. Forget about neatening up just yet; this phase is all about a strategic sort.
Your mission, should you choose to accept it, is to pull everything out. Empty every drawer, every box, every "I'll get to it later" pile. As you unearth your treasures, start grouping similar items together. You'll probably start to see some natural categories emerge:
- Fabric: Sort it by type (cotton, vinyl, felt) or by color—whatever makes the most sense for how you choose materials for a project.
- Yarn & Fiber: Group these by weight, fiber content, or color family.
- Paper Goods: Keep cardstock, scrapbook paper, and vinyl sheets in their own piles.
- Adhesives & Paints: This is for all your glues, paints, mediums, and glitter.
- Tools: Gather all your scissors, rotary cutters, rulers, and other gadgets.
The Decisive Four-Box Method
Once you have your piles, it's time to make some decisions. This is where the simple but incredibly effective four-box method comes in. You’ll set up four distinct zones or containers labeled: Keep, Donate, Relocate, and Discard.
This simple framework forces you to be honest about each item. You’ll rediscover supplies you completely forgot you had and probably find a few duplicate rotary cutters you don't need. It's also a great reality check on your crafting habits. Are you holding onto beads from a jewelry-making phase that ended five years ago? This is your official permission to let them go and make room for the things that spark your creativity today.
Here's a quick look at how this method works:
The Four-Box Sorting Method
This simple yet effective framework helps you categorize every single item in your craft collection during the initial sorting phase.
| Category | Action | Example Items |
|---|---|---|
| Keep | Items you love, use regularly, or need for current projects. | Your favorite scissors, fabric for an upcoming quilt, go-to paint colors. |
| Donate | Good-condition supplies for hobbies you no longer pursue. | Unused yarn from a brief knitting phase, old scrapbooking kits. |
| Relocate | Items that don't belong in your craft space. | Office supplies, household tools, kids' school project materials. |
| Discard | Anything broken, dried up, or unusable. | Dried-up markers, tiny fabric scraps, broken glue guns. |
By working through every item with this method, you ensure that only the supplies that truly serve your creative life make it back into your space.
This initial planning phase really boils down to three core actions, as this flowchart shows.
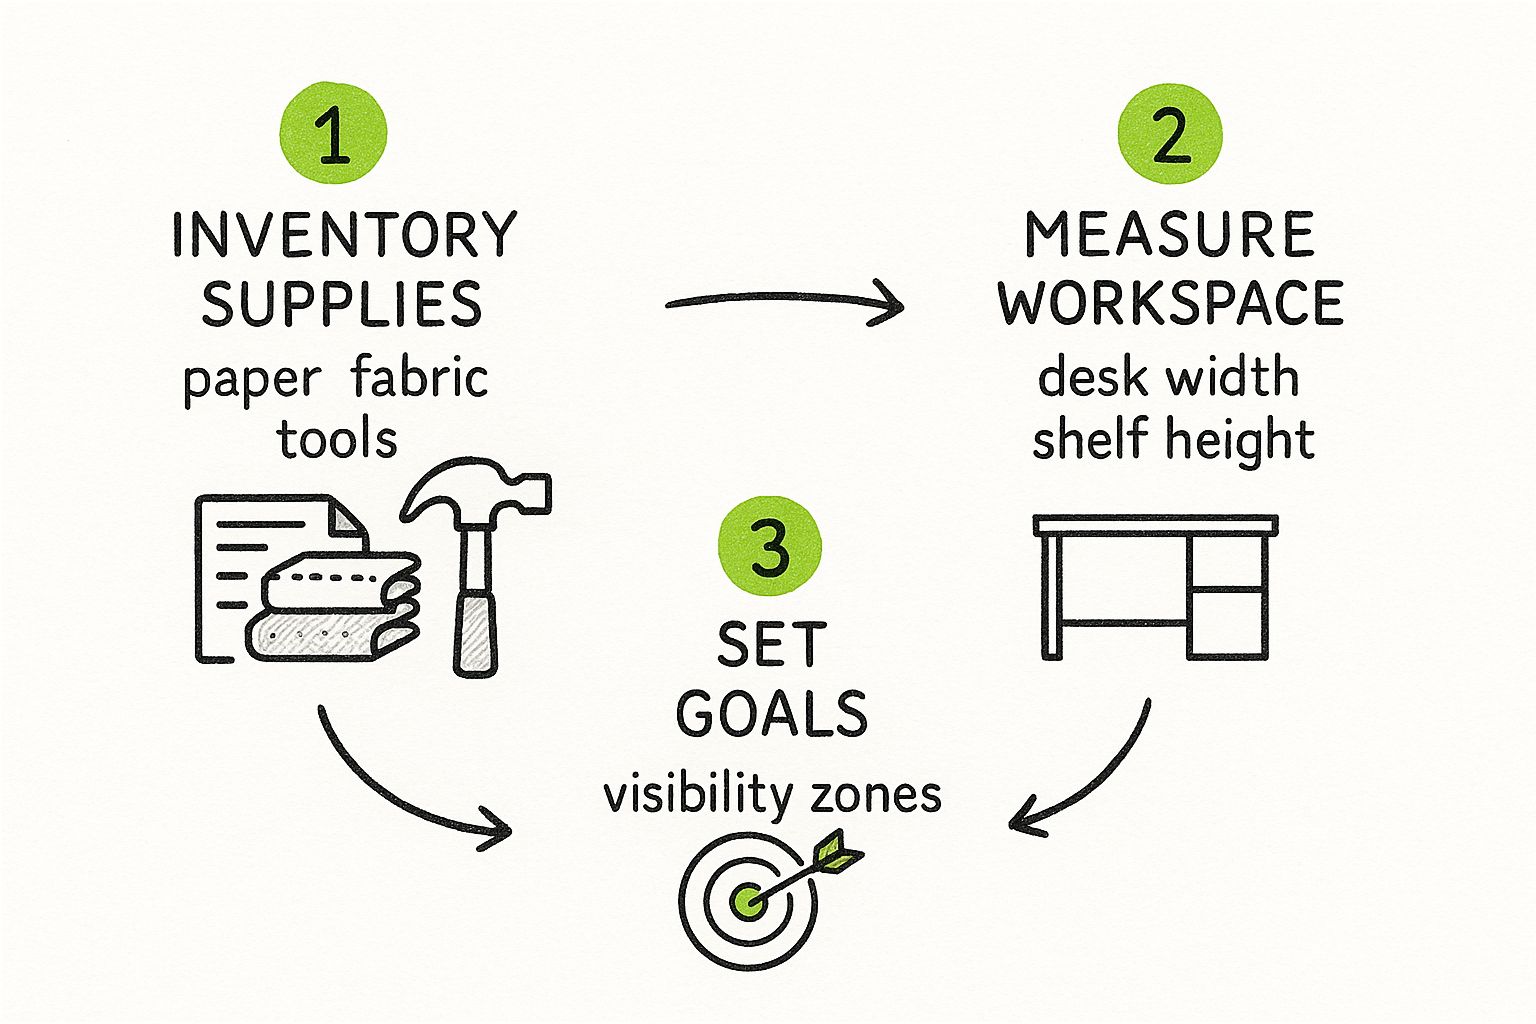
As you can see, taking inventory, measuring your space, and setting goals are the essential building blocks for an organization system that actually lasts.
This kind of thoughtful approach is more important than ever. The global arts and crafts market was valued at around $49.44 billion and is expected to hit nearly $79.31 billion by 2030. That explosion means more tempting supplies are available, making a solid organizational strategy a must-have for any serious crafter. You can dig into more market insights over at 360iresearch.com.
Once you’ve finished sorting, that overwhelming pile will have transformed into a curated collection that reflects your true passions. It’s ready to be housed in a functional, inspiring system—a space where you can spend less time searching and more time creating. Here at bsewinn.com, we know that an organized space is the first step to unlocking your creativity, which is why we are committed to empowering crafters by providing extensive resources, online classes, and training for every part of your crafting journey.
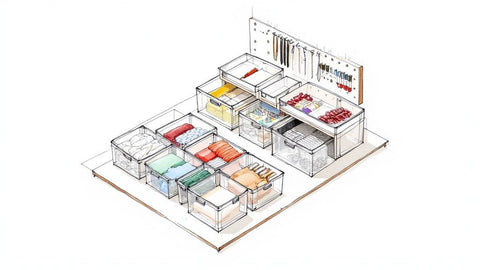
Finding the Right Home for Every Supply
Okay, you've sorted and decluttered—now for the fun part. It's time to find a smart, functional home for everything you decided to keep. This is where we build the foundation for a craft space that actually works for you, moving beyond just tossing everything into generic bins.
Think of your storage as a library for your creativity. Just like you wouldn't dump all your books into one giant box, your craft supplies deserve a system that makes them easy to find and inspiring to use. The goal is to see what you have at a glance, so you never have to tear the room apart looking for that one specific spool of thread again.
Go Vertical and Get Creative
One of the biggest mistakes I see crafters make is completely ignoring their wall space. Your walls offer a massive amount of organizational real estate without eating up your precious floor area. Pegboards and wall grids are fantastic for this; they let you hang baskets, hooks, and shelves for the tools you're constantly reaching for.
And don't just stick to the "craft aisle" for inspiration. Some of my favorite solutions come from other parts of the house:
- Kitchen Spice Racks: These are perfect for holding small bottles of glitter, tiny paint pots, or little jars of beads.
- Vertical Paper Trays: I love these for storing sheets of vinyl, cardstock, or neatly folded fabric fat quarters. They're not just for office paper!
- Rolling Carts: A three-tiered utility cart is basically a mobile craft station. You can load it up with everything for your current project and just roll it wherever you need it.
This approach lets you create a system that can grow right along with you. At bsewinn.com, we're all about empowering crafters with tools and knowledge that support your creative journey. Our custom sewing machine designs are just the start; your organization should feel as supportive as our online classes and training, helping you expand your skills without adding to the chaos.
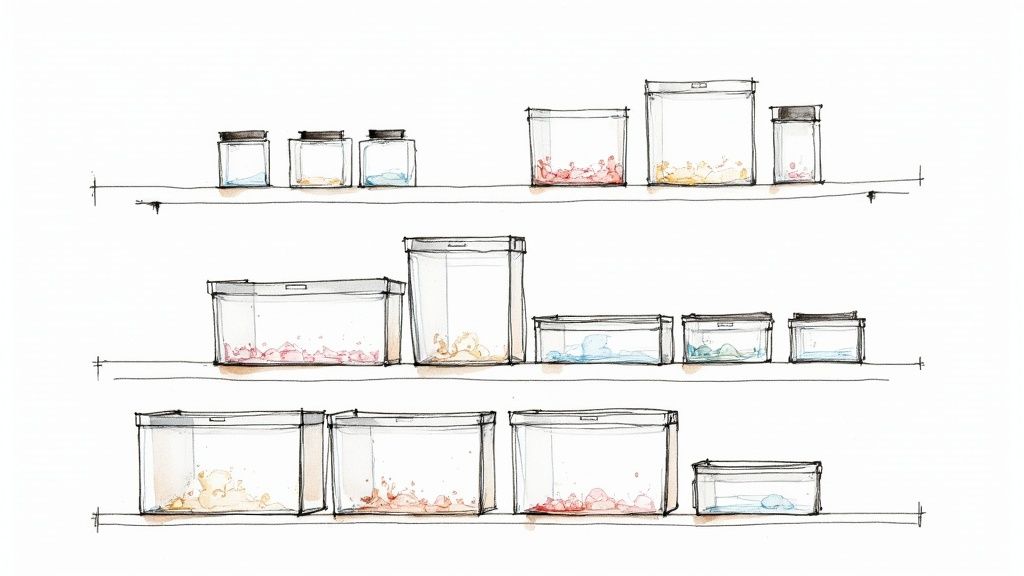
Visibility Is Your Best Friend
Here’s a simple rule I live by: if you can't see it, you won't use it. This is the real secret to keeping a space organized for the long haul. Clear, stackable containers are an absolute game-changer because they let you see what's inside without having to open a dozen different boxes.
A well-organized space isn’t just about being tidy; it’s about reducing the friction between having an idea and bringing it to life. When your tools and materials are easily accessible, you’re more likely to start—and finish—your projects.
For those opaque containers or drawers you can't part with, grab some custom labels. Labeling turns your storage from a guessing game into an intuitive system where putting things away is just as easy as taking them out. Trust me, this small step is crucial for making it all stick.
Finally, while you're getting your major supplies organized, don't forget about your foundational tools. If you're building out your core sewing kit, check out our guide on the top sewing tools for beginners to make sure you have the essentials covered and ready for their new, organized home. When you pair smart storage with the right equipment, you create a workflow that feels seamless.
Designing a Creative Workspace with Zones
A truly organized craft room is more than just a collection of tidy bins. It’s a space that’s built around you and how you create. Once you’ve got a handle on sorting and storing your supplies, the next big win is structuring your physical space to match your workflow. This is where "zoning" comes in. It’s all about creating dedicated areas for specific tasks, which keeps you in the creative flow and cuts way down on the constant setup and cleanup dance.
Think of it like setting up stations in a professional kitchen or workshop. When you group everything you need for a specific activity, you completely eliminate that friction of having to hunt down a tool or clear off a surface every time you switch gears. When you're trying to figure out the best layout, it can be really helpful to borrow ideas from architects who specialize in maximizing space within a narrow footprint, since their whole world revolves around efficiency and smart design.
Establish Your Primary Creation Station
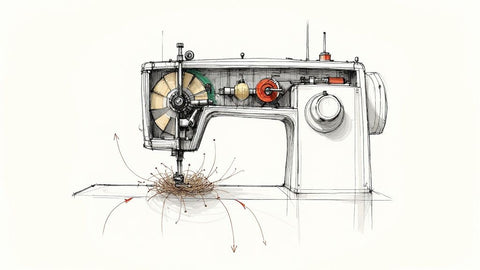
Your main creation station is the heart of your craft room, the command center. For most of us, that’s our sewing area. Your custom bsewinn.com machine should be the star of the show here, with every essential tool and notion within arm's reach. No getting up, no digging through drawers.
Here’s how I like to set up an efficient sewing zone:
- Threads and Bobbins: A wall-mounted thread rack is my favorite because you can see every color at a glance. If not, a shallow drawer organizer right next to the machine works wonders.
- Essential Notions: I keep my pins, a trusty seam ripper, marking tools, and small snips in a little caddy or even a pretty ceramic dish right beside my machine.
- Machine Accessories: All those presser feet, extra needles, and cleaning brushes get their own dedicated small container or drawer insert.
This is the exact same philosophy we bring to our bsewinn.com online classes—a structured environment where everything is ready for you. When your space is set up this way, you can slide into your chair and get right to the fun part without losing a single moment of precious creative time.
Build Out Your Supporting Zones
Beyond your main sewing hub, setting up a few other key zones will completely transform how your space feels and functions. And you don't need a massive room to pull this off! Even dedicating different corners of the same desk can make a huge difference.
The whole point of zoning is simple: spend less time prepping and cleaning up, and more time actually making things. A thoughtfully designed space anticipates what you’ll need before you even have to think about it.
Consider carving out a few of these functional areas to support your primary craft:
- A Dedicated Cutting Station: This is a non-negotiable for me. It could be a large self-healing mat on a permanent table or even a fold-out surface. The key is that your rotary cutters, rulers, and fabric weights live here—and only here. This single habit keeps your main sewing area from getting buried under fabric scraps and clutter.
- An Assembly or Gluing Area: If you ever work with adhesives, this one's a lifesaver. Protect a small surface with a silicone mat or some craft paper. Keep your glue guns, various glues, and clamps in this zone. It contains the inevitable mess and protects your other surfaces.
- A "Project-in-Progress" Spot: This is the zone most people forget, but it's critically important! Designate a specific tray, a cute bin, or a small shelf where you can park all the pieces of your current project. This prevents it from getting lost, wrinkled, or mixed in with other supplies and means you can pick up exactly where you left off, even if it's days later.
Creative Solutions for Small and Awkward Items
Once you've mapped out your broad categories and zones, it's time to dive into the real culprits of craft room chaos—the small, awkward, and downright fiddly supplies. Let’s be honest, it’s not the big bolts of fabric that vanish; it’s the tiny buttons, runaway beads, and loose bobbins. Don't even get me started on glitter.
Taming these tricky supplies is what elevates a good organization system into a great one. With a few clever hacks I've picked up over the years, you can give every tiny treasure a proper home so nothing gets lost in the shuffle again.
Taming the Tiny Tidbits
The smallest items demand the smartest solutions. The goal is to contain and categorize them in a way that keeps everything visible but totally secure. No more digging through a junk drawer!
- Beads, Buttons, and Embellishments: I swear by clear tackle boxes or even pill organizers. Their little individual compartments are perfect for sorting by color, size, or type, and the transparent lids mean you can spot what you need in an instant.
- Pins and Needles: A magnetic strip mounted on the wall near your sewing machine is an absolute game-changer. It keeps pins, needles, and even bobbins neatly lined up and right where you need them. A magnetic pin bowl on your work surface works just as well.
- Embroidery Floss: To dodge that tangled nightmare, wind your floss onto small plastic or cardboard bobbins. You can then file them neatly in a clear photo storage case or a purpose-built floss organizer.
The secret is to make these small items so easy to put away that you'll actually do it. When a system feels natural, tidiness becomes part of your creative process instead of a chore.
Handling Awkwardly Shaped Supplies
Not everything fits neatly into a square box, does it? Long, rolled, or oddly shaped items need their own special solutions to keep them from becoming a tangled, damaged mess. This is where you can get really creative.
For instance, managing long rulers and cutting mats can be a pain. When you know the benefits of rotary cutting, you definitely want to protect those tools. I've found that using wall-mounted clips or even a tall, narrow basket keeps them upright and safely out of the way.
Here are a few more tried-and-true ideas for those cumbersome items:
- Vinyl and Paper Rolls: A wall-mounted wine rack or a simple plastic bag holder are fantastic for storing rolls vertically. This keeps them visible and completely wrinkle-free.
- Knitting Needles and Paintbrushes: Always store them upright to protect their tips. A pretty vase, a few decorated mason jars, or a desktop pencil organizer works beautifully.
- Ribbon Spools: A simple paper towel holder can dispense ribbon like a dream. For a bigger collection, I've mounted a wooden dowel between two brackets on a shelf to keep all my spools organized and easy to grab.
These are the kinds of strategies that take your space from simply stored to truly organized. It’s this attention to detail that we're all about at bsewinn.com, where our custom sewing machine designs and online training are built to support a seamless creative workflow.
Keeping Your Creative Space Organized for Good
You’ve sorted, decluttered, and put everything in its new home. Getting your craft supplies organized is a huge win, but let's be honest—the real challenge is keeping it that way.
The good news? It’s not about another massive overhaul. The magic lies in building a few simple, sustainable habits that stop the clutter from creeping back in. Think of it as a collection of small routines that keep your creative oasis a source of inspiration, not stress.
If you adopt only one new habit, make it the 'end-of-session tidy.' It sounds almost too simple, but it's a game-changer. Just take five minutes after each creative burst to reset your space. Put your tools away, return fabric to its bin, and clear off your main work surface. This tiny commitment prevents a small mess from snowballing into total chaos.
Adopt Proactive Organizational Habits
To truly stay on top of things, your system has to handle both incoming and outgoing supplies. This is where a few key rules can make all the difference, helping you manage your collection thoughtfully over time.
A great place to start is with the 'one-in, one-out' rule. It’s a classic for a reason. Whenever you bring a new skein of yarn or piece of fabric into your collection, you have to let go of an old one. This forces you to be more mindful of your purchases and stops that carefully curated stash from overflowing its designated space. For more ideas like this, check out these broader home organization tips that apply well beyond the craft room.
I also recommend scheduling quick seasonal check-ins. Your hobbies and interests evolve, and your supplies should, too. A brief review every few months helps you clear out materials for projects you’re no longer excited about, making room for whatever is sparking your creativity now.
An intuitive labeling system is the backbone of long-term organization. The easier it is to put something away, the more likely you are to do it.
Make Your System Effortless
At the end of the day, the best organization system is the one you’ll actually stick with. So, make it as easy as possible to put things back where they belong.
- Use clear containers so you can see what’s inside at a glance.
- Stick to visible, easy-to-read labels.
- Create designated zones for different types of supplies.
These proactive habits are the secret to a permanently tidy creative space. By folding these small routines into your creative process, you can spend less time searching and more time bringing your amazing ideas to life. If you need more in-depth strategies, our guide on sewing room organization ideas is packed with them.
A Few Lingering Questions on Craft Supply Organization
Even after you've got a great system going, some tricky little problems always seem to pop up. Let's tackle a few of the most common questions I hear from fellow crafters. A few quick answers here can help you put the finishing touches on your newly organized space.
Getting your supplies in order means you can spend more time on the fun part: actually creating. Here at bsewinn.com, we know that an efficient workspace is just as important as the right tools. We are committed to empowering crafters through our custom sewing machine designs, and the support offered via extensive resources like our online classes and training is key to that mission.
What Is the Best Way to Store Fabric to Prevent Wrinkles?
Nothing stops a project in its tracks faster than discovering your perfect fabric is full of deep-set creases. The best way to store it really comes down to the size of your cuts.
For your smaller pieces—think fat quarters or anything under a yard—my favorite trick is wrapping them around acid-free comic book boards. You can then stand them up in a bin or drawer and "file" them like books on a shelf. This keeps them flat, protected, and super easy to see at a glance.
When you're dealing with larger yardage, your best bet is to roll the fabric onto sturdy cardboard tubes (those leftover wrapping paper tubes are perfect for this). You can store these rolls standing up in a tall basket or lay them down on a shelf. Either way, you'll avoid those pesky wrinkles that form from folding.
How Can I Organize Supplies in a Very Small Space?
When you’re short on floor space, you’ve got to think vertically. Your walls and doors are your new best friends.
- Go Over the Door: Those shoe organizers with clear pockets are amazing for holding yarn, small paint bottles, or even rolled-up vinyl.
- Get a Rolling Cart: A multi-tiered utility cart is like a mobile craft station. You can load it up with everything you need for your current project and then just tuck it away in a closet when you're done.
- Use Wall Grids & Pegboards: These are lifesavers for getting scissors, rotary cutters, and other frequently used tools off your desk but still right where you can grab them.
Making a small area work is all about maximizing every available surface. By going vertical, you can store a surprising amount of stuff without feeling like the walls are closing in, creating an inspiring little corner for your creativity.
How Do I Keep Track of My Inventory to Avoid Buying Duplicates?
We’ve all been there—coming home from the craft store only to realize we already have four of that exact same thing. It’s frustrating, and it wastes money and space. The fix is a simple inventory system you can check before you shop.
This doesn't have to be anything fancy. An app on your phone or even a basic spreadsheet can do the trick. Just create categories (like "Acrylic Paints" or "Cotton Fabric") and make a quick note of what you have. If you prefer a low-tech option, a binder with inventory sheets works just as well. A quick look at your list before you leave the house will save you from buying that fifth bottle of navy-blue paint.
A well-organized craft room truly unlocks your creative potential. At B-Sew Inn, we’re committed to giving you the tools, training, and support to elevate every part of your sewing journey. Take a look at our custom sewing machine designs and other resources to bring your vision to life at https://www.bsewinn.com.