Diving into a new hobby can feel like a huge leap, but I promise you, learning to sew is one of the most rewarding skills you can pick up. It's way more accessible than you might think. This guide is your very first free sewing lesson, and it's designed to take you from just curious to actually creating with confidence. We’re going to skip the jargon and get right to the good stuff, showcasing tangible projects you can replicate.
Your Sewing Journey Starts Here
Here at bsewinn.com, we don't just sell custom-designed machines; we're genuinely passionate about empowering crafters with the knowledge to actually use them. Our commitment is to support you with comprehensive online classes, hands-on training, and extensive resources. Think of this as a friendly chat where I'll walk you through the essential tools, explain what they do, and help you put together a starter kit that makes sense for you—no fluff, no overwhelm.
Getting started isn't about owning every gadget under the sun. It's about nailing the fundamentals. A solid foundation is what turns potential frustration into a joyful, creative process. This first lesson is all about demystifying those first steps so you feel ready and excited to get going.
Why Learning to Sew is a Game-Changer
Sewing is so much more than just a practical skill; it's a creative outlet that’s all your own. You can go from mending a favorite shirt one day to crafting a completely unique dress from scratch the next. The possibilities are truly endless. When you learn to sew, you gain a level of control over your wardrobe and home decor that you just can't get from buying off the rack.
Plus, the sewing community is incredible. While paid courses are great, free sewing lessons have always been the backbone of making this craft accessible to everyone. Since the early 2000s, community centers and non-profits across the US, UK, and Australia have offered free workshops, helping people save money by making or repairing their own clothes. In fact, reports from the early 2010s showed these free classes in the US alone reached about 150,000 people every year. That tells you just how many people are eager to learn. If you're curious, you can find more insights on the impact of online sewing education on prosperityforamerica.org.
At its heart, sewing is about empowerment. It’s the ability to look at a piece of fabric and see not just what it is, but everything it could become. That's the magic we want to help you find.
Building Your Essential Starter Kit
One of the first questions I always hear from beginners is, "What do I really need to start?" It's so easy to walk into a craft store and feel completely overwhelmed. But honestly, you only need a handful of key items to get started. A simple, solid toolkit keeps you focused on learning the craft, not collecting gear.
Here’s a no-fuss breakdown of what you'll want to have on hand:
-
A Reliable Sewing Machine: This will be your biggest investment, but it doesn't need to be fancy. A machine with basic stitches, like a straight stitch and a zigzag, is all you need to begin. At bsewinn.com, we specialize in machines that are designed to be user-friendly, and we empower crafters by backing them up with tons of training resources.
-
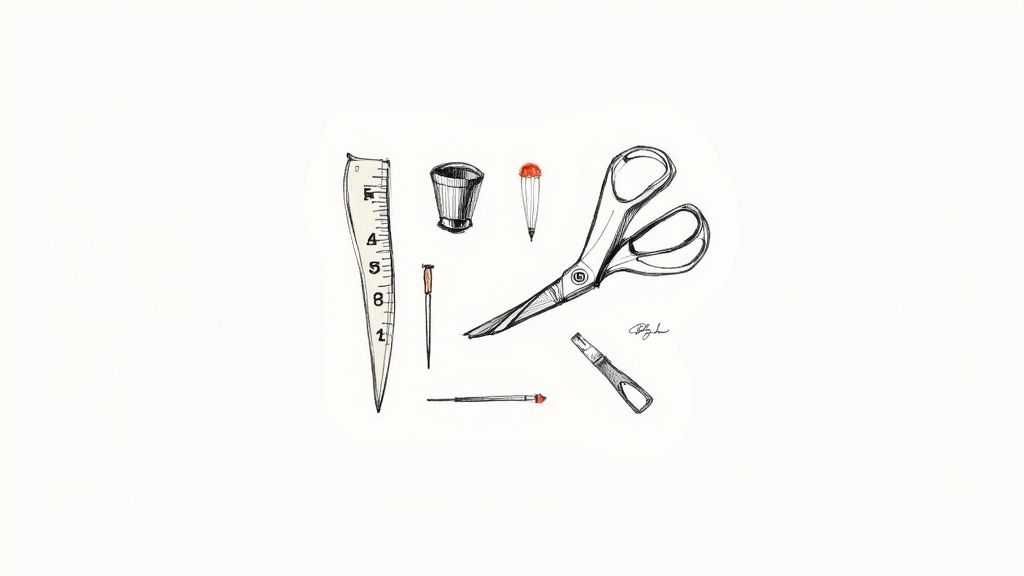
Fabric Shears: A good pair of scissors that you use only for fabric is an absolute must. Seriously, don't even think about cutting paper with them—it will dull the blades in a heartbeat.
-
Measuring Tools: You'll need a flexible measuring tape for taking body measurements and a clear ruler or a small seam gauge for getting those seams perfectly precise.
-
Pins and a Pincushion: Straight pins are your best friend for holding fabric pieces together before and while you sew. A pincushion (magnetic ones are great!) keeps them from ending up all over your floor.
-
Thread: To start, just grab a few spools of all-purpose polyester thread. Basic colors like black, white, and a neutral gray will get you through most of your first projects.
Get Comfortable With Your Sewing Machine
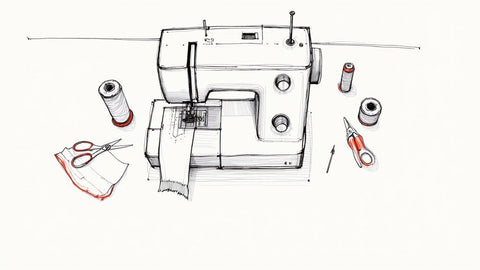
Your sewing machine is going to be your creative partner, so let's get you two properly acquainted. Forget that dense instruction manual for a minute. The best way to learn is by doing, and this part of our free sewing lesson is all about a hands-on introduction to your machine. We're going to build the kind of confidence that will carry you through every single project you dream up.
We’ll focus on the big three that often trip up new sewers: threading the machine, winding the bobbin, and getting that bobbin inserted correctly. Once you master these, you'll feel like you and your machine are speaking the same language. You'll be in control.
Here at Bsewinn.com, we design our custom machines with exactly this in mind. We believe that really understanding your tools is the key, which is why our online classes always start here. Before you even touch a piece of fabric, it's also a good idea to make sure your toolkit is ready to go. Take a peek at our guide on the top sewing tools for beginners to make sure you've got all the essentials.
Understanding the Key Machine Parts
Getting to know the main components of your machine makes the whole process feel way less mysterious. It’s like learning the names of your go-to kitchen utensils. You don’t need to memorize every screw, just the parts you'll be using all the time.
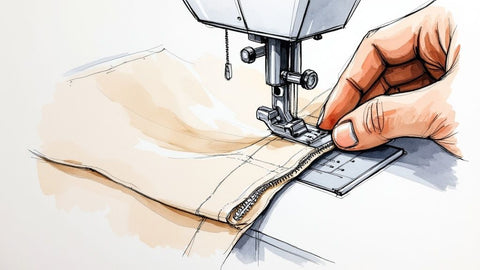
- Presser Foot: This little foot—it can be metal or plastic—is what holds your fabric down flat while you sew, which is crucial for getting nice, even stitches. You’ll eventually collect different feet for specific jobs like zippers or buttonholes, but for now, the standard all-purpose foot is your best friend.
- Tension Dial: See that numbered dial? It controls how tight the upper thread is. I'd say 90% of stitch problems, like those frustrating loops and tangles, come from the tension being set wrong.
- Stitch Selector: This is the fun part! This dial or screen lets you pick your stitch, whether it’s a simple straight stitch or a decorative zigzag.
- Handwheel: Found on the right side of the machine, the handwheel lets you move the needle up and down manually. Here's a pro-tip: Always turn it toward you, never away. Turning it backward is a surefire way to create a tangled mess of thread.
The Art of Threading and Bobbin Winding
Okay, deep breath. Threading the machine and winding the bobbin are the two tasks that feel like a puzzle at first, but I promise they become muscle memory surprisingly fast. Most modern machines even have little numbers and arrows printed right on them to show you the way.
I’ve learned this the hard way: the secret to successful sewing is all in the prep work. A perfectly wound bobbin and a correctly threaded machine are the foundation of every beautiful stitch. Rushing these steps will almost always lead to frustration down the road.
Winding the bobbin is your first job. You’ll pop your spool of thread onto the spool pin, guide the thread through a little tension disc, and wrap the end around an empty bobbin a few times. Once you click the bobbin winder into place, the machine does the rest, creating a neat, tightly wound bobbin for you.
Next up is threading the machine itself. Just follow the numbered path, guiding the thread through various hooks and levers, up through the take-up lever, and finally down to the needle. The last piece of the puzzle is popping that full bobbin into its case below the needle plate. Once you have both the top thread and the bobbin thread in place, you are officially ready to sew. You did it
Mastering Your First Essential Stitches
Alright, this is where the real fun starts—making your first stitches! It’s the moment the magic happens, when you start turning simple pieces of fabric into something real and beautiful. In this part of our sewing lesson, we’re going to get familiar with the fundamental stitches you'll use over and over again.
Think of each stitch as having its own specific job. Learning what they do is like learning the basic vocabulary of sewing. We'll connect each one to a practical use, so you aren't just sewing random lines on scrap fabric. You're building skills you can actually use on your first project. Here at Bsewinn.com, we know that this foundational knowledge is what builds confidence, which is why our online classes always kick off with these core skills.
The All-Important Straight Stitch
First up is the straight stitch. It’s the bedrock of almost every seam you will ever sew. Its purpose is simple but powerful: joining two pieces of fabric together.
When you're practicing, your main goal is to learn how to guide the fabric smoothly. Let the machine's feed dogs do the heavy lifting of pulling it through. A common rookie mistake is to push or pull the fabric, but all you need to do is gently steer it with your fingertips.
Sewing a perfectly straight line is a skill that only comes with practice. Here’s a great tip: start by sewing on a piece of lined paper (with no thread in your machine!) to get a feel for controlling the speed and direction without wasting fabric.
The Versatile Zigzag Stitch
Next is the wonderfully useful zigzag stitch. While a straight stitch is your workhorse for construction, the zigzag is your go-to for finishing touches. Raw fabric edges have a tendency to fray and unravel over time, but a quick zigzag along the edge neatly encases those threads, giving you a clean and durable seam.
This stitch is also a lifesaver when you dip your toes into sewing with knit or stretchy fabrics. A straight stitch has zero give and will pop the second the fabric stretches. The zigzag, however, is designed to stretch right along with the material, which means no more broken seams on your comfy clothes.
One of the biggest “aha!” moments for a new sewer is realizing that the right stitch in the right place makes all the difference. A simple zigzag stitch can take a homemade garment from looking "crafty" to looking professionally finished and ready to survive wash day.
Locking It Down with the Backstitch
Finally, let’s talk about the backstitch. This isn't really a different stitch, but a crucial technique. It’s a few simple stitches in reverse at the beginning and end of every seam that lock your work in place. Without it, your threads can easily pull loose, and that beautiful seam you just sewed will start to come undone.
Think of it like tying a knot when you hand sew. Most machines have a dedicated lever or button for this. Just sew a few stitches forward, press the backstitch button to go a few stitches in reverse right over them, and then continue on. It’s a tiny step that makes a massive difference in how long your projects last.
To help you keep these straight, here's a quick-reference table for your sewing space.
Beginner's Essential Stitch Guide
This handy chart breaks down the most important stitches you'll need as a beginner, what they're for, and some typical settings to get you started.
| Stitch Name | Primary Use Case | Common Machine Setting | Pro Tip |
|---|---|---|---|
| Straight Stitch | Joining seams, topstitching, and general construction. | Stitch Length 2.5-3.0 | Lengthen to 4.0 for temporary basting stitches that are easy to remove. |
| Zigzag Stitch | Finishing raw edges to prevent fraying, sewing knits. | Width 3.0, Length 1.5 | A wider, shorter stitch (a "satin stitch") can be used for decorative appliqué. |
| Backstitch | Securing the beginning and end of a seam. | Use the reverse lever/button. | Just 2-3 stitches are enough. Overdoing it can create a bulky, messy start. |
Getting comfortable with these three basics is your ticket to becoming a more confident and capable sewer. They are the foundation upon which all your future projects will be built.
Once you feel good about these foundational stitches, you might get curious about more decorative work. You can explore different embroidery stitches to add some flair to your projects. Also, don't forget that your needle choice is just as critical as your stitch choice. Our guide on choosing the right needle for your project can save you a lot of headaches down the road.
Create Your First Project: A Reversible Tote Bag
Okay, this is the part I love best. There's really no feeling quite like making something you can actually use, and this reversible tote bag is the perfect tangible example to give you that amazing "I made this!" moment.
We're going to put those new skills of yours—straight seams, solid backstitching, and tidy finishing—to work on something fun and satisfying. I've broken down every single step, from cutting the fabric to the final stitch. Trust me, it’s easier than it looks, especially when you have a good machine that lets you focus on creating instead of fighting with the hardware.
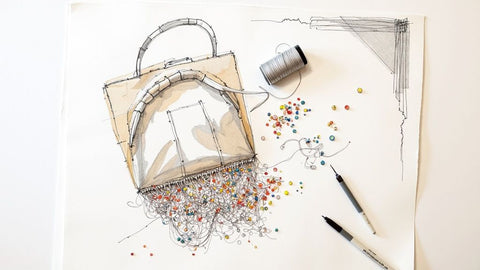
This little sketch gives you the basic idea of how the pieces come together. It’s a great reminder that even a finished project like a bag is just a few simple, manageable steps.
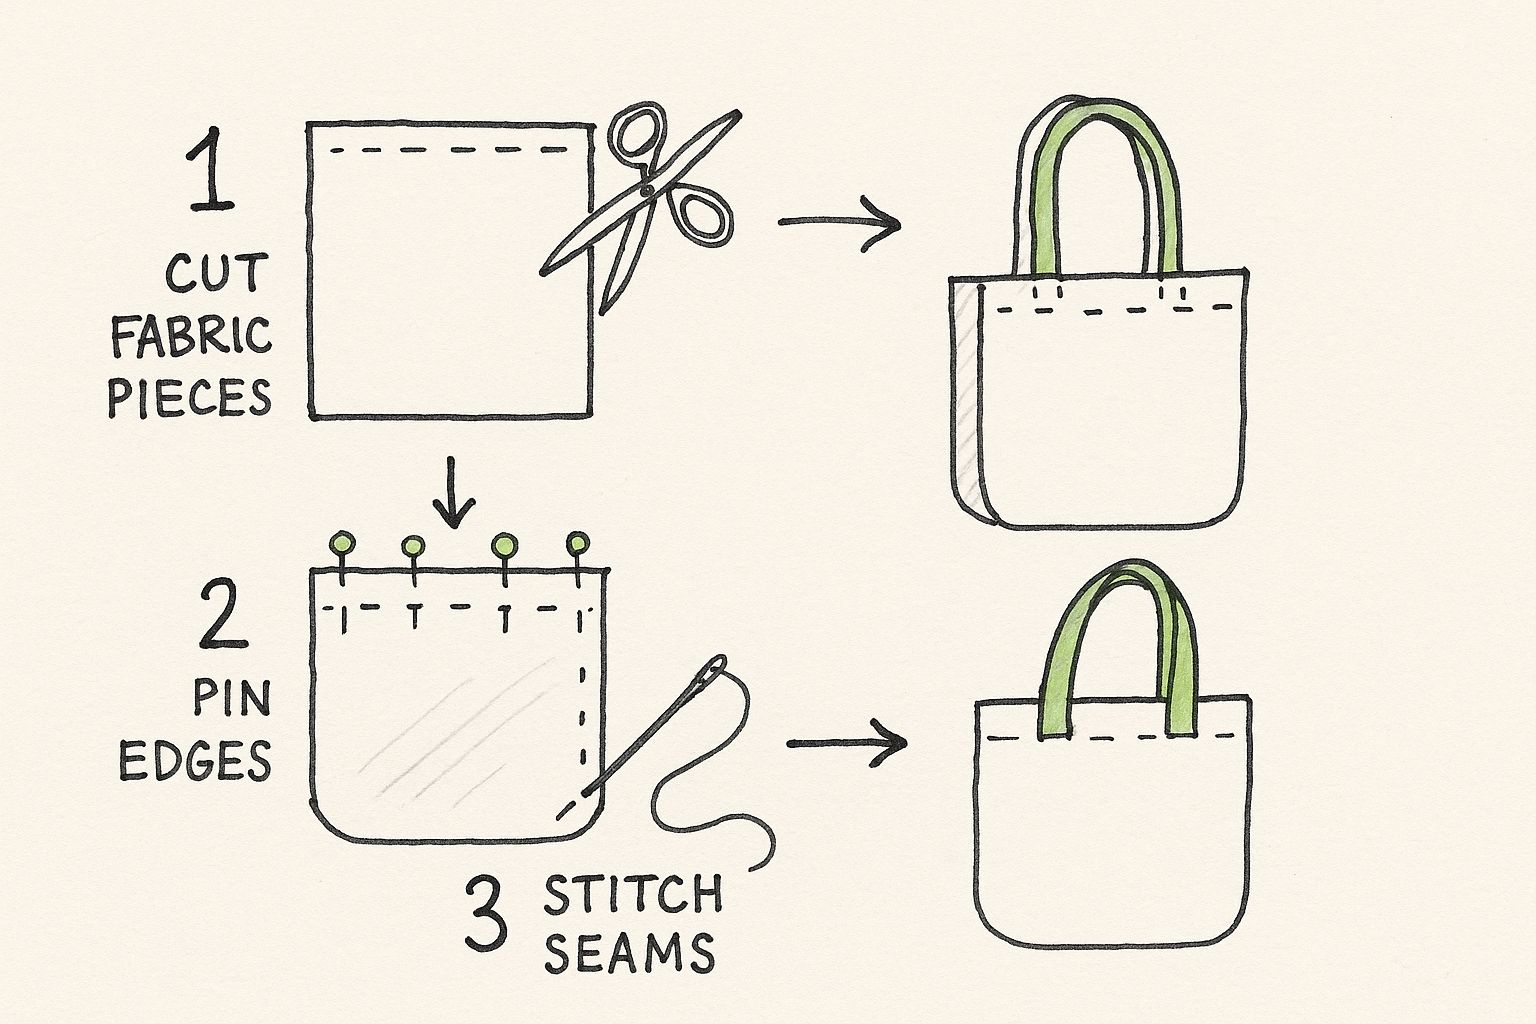
See? Totally doable. Let's get to it.
Gathering and Preparing Your Materials
First things first, let's pull our supplies together. For this reversible tote, you'll need two different fabrics. Think of one as the "outside" and the other as the "lining"—but since it’s reversible, they both get to be the star of the show!
For beginners, I always recommend sticking with stable fabrics like cotton, canvas, or even a lightweight denim. They don't stretch or slip around, which makes them much easier to handle.
Here’s your cutting list:
- Outer Fabric: Cut two (2) rectangles, each measuring 18 inches by 14 inches.
- Lining Fabric: Cut two (2) rectangles, also 18 inches by 14 inches.
- Strap Fabric: Cut two (2) long strips, each 4 inches wide by 22 inches long. You can use either your outer or lining fabric for this—your choice!
Getting your cuts straight and accurate is the secret to a professional-looking bag. If you have a rotary cutter and mat, now's the time to use them! If not, no worries. A good sharp pair of fabric shears and a clear ruler will get the job done just fine.
Assembling the Bag Body
With all your pieces cut, it's time to head to the machine. Let's start with the outer bag. Take your two outer fabric rectangles and place them with the "right sides" of the fabric facing each other. Line up all the edges as perfectly as you can.
Pin along the two long sides and one of the short sides. You're leaving one short side open—that's the top of your bag!
Now, using a straight stitch (a stitch length of 2.5 is a great all-purpose setting), sew along the three sides you pinned. Try to keep a consistent 1/2-inch seam allowance. And don't forget to backstitch at the very beginning and very end of your seam to lock everything in.
Once that's done, repeat this exact same process with your two lining fabric pieces.
Here's a pro tip that makes a huge difference: press your seams open with an iron after you sew them. It takes just a few seconds, but it reduces bulk and helps create crisp, sharp corners. Your finished tote will look so much more polished!
You should now have two separate bag shapes. Before you turn them, carefully clip the two bottom corners of each bag. Just a little snip, making sure not to cut through your stitching. This one small step is the key to getting nice, sharp corners instead of bulky, rounded ones.
Crafting and Attaching the Straps
Let's make some handles. Grab one of your long fabric strips and fold it in half lengthwise, with the wrong sides of the fabric together. Give it a good press with your iron.
Now, open that strip back up. You'll see a crease down the middle. Fold each of the long raw edges in to meet at that center crease, and press it all down again. Finally, fold the whole thing in half along that original center crease. All your raw edges should now be tucked away neatly inside.
To finish the strap, topstitch close to the edge along both long sides. This not only closes the strap but also makes it strong and gives it a clean, finished look. Repeat all these steps for your second strap, and you're done!
Making a simple bag like this is such a fantastic way to build your confidence. Once you get the hang of it, you might be surprised how quickly you're ready for the next challenge. When that time comes, our guide on the 4 easy steps to start quilting is a perfect next step.
It's amazing to think how many people have picked up this craft, thanks in large part to free sewing lessons just like this one. The home sewing machine market was valued at over USD 1.5 billion in 2020 and is expected to fly past USD 2.5 billion by 2025. A lot of that growth is because accessible online tutorials have made it so easy for beginners to jump in and start creating.
Tackling Those Common Beginner Sewing Frustrations
Every single person who learns to sew hits a few snags. It's just part of the process! Think of this section as your personal troubleshooting guide for those moments that make you want to scratch your head. Instead of getting discouraged, you’ll learn how to play detective, figure out what's wrong, and fix the most common issues. Trust me, this builds a much deeper understanding of how your machine actually works.
These little hiccups aren't failures; they're just your machine's way of trying to tell you something. Learning to speak its language is a skill that will serve you well on every single project you ever make. Here at bsewinn.com, our online training is all about empowering you with that exact knowledge, turning what could be a frustrating moment into a genuine learning experience.
Oh No, the Dreaded 'Bird's Nest' of Thread!
You’re sewing along, everything seems fine, and then... crunch. The machine jams. You lift up your fabric to find a giant, tangled mess of thread on the bottom. We’ve all been there! This frustrating "bird's nest" is probably the most common headache for new sewers, but 9 times out of 10, it's a super simple fix.
The number one culprit? You threaded the machine with the presser foot down. It's an easy mistake to make! When the presser foot is down, the tension discs are clamped shut, so the thread can't settle in between them properly.
The golden rule is to always make sure your presser foot is up when you're threading the top part of your machine. This opens up those little tension discs and lets the thread slide right in where it belongs, giving you a perfectly balanced stitch.
Why Are My Stitches Skipping?
Another classic beginner problem is skipped stitches—those annoying little gaps in your seam where the needle just didn't quite form a stitch. This one almost always comes down to your needle. It's the workhorse of your machine, but it doesn't last forever!
A needle that's dull, slightly bent, or just the wrong type for your fabric is usually the reason your stitches are skipping. As a general rule of thumb, you should pop in a fresh needle after every 8-10 hours of sewing time.
Here are a couple of other things to check if you're getting skipped stitches:
- Wrong Needle for the Job: Are you trying to sew stretchy knit fabric with a universal needle? That’s a common cause of skipped stitches. Knits need a special ballpoint or stretch needle that is designed to slide between the fabric fibers instead of piercing through them.
- Is it Inserted Correctly? Double-check that your needle is pushed all the way up into the clamp. Also, make sure the flat side of the needle is facing the right way (on most machines, it faces the back).
Sewing is a skill you build, one stitch at a time. By learning to solve these little problems, you're not just fixing a wonky seam; you're building the confidence to dive into bigger, more exciting, and more creative projects.
This idea of supportive learning is so powerful. It's amazing to look back at community programs where kids were offered free sewing lessons. Reports often showed that the kids were so engaged they wanted to keep sewing even after class was over! It just goes to show how motivating a little free and encouraging guidance can be. To see how this spirit lives on, you can explore some wonderful free resources for teaching kids to sew on sewasoftie.com.
Your Top Sewing Questions, Answered
Every new sewer has questions—I know I certainly did! It's completely normal to wonder about a few things as you get started. Let's tackle some of the most common questions I hear from beginners, so you can feel totally confident as you continue your sewing journey.
First up, supplies. It's so easy to get overwhelmed by all the shiny gadgets in the craft store, but you really don't need them all right away. Stick to the essentials we covered in the first section: a machine you can count on, a sharp pair of fabric shears, quality thread, pins, and something to measure with. That’s it. You can always pick up specialty feet and other tools as you discover what you love to make.
How Much Do I Really Need to Practice?
This is a big one. While there isn't a single magic number, the real secret is consistency. I've found that aiming for two to three short sessions a week is far more effective than one marathon sewing day.
Even just 30 minutes at a time helps build that crucial muscle memory for guiding fabric and controlling your speed. Short, focused practice keeps you from getting frustrated or burned out, which is key to sticking with it.
So, you've made the tote bag from this guide (way to go!). What's next? Don't be afraid to jump into another simple project. Think pajama pants or a simple elastic-waist skirt. Each new project will cement the skills you already have while gently introducing a new one. The goal is steady progress, not perfection.
Every single expert was a beginner once. Be kind to yourself, celebrate your finished projects (no matter how imperfect!), and most importantly, have fun bringing your ideas to life.
Here at B-Sew Inn, we're passionate about supporting you through your entire creative journey, from that very first stitch to your most ambitious project yet. We don't just sell machines; we provide the classes, training, and resources you need to truly succeed.
See everything we have to offer, from machines to online education, over at B-Sew Inn.