Sewing an invisible zipper is a professional technique that truly elevates handmade garments, creating a clean, hidden closure perfect for projects like custom dresses, skirts, and tailored trousers. At bsewinn.com, we believe that empowering crafters starts with mastering foundational skills like this. Our custom sewing machine designs, extensive online classes, and supportive resources are all created to help you bring your creative visions to life. The trick to a perfect invisible zipper is stitching as close to the zipper coils as possible, which is easily achievable with a specialized foot. When you get it right, the fabric meets so seamlessly that the zipper just disappears.
Your Foundation for a Flawless Finish
Before you sit down at your sewing machine, let’s talk prep. The secret to sewing an invisible zipper isn't just the stitching—it's the thoughtful preparation beforehand. This stage sets the foundation for a smooth process and helps you avoid common frustrations like puckered fabric or misaligned seams. It's a core principle we emphasize in our online classes at bsewinn.com, because mastering these fundamentals is what truly empowers you as a crafter to replicate any design you can imagine.
First, match your zipper to your fabric. A heavy-duty zipper on a lightweight silk is a recipe for disaster; it’ll create bulk and tension. On the flip side, a delicate zipper on thick wool might not withstand the stress. Always pick a zipper that complements your fabric's weight and drape for that truly invisible look. For example, a delicate silk dress design would call for a lightweight, flexible invisible zipper.
Pre-Wash and Press Everything
Here's a pro tip that has saved countless projects: pre-wash and press both your fabric and the zipper tape. It’s easy to forget, but just like fabric, zipper tapes can shrink slightly. By pre-shrinking everything together, you guarantee your beautifully installed zipper won’t get wavy and distorted after the first wash, preserving the integrity of your custom garment.
Once dry, give your fabric a good press. Then, turn your iron to a low heat setting and gently unroll the zipper coils, pressing them flat. This simple step makes a world of difference because it allows your needle to get much closer to the teeth—the absolute key to making the zipper vanish.
A well-prepared project is halfway to success. Taking the time to pre-wash, press, and gather the right tools eliminates guesswork and paves the way for a satisfying, professional-quality finish on any garment design.
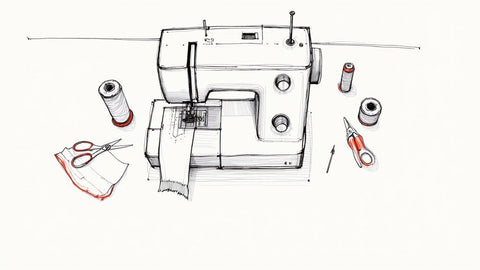
Gather Your Essential Tools
Having the right equipment ready makes the entire process easier and more enjoyable. While you can get by with the basics, a few tools are non-negotiable for achieving that coveted invisible finish. The demand for these sleek closures has skyrocketed, making them a staple in the modern apparel industry. To give you some perspective, the global zipper market was valued at USD 13.3 billion back in 2020, and specialized invisible zippers are playing an increasingly significant role in that figure.
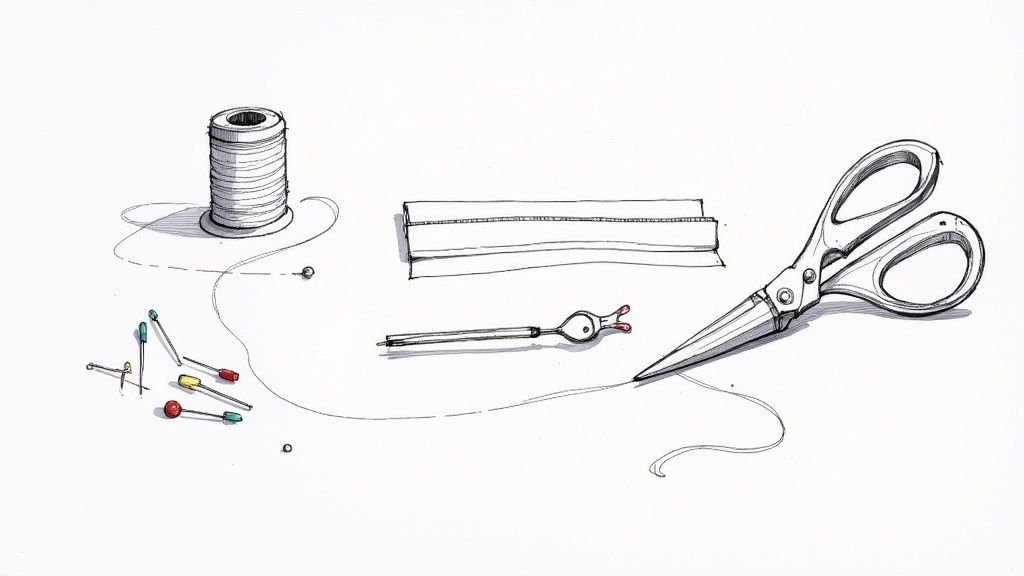
Before you start, gather everything you’ll need. I've put together a quick checklist to make it simple.
Essential Tools and Materials Checklist
| Tool/Material | Purpose and Importance |
|---|---|
| Invisible Zipper Foot | This is the star of the show. The grooves on the bottom guide the zipper coils perfectly under the needle, ensuring a consistent, close stitch line. It's nearly impossible to get a truly invisible finish without one. |
| Fine Pins or Clips | You’ll need these to secure the zipper tape to the fabric without causing any distortion or puckering. I prefer fine, sharp pins for delicate fabrics and clips for heavier materials. |
| Marking Pen or Chalk | A water-soluble pen or tailor's chalk is essential for accurately marking your zipper placement on the seam allowance. This ensures everything lines up perfectly from top to bottom. |
| Iron and Pressing Cloth | Crucial for pressing the zipper coils flat before you sew. A pressing cloth helps protect both your zipper and your iron from the heat. |
| Matching Thread | Choose a high-quality, all-purpose thread that matches your fabric color as closely as possible for a truly professional result. |
Having these items within arm's reach means you can focus on the sewing, not on hunting for tools.
The single most important item on that list is the Invisible Zipper Foot. Its unique design with dedicated grooves guides the zipper coils so your stitch line ends up perfectly and consistently close. At bsewinn.com, we offer a high-quality invisible zipper foot compatible with a wide range of machines. It’s a small investment that pays off big time in the quality of your finished garments. Our commitment at bsewinn.com is to empower crafters like you by providing not just the tools, but also the training to use them effectively.
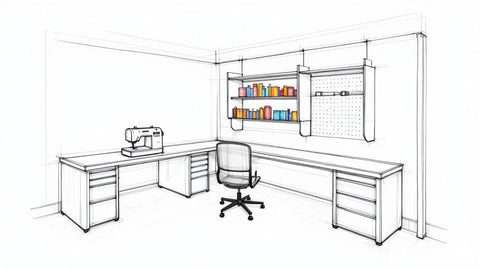
Getting Your Fabric Ready with Precision

With all your tools laid out, it's time to prep your fabric. This is the stage where precision really pays off, separating a decent finish from a truly professional one. It's all about laying the groundwork now to ensure everything lines up perfectly later. At bsewinn.com, we're big believers that mastering these foundational steps is key to successfully creating custom designs, which is why our online classes and resources always circle back to the importance of good prep work.
One of the most common mistakes is waiting to finish seam allowances until after the zipper is in. For a cleaner, more durable result, always finish the raw edges of the fabric first. This professional touch encases the raw edges neatly, making the inside of your garment look just as polished as the outside. A quick pass with a serger gives a sturdy finish, but a simple zigzag stitch on your regular sewing machine also works great.
Stabilizing for a Flawless Seam
Some fabrics, like lightweight silks or stretchy jersey knits, can be tricky. They tend to stretch and warp as you sew, leaving you with a wavy, homemade-looking seam. The fix? Stabilize the area before stitching.
For a tangible example, imagine you are making a chiffon blouse. Simply cut a thin strip of lightweight fusible interfacing, about an inch wide and the length of your zipper. Iron this strip onto the wrong side of your fabric, right along the seam allowance where the zipper will go. This adds just enough structure to keep the fabric from misbehaving, ensuring your zipper lies perfectly flat without pulling or puckering.
My Pro Tip: Always finish your seam allowances and press on your interfacing before you mark your zipper placement. This gives you a stable, accurate canvas to work on, so your marks won’t shift or distort as you handle the fabric.
Marking Your Placement Accurately
Okay, your fabric is finished and stabilized—now it's time to mark exactly where the zipper will live. This is another moment where accuracy is everything. Go ahead and open your zipper, then lay it face down on the right side of one of your fabric panels. You want the zipper coils sitting directly on your seam line.
- Pick the Right Marking Tool: I always reach for a water-soluble marking pen or some tailor's chalk. You need something that shows up clearly but will disappear without a trace later.
- Pin It Down: Carefully pin the zipper tape in place along the seam allowance. The trick here is to avoid stretching either the fabric or the zipper tape as you go.
- Mark Your Key Points: Make small, clear marks at the very top and bottom of the zipper stops. If your garment has any seams that cross the zipper, like a waistline seam, make sure to mark where they hit on the zipper tape. This is crucial for getting those lines to match up flawlessly.
Now, repeat the process for the other side of the zipper on the matching fabric panel. Don't rush this part. With your fabric perfectly prepped and marked, you're all set to move on to the sewing machine.
Setting Up Your Sewing Machine for Success
Getting your sewing machine dialed in is crucial for achieving a professional, truly invisible finish. Before you thread the needle, there's one piece of equipment that makes all the difference: the presser foot.
For an invisible zipper, you must swap to a specialized invisible zipper foot. This attachment is genius; it has two tiny grooves on the bottom designed to hold the zipper coils open and guide them right under the needle. This is how you get your stitches incredibly close to the zipper teeth—the secret to making it vanish into the seam. Changing it is a breeze; just snap off your all-purpose foot and snap this one on.
If you're using one of our custom machine designs, we've got you covered with specialized attachments like the zipper foot for Accomplish machines. Our commitment at bsewinn.com is to empower crafters by providing the right tools and extensive training to ensure you feel confident and supported.
Fine-Tuning Your Machine Settings
Once the right foot is locked in, a few quick tweaks to your machine settings will set you up for success.
- Needle Selection: Always match your needle to your fabric. A universal 80/12 is fantastic for medium-weight fabrics. But if you’re working with something delicate like chiffon, switch to a 70/10. For heavier materials, bump it up to a 90/14.
- Stitch Length: A stitch length of 2.5mm is just about perfect for most zipper jobs. It creates a strong seam that isn't too stiff or bulky.
- Thread Tension: Puckering is almost always a tension issue. Before you touch your actual garment, grab a scrap of the exact same fabric and do a test run. If you see loops or the fabric is gathering, adjust the tension dial until your stitches lie perfectly flat.
I’ll say it again: always test on a scrap first! This quick five-minute check confirms that your needle, stitch length, and tension are all playing nicely together. It’s the best way to prevent a headache later on.
Nailing these settings is the first step toward creating high-quality garments. It’s no surprise that the demand for reliable zippers is huge. Just to give you an idea, the North American zipper market was valued at an incredible USD 5.7 billion in 2023, making up 42.3% of the global market thanks to the huge apparel industry here. You can read more about zipper market trends over at news.market.us. That focus on quality starts right at your sewing machine.
The Stitching Process from Start to Finish
Alright, your fabric is prepped, your machine is dialed in, and now it's time for the magic. Stitching an invisible zipper is all about precision, but it’s one of the most satisfying things in sewing when you see that seam just... disappear. I'm going to walk you through every step. Empowering you with clear, actionable guidance is a cornerstone of what we do at bsewinn.com, through all our online training and resources.
First, let's tackle one side of the zipper. Go ahead and unzip it all the way. Place one half of the zipper tape face-down onto the right side of your fabric. The key is to get the zipper coils (the plastic teeth) lined up perfectly with your marked seam line. Make sure the top stop of the zipper sits just below the top edge of your fabric—check your pattern’s seam allowance to know exactly where.
Now, carefully pin that zipper tape into place. When you're ready, lower your invisible zipper foot so the coils nestle right into the correct groove.
Stitching the First Side
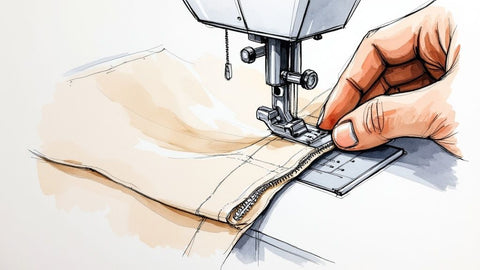
Start sewing from the top of the zipper and work your way down toward the bottom stopper. Let the machine and the special foot do most of the work—the foot's grooves automatically unroll the zipper coils, guiding your needle to stitch perfectly close to the teeth. As you get close to the zipper pull at the bottom, stop and backstitch to lock your seam in place. Don't worry that you can't sew all the way to the end; that's completely normal.
Take a look at this sketch—it really helps visualize what's happening.
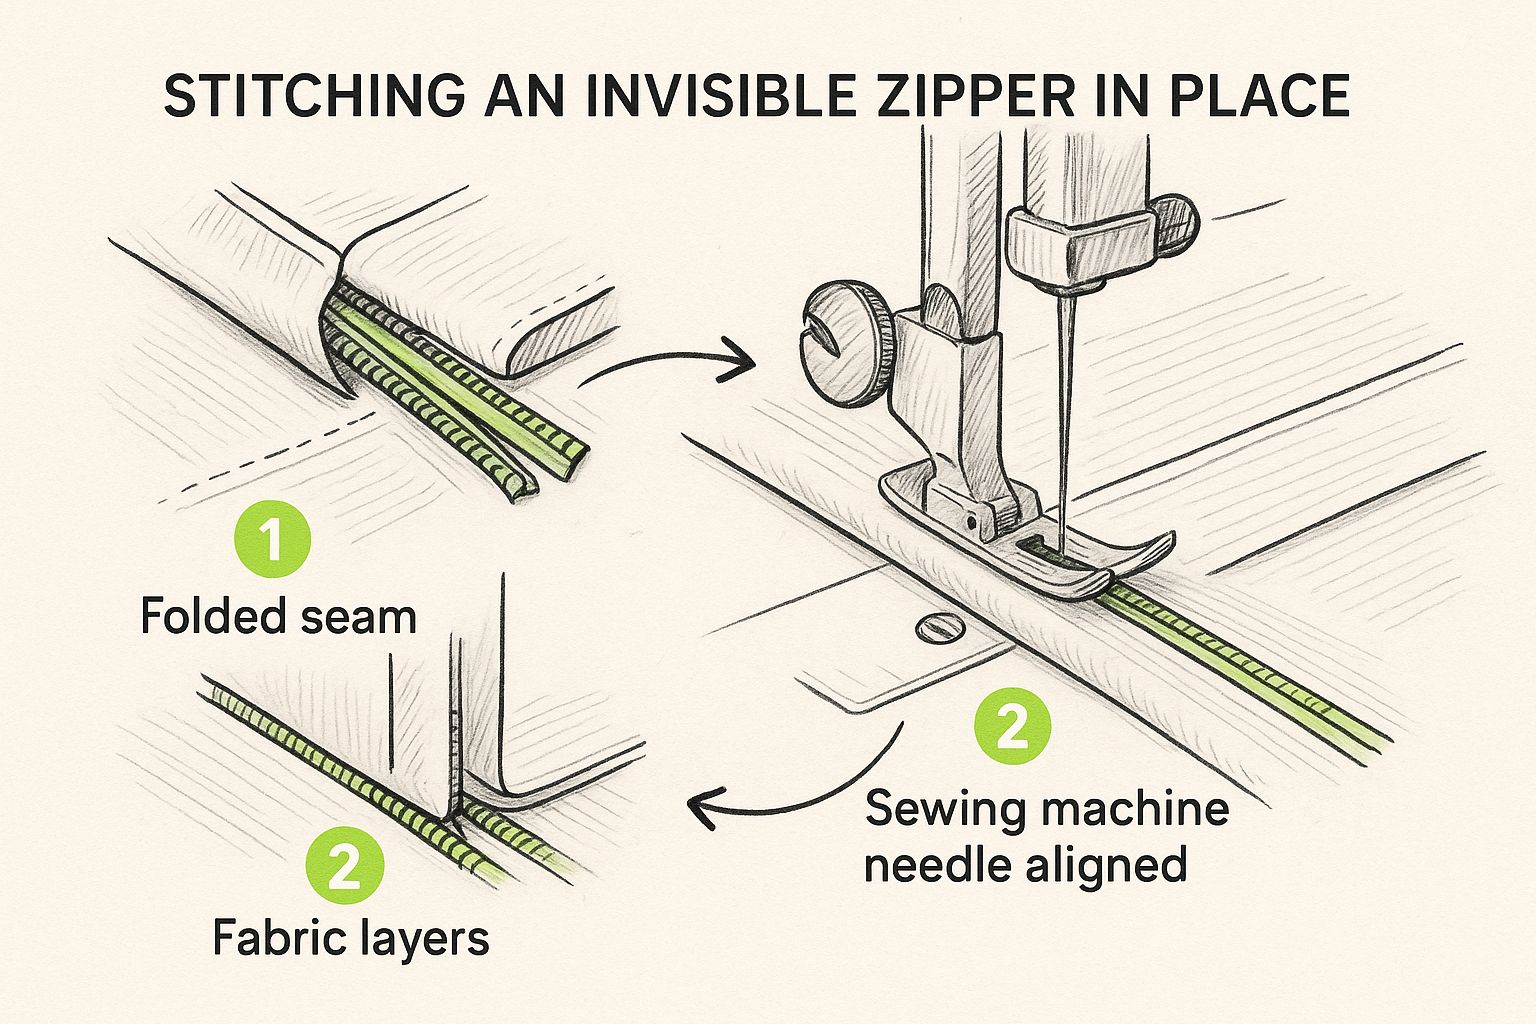
See how the needle runs right alongside the unrolled zipper coils? That's the secret sauce for a truly invisible finish.
Aligning and Sewing the Second Side
Time for the other side, and this is where careful alignment is critical. Close the zipper for a moment. Now, lay the unsewn half of the zipper tape onto the other piece of fabric, again, face-down on the right side.
This is a make-or-break moment, especially if your garment has any horizontal seams, like a waistline.
- Match Key Seams: If you have a waistline, make sure it lines up perfectly on both sides of the zipper. I like to use chalk to transfer the seam location from the side I've already sewn over to the unsewn zipper tape.
- Pin Securely: Once you've got your key points matched up, pin that second zipper tape down securely.
- Stitch Again: Unzip the zipper again. Fit the coils into the other groove of your invisible zipper foot and stitch this side down, just like you did the first one.
Quick pro-tip: Before you go any further, close the zipper and take a good look. Do your waistline seams match up? Is the fabric lying flat? If anything looks off, now is the time to fix it.
Closing the Seam Below the Zipper
With both sides of the zipper stitched in place, all that's left is to sew the rest of the seam below it.
Zip it closed. Switch from the invisible zipper foot back to a standard zipper foot. Gently push the tail of the zipper out of your way. Position your needle to start as close as possible to your last stitch at the bottom of the zipper, maybe even overlapping it by a tiny bit. Backstitch to secure it, then continue sewing down the rest of the seam.
Once you’re done, press that seam open below the zipper. You’ll have a beautifully smooth, continuous line.
Finishing Touches for a Professional Look
You’ve stitched the main seam, and you're on the home stretch. But these next details are what elevate your work from "good" to "great." Taking a few extra minutes here will ensure your zipper is truly invisible and durable. This is how we achieve the professional, handmade quality we all strive for at bsewinn.com, empowering you to create garments you're proud of.
First, give it a careful final press. Always use a pressing cloth to protect the zipper’s plastic teeth from the direct heat of your iron, and press the seam allowances open. This encourages the fabric to lie perfectly flat and helps the zipper completely disappear into the seam.
Securing the Zipper Tape and Tail
Now, let's look at the inside. To keep everything tidy, secure the zipper tape to the seam allowance. A few discreet hand stitches work beautifully. If you prefer using your machine, you can carefully topstitch it down. For delicate fabrics, I highly recommend a teflon zipper foot; it glides over the material without snagging.
The bottom tail of the zipper needs attention, too. Just snip off any extra length, leaving about an inch. Tuck that tail under and hand-tack it securely to the seam allowance. This tiny step prevents the end from peeking through and adds to that polished look.
A truly professional finish is all about the details others might not even see. Securing the zipper tape and tail inside the garment not only looks neater but also makes the whole thing last longer by reducing stress on the zipper's base.
Integrating Linings and Facings
If your project has a lining or a facing, attaching it cleanly is the grand finale. This is how you conceal all raw edges for that high-end finish. For example, when adding a facing to a custom-made skirt:
- Prep the Facing: With the zipper closed, lay your facing right-sides together with the garment. Pin it securely around the waistline.
- Stitch It Down: Using your regular zipper foot, stitch the facing to the garment. When you get close to the zipper, simply fold the seam allowance back toward the facing and sew as close as you can to the zipper teeth.
- Turn and Press: Before turning, trim the corners and grade the seams to reduce bulk. Then, turn the facing to the inside and give it one last, thorough press. Voilà! The raw edges of your zipper are neatly sandwiched between the garment and the facing.
These finishing techniques create beautiful clothing that stands the test of time. There's a huge demand for these seamless closures, reflecting a major trend in fashion. In fact, the invisible zipper market was valued at around USD 400 million in 2023 and is expected to climb to nearly USD 700 million by 2033. You can read more about this growth over at DataHorizzon Research. Taking the time to perfect these final details really ensures your projects meet that high standard.
Working Through Common Zipper Hiccups
Even seasoned sewists encounter a snag now and then when sewing an invisible zipper. At bsewinn.com, we're all about giving you the know-how to sail through these challenges, which is why we've put together a huge collection of online resources and training to back you up. Our mission is to empower you to tackle any sewing project with confidence.
Let's dive into some of the questions I hear most often from fellow makers in our community.
"Help! Why Does My Zipper Look Wavy?"
Ah, the dreaded wavy zipper. It's a common problem, but usually an easy fix. More often than not, the culprit is stretched-out fabric or zipper tape. This happens a lot with knits or delicate fabrics.
My go-to prevention method is to stabilize the seam allowance with a thin strip of lightweight fusible interfacing before sewing. It adds just the right amount of support to stop the fabric from warping. Also, make a conscious effort to let the machine do the work. Don't pull or push your fabric through; just guide it gently.
One last thing to check is your thread tension. If it's too high, it'll pull and pucker the fabric. I always run a quick test on a scrap from my project to get the tension just right before starting.
"Can I Really Sew an Invisible Zipper Without the Special Foot?"
You can, but it's like trying to chop onions with a butter knife—possible, but not ideal. While I wholeheartedly recommend an invisible zipper foot for that truly professional look, you can get by with a standard zipper foot if you're in a bind. You'll have to manually unroll the zipper coils with your fingers as you stitch, carefully guiding the needle to get as close as you can without hitting the teeth. The real challenge is that you'll almost never get as close as a specialized foot does, which means the zipper might be a little less invisible.
Honestly, if you're serious about creating your own custom clothing designs, an invisible zipper foot is a tiny investment that pays off big time in the quality of your finish. It's one of those essential tools that will empower you to achieve truly professional results.
"Should I Bother Pressing the Zipper Coils Before I Sew?"
Yes, you absolutely should! This is one of those game-changing tips that makes a massive difference. When you get an invisible zipper, the teeth are coiled up tightly. Gently pressing them flat with your iron on a low or medium setting is a total game-changer. Just be sure to use a press cloth to protect the plastic teeth from melting. This simple step unrolls the coils, which lets your needle get right up against the base of the teeth.
"What's the Best Way to Finish the Seam at the Bottom?"
Getting a seamless transition from the zipper to the rest of the seam is key for a polished look. Once you've attached both sides of the zipper, zip it up. Now, swap out your invisible zipper foot for a regular zipper foot. You'll want to position your needle so it starts just a hair to the side of your last stitch at the bottom of the zipper. Secure it with a good backstitch, then sew the rest of your seam using your normal seam allowance. The idea is to make it look like one long, uninterrupted seam.
Ready to take your sewing projects to the next level with the right tools and expert support? At bsewinn.com, we’re committed to empowering crafters like you. We’ve got everything from custom sewing machine designs and accessories to online classes and extensive resources designed to help you grow.
Come explore our commitment to crafters and find the perfect tools for your next creation at https://www.bsewinn.com.