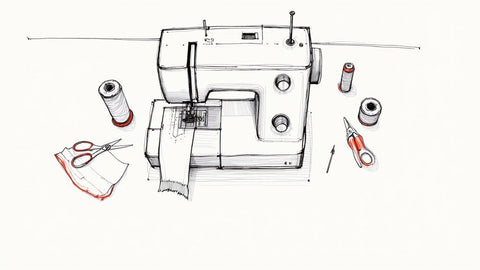
There's something truly special about turning a simple piece of fabric into a sparkling, one-of-a-kind beaded bag. I'll never forget the first one I made; the feeling of seeing those beads catch the light was just magical. If you've been wanting to try your hand at it, you're in the right place. This comprehensive guide will show you exactly how to replicate this beautiful project, creating your own custom accessory.
It’s not just about crafting, either. It’s a way to express your personal style, and it's a trend that's really taking off in the fashion world. More and more, people are falling in love with handmade, artisanal pieces.
The numbers back this up, too. The global market for bead products, including gorgeous bags like the one you're about to make, hit about USD 18.2 billion. That’s a huge number, and it tells me that unique, expressive fashion is here to stay. If you're curious, you can dig into more details about the bead products market on imarcgroup.com.
We’re Here to Help You Create
Here at bsewinn.com, our entire commitment is to empower crafters like you, giving you the confidence and the tools you need to bring your ideas to life. Think of us as your creative partner, here to guide you from that very first stitch to placing the final, perfect bead on a tangible project you can replicate.
We support your creative journey with:
- Custom Sewing Machine Designs: We've engineered our machines to be incredibly user-friendly. Our custom designs ensure that even complex steps, like those in this beaded bag project, feel straightforward and intuitive.
- Comprehensive Online Classes: Stuck on a tricky technique? Our online classes are led by experts who can walk you through it, providing the in-depth training you need right from the comfort of your sewing room.
- Extensive Resources: Whether you need a detailed tutorial or just want to connect with other crafters, our extensive resources mean you're never going it alone.
We want you to feel excited and ready to dive into this project. We'll cover everything you need to know, from picking out the perfect materials to adding those beads for a finish that looks totally professional.
Choosing the Right Tools and Materials
The secret to a stunning beaded bag isn't just in the final stitches—it's in the thoughtful choices you make before you even start. Picking the right materials is the foundation of the whole project. It’s what makes the process smoother and ensures your finished bag is both beautiful and built to last. It’s about more than just finding pretty beads; it’s about knowing how each piece of the puzzle fits together.
It's fascinating to see just how much people love the art of beadwork. Beaded bags are a huge deal globally, and the United States is a major market for them. The most incredible craftsmanship comes from all over the world, with Vietnam supplying about 33% of these bags, followed closely by China and India. You can get a sense of this thriving trade from this global trade overview on volza.com.
This little graphic breaks down the core components you’ll need to pull together for your project.
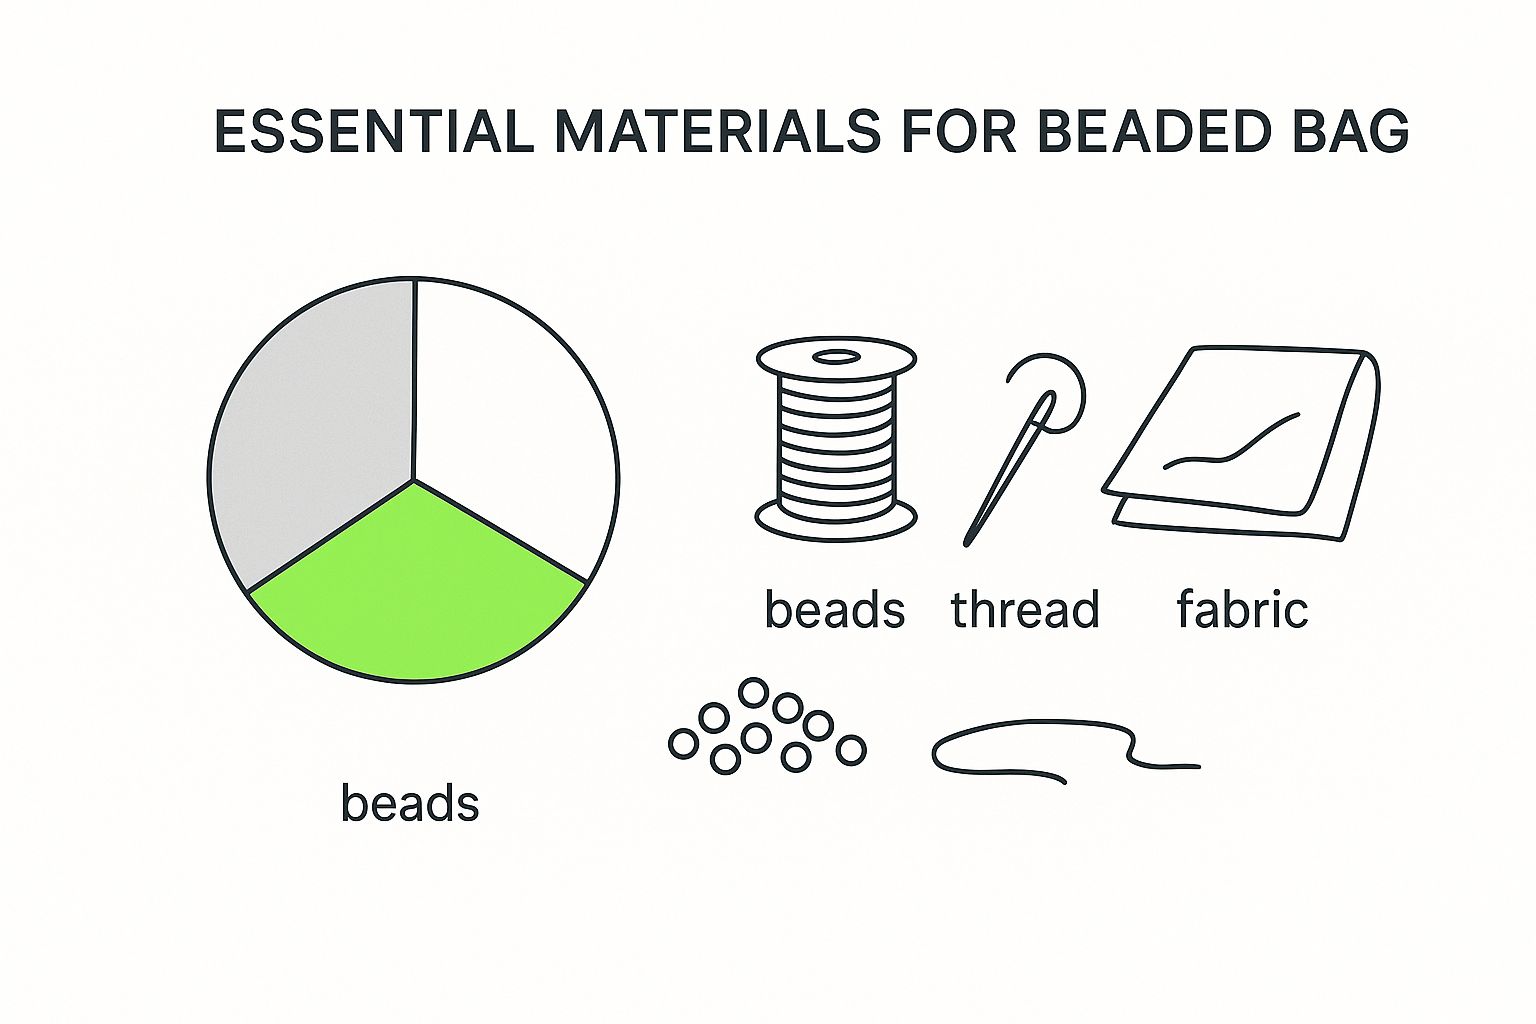
As you can see, it all comes down to the essential quartet: fabric, beads, thread, and needles. These are the absolute backbone of your bag's design and structure.
Essential Sewing and Beading Supplies
Let's get everything gathered up front. There’s nothing worse than getting into your creative zone only to realize you're missing a crucial item.
- Fabric: I always recommend a sturdy, non-stretch fabric. Think canvas, denim, or a good, heavy cotton. This provides the structure you need to support the weight of the beads without any sad sagging.
- Interfacing: This is my secret weapon for a professional finish. Fusing a layer of interfacing to your main fabric adds that extra stiffness and durability that makes a world of difference.
- Thread: Whatever you do, don't grab your standard sewing thread for the beading part. You need a specialized beading thread, usually made from nylon or a conditioned polyester. It's designed to be super strong and won't fray on you.
- Needles: You’ll actually need two different kinds. Your regular sewing machine needles will be for constructing the bag itself. For the beadwork, you'll want fine, long beading needles with tiny eyes that can slip through even the smallest bead holes.
Here at bsewinn.com, we know that the right tools make any project more enjoyable. For creating those strong, clean interior seams, a quality machine is a game-changer. The Baby Lock Acclaim Serger, for instance, gives you those professional-grade finishes that prevent fraying and make your bag last for years.
Key Takeaway: The strength of your bag lies in its foundation. Don’t skimp on your fabric, thread, or interfacing—these are the elements that will hold all that gorgeous beadwork in place.
Selecting the Perfect Beads
Now for the fun part! The beads are truly the star of the show and will give your bag its unique personality.
Think about how different types will create a different vibe. Tiny seed beads are perfect for those intricate, detailed patterns. If you're going for a bold, modern look, larger statement beads can make a huge impact.
Don't forget to consider weight! Heavy glass or crystal beads are beautiful, but they'll need a more robust fabric and some reinforced stitching to keep them secure. I love to mix and match textures and finishes—like combining matte and metallic beads—to add real depth and visual interest to my designs.
Bead and Fabric Pairing Guide
Choosing the right bead for your fabric (and vice versa) can feel a little tricky, but it's crucial for getting the look and durability you want. A heavy bead on a flimsy fabric is a recipe for disaster, while a delicate bead might get lost on a bulky material. Here’s a quick guide I’ve put together from my own experience to help you make the perfect match.
| Fabric Type | Best Bead Types | Key Considerations |
|---|---|---|
| Canvas/Denim | Glass, Stone, Wood, Metal | These sturdy fabrics can handle heavier beads. Ensure your needle and thread are strong enough for both the fabric and beads. |
| Heavy Cotton | Seed Beads, Bugle Beads, Sequins | Great for detailed, all-over patterns. The tight weave provides a solid base for intricate stitching without puckering. |
| Satin/Silk | Crystal, Pearl, Small Seed Beads | Lighter beads prevent strain on these delicate fabrics. Use a very fine needle and thread to avoid visible holes. |
| Felt/Wool | Larger Plastic or Wood Beads | These fabrics have a soft texture that pairs well with chunkier, less formal beads. Spacing beads out is often best. |
| Leather/Suede | Metal Studs, Bone, Turquoise | Requires special leather needles and strong thread. The beads should complement the rugged nature of the material. |
Ultimately, these are just guidelines to get you started. The best combinations often come from experimenting, so don't be afraid to play around with different textures and weights to see what you love.
Getting Your Pattern and Fabric Ready for Action
Ask any seasoned bag maker, and they'll tell you the secret to a professional-looking project is all in the prep work. Seriously. Taking the time to get these first few steps right creates the foundation for everything that follows. If you rush through this part, you'll be fighting with your project the whole way. Let's set ourselves up for a win from the get-go.
First things first, you need a pattern. Don't feel like you need to be a master designer here—a simple shape is actually perfect for showing off gorgeous beadwork. A basic clutch, a simple tote, or even a little drawstring pouch are all fantastic choices. You can find tons of free patterns online, or just draft your own with some paper and a ruler. A simple rectangle is a perfect starting point for a beginner's clutch.

With your pattern sorted, it's time to cut your fabric. This is where accuracy really counts. Lay your fabric out on a flat surface, making sure your pattern pieces are lined up with the grainline before you even think about cutting. A sharp pair of fabric scissors or a rotary cutter will be your best friend for clean, crisp edges.
Add Some Structure with Interfacing
This might just be the most important step for a beaded bag: adding interfacing. Beads have some heft to them, and without a little reinforcement, even a sturdy fabric will start to sag and lose its shape over time. Interfacing is a non-woven material that you simply fuse to the wrong side of your fabric pieces with an iron.
This one simple addition gives your bag the structure it needs to support the weight of the beadwork, resulting in that crisp, high-quality finish we're all after. Just be sure to follow the manufacturer's instructions for whatever type of interfacing you're using to get a really strong bond.
Transferring Your Beading Design
Okay, your fabric is cut and reinforced—now for the fun part! It's time to transfer your beading design onto the fabric. This gives you a clear roadmap for your stitching, making sure your pattern turns out just like you imagined it. A well-lit workspace is a non-negotiable for this kind of detailed work. For some extra light right where you need it, something like the Baby Lock 10-foot light bar can be a total game-changer for seeing your lines clearly.
There are a few ways you can do this, and none of them are wrong:
- Transfer Paper: This is my go-to for more complex patterns. You just place the waxy side down on your fabric, lay your design over it, and trace the lines with a stylus or pen. Easy peasy.
- Fabric Pens: If you're doing a simpler design or even freehanding it, a water-soluble or heat-erasable fabric pen is perfect. You can draw right on the fabric, and the marks will vanish later on.
- The Light Box Method: This is a classic for a reason. If you're working with lighter fabric, you can put your design on a light box (or even just tape it to a sunny window), lay your fabric on top, and trace the pattern you can see through it.
Pick the method that feels right for you and your design's complexity. The goal here is to create a clear, easy-to-follow map for your beading journey. By taking your time with these prep steps, you're basically creating the perfect canvas for your art.
Assembling Your Bag Before Adding Beads
With all your fabric pieces cut and ready to go, it’s time to actually build your bag. This is where the magic happens, transforming those flat pieces of fabric into a three-dimensional canvas, just waiting for all those sparkly beads. I’ve found that sewing the main body of the bag first makes life so much easier. It gives you a stable, solid structure to work on when you start the intricate beading process later.
This foundational work is where a good sewing machine really proves its worth. Custom sewing machine designs from bsewinn.com, for example, feature intuitive controls that make even fiddly steps feel simple. We are committed to empowering you to create, backing you with reliable tools and extensive resources like our online classes and training.
Constructing the Main Body
Let’s start with the outside of your bag. Grab your two main outer fabric pieces and place them right sides together, making sure every edge is lined up perfectly. Pin them in place so nothing slips around while you're sewing.
Now, head to your sewing machine. Stitch along both sides and the bottom of the fabric, but leave the entire top edge open—that’s how you’ll get things in and out of your bag! Don't forget to backstitch at the start and finish of each seam. It’s a tiny step that locks in your stitches and makes your bag so much more durable.
You've now got the basic shell! Before you turn it right-side out, take a moment to snip the bottom corners diagonally. This little trick removes extra fabric bulk and helps you get those crisp, professional-looking corners when you turn it.
Pro-Tip: The secret to a bag that lasts is all in the seams. Don't rush this part. Taking the time to sew straight, secure seams now means your bag will be able to handle the weight of the beads and the wear and tear of daily use down the road.
Creating a Polished Interior with a Lining
A lining is what takes a homemade bag from nice to luxe. It hides all the raw seams, gives it a high-end feel, and protects the back of your beadwork. The good news is, sewing the lining is almost exactly the same as sewing the outer shell.
Place your two lining pieces right-sides together and sew along the sides and bottom. Here’s the crucial difference: this time, you need to leave a 3-4 inch gap unsewn along the bottom edge. This little opening is absolutely essential for turning the whole bag right-side out later on.
Finishing Seams for Durability
To keep your fabric from fraying over time, it’s a good idea to finish the raw edges of your seams. This is especially important for the outer bag, which will see the most action.
You’ve got a few easy options here:
- Zigzag Stitch: Most machines have a zigzag setting. Just run that stitch right along the raw edge of your seam allowance. Easy peasy.
- Pinking Shears: If you have them, these scissors cut a sawtooth pattern that really helps minimize fraying. It’s a great no-sew option.
- Serger: For the ultimate professional finish, a serger is the way to go. It trims the excess fabric and wraps the edge in thread all at once for a super clean, durable seam.
Once your outer shell and lining are constructed, you’re ready for the final assembly—joining them together, adding any closures, and attaching your straps. With this solid foundation in place, you’re all set for the fun part: beading
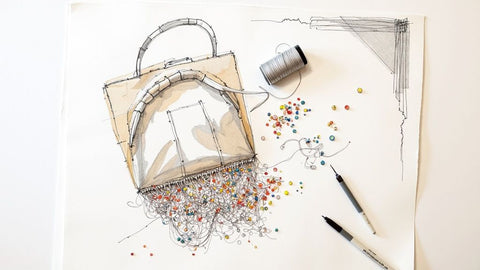
This is where the magic really happens. Your bag is about to transform from a simple sewing project into a true piece of wearable art. I know adding beads can feel a little intimidating, but I promise it’s just a series of simple, repetitive motions. Once you get the hang of a few key techniques, you’ll build confidence and be able to create stunning designs that are both beautiful and durable.
I've seen so much feedback on beaded bags over the years. People absolutely love them for their fashionable look (25.4%) and even think they seem durable (10.8%). But the biggest complaint? Fragility, hands down (14.1%). Broken straps, missing beads—it's a real issue. By focusing on secure beading techniques from the very start, we can get ahead of this problem and make sure your handcrafted bag is built to last. It’s worth looking into consumer insights on beaded bag trends just to see how much durability matters to people.
Here at bsewinn.com, we want you to feel totally empowered when learning a new skill. That’s why our online training and classes break down these exact methods in clear, easy-to-follow detail, so you can perfect your stitches with an expert guiding you along the way.
The Backstitch for Clean Lines
The beading backstitch is going to be your absolute best friend for creating crisp outlines and solidly filled-in shapes. It’s incredibly strong and makes the beads lie perfectly flat and uniform against the fabric, which is exactly what you want for detailed patterns.
Here’s the basic rhythm:
- First, bring your threaded needle up from the back of the fabric.
- String on about four or five beads.
- Lay them flat right on your design line and push the needle back through the fabric just at the end of that little line of beads.
- Now, bring the needle back up through the fabric, popping up between the last two beads you just stitched down.
- Pass the needle through those last two beads one more time. This reinforces them before you add the next batch.
This motion essentially "locks" each little group of beads in place, creating a secure, continuous line that looks so professional. It takes a little more time, I'll admit, but the sturdy result is completely worth the effort.
Couching for Attaching Strings of Beads
Okay, what if you want to add long, flowing lines of beads or cover a big area a bit faster? This is where couching comes in. It's a fantastic technique. Instead of sewing each bead down one-by-one, you lay a pre-strung line of beads onto your fabric and then tack it down with a separate thread.
Picture a swirly pattern across the front of your clutch. You’d start by stringing a long strand of beads. Then, with a second needle and thread, you make small, discreet stitches over the beading thread, anchoring it to the fabric every few beads. This method is also a lifesaver for attaching thicker cords or strings of heavier beads. A specialized foot, like a quilting foot for precise stitching, can be a huge help in keeping your tacking stitches perfectly straight and close to the beadwork.
Scatter Technique for a Sparkling Texture
For a more organic, free-form vibe, the scatter technique is just pure fun. You’re basically sewing individual beads or small clusters randomly across an area to create a sparkling, textured surface. This is perfect for filling in the background of a design or just adding a touch of glamour without a rigid pattern.
The real secret to a beautiful scatter is variation. Don’t be afraid to mix up the sizes, colors, and finishes of your beads. It creates so much depth and interest. Just be sure to secure each bead or small cluster with two or three small stitches so they’re firmly attached.
And listen, troubleshooting is just part of the process. If your thread gets tangled, resist the urge to pull on it! Gently work the knot out with your needle instead. Keeping your thread tension even is also key—if you pull too tight, the fabric will pucker, but if it's too loose, you'll end up with wobbly beads. With a little practice, you'll find your rhythm.
The Finishing Touches That Make All the Difference
You’ve stitched the last bead, and your bag is so close to being done! These final few steps are my favorite part. It’s where you take a project from something you made to a professional-looking accessory you’ll be proud to show off. We'll also cover how to keep your new creation looking amazing for years to come.
Before we get to the fun stuff, do a quick quality check. I always run my fingers gently over all the beadwork, just feeling for any beads that might be a little loose or any threads that don't feel totally secure. One wobbly bead can sometimes cause a domino effect, so it's much easier to add a few reinforcing stitches now. Trust me, this quick inspection ensures all your hard work stays put.
Adding a Little Extra Flair
This is where you can really let your personality shine and make the bag one-of-a-kind. These small additions can have a huge impact on the final piece.
- Tassels and Charms: I love adding a handmade tassel or a little curated charm. It adds a bit of movement and personality. You can clip one onto a zipper pull or stitch it onto a corner for a subtle but really stylish touch.
- Handle Details: Think about wrapping the base of your straps with a pretty, complementary thread. You could also add a few decorative beads where the handles join the bag. Not only does it look great, but it also reinforces a high-stress area.
- A Tidy Lining: Make sure your lining is tucked in perfectly. The small opening you used for turning the bag right-side out should be closed up with a neat invisible stitch. A clean, beautiful interior is the secret sign of a truly well-made bag.
Taking just a few extra moments for these final flourishes is what really sets a handmade piece apart. It's the care you put into the little details that shows off your craftsmanship and pride in your work.
Keeping Your Beaded Bag Beautiful
Proper care is everything when it comes to preserving your hard work. Beaded bags need a little more TLC than your average fabric tote, but if you treat them right, they can honestly last a lifetime.
When it comes to cleaning, spot treatment is your best friend. If you get a little smudge, just gently dab the area with a soft, damp cloth and maybe a tiny bit of mild soap. Whatever you do, try to avoid submerging the whole bag in water—it can weaken the threads and sometimes damage the finish on delicate beads.
How you store it matters, too. I keep mine in a dust bag (an old pillowcase works great!) to protect it from snags and dust. Try not to hang your bag by its straps for long periods, as the sheer weight of the beads can cause stretching over time. Laying it flat or setting it on a shelf is a much better option.
And if a bead ever comes loose? Don't panic! It happens. Just grab a beading needle and some matching thread to stitch it right back into place. A small, secure knot on the inside of the lining is all you need.
There's just no feeling quite like creating something beautiful with your own two hands. At B-Sew Inn, we're here to support every step of your creative journey, whether that's finding the perfect machine or getting the training you need to bring your ideas to life. Come explore our community and find your next inspiration at https://www.bsewinn.com.