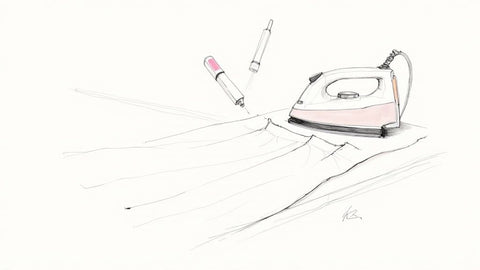
If you want to know the secret to truly professional-looking projects, it all comes down to one thing: learning how to press your seams properly. The trick is to use a deliberate up-and-down motion with your iron, never a sliding one. This simple technique, which we call pressing, is what sets your stitches perfectly into the fabric without stretching or distorting those pieces you so carefully cut.
Why Pressing Seams Is a Game Changer in Sewing

Let's be real—when you're excited to finish a project, stopping to press at every step can feel like a chore. But trust me, it’s the one thing that separates a good homemade item from a great handmade one. The first thing to get straight is the crucial difference between 'pressing' and 'ironing'. They are not the same thing.
- Pressing is what we do in sewing. You lift the iron and place it down firmly on the seam. This sets the stitches, melds the thread right into the fabric, and helps shape your project without messing with the fabric's grain.
- Ironing is that classic back-and-forth sliding motion you use to get wrinkles out of a shirt. It’s fantastic for laundry day but an absolute disaster for sewing. That sliding can easily stretch and warp your fabric pieces, throwing everything out of whack.
This isn't just about being fussy; it has a direct impact on how your final piece turns out. When you press your seams correctly, patterns line up beautifully, bulky intersections lie flat for a sleeker fit, and the whole thing just has that polished, store-bought look.
The Foundation of a Professional Finish
It seems like more and more people are rediscovering these foundational skills. With the huge revival in DIY and crafting, the sewing machine market has seen a real boom, especially in North America and Europe. So many of us are making our own unique clothing and home decor—projects where knowing how to press seams is absolutely key for a quality result. You can read more about this trend and how it’s shaking up the sewing industry.
At bsewinn.com, we’ve always believed that mastering core skills like pressing is what truly unlocks your creative potential. Our custom sewing machine designs are built to help you achieve these professional results, and we are committed to empowering crafters on their journey.
We're here to help every crafter on their journey. Through our extensive resources, online classes, and expert training, we offer the support you need to build your confidence and nail your techniques, turning every project into something you're incredibly proud of.
Building Your Essential Pressing Toolkit
Having the right tools is what really turns pressing from a chore into a satisfying, almost magical part of sewing. Sure, a basic iron can get you started, but a few key pieces will take your projects to the next level. They give your work that crisp, professional structure that’s so hard to get otherwise.
Your main workhorse is always going to be a quality steam iron. I can't stress this enough. Look for one with consistent heat and a powerful burst of steam. That combination is what relaxes the fabric fibers, making your seams pliable and easy to shape exactly how you want them.
But to really master your pressing game, you'll want a few more things in your corner.
Specialized Tools for a Flawless Finish
Beyond the iron, a few specialized tools are designed to tackle specific shapes and fabrics. These aren’t just for seasoned tailors; they're absolute game-changers that make tricky tasks feel so much easier.
- Tailor’s Ham: This firmly stuffed cushion is your best friend for pressing any curved seam. Think collars, princess seams, or darts. Its rounded shape lets you mold the fabric into its intended 3D form, which is something you just can't do on a flat ironing board.
- Seam Roll: For long, skinny seams like the ones in sleeves or pant legs, a seam roll is a must-have. It allows you to press the seam open without accidentally creating new, unwanted creases on the rest of the garment. It’s a real lifesaver.
- Wooden Clapper: This simple block of wood is pure magic, especially on fabrics like wool or denim that can be a bit stubborn. After you hit the seam with steam, you press the clapper down firmly on top of it. The wood absorbs the steam and traps the heat, setting the seam incredibly flat and sharp.
It really comes down to a simple workflow: look at your seam's shape, grab the right tool for the job, position your fabric, and press.
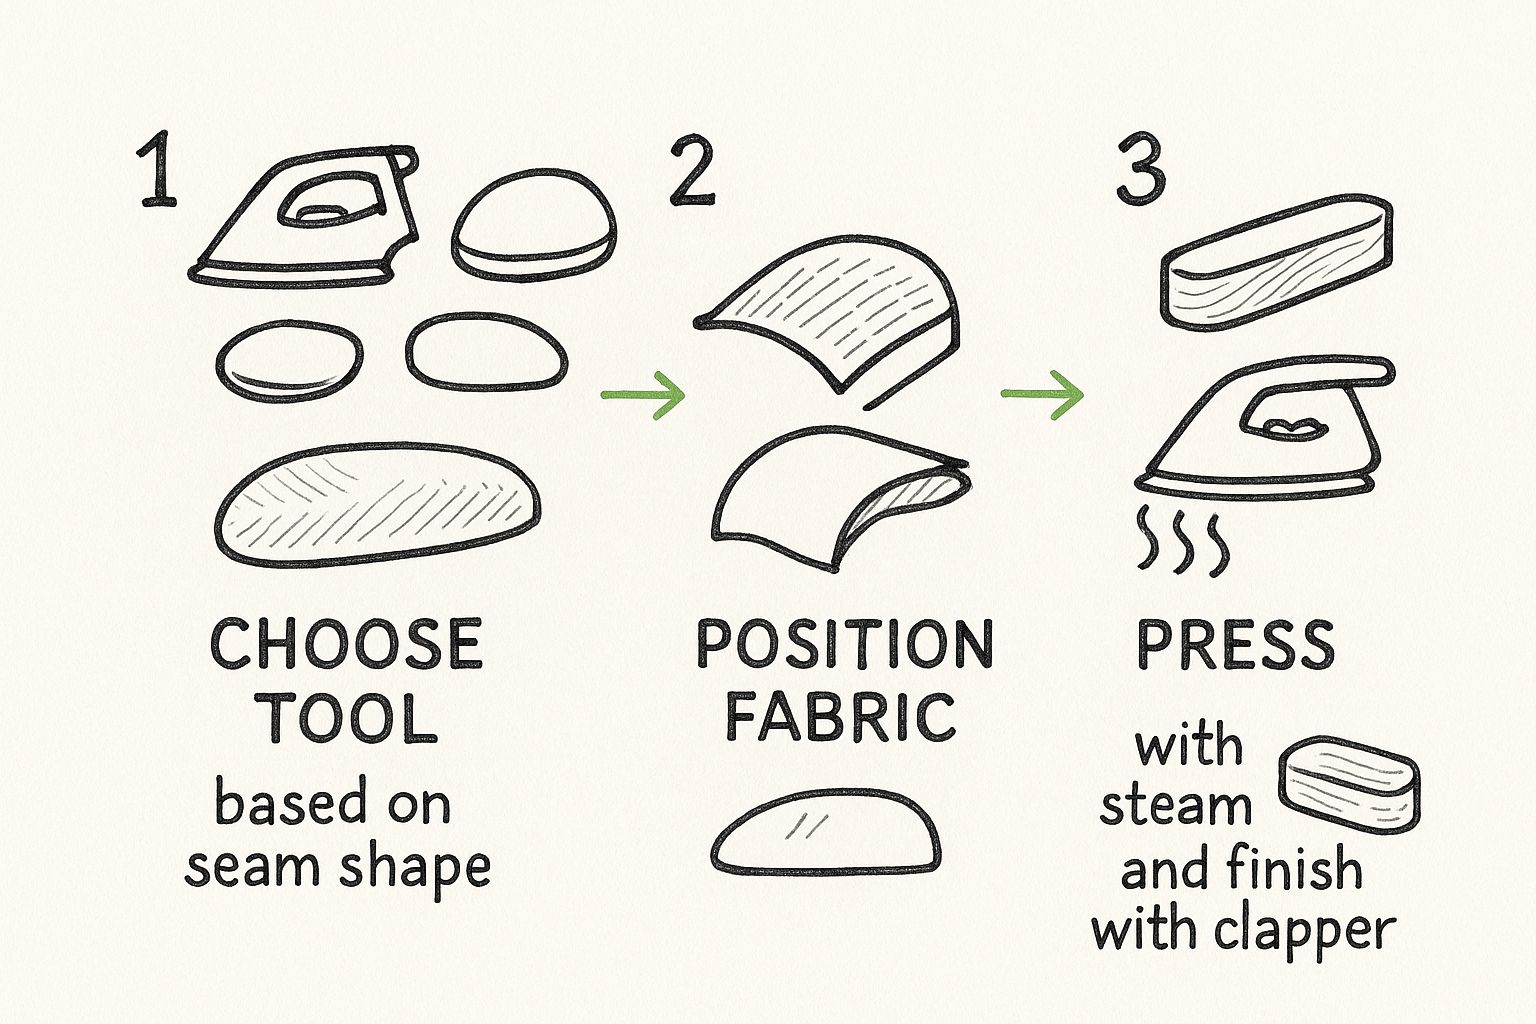
This graphic is a great reminder that the seam itself—whether it's curved, straight, or just needs to be extra crisp—tells you which tool to reach for.
For a great overview of foundational equipment that every sewist should have, you can check out our guide on the top sewing tools for beginners.
Pressing Tools and Their Best Uses
To make it even clearer, I've put together a quick-reference table that breaks down what each tool does best.
| Tool Name | Primary Purpose | Best For |
|---|---|---|
| Steam Iron | Applying heat and moisture to relax fibers | All-purpose pressing for nearly any fabric type. |
| Tailor’s Ham | Shaping and pressing curved areas | Darts, collars, princess seams, sleeve caps, bust lines. |
| Seam Roll | Pressing long, narrow seams without creasing | Sleeves, pant legs, and other tubular garment sections. |
| Wooden Clapper | Setting seams flat with sharp creases | Tailored garments, wool coats, denim, thick cottons. |
Think of these tools as your pressing support team. Each one has a specialty, and knowing when to call them in will make all the difference in your finished projects.
Building out your toolkit is a true investment in your craft. At bsewinn.com, we're committed to empowering crafters with the right tools and knowledge. We provide the resources and training you need to master these techniques and achieve that beautiful, professional result you’re aiming for.
Getting to Grips with Core Seam Pressing Techniques
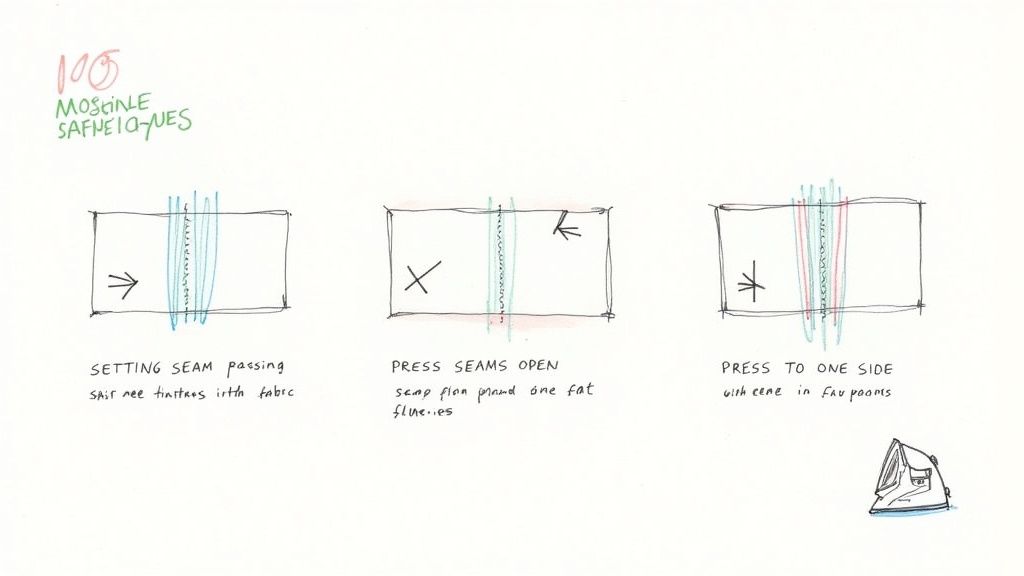
Okay, now that your pressing station is all set up, it's time to dig into the three foundational techniques you’ll find yourself using on nearly every single project. These methods aren't rocket science, but knowing exactly when and how to use each one is what separates okay results from truly professional-looking work.
First things first, let's talk about setting the seam. This is a non-negotiable step for me. It’s the simple act of pressing the line of stitching just as you sewed it, before you open up the fabric pieces. Doing this helps the thread relax and almost melt into the fabric fibers. The result is a stronger, flatter, and more stable seam right from the get-go.
Pressing Seams Open for a Flat Finish
Once you've set your seam, you have a decision to make about the seam allowances. A really common method, especially in garment sewing, is to press the seams open. This is exactly what it sounds like: you'll gently pull the fabric pieces apart and press the two seam allowances flat, pointing in opposite directions.
This technique is your best friend for getting rid of bulk. A great tangible example is a bodice with princess seams—pressing those curved seams open is the only way to get the front of the garment to lie smoothly against the body without any awkward ridges. It gives you that clean, professional finish where the construction details are practically invisible from the right side.
For tiny seams or those tricky corners that are hard to get into, a little helper like a stiletto and pressing tool is a lifesaver for holding those seam allowances in place while you press.
It all boils down to this: using the right pressing technique for the job makes everything that comes after so much easier and more accurate. Whether you're matching up points on a quilt or getting a smooth drape on a dress, it all starts at the ironing board.
Pressing Seams to One Side for Strength
The other main option is pressing seams to one side. Instead of opening them up, you press both seam allowances together in the same direction. This is a huge favorite in the quilting world because it makes nesting seams a dream, helping you get those perfect points and intersections we all strive for.
In dressmaking, pressing to one side adds a bit of structure and support. Take a waistband, for instance—you would typically press the seam allowance up toward the waistband itself. This tangible example shows how the technique adds reinforcement and helps the band sit crisply without collapsing. The same goes for yokes on shirts or cuffs on a sleeve.
This level of precision is just as important in large-scale manufacturing. In fact, the industrial sewing machine market is projected to hit $4.785 billion by 2032, a number driven by the demand for high-quality production in clothing and footwear. Those powerhouse machines depend on perfectly prepared seams to create durable, beautifully finished goods. You can learn more about the growth in industrial sewing technology.
Here at bsewinn.com, we're all about helping you bring that same professional quality to your own sewing room. Through our custom machine designs, extensive resources, and expert training, we want to empower you to master these techniques and create projects you're truly proud of.
Handling Tricky Fabrics Like a Pro
Sure, pressing standard cotton is pretty straightforward. But what happens when you’re working with silk, velvet, or slinky synthetics? Your technique definitely needs a little adjustment. Handling these trickier fabrics without causing damage just requires a bit more care, but trust me, the beautiful results are well worth the effort.
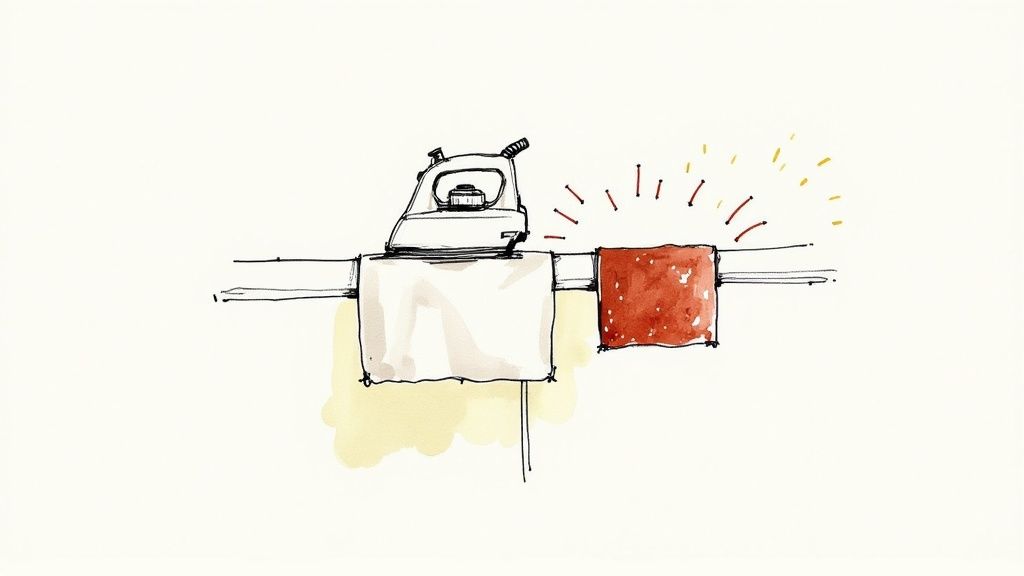
For anything slick or shiny—think silk, satin, and a lot of synthetics—a press cloth is your best friend. It’s a non-negotiable part of my toolkit. This simple piece of fabric acts as a barrier, preventing those dreaded shiny spots that pop up when an iron gets too friendly with the material. I always stick to a low or medium heat setting and try to press from the wrong side whenever I can.
Water spotting from steam is another common headache, especially with delicate silks. To get around this, I’ll often use a dry iron and just lightly mist my press cloth with a spray bottle. This gives me just enough moisture to set the seam perfectly without risking any marks on the fabric.
Preserving Texture and Pile
Now for the really fun stuff: fabrics with texture or a pile. Things like velvet, corduroy, and faux fur present a unique challenge. You need to get those seams flat without completely crushing that gorgeous surface.
- Velvet: Whatever you do, never press velvet on a flat ironing board. The absolute best tool for the job is a needle board, but a thick, fluffy towel will also work in a pinch. Just place the velvet pile-side down onto the textured surface. This gives the fibers somewhere to go so they don’t get flattened.
- Corduroy and Faux Fur: Much like velvet, you’ll want to press these from the wrong side. My trick is to let the iron hover over the seam, give it a good blast of steam, and then use my fingers to gently press the seam open or to one side. A light touch is everything here.
The real secret to success with any challenging fabric? Always, always test on a scrap piece first. It's a simple step that has saved me from countless costly mistakes and gives me the confidence to tackle those beautiful, high-end materials.
We believe that knowing these little tricks opens up a whole new world of creative possibilities. Of course, mastering how to press any fabric is a lot easier when you have the right equipment. The global sewing machine market is expected to hit $5.9 billion by 2028, which just shows how many crafters are looking for machines that deliver professional results. You can read more about the trends shaping the sewing machine industry if you're curious.
And if you’re working on projects that need a bit more structure, you might find our guide on what fusible interfacing is and how to use it helpful, too.
Dealing with Common Pressing Mishaps
We’ve all been there. You finish a perfectly lovely seam, take it to the ironing board, and suddenly it’s a wavy mess. Or worse, your beautiful dark fabric now has ugly shiny spots. It’s enough to make you want to throw the project across the room, but don’t despair. Most of these pressing headaches are easy to fix—and even easier to prevent once you know what’s going on.
Think of this as your troubleshooting guide for when things go sideways at the ironing board. The most common culprit is accidentally stretching your fabric, which happens all the time with knits or any piece cut on the bias. This is almost always caused by using a classic back-and-forth ironing motion instead of an up-and-down pressing motion. The fix is simple: always lift the iron completely off the fabric before moving to the next spot. It’s a tiny change in habit that makes a world of difference and is a cornerstone of learning how to press seams like a pro.
Getting Rid of Shine and Seam Imprints
Another frustrating issue is that dreaded shine that appears on fabric, especially dark synthetics or wools. When you see that, it’s a warning sign that your iron is too hot and is literally melting the surface fibers.
- How to prevent it: A press cloth is your best friend. It creates a protective barrier that diffuses the iron’s direct heat. And always, always test your iron’s temperature on a scrap piece of fabric first.
- How to fix it: You can sometimes salvage a shiny spot. Try hovering your steam iron over the area (don't let it touch the fabric!) and then gently brushing it with a soft-bristled brush. This can help lift the crushed fibers back up.
Seam allowances creating a visible ridge or imprint on the right side of your project is another one of those little things that can drive you crazy. This happens when the iron’s pressure smashes the edge of the seam allowance into the good side of your fabric.
The secret to avoiding these imprints is to redirect the pressure. I like to slip a strip of cardstock or a piece of an old manila folder under the seam allowance while I press. This little trick shields your main fabric from that hard edge, leaving you with a beautifully smooth finish.
Here at bsewinn.com, we know that building these little troubleshooting skills is what really builds sewing confidence. Our online classes, custom machine designs, and extensive resources are all about empowering you with the hands-on knowledge to tackle any challenge. We want to help you turn those potential mistakes into learning moments so your projects always look polished and professional.
Your Pressing Questions Answered
Even after you get the hang of how to press seams, a few questions always seem to pop up. Let's tackle some of the most common ones I hear from fellow sewers to help you troubleshoot and really perfect your technique.
One of the first things people ask is about pressing versus ironing. It’s a simple distinction, but it’s critical: pressing is an up-and-down motion. You’re setting the stitches without stretching the fabric. Ironing, with its back-and-forth sliding, is what you do for laundry, but it can easily pull your carefully cut pieces out of shape.
Another big question is when to press your seams open versus to one side.
Honestly, the best method really depends on your project. Your pattern instructions should be your first stop—they’ll usually tell you the ideal approach for that specific design. If they don’t say, the type of project is your next best clue.
Open vs. To The Side
For most garments you make, pressing seams open is the way to go. This little move distributes the bulk of the seam allowance evenly to both sides. The result? A much flatter, less obvious seam on the outside of your clothing.
Quilting is a different story, though. Pressing to one side is often the trick here. This technique lets you "nest" your seams together, which is a fantastic way to get those points and intersections in your quilt blocks to match up perfectly.
Steam or No Steam?
Can you get a great press without a cloud of steam? Absolutely. In fact, a lot of tailors prefer a dry iron, especially when they team it up with a wooden clapper. The clapper traps the heat and any moisture right where you need it, setting an incredibly crisp, flat seam.
If you do need a bit of moisture, you can just use a spray bottle for a light mist or place a damp press cloth between your iron and the fabric. Easy.
Finally, what’s going on if your seams get wavy after pressing? This is a classic sign that the fabric was stretched, especially if it’s a knit or a piece cut on the bias. The culprit is almost always sliding the iron instead of pressing. Just remember to lift the iron completely off the fabric before moving to the next section. No pulling, no distortion.
At B-Sew Inn, we believe that building up these practical skills is what truly unlocks your creative potential. From our custom sewing machine designs to our huge library of online resources and classes, we're here to support you at every step. We empower crafters to create tangible, beautiful projects they can be proud of. You can explore everything we offer at https://www.bsewinn.com.