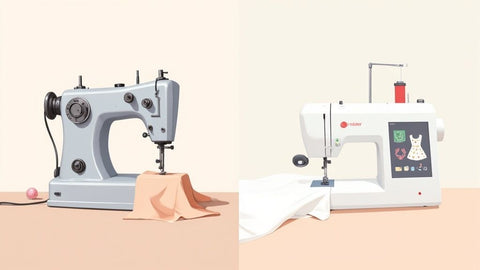
A well-organized sewing room is more than just a tidy area; it’s a functional, inspiring space that fuels your creativity. When your tools are accessible, fabrics are neatly stored, and your workflow is streamlined, you can spend less time searching and more time bringing your artistic visions to life. This guide serves as a comprehensive "how-to" on organizing your workspace, showcasing tangible examples that crafters can replicate to build an efficient and beautiful creative sanctuary. The core principles of creating an orderly environment are universal. For a broader perspective on how to achieve a tidy and efficient workspace, consider these valuable laundry room organization tips for a clutter-free space which share similar goals of maximizing utility in a dedicated area.
At B-Sew Inn, we believe that an organized environment is the first step toward mastering your craft. Our commitment to empowering crafters extends beyond providing custom sewing machine designs; we offer the support you need to create the perfect sewing sanctuary through our online classes, training, and extensive resources. Let's dive into these sewing room organization ideas you can implement to conquer clutter and streamline your creative process.
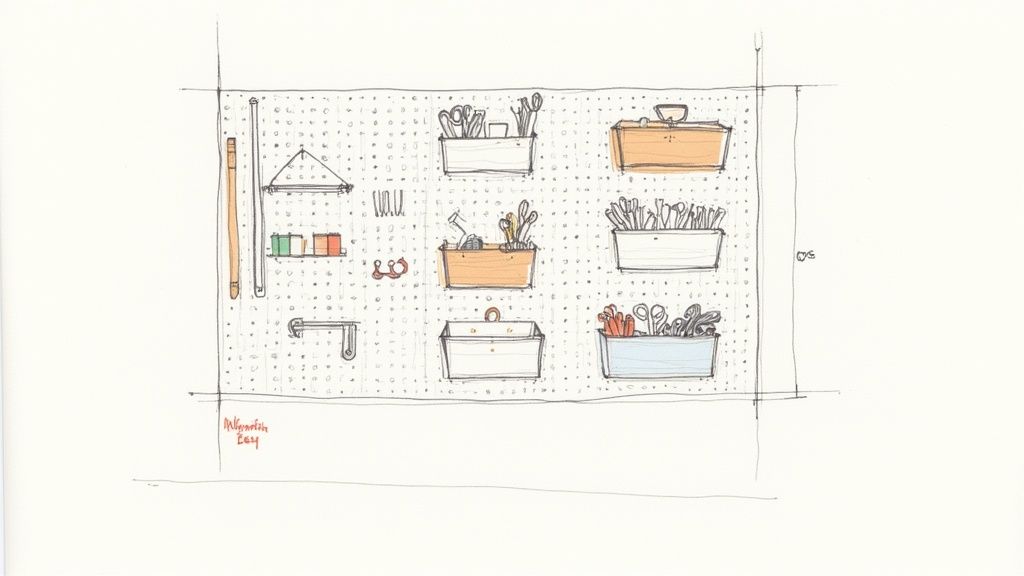
1. Pegboard Wall System: The Ultimate Vertical Organizer
A pegboard wall system is one of the most effective sewing room organization ideas for reclaiming precious floor and desk space. This versatile solution uses a perforated hardboard panel mounted on a wall, transforming an entire vertical surface into a customizable storage powerhouse. By utilizing a wide array of hooks, shelves, baskets, and holders, you can create a designated spot for every tool, keeping your most-used items visible and within arm's reach.
The core benefit of a pegboard is its incredible adaptability. Unlike fixed shelving, a pegboard system evolves with your creative projects. Need more space for your growing thread collection? Simply add a few dowel pegs. Starting a new quilting project? Rearrange the hooks to accommodate your rotary cutters and rulers. This flexibility ensures your storage solution remains perfectly tailored to your current workflow, minimizing clutter and search time.
How to Implement a Pegboard System
Implementing a pegboard is a straightforward DIY project that delivers a high impact on organization.
- Proper Installation: Mount the pegboard using furring strips or spacers to create a gap (at least 1/2 inch) between the board and the wall. This clearance is essential for the hooks to fit securely into the holes.
- Strategic Grouping: Arrange your tools by function. Create zones for cutting tools (scissors, rotary cutters), measuring instruments (rulers, tape measures), and marking supplies (fabric pens, chalk). This logical grouping streamlines your process.
- Use Clear Containers: For small notions like bobbins, buttons, or pins, attach small, clear bins or jars to the pegboard. This keeps tiny items contained while maintaining visibility.
- Outline Your Tools: A popular trick seen in professional workshops is to trace the outline of each tool directly onto the pegboard with a marker. This makes it instantly clear where everything belongs, ensuring tools are always returned to their designated spot.
This system is perfect for sewists who feel overwhelmed by desktop clutter or have limited square footage. By going vertical, you create an efficient "mission control" for your sewing supplies. B-Sew Inn is committed to empowering crafters, and a well-organized space like this is the foundation for creativity. Many of our instructors leverage this very system to keep their creative spaces tidy, allowing them to focus on designing and teaching rather than searching for misplaced tools.
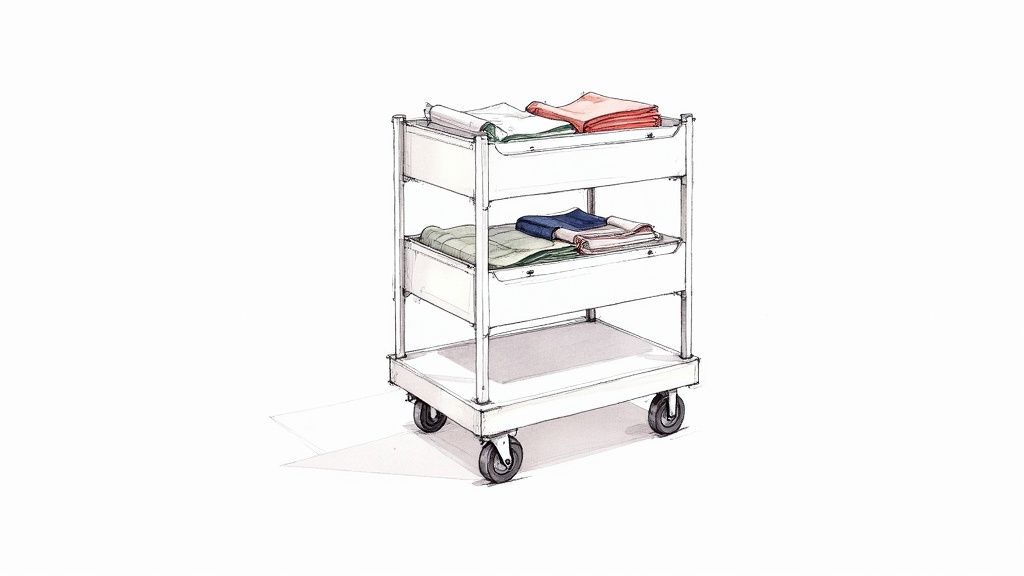
2. Rolling Cart Storage System: Mobile and Modular
A rolling cart storage system offers unmatched flexibility, making it one of the most dynamic sewing room organization ideas for creators who need their space to adapt. These mobile units on wheels act as portable stations, allowing you to bring specific tools and supplies directly to your workspace, whether you're at the sewing machine, cutting table, or ironing board. This eliminates the need to constantly get up and search for items, creating a more fluid and efficient workflow.
The primary advantage of a rolling cart is its modularity. You can designate different carts for specific tasks or projects, keeping everything you need contained and ready to go. A cart for quilting might hold rotary cutters, rulers, and fabric squares, while another could be a dedicated pressing station with an iron, starch, and related notions. This approach keeps your main surfaces clear and allows you to reconfigure your entire room layout in minutes, a feature especially valuable in multi-purpose or smaller creative spaces.
How to Implement a Rolling Cart System
Integrating rolling carts is simple and instantly boosts organization. This is a tangible example that crafters can replicate for immediate improvement.
- Assign a Purpose: Dedicate each cart to a specific function. Create a "current project" cart to hold all the fabric, thread, and patterns for what you’re actively working on. This keeps everything together and makes it easy to put away when you need a break.
- Utilize Dividers and Bins: Use drawer dividers, small bins, or magnetic containers attached to the sides to organize small items like bobbins, seam rippers, and marking tools within each tier. This prevents a jumbled mess and makes items easy to find.
- Prioritize Stability: Choose carts with locking wheels. This is crucial for safety and stability, ensuring the cart doesn't roll away while you're cutting fabric or using it as an extra work surface.
- Consider Height and Surface: Select a cart height that is comfortable to work from when you're sitting at your sewing table. Some carts have a solid top, providing an additional, mobile surface for small tasks.
This system is ideal for sewists whose projects and needs change frequently. At B-Sew Inn, many of our instructors utilize rolling carts in their studios to keep materials for different online classes separate and accessible. This demonstrates how our commitment to support and resources extends to practical solutions that enhance the creative environment.
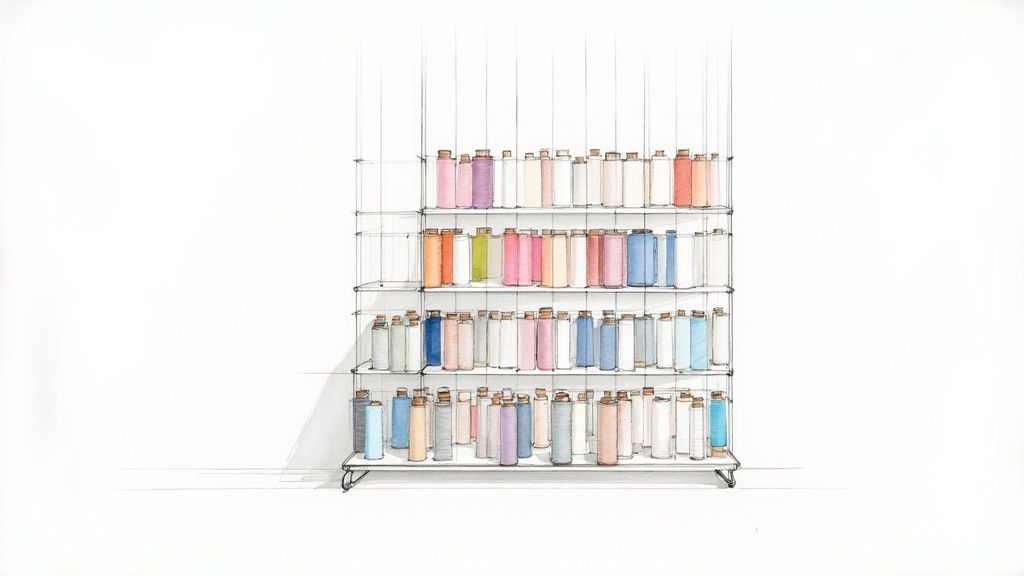
3. Thread Organization Systems: A Colorful and Tangle-Free Solution
A dedicated thread organization system is a non-negotiable component of the best sewing room organization ideas, transforming a potential jumble of spools into a functional and visually stunning display. These specialized solutions, ranging from wall-mounted racks to drawer inserts and standalone towers, are designed to keep your threads neatly arranged, tangle-free, and easily accessible. By giving every spool a specific home, you protect your thread from dust and tangles while making color selection a quick and inspiring part of your creative process.
The primary advantage of a proper thread storage system is its ability to preserve the quality of your thread while streamlining your workflow. Unlike a disorganized box where threads can unravel and weaken, specialized racks and containers keep each spool separate and secure. This approach allows you to focus on your project instead of untangling a knotted mess, embodying the efficiency we champion at B-Sew Inn.
How to Implement a Thread Organization System
Choosing and implementing the right system can dramatically improve your sewing efficiency. This is a key "how-to" step for any crafter.
- Organize by Color: Arrange your spools in a rainbow or gradient order. This not only creates an attractive visual but also makes it incredibly easy to find the exact shade you need for a project.
- Sort by Thread Type: If you work with various materials, create labeled sections for cotton, polyester, silk, and specialty threads. This prevents confusion and ensures you select the correct thread for your fabric.
- Protect from Damage: For threads displayed on open racks, consider a clear dust cover or placing the rack inside a cabinet. For expensive or delicate threads, use storage that offers UV protection to prevent colors from fading over time.
- Prioritize Accessibility: Position your most frequently used thread colors and types at eye level or in the most accessible drawers. Store less-used or seasonal colors on higher shelves or in back sections.
This type of organization is essential for any sewist who values efficiency and quality. At B-Sew Inn, we emphasize how a well-organized space, starting with foundational elements like thread, empowers creators to bring their custom designs to life with greater ease and precision, backed by our extensive resources and training.
4. Fabric Storage and Organization
An inspiring fabric collection can quickly become overwhelming without a proper system. Effective fabric storage is a cornerstone of sewing room organization ideas, designed to preserve textile quality, maximize space, and make your materials easily accessible. By implementing a clear system, you can transform a chaotic pile of fabric into a functional and visually appealing "library" that fuels your creativity.
The primary goal is to store fabric in a way that prevents wrinkles, fading, and damage while allowing you to see what you have at a glance. The key is finding a method that suits your space and the types of fabric you work with, turning your stash from a source of stress into a curated collection ready for your next project.
How to Implement Fabric Storage Systems
Choosing the right storage method depends on your collection's size and your room's layout. Here are some proven techniques you can replicate:
- Vertical "Filing" Method: A favorite among quilters, this technique involves wrapping fabric neatly around comic book boards or mini bolts. The uniformly sized bundles are then stored vertically on shelves or in bins, like books in a library. This makes it incredibly easy to flip through your collection and pull out exactly what you need.
- Categorize Your Collection: Group fabrics logically to streamline your search process. Common categories include color, fabric type (cotton, knits, silk), project (e.g., "quilting," "garments"), or even designer. This prevents you from having to unfold every piece to find the right one.
- Protect Delicate Textiles: For heirloom fabrics like silk or wool, store them flat in acid-free tissue paper inside drawers or archival boxes. To protect woolens from pests, add cedar blocks or lavender sachets to the storage area.
- Use Clear Bins for Scraps: Don't let scraps take over. Sort them by color into clear containers so you can quickly find the perfect small piece for appliqué or patchwork. For those who want a more structured solution, we offer patterns like the By Annie 'Contain Yourself' Fabric Bins that you can create yourself.
This approach is essential for any sewist with a growing fabric stash. This commitment to organized, accessible supplies is a principle we champion at B-Sew Inn, as our extensive resources and support are designed to empower creators to spend more time bringing their designs to life.
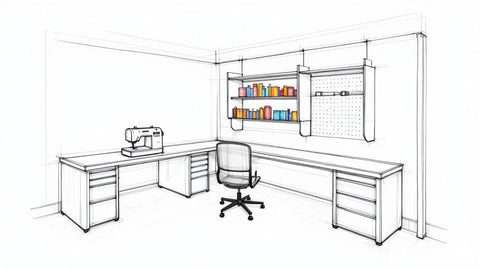
5. Multi-Functional Cutting Table: The Creative Hub
A multi-functional cutting table is the cornerstone of an efficient sewing room, serving as a dedicated, large-scale workspace for fabric preparation. More than just a flat surface, this essential piece of furniture combines ample cutting area with integrated storage, transforming it into a central hub for projects. Many models, or even cleverly adapted kitchen islands, offer built-in cubbies, drawers, and shelves to keep rulers, rotary cutters, and pattern weights organized and accessible.
The primary advantage of a dedicated cutting table is its ergonomic design and expansive surface area. It eliminates the need to work on the floor, saving your back and knees, while providing enough space to lay out large cuts of fabric without shifting or folding. This is a game-changer for quilters and garment makers, as it ensures greater accuracy from the very first cut. As one of the most impactful sewing room organization ideas, it centralizes the messiest part of the process, keeping fabric scraps and tools contained.
How to Implement a Multi-Functional Cutting Table
Setting up your cutting station for maximum efficiency involves more than just assembly. Here's a how-to guide:
- Ergonomic Height: Position the table so the surface is at your elbow height when you are standing. This minimizes back strain during long cutting sessions. Some tables offer customizable heights for perfect comfort.
- Full-Surface Mat: Invest in a large, self-healing cutting mat that covers the entire tabletop. This protects the surface and allows you to cut anywhere without repositioning a smaller mat.
- Zone Your Tools: Use the built-in storage to create zones. Dedicate specific drawers or shelves for cutting tools, another for marking instruments, and a third for pattern-making supplies.
- Add Proper Lighting: Clear visibility is paramount for precision. Explore the benefits of essential task lighting installed directly above your table to ensure accuracy and reduce eye strain.
- Consider Mobility: If your space is multi-purpose, add heavy-duty locking casters to your table. This allows you to easily move it out of the way when it's not in use.
This solution is ideal for any sewist who regularly works with large fabric pieces. At B-Sew Inn, we believe that an empowered crafter starts with an organized space. A functional cutting table, supported by our training and resources, is a key component of that foundation.
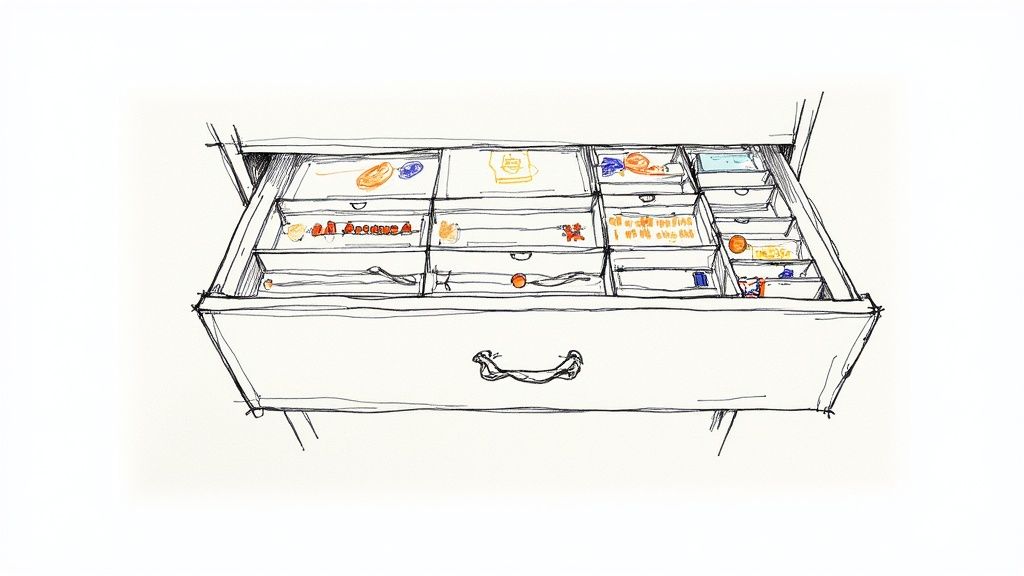
6. Drawer Divider Systems: Taming the Notion Chaos
Drawer divider systems are a game-changing sewing room organization idea for conquering the chaos of small notions and tools. These customizable inserts transform wide, messy drawers into perfectly portioned compartments for everything from buttons and bobbins to seam rippers and snaps. By creating a designated spot for each item, you eliminate the frustrating "junk drawer" effect and can find what you need in seconds.
The primary advantage of drawer dividers is their ability to create order out of chaos for tiny, easily lost items. Unlike open bins where supplies can get jumbled, dividers neatly segregate your inventory. This method is highly adaptable, with options ranging from simple plastic trays to adjustable bamboo dividers. This ensures you can create a layout perfectly suited to your specific collection of threads, zippers, and specialty presser feet, making your workflow smoother and more efficient.
How to Implement a Drawer Divider System
Organizing your sewing drawers with dividers is a simple yet powerful upgrade that brings immediate clarity to your space.
- Measure First: Before purchasing any system, measure the internal height, width, and depth of your drawers. This ensures a snug and effective fit without wasted space.
- Group by Category: Assign specific compartments or sections to like items. Keep all your machine needles in one area, elastic in another, and various fasteners like hooks and eyes together. This logical grouping is key to an intuitive system.
- Use Clear or Labeled Containers: Opt for clear trays or label each compartment. This allows for quick identification of contents without having to rummage through every section. To make the most of your drawer space and keep all your notions neatly arranged, explore these expert tips on organizing drawers for more clever ideas.
- Prioritize Accessibility: Place your most frequently used items, like your favorite thread colors or universal needles, in the most accessible front compartments. Less-used specialty items can be stored toward the back.
This is an easily replicable example for instant organization. At B-Sew Inn, our online classes and training often emphasize that an organized space is the first step to creative freedom. A well-structured drawer system empowers crafters by making tool management effortless, letting you focus on bringing your designs to life.
7. Vertical Wall Storage Solutions
For sewists with ambitious project goals and ever-expanding supply collections, vertical wall storage solutions offer a transformative approach to organization. These systems utilize floor-to-ceiling wall space, incorporating a mix of shelves, cabinets, and hanging components to create a highly efficient and large-scale storage hub. Unlike a single pegboard, these comprehensive systems can house everything from fabric bolts and project bins to books and sewing machines.
The primary advantage of these systems is their ability to maximize storage capacity within a minimal footprint, making them one of the best sewing room organization ideas for both small and large spaces. Modular systems can be adapted to fit any wall and any collection. This allows you to combine open shelving for frequently accessed items with closed cabinets to conceal less-used supplies, achieving a look that is both functional and visually appealing.
How to Implement Vertical Wall Storage
Installing a full-wall system requires planning but pays off with unparalleled organization.
- Secure Installation: These systems bear significant weight. Always use wall anchors and mounting hardware rated for your wall type (drywall, plaster, or masonry) and the total expected weight of your supplies.
- Create Zones: Arrange your storage logically. Dedicate lower, easily accessible shelves for daily-use items like current project bins and thread. Use higher shelves for long-term storage, such as fabric backstock or seasonal supplies, and keep a sturdy step stool handy.
- Balance Open and Closed Storage: Use open shelves to display inspirational items like colorful fabric stacks and pattern books. Use drawers or cabinets to hide away clutter, tools, and less visually pleasing necessities.
- Integrate Lighting: Enhance visibility and create a high-end feel by installing LED strip lighting under shelves. This illuminates your workspace and makes it easier to find exactly what you need without casting shadows.
This approach is ideal for dedicated crafters who need a robust system to manage a large inventory. For smaller, yet still effective, vertical solutions, consider options like an over-the-door frame organizer which capitalizes on often-overlooked storage space. B-Sew Inn's commitment to empowering crafters includes providing ideas and resources for creating such efficient spaces.
7-Item Sewing Room Organization Comparison
| Storage System | Implementation Complexity 🔄 | Resource Requirements ⚡ | Expected Outcomes 📊 | Ideal Use Cases 💡 | Key Advantages ⭐ |
|---|---|---|---|---|---|
| Pegboard Wall System | Moderate - Requires wall mounting and proper anchoring | Low - Inexpensive materials and accessories | Highly customizable storage, maximizes vertical space, easy tool access | Workshops or craft rooms needing visible, flexible tool storage | Customizable layout, space-saving, cost-effective |
| Rolling Cart Storage System | Low - Minimal setup, mostly plug-and-play | Low to Moderate - Cost varies by model and features | Mobile and flexible storage that adapts to changing workspace needs | Small or multi-area studios requiring portable storage | Mobility, multifunctionality, compact footprint |
| Thread Organization Systems | Moderate - May require wall space and careful setup | Moderate to High - Specialized racks can be costly | Tangle-free, color-coordinated thread storage with thread protection | Large thread collections needing display and preservation | Prevents tangling, quick color selection, extends thread life |
| Fabric Storage and Organization | High - Requires planning, folding, and dedicated space | Moderate to High - Shelving and preservation materials | Organized and preserved fabric collections with easy inventory | Extensive fabric libraries prioritizing preservation and visibility | Fabric quality preservation, space efficiency, inventory management |
| Multi-Functional Cutting Table | High - Needs significant floor space and possible customization | High - Investing in quality table and features | Dedicated cutting area with integrated storage, ergonomic benefits | Sewing rooms requiring large prep surface and integrated storage | Large workspace, ergonomic, centralized tool access |
| Drawer Divider Systems | Low to Moderate - Requires measurement and assembly | Low - Affordable modular units | Maximizes drawer space, keeps small items organized and accessible | Small notions and tool storage in existing drawers | Space-efficient, customizable, inexpensive |
| Vertical Wall Storage Solutions | High - Professional installation often recommended | Moderate to High - Custom shelving and wall anchors | Maximizes floor space, creates extensive, accessible storage | Small rooms needing maximum storage with visual appeal | Space maximization, adjustable shelving, mixed storage options |
Stitching It All Together: Your Path to a Perfect Sewing Space
Embarking on the journey to organize your creative sanctuary is about much more than just tidying up; it's a transformative act that directly enhances your craft. Throughout this "how-to" guide, we've explored tangible examples of sewing room organization ideas you can replicate, from the versatility of a pegboard wall to the efficiency of drawer dividers. Each concept serves a singular purpose: to remove friction from your creative process, allowing your passion for sewing to flow unimpeded.
By implementing these strategies, you are designing a personalized workflow. Imagine effortlessly gliding from a multi-functional cutting table to your sewing station, where every spool of thread is visible and within arm's reach. This is the tangible result of thoughtful organization. It’s the end of frantic searches for a missing bobbin or the frustration of working on a cluttered surface. Instead, you cultivate an environment where every tool has a home and every project begins with clarity and joy.
From Ideas to Implementation: Your Action Plan
The key to lasting success lies not in adopting every idea at once, but in selecting the systems that resonate with your specific needs. Remember, the ultimate goal is to create a system that is intuitive for you.
- Start Small: Choose one area that causes the most daily frustration. Is it your tangled thread collection? Begin with a dedicated thread rack. Conquering a single challenge builds momentum.
- Embrace Zoning: Think of your room in terms of activity zones: a cutting area, a pressing station, and a sewing hub. Use rolling carts and vertical storage to equip each zone with the necessary tools, minimizing unnecessary movement.
- Customize and Adapt: The solutions we've discussed, such as pegboards and drawer dividers, are fundamentally modular. Don't be afraid to adjust them over time as your collection of tools and materials grows.
Ultimately, mastering your space is an act of empowerment. At B-Sew Inn, we are committed to empowering crafters by providing custom sewing machine designs and the support needed to use them effectively. Our extensive resources, online classes, and training are designed to help you bring any design to life. We believe that by helping you build a functional and beautiful creative space, we are helping you unlock your fullest potential and create amazing projects with confidence.
Ready to elevate your creative environment with the best tools and support? Explore the innovative sewing machines, furniture, and educational resources at B-Sew Inn to build the sewing room you've always dreamed of. Visit B-Sew Inn to discover how we can help you stitch your vision into reality.