If you've ever wanted to literally draw with thread, then free motion quilting (FMQ) is about to become your new favorite technique. It’s a complete flip from traditional sewing, where the machine is in charge of moving the fabric. With FMQ, you are in complete creative control, guiding the fabric freely under the needle to create curves, swirls, and any intricate pattern you can dream up.
Unlocking Your Creative Freedom with Free Motion Quilting
Here's the best way to think about it: imagine your sewing machine's needle is a stationary pen, and your quilt is the piece of paper. In free motion quilting, you're the one moving the paper around, not the pen. This simple shift opens up a world of possibilities, turning the functional task of stitching quilt layers together into a true art form.
At bsewinn.com, we're dedicated to empowering crafters to bring their visions to life. We pour our experience into custom sewing machine designs, comprehensive training, and extensive resources—all designed to help you master skills like FMQ. It's the perfect way to add a deeply personal, one-of-a-kind signature to every project you create.
The Rise of an Artistic Technique
Free motion quilting really took off during the big quilting revival in the late 20th century. Quilters were looking for more expressive ways to finish their quilts, and FMQ was the answer. By the early 2000s, it was clear this wasn't just a trend—surveys showed that a whopping 70-80% of machine quilters were using it in some form, drawn to its artistic flexibility. It simply allows for so much more creativity than just stitching in straight lines. Learn more about the history of quilting techniques from Britannica.com.
Now, FMQ is a very hands-on process, which is a huge part of its charm. But it's different from other methods out there. If you find yourself working on massive quilts or you'd rather have a machine-guided process, you might want to check out our guide that explores what is longarm quilting and how it compares. For that hands-on, creative touch you can achieve with your home machine, though, free motion quilting is in a class of its own.
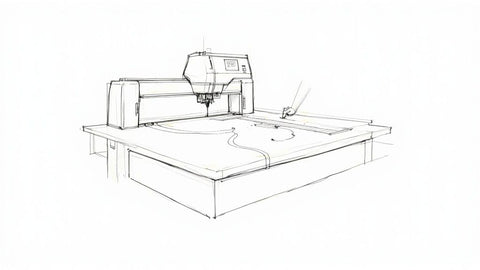
Preparing Your Machine and Workspace
A great free motion quilting session always starts with a little prep. It's tempting to jump right in, but taking a few minutes to get your machine and workspace ready can save you a world of headaches. Think of it as setting the stage—it lets you focus on your creativity, not on fighting with your equipment.
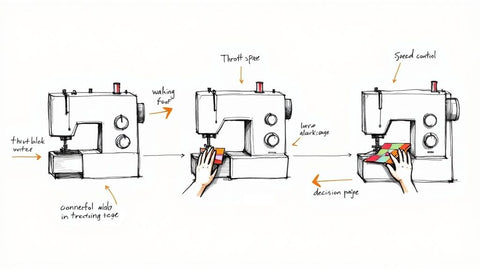
The very first thing you'll do is tell your machine that you're in charge now. To do that, you need to lower the feed dogs. These are the tiny teeth under your needle that normally grip the fabric and pull it through. Dropping them is the magic step that lets you move your quilt in any direction you want.
Next, you’ll want to swap out your regular presser foot for a special darning foot (sometimes called a quilting foot). This little guy is designed to hover just over the fabric. It holds the material down just long enough to form a stitch but gives you the freedom to glide the quilt around smoothly. Trust me, skipping this step will lead to a bunched-up, puckered mess.
Essential Machine and Space Adjustments
With the big mechanical changes out of the way, a few final tweaks will really set you up for a smooth ride. Creating a supportive, comfortable space isn't just about feeling good; it dramatically improves your stitch quality and lets you quilt for longer without getting sore.
Here are a few things I never skip:
- Install a New Needle: Always start a quilting project with a fresh needle. A size 90/14 or 80/12 quilting needle is a fantastic choice, designed to pierce through all those layers without a fight.
- Select Quality Thread: Don't skimp here. A good quality 40wt or 50wt thread will save you from constant, frustrating breaks and lint buildup. It lets you stay in the creative zone.
- Create a Large, Flat Surface: If you have an extension table, now is the time to use it. It is an absolute game-changer. It supports the weight of your quilt so it doesn't drag, making your movements feel almost effortless.
- Improve Your Grip: It might sound simple, but a pair of quilting gloves with those little rubberized fingertips gives you a surprising amount of control. You'll be able to guide the quilt with light, precise movements instead of a death grip.
These small adjustments make a massive difference. They can transform a tricky process into something genuinely fun and creative. And while we're talking about machine setup, it’s worth noting that for quilts with straight or gently curved lines, knowing how to use a walking foot is another incredibly useful skill to have in your back pocket.
Your Essential Free Motion Quilting Toolkit
Having the right gear for the job can make all the difference, and that's especially true with free motion quilting. The right tools can take the experience from a frustrating struggle to a joyful, creative flow. While your sewing machine does the heavy lifting, a few key accessories are what really let you unlock its full potential.
Think of it this way: you could technically paint a masterpiece with a single brush, but grabbing a few different sizes makes expressing your vision so much easier. The same idea applies here. Certain tools aren't just little helpers; they're what allow you to guide the quilt with ease and let the machine create beautiful, even stitches.
The single most important piece of your kit is a free motion quilting foot, sometimes called a darning foot. This one is absolutely non-negotiable. It's cleverly designed to hover just over the fabric, applying enough pressure to form a perfect stitch without clamping down on your quilt sandwich. This lets you move your project in any direction—left, right, backward, or in graceful curves—without the fabric bunching up.
Must-Haves vs. Nice-To-Haves
To get you started without feeling like you need to buy out the entire store, let's break down your toolkit into two piles: the absolute essentials and the highly recommended upgrades. The essentials are what you need to even begin, while the "nice-to-haves" are the things that will seriously improve your control and comfort, making the whole process more enjoyable.
Here’s a quick look at the core tools and some of the most popular accessories that experienced quilters swear by.
Free Motion Quilting Toolkit: Essential vs. Recommended
| Tool | Category | Primary Function |
|---|---|---|
| Free Motion Quilting Foot | Essential | Allows the fabric to move freely in any direction while the needle is stitching. |
| Quilting Needles (90/14) | Essential | Strong and sharp enough to get through all three layers of your quilt sandwich without breaking or skipping stitches. |
| Supreme Slider | Recommended | A slick, reusable sheet that makes your quilt glide like it's on ice, dramatically reducing drag. |
| Quilting Gloves | Recommended | Gives you a much better grip for guiding the fabric with a light, confident touch, reducing hand and shoulder fatigue. |
| Extension Table | Recommended | Creates a large, flat surface that supports the weight of your quilt so it doesn't pull against your needle. |
Getting the essentials handled first is key, but as you can see, the recommended items really focus on making the physical act of quilting smoother and more ergonomic.
This chart really drives home how valuable these tools are to the quilting community. It’s no surprise that everyone uses a specialty foot!
While the free motion quilting foot is a 100% must-have, you can see that a huge number of quilters also rely on tools that improve fabric movement and grip. A Supreme Slider is used by 75% of quilters, and 60% use quilting gloves—that tells you they make a real, noticeable difference in the final product and the quilter's comfort.
Mastering Fundamental Quilting Stitches
Okay, this is where the real fun begins. Once your machine is all set up, it's time to start stitching. But here's a little secret: your first goal isn't making a perfect design. It’s all about finding your rhythm.
The magic of beautiful free motion quilting stitches happens when you find that sweet spot, that perfect partnership between how fast your hands are moving and how fast your machine is sewing.
Think of it like learning to dance. If your feet move too quickly or slowly for the music, the steps just feel clumsy. It’s the same with quilting. If your hands move the quilt sandwich too fast for the machine's speed, you'll end up with long, stretched-out stitches. But if your hands are too slow, the stitches will bunch up into tiny, dense knots. You're looking for that smooth, easy flow where your hand speed and the pedal work together to create gorgeous, even stitches.
Your First Stitches: Building That Muscle Memory
Before you even think about putting your prized quilt top under the needle, get to know your new best friend: the practice "quilt sandwich." Seriously, just grab a couple of fabric scraps, stick a small piece of batting in between, and use it to warm up. This is your no-pressure zone to build confidence and muscle memory without a single worry about making a mistake.
Start by just doodling with the fabric under the needle. Move it around, try different speeds. Remember, the goal right now is consistency, not perfection.
The most important skill you can develop in free motion quilting is a steady, consistent rhythm. Once you stop overthinking the machine and just get lost in the flow of the design, you’ve unlocked the secret.
Foundational Designs to Start Practicing Now
Ready to try a few classic designs? These three patterns are tangible examples you can replicate and are the building blocks for so many other amazing quilting motifs. Doodle them on your practice sandwich until the movements start to feel second nature.
-
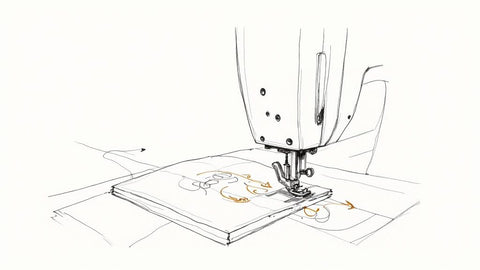
Stippling (or Meandering): This is the quintessential free motion stitch that everyone starts with. Just imagine drawing one long, curvy, continuous line that wanders all over the fabric but never, ever crosses itself. It's super forgiving and a fantastic way to fill background space while getting the hang of moving the quilt.
-
Simple Loops: Stitching a series of continuous loops is a wonderful way to practice making smooth, rounded motions. You can make them big or small, skinny or loopy. The real key here is to keep the movement fluid as you create one loop after another. It’s absolutely brilliant for building control.
-
Basic Swirls: Swirls look so elegant but are surprisingly simple to get the hang of. Just start in the center and spiral your way out, then slide over and start a new one. Don't stress about making them all look identical—those little variations are what give a handmade quilt its unique charm!
At bsewinn.com, we truly believe that practice is what empowers you. Our online classes and extensive resources are here to guide you through these first steps, giving you the support you need to turn these basic shapes into stunning quilt designs you'll be proud of.
Troubleshooting Common Quilting Challenges
Let's be real—even the most experienced quilters hit a snag now and then. The good news? Most free motion quilting hiccups are surprisingly common and have simple fixes. Figuring out what's going wrong is the first step to getting back into your creative groove.
One of the biggest frustrations is getting inconsistent stitches. You might flip your quilt over and see ugly little loops on the back, a classic sign of "eyelashes." This usually means your top thread tension is too loose. On the flip side, if you see the bobbin thread peeking through on top, your tension is probably too tight.
Then there's the dreaded thread break, which can totally throw off your rhythm. More often than not, this is caused by cranking the top tension up too high, which puts way too much stress on the thread. It can also happen if your hands are moving faster than your machine can keep up.
Your Quick Troubleshooting Checklist
Fabric puckering is another hurdle that can really test your patience. This is typically a sign that your quilt sandwich isn't basted securely enough. It can also happen if you're pushing and pulling the fabric aggressively instead of gliding it smoothly under the needle. When you hit one of these roadblocks, take a deep breath—don't get discouraged! Just work the problem.
Here’s a little checklist to run through when things go sideways:
- Check Your Tension: Seeing "eyelashes" on the top or bottom? Tweak your top tension dial just a little bit at a time.
- Assess Your Speed: Are your hands and the machine in sync? Try to find a steady, comfortable rhythm where they work together.
- Inspect Your Needle: Is it old, bent, or maybe the wrong type? A fresh 90/14 quilting needle can solve a surprising number of issues.
These challenges are just part of the journey. Every problem you solve is a skill you've just earned, making you a more confident and capable quilter. Remember, it's all about progress, not perfection.
At bsewinn.com, we're here to help you through every single stitch. Our extensive resources, online training, and supportive community are packed with even more solutions to keep you quilting happily. Trust me, overcoming these little obstacles is incredibly rewarding.
Your Top Free Motion Quilting Questions, Answered
Jumping into free motion quilting always brings up a few questions. It’s totally normal! Having some quick, clear answers can give you the boost of confidence you need to really get started. Let’s walk through some of the things beginners ask the most.
So many people wonder if they need a fancy, expensive sewing machine to get started. The answer is a big, happy no. Honestly, your standard home sewing machine is probably all you need. The real question is whether you can lower (or cover) its feed dogs and pop on a darning or quilting foot.
Another thing that trips people up is the stitch length. Since you’re the one moving the fabric around, there's no stitch length setting you need to worry about. Your "stitch length" really comes from the rhythm you create between the speed of the machine and the speed of your hands. Finding that sweet spot where they work together is the goal.
Do I Really Have To Drop My Feed Dogs?
Yes, this is non-negotiable! It’s the key that unlocks the whole technique. The feed dogs are designed to pull your fabric in one straight line, but for free motion, you need to be in the driver's seat. Dropping them is what gives you that freedom to move in any direction you want.
This simple mechanical feature is what helped quilting artists create beautifully intricate designs so much faster than by hand, really popularizing the method in the late 19th and early 20th centuries. You can learn more about quilt-making history on Wikipedia.
The whole point of free motion quilting is taking total control of the fabric. Disengaging the feed dogs is the single most important step to make that creative freedom happen.
What’s The Best Fabric For Practice?
Save your good fabric for later! For practice, simple, cheap cotton solids are your best friend. Why? Because you can actually see your stitches. This makes it a thousand times easier to check your tension and see how consistent you're being, without a busy pattern getting in the way.
Just make some little "quilt sandwiches"—two squares of scrap cotton with a piece of batting tucked inside. This feels just like a real quilt and is the perfect way to warm up, get comfortable, and start building that all-important muscle memory.
At bsewinn.com, we love empowering your creativity, from the very first question to the final stitch. Feel free to explore our resources, check out our custom sewing machine designs, or join our online classes to master free motion quilting with a community that cheers you on. Visit bsewinn.com to get started.