There's nothing quite like the thrill of a new sewing machine arriving at your door, especially when it’s the Baby Lock Brilliant Sewing Machine with Arrow Alice Cabinet. This isn't just about getting a new machine; it's about building a whole new creative space designed to bring your sewing visions to life. At bsewinn.com, we believe that the right setup empowers you to create projects you've only dreamed of. This guide will walk you through setting up your new creative station and then dive into a tangible project you can replicate right away.
From Box to Creative Station: Your First Steps
I know the temptation is to rip everything open and start building immediately, but trust me on this: a few minutes of organization now will save you a ton of headaches later. Think of it as setting the stage for success and your first custom sewing machine design.
This isn't just a dry checklist. I want to walk you through the process with some real-world tips that will help you get set up with confidence and avoid misplacing any of those tiny, crucial parts.
A Smooth Assembly Starts with Good Prep
First things first, clear out a good amount of floor space. You'll need more room than you think! Unpack all the flat-packed pieces of the Arrow Alice Cabinet and lay them out. My go-to trick is to grab a few small bowls or a muffin tin for all the screws, dowels, and hardware. Grouping them by type makes it so much easier to find what you need when the instructions call for it.
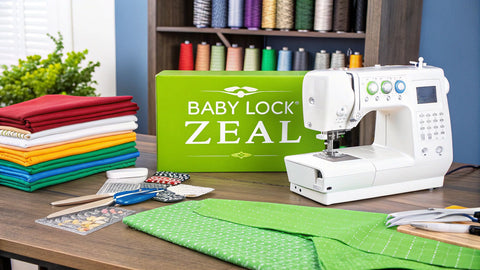
Next, it's time for the star of the show: the Baby Lock Brilliant. As you unbox it, take a moment to get acquainted with all the goodies that come with it. Lay out the presser feet, bobbins, and other accessories. One of the best things about this machine is how much value is packed right into the box.
The Baby Lock Brilliant is a powerhouse, loaded with 190 built-in stitches, a super clear LCD screen, and a quick-set bobbin system that's a dream to use. What really sets it apart is that it comes with 14 different presser feet, including a walking foot and a free-motion foot. Those are specialty feet that you often have to buy separately, so having them included is a massive bonus for creating diverse sewing designs from day one.
Taking the time to sort and inventory everything does more than just prevent lost pieces. It helps you familiarize yourself with your new setup, turning assembly from a chore into the very first step of your creative process.
For a full rundown, check out our complete overview of the Baby Lock Brilliant Sewing Machine with Arrow Alice Cabinet. Here at bsewinn.com, our goal is to empower crafters by providing all the resources you need to truly master your tools, from setup guides to online classes and extensive training. Your next sewing adventure starts right here, on a perfectly organized foundation.
Putting Together Your Arrow Alice Cabinet
The idea of building sewing furniture can feel a little intimidating, but I was genuinely surprised at how smoothly the Arrow Alice Cabinet comes together. Instead of just walking you through the manual page-by-page, I want to share a few tips I picked up along the way that will make turning those diagrams into a finished sewing station a whole lot easier.
First things first: build the main cabinet body on a soft surface. I laid out an old blanket on my floor, which was perfect for preventing any scratches on that nice laminate finish. As you start attaching the side panels to the base with the cam locks, here’s a pro tip: only tighten them about 80% of the way. This leaves just enough wiggle room to get every single piece perfectly aligned before you give them that final, firm twist. Trust me, it makes a huge difference.
Hanging the Doors and Installing the Hydraulic Lift
Getting cabinet doors to hang perfectly straight is an art form. It really helps if you have a basic understanding different cabinet door hinge types before you start. Knowing what you're working with makes those tiny adjustments for a perfect, gap-free fit so much less frustrating.
Now for the really cool part: the hydraulic airlift that brings your Baby Lock Brilliant up and down. This is the game-changer. The most important thing to remember is to attach the lift mechanism to the inside of the cabinet before you put the machine platform on top. I’ve heard of people trying to do it the other way around, and it makes reaching the screw holes a nightmare.
This little guide is a great reminder of what to consider before you even cut the tape on the box.
As you can see, checking your machine's dimensions and weight ahead of time is key to making sure everything fits and functions just as it should.
Once your cabinet is built, it’s so much more than just a piece of furniture—it’s your own creative headquarters. Here at bsewinn.com, we know that a great setup is where amazing projects begin. We're here to get you started with the best tools and the support to go with them, like our extensive resources and online classes to help you master every feature of your new Baby Lock Brilliant Sewing Machine with Arrow Alice Cabinet. By following these little assembly tips, you can skip the common headaches and build a sturdy, reliable home for your craft.
Creating Your Integrated Sewing Workspace
Alright, your Arrow Alice cabinet is built, and now the real fun starts. This is the moment we turn these two beautiful pieces—the machine and the cabinet—into a single, powerhouse sewing station. We're not just putting a machine in a table; we're creating a personalized creative hub, the perfect launchpad for any sewing machine design you can imagine.
The whole point of a cabinet like this is to get your Baby Lock Brilliant sitting perfectly flush with the surface. It creates a massive, flat sewing area where your fabric can just glide from the table right up to the needle. If you've ever wrestled with a big quilt or a long dress hem, you know this is an absolute game-changer.
Achieving a Perfectly Flush Sewing Surface
First things first, let's get the machine settled. Gently place your Baby Lock Brilliant onto the cabinet's airlift platform. With the machine sitting securely, give the platform a firm push down until it clicks into its second position. There are three positions in total, and this middle one is what gives you that perfect flatbed sewing height.
Now for the fine-tuning. Look for a small adjustment screw on the lift mechanism. A tiny turn here or there is all it takes to get the machine's sewing bed perfectly level with the cabinet top. Don't skip this step! That small adjustment is the secret to sewing with incredible comfort and precision.
A well-integrated workspace isn't just about looks; it's about pure function. When your machine is flush with the cabinet, you eliminate the fabric drag and pulling that can distort stitches, especially on delicate or heavy materials. It’s a simple step that yields professional results, essential for high-quality custom sewing designs.
Managing Cables for a Tidy Workspace
With the machine perfectly positioned, it's time to deal with the cables. Nothing ruins the flow like a tangled mess of power and foot control cords snagging your fabric or just looking cluttered. The Arrow Alice cabinet was designed with this exact problem in mind, giving you a few ways to keep things tidy.
Go ahead and thread the power cord and the foot pedal cable through the openings at the back of the cabinet. Here’s a little tip from my own setup: I use a few simple cord clips stuck to the inside wall of the cabinet. They keep everything secure and completely out of sight.
The Arrow Alice is packed with thoughtful features designed to make your sewing time smoother and more organized.
Arrow Alice Cabinet Key Features and Benefits
Here’s a quick look at why this cabinet works so well with a machine like the Baby Lock Brilliant.
| Feature | Benefit for Your Sewing Workflow |
|---|---|
| 3-Position Airlift | Easily move your machine from flatbed to free-arm to storage with a gentle push. No heavy lifting required! |
| Flush-Mount Surface | Creates a large, smooth area that prevents fabric from snagging or pulling, which is essential for quilting and large projects. |
| 2 Fold-Out Leaves | Expands your workspace in seconds, giving you ample room to support quilts or cut large pattern pieces. |
| 4 Storage Drawers | Keeps your thread, notions, and accessories organized and within arm's reach, so you spend less time searching and more time sewing. |
| Locking Caster Wheels | Allows you to easily move your sewing station for cleaning or rearranging, then lock it in place for total stability while you sew. |
This final integration is more than just setup; it's about crafting an environment that supports your creativity from start to finish.
Thinking about how your whole space works together is key. To really get the most out of your new setup, it helps to apply the principles of choosing the right work bench with integrated storage to ensure there's a place for every tool and notion. At bsewinn.com, we’re here to help you build not just amazing projects, but your ideal creative space.
Powering Up for Your First Perfect Stitch
With your sewing station all set up, it's time for the fun part: bringing your Baby Lock Brilliant to life. This is that exciting final check before you lay down your first perfect stitch. I like to think of this as the machine's "warm-up." Getting these steps down now builds the muscle memory that makes all your future sewing feel effortless.
We'll kick things off with threading. This can feel a little intimidating on some machines, but the Brilliant makes it incredibly straightforward. It has numbered, on-machine guides that literally show you the thread path from the spool pin, down through the tension discs, and right back up through the take-up lever. No guesswork needed.
And the best part? The advanced needle threader. Once your needle is in its highest position, you just press a lever, and click—the needle is threaded. This feature alone is a lifesaver, saving you from squinting and frustration, especially when you're swapping thread colors often.
Mastering the Drop-In Bobbin
Let's talk about the unsung hero of a beautiful stitch: the bobbin. I can’t tell you how many times I've seen messy, loopy stitches on the underside of a project, and nine times out of ten, an improperly wound or installed bobbin is the culprit. Thankfully, winding a bobbin on the Brilliant is a cinch; just follow the simple guides on top of the machine and let it do the work for you.
When it's wound, the quick-set drop-in bobbin system makes getting it in place a total breeze.
- Slide off the cover: The clear bobbin cover plate right next to the needle plate just slides off.
- Drop it in: Pop the wound bobbin into its case so the thread is coming off in a counter-clockwise direction.
- Guide the thread: Pull the thread tail through the little slit in the bobbin case.
- Snip it: A built-in cutter trims the thread to the perfect length. That's it! You don’t have to fish for the bobbin thread yourself; the machine handles that automatically when you start to sew.
Over at bsewinn.com, we hear from sewists all the time that truly mastering the bobbin was their big "aha!" moment. It's one of those small details that makes a massive impact on your results, which is why we're committed to empowering crafters by focusing on these foundational skills in our online training and extensive resources.
Navigating the Intuitive LCD Screen
Alright, let's turn our attention to the command center—the LCD screen. This is where you tell your Baby Lock Brilliant exactly what you want it to do. Using the simple navigation buttons, you can scroll through the machine's 190 built-in stitches.
When you pick a stitch, the screen gives you all the essential info at a glance: which presser foot to use, and the default stitch length and width. You can tweak these settings with the "+" and "-" buttons to get them just right for your specific fabric and project. You can even save your own custom stitch combinations for projects you return to again and again.
And just like that—machine threaded, bobbin set, and stitch selected—you're officially ready to start creating.
Your First Project: A Reversible Quilted Placemat
Alright, you've done the hard work. The machine is humming, the cabinet is perfectly organized, and your sewing space is officially ready for action. This is the moment where all that setup pays off and you can dive into a tangible project you can replicate.
So, what's next? Let's dive into a project that really lets you see what your new Baby Lock Brilliant and Arrow Alice cabinet can do. A custom quilted placemat is a fantastic first project. It’s small enough not to be overwhelming, but it gives you a chance to play with some of the machine's best features—like straight-line quilting with the walking foot and adding flair with its gorgeous decorative stitches.
How-To: Create Your Placemat Design
This is where you'll really appreciate the Arrow Alice cabinet. When you're in the middle of a creative flow, the last thing you want is to hunt for a stray rotary cutter or that specific spool of thread. Having everything neatly stored and within arm's reach means you can stay focused on your design, not on the mess. It’s a game-changer, turning a potentially frustrating process into pure creative expression.
Step-by-Step Guide:
- Cut Your Fabric: For one placemat, cut two pieces of coordinating cotton fabric (one for the front, one for the back) and one piece of cotton batting, each measuring 14" x 19".
- Make a "Quilt Sandwich": Lay your backing fabric right side down, place the batting on top, and then lay your front fabric right side up. Smooth everything out and pin the layers together.
- Quilt the Layers: Attach the included walking foot to your Baby Lock Brilliant. This foot is essential for evenly feeding multiple layers. Quilt straight lines across the placemat, spacing them about 1" apart. The large, flush surface of the Arrow Alice cabinet will prevent any pulling or dragging.
- Add a Decorative Border: Switch to a standard presser foot and select one of the Brilliant's beautiful decorative stitches from the LCD screen. Sew a decorative border about ½" from the edge around the entire placemat.
- Finish the Edges: Trim the placemat to be perfectly square and finish with your favorite binding method.
This simple, replicable project showcases the power of having an integrated system. You've just created a high-quality, custom sewing machine design!
Here at bsewinn.com, we live for this stuff. Getting you the right machine is just step one. Our real mission is to empower crafters like you to feel confident using it. That’s why we pour so much energy into our extensive resources like online training and classes—we want you to master every single technique you've been dreaming of, from your first placemat to your most ambitious quilt.
We're here to help you bridge that little gap between getting everything unboxed and actually making something beautiful. To get more familiar with your machine's features, check out our deep dive into the Baby Lock Brilliant Sewing Machine.
Working Through Those First Few Questions
Even when setup goes off without a hitch, it's totally normal to have a few questions as you get the feel for your new Baby Lock Brilliant and Arrow Alice Cabinet. Let's walk through some of the common things that come up so you can sew with confidence from the get-go.
A lot of new owners ask how to get that perfectly flat, uninterrupted sewing surface. The magic here is the cabinet's hydraulic lift. Once your machine is sitting on the lift platform, just give it a firm push down until you feel it lock into that middle position. From there, you can use the small adjustment screw on the lift itself to do any fine-tuning until it's perfectly flush with the cabinet top.
Why Are My Stitches Looking Loopy?
If you're seeing messy, loopy stitches on the bottom of your fabric, don't panic! This is one of the most common hiccups for any sewist, and the fix is usually pretty simple. Nine times out of ten, it’s an issue with your upper thread tension.
Your first move should always be to re-thread the entire machine from the start. Make sure the presser foot is up when you do this—that's the key step that opens up the tension discs so the thread can seat itself properly.
A sharp needle that's the right size for your fabric is a game-changer. I can't stress this enough! A dull or incorrect needle is the culprit behind all sorts of stitch problems, from loops to skipped stitches. It's a tiny detail that makes a huge difference in your finished projects.
And if you want to make sure your sewing kit is fully stocked, you can grab a full list of our favorite top sewing tools for beginners to set yourself up for success.
Here at B-Sew Inn, our goal is to empower your creativity with the best tools and support out there. We're committed to helping you succeed through our custom sewing machine designs, comprehensive training, online classes, and extensive resources. Discover the Baby Lock Brilliant and Arrow Alice Cabinet today!