

So, what makes a quilting machine the one for a beginner? It’s simple, really. You’re looking for a tough, easy-to-use machine with the right core features—a strong frame, enough room to handle your fabric, and stitch controls that don't require a user manual for every adjustment. The goal is to find that sweet spot between price and features that will let you grow, so you aren’t itching for an upgrade after your first quilt.
Finding the Right Machine to Start Your Quilting Journey
Diving into quilting is an incredible creative leap, and your sewing machine is your most important partner on that journey. You want a machine that feels like an extension of your hands, not some complicated piece of equipment you're constantly fighting. Forget getting bogged down in confusing tech specs for now. Let's focus on what truly matters when you're just starting out.
Think of it this way: you're not just buying a tool; you're investing in your own creativity. Here at bsewinn.com, we are committed to empowering crafters like you. We do more than just help you find a machine. Our custom sewing machine designs come with a whole support system—from online classes and in-depth training to an extensive library of resources—so you can feel confident from your very first stitch.
Why Is Everyone Suddenly a Quilter?
It’s not just you—the quilting community is booming, with new people picking up the craft every single day. This huge wave of interest has thankfully pushed manufacturers to design better, more intuitive machines for beginners. The quilting industry is now pulling in around $4.5 billion globally!
Even more telling, recent numbers show that 18% of all quilters are brand new to it. That's a huge jump from just 11% the year before. This fresh energy is why we’re seeing so many more machines that are both powerful and user-friendly.
Let’s be real: your first machine doesn't need hundreds of fancy stitches or a flashy digital screen. It just needs to nail the basics. A solid straight stitch, even tension, and the muscle to punch through a few layers of fabric without whimpering—that's the trifecta.
Building a Foundation for Success
Choosing the right first machine really does set the tone for your whole quilting adventure. It’s all about finding a reliable workhorse that can handle simple patchwork now and grow with you when you’re ready to tackle bigger, more ambitious quilts. The features we’re about to get into are the ones that will make the process smoother and way more fun.
If you want to get a head start, our guide on quilting for beginners in a step-by-step format is the perfect companion piece to this one. Now, let’s dig into the specific features that turn a regular sewing machine into a quilter’s best friend.
Understanding the Must-Have Features for Quilting
Not every sewing machine can handle quilting. When you start shopping, it can feel like you're trying to learn a new language, with terms like "throat space" and "feed systems" getting tossed around. Don't worry—I'm here to be your translator, turning all that technical jargon into what it actually means for your quilting projects.
Think of it like buying a car. You wouldn't buy a tiny smart car to go off-roading, right? The same logic applies here. A beginner sewing machine for quilting needs a specific set of skills to muscle through thick layers of fabric and batting. Getting a handle on these key features is the secret to choosing a machine you'll love.
The Foundation: A Sturdy Metal Frame
Before we get into the bells and whistles, let's talk about the skeleton of the machine. A solid, heavy-duty metal frame is absolutely non-negotiable. Why? Quilting involves a lot of fabric wrangling, and that weight can make a flimsy, plastic machine vibrate, shake, and—worst of all—skip stitches.
A good metal frame gives you a smooth, vibration-free ride, which is critical for keeping your stitches even and consistent. This stability is the bedrock of good quilting, whether you're piecing tiny blocks or stitching the final quilt sandwich.
Throat Space: Your Quilting Workspace
One of the most important (and easiest to overlook) features for a quilter is the throat space. This is simply the open area to the right of your needle. It's your workspace, and it determines how much quilt you can comfortably manage. Trying to stuff a big quilt through a small opening is like trying to paint a giant mural in a tiny closet—frustrating and creatively stifling.
A small throat of 5-6 inches is fine for piecing, but you'll hit a wall fast when you try to quilt a lap or bed-sized project. You’ll spend more time wrestling the fabric than sewing. For a beginner, a machine with at least 8 inches of throat space makes the whole process more enjoyable and helps prevent puckers and pulled stitches.
This quick visual guide shows the three non-negotiables I recommend for any beginner's quilting machine.
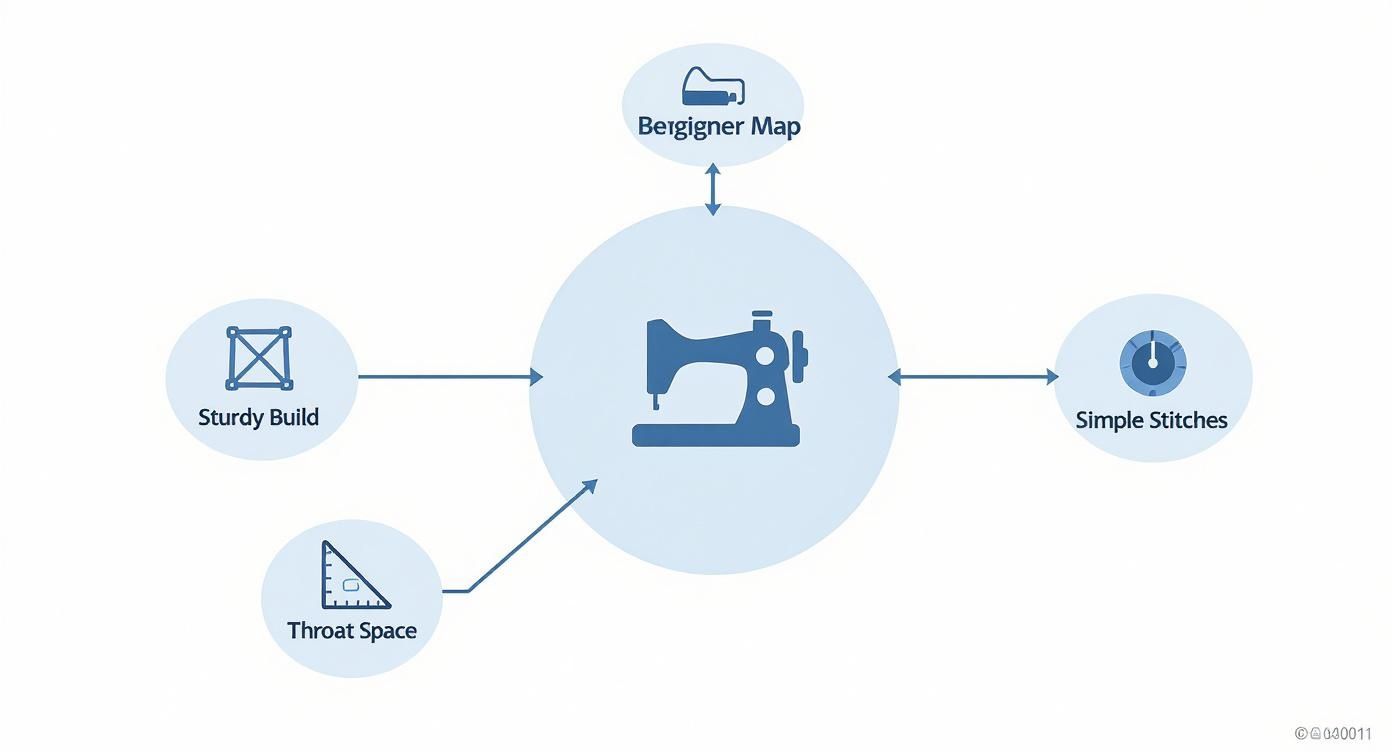
As you can see, a solid build, enough elbow room, and easy-to-use controls are the trifecta for a great starter machine. They let you focus on learning the craft, not fighting your equipment.
Quilting Feature Cheat Sheet for Beginners
Feeling a bit overwhelmed by the terminology? I get it. This little cheat sheet breaks down the most common features you'll encounter and explains why they matter for quilting, plain and simple.
| Feature | What It Is | Why a Beginner Quilter Needs It |
|---|---|---|
| Throat Space | The open area to the right of the needle. | More room means you can quilt larger projects without wrestling the fabric. |
| Walking Foot | A presser foot with built-in feed dogs. | It pulls the top layer of your quilt at the same speed as the bottom, stopping puckers. |
| Dual Feed | A built-in system that feeds the top fabric. | A more integrated version of a walking foot. Does the same job, no attachment needed. |
| Needle Up/Down | A button that stops the needle in the fabric. | Perfect for pivoting at corners without losing your spot. An absolute game-changer. |
| Speed Control | A slider that sets a maximum sewing speed. | Lets you slow things down for tricky curves or free-motion work, giving you more control. |
| Metal Frame | The internal structure of the machine. | Provides stability, reduces vibration, and prevents skipped stitches on thick quilts. |
Think of this table as your pocket guide when you're comparing models. It helps you look past the marketing and focus on the features that will genuinely make your quilting life easier.
Fabric Control: The Walking Foot and Dual Feed
A "quilt sandwich"—your pretty top, fluffy batting, and sturdy backing—is a thick and often slippery beast. A standard presser foot only pulls the bottom layer of fabric through the machine. This almost always leads to the top layer shifting, bunching up, or creating ugly puckers.
This is where a walking foot or dual feed system becomes your absolute best friend.
- Walking Foot: This is an accessory foot that has its own little set of "teeth" (feed dogs) on top. It works in sync with the machine's bottom feed dogs to grip and pull all three layers of your quilt through at the exact same rate. Think of it as all-wheel drive for your fabric.
- Dual Feed System: This is a feature built right into some machines. You just flip a little lever, and a top-feeding mechanism engages to do the same job as a walking foot. It's a bit sleeker since you don't have to attach a bulky foot.
Honestly, a machine that either comes with a walking foot or has a dual feed system is a must. This one feature is probably the single most important tool for achieving those beautiful, pucker-free quilting lines you see on finished quilts.
Precision and Control: The Little Things That Matter Most
Beyond the big-ticket items, a few smaller functions can make a massive difference in your day-to-day quilting, especially when you're just starting out.
A machine’s ability to stop with the needle in the down position is a game-changer for quilting. It acts like a pivot point, allowing you to lift the presser foot and rotate your entire quilt to change direction without ever losing your place or creating a crooked corner.
Another lifesaver is speed control. This is usually a slider on the front of the machine that lets you cap the top speed. When you're tackling detailed free-motion designs or navigating sharp points, slowing the machine right down gives you the precision you need to stay on track.
Finally, adjustable presser foot pressure is a fantastic feature to have. It lets you lighten the foot's pressure to prevent stretching on delicate fabrics or increase it to help power through thick seams. These control features work together to help you confidently tackle whatever your project throws at you.
Budgeting for a Machine That Grows with You
Picking out your first quilting machine is a huge step. It’s an investment in yourself and your creativity, but it definitely shouldn’t break the bank. The trick is to think about long-term value, not just the price tag today. You want a machine that can keep up with you as your skills get better and better.
Think of it as finding a partner for your quilting journey. You need something that will handle your first few nine-patch blocks but will still be chugging along happily when you decide you're ready to try free-motion quilting. If you plan ahead a little, you won't outgrow your machine in six months and have to start shopping all over again.
Decoding the Price Tiers
Let's get real about what your money can buy. The sewing machine world is huge, but we can break it down into a few simple categories to make sense of it all.
- Under $300: These are usually your basic, no-frills mechanical machines. They're fantastic for learning your way around a machine and piecing simple quilt tops. But, you'll quickly notice they’re missing features that make quilting easier, like a big throat space or a needle up/down button. That can get really frustrating when you're wrestling with a bigger project.
- $300 - $600: This is the sweet spot for a lot of new quilters. In this price range, you'll find some really solid computerized machines with features that are a game-changer for quilting. We're talking speed control (a lifesaver!), a needle up/down button, and a better selection of presser feet included right in the box.
- $600+: Now you’re getting into the territory of machines built with quilters in mind. These machines almost always have a bigger throat space (think 8 inches or more), might come with a dual feed system, and are built tough enough to handle hours of quilting without complaining.
Making a smart choice here means you'll have the right machine not just for the quilter you are today, but for the quilter you want to become.
Why It Pays to Invest in Your Growth
I know it’s tempting to just grab the cheapest machine on the shelf. But trust me, there are hidden costs to starting too small. A machine that groans and skips stitches when you try to quilt through a few layers, or one that doesn't have enough room to maneuver a lap quilt, can turn this fun hobby into a total drag.
Spending a little more upfront on a capable beginner sewing machine for quilting almost always saves you a ton of headaches (and money!) down the line. It's no surprise that the global sewing machine market is huge—valued at $5.59 billion—and growing. Manufacturers are paying attention to quilters and now offer incredible machines under $1,000 packed with the good stuff. You can learn more about sewing machine market trends and see how it's benefiting us crafters.
Think of it like this: A machine with a walking foot, a needle-down feature, and a bit more throat space isn't a luxury—it's an investment in your own enjoyment. These are the exact features that solve the biggest frustrations that make new quilters want to give up.
Making Your Dream Machine a Reality with B-Creative
Here at bsewinn.com, we don't think a tight budget should stop you from getting a machine that truly inspires you. We see your potential and want to give you the tools to grow without the financial stress. That's why we've designed our own custom sewing machines and created programs to make them accessible to everyone.
Our B-Creative financing and membership programs were made for quilters just like you. These options let you take home a more capable machine today and pay for it over time with small, easy installments. That means you can get the features you'll need to grow—like more throat space or a dual feed system—without having to pay for it all at once.
And it gets better. A B-Creative membership is like a backstage pass to a whole world of support. You get access to exclusive online classes, step-by-step tutorials, and a massive resource library. You're not just buying a machine; you're joining a community that's here to help you get the most out of it. By mixing easy financing with great education, we want you to feel confident picking a machine that won't just work for you now, but will be right there with you for years to come.
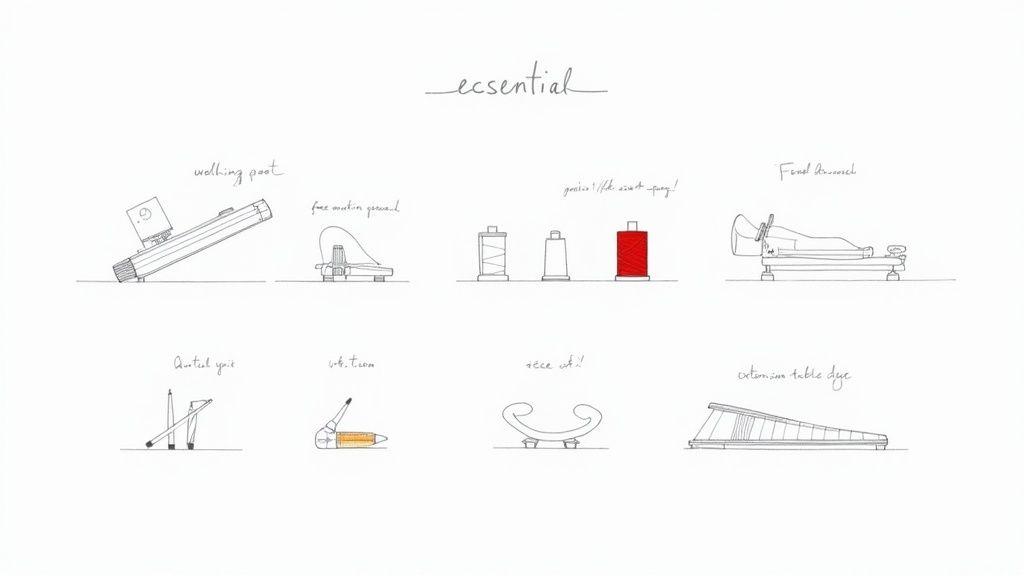
Essential Accessories to Unlock Your Quilting Potential
A great machine is your foundation, but the right accessories are what really elevate your quilting. Think of your new sewing machine like a great car engine; it has all the power, but it needs the right tires and tools to truly perform. These essentials make the whole process smoother, more precise, and frankly, a lot more fun.
Some machines come bundled with a few of these tools right out of the box, which is a huge bonus. Many of our favorite beginner models include a "quilting kit" with these critical aids, making them a fantastic value. New quilters often find they have a much easier start when their machine includes things like a removable extension table or an automatic thread cutter.
Putting together a small toolkit with these key items will perfectly complement your new beginner sewing machine for quilting and set you up for success right from the start.
Feet That Will Change Your Quilting Game
The standard presser foot on your machine is a generalist, but quilting really calls for specialists. The right feet can solve your biggest frustrations before they even begin, giving you professional-looking results from day one. These are the three you absolutely need in your toolbox.
- The Walking Foot: If you only get one accessory, make it this one. It has a set of built-in feed dogs that grip the top layer of your quilt sandwich, moving it along in perfect sync with the bottom layer. This is the secret to preventing the shifting and puckering that drives quilters crazy, giving you beautiful, straight quilting lines every time.
- The Free-Motion (Darning) Foot: This little foot is your ticket to creative freedom. It hovers just above the fabric, letting you move the quilt in any direction to literally "draw" with your thread. It's a must-have for stippling, loops, and any other free-hand designs you can dream up.
- The 1/4-Inch Seam Foot: Precision is everything when you're piecing a quilt top. This foot has a small metal guide on its edge that ensures every single seam you sew is exactly a quarter-inch wide. That kind of consistency is the secret to making all your quilt blocks line up perfectly.
Support and Precision Tools
Beyond the presser feet, a few other items will make a massive difference in your workflow. These accessories are all about creating a better workspace and making sure your stitches are as perfect as they can be.
An extension table is a non-negotiable for supporting the weight and bulk of your quilt. It's a flat surface that slides onto your machine, creating a larger, level area for your project to rest on. Without one, the weight of the quilt pulls on the fabric as you sew, leading to distorted stitches and wonky tension. It seriously reduces the strain on both you and your machine.
You wouldn't try to build a model airplane on a tiny, wobbly TV tray, would you? An extension table gives you the stable, expansive workspace your quilt deserves, preventing gravity from becoming your worst enemy.
The Unsung Heroes: Needles and Thread
Finally, let's not overlook the basics. Using the right needle and thread for the job is such a simple step, but it prevents a world of trouble. Quilting means piercing through three layers of material, which is a tough job for a standard needle.
Needles: Look for quilting needles. They're designed with a special tapered point to cleanly pierce multiple layers without shredding your fabric or batting. For most projects, a size 90/14 is a great all-purpose choice. And a pro tip: change your needle after every 8-10 hours of sewing to keep your stitches looking sharp.
Thread: High-quality, 100% cotton thread is the gold standard for both piecing and quilting. A 50-weight cotton thread is perfect for piecing because it’s strong but thin, which helps your seams lay nice and flat. For the actual quilting, you can stick with 50-weight or move to a slightly thicker 40-weight thread if you want your stitches to pop a bit more. For an even deeper dive, check out our guide on the top sewing tools for beginners.
Setting Up and Mastering Your First Stitches
Alright, you've brought your new machine home—this is where the real fun starts! It's that thrilling moment when you shift from just planning your quilts to actually making them. Getting these first few steps right will build your confidence for every single project that comes after.
This is the hands-on part of our how-to guide. We're going to demystify the setup process so you can start quilting with a feeling of excitement, not intimidation. Think of it as your pre-flight checklist before taking off on this amazing creative journey.
At bsewinn.com, we’re huge believers that knowledge is empowering. It’s why our custom sewing machine designs come with a whole world of support, like online classes and training. You should never feel stuck or overwhelmed, and this guide is your first step into that supportive quilting community.
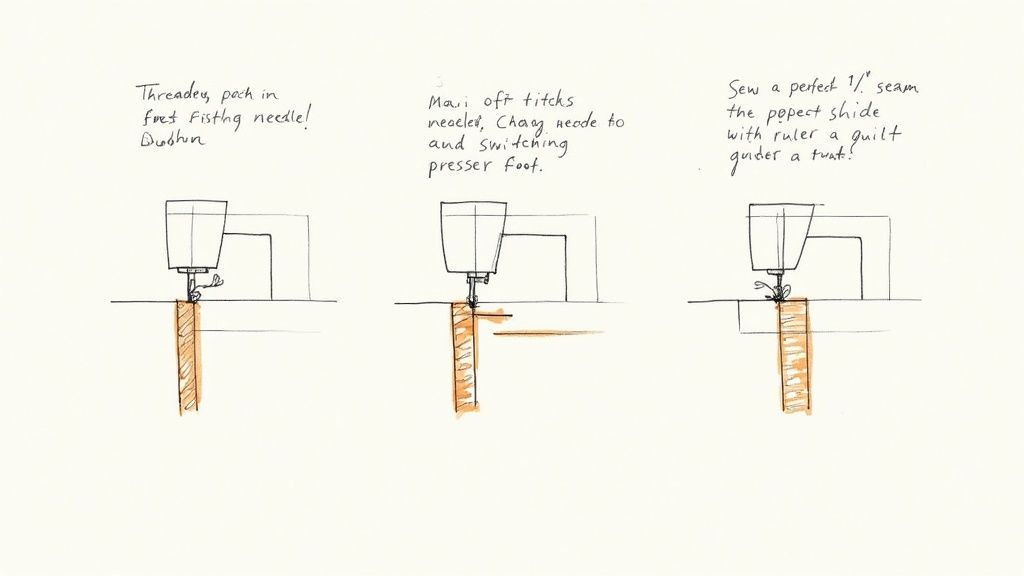
Your First Steps Unboxed
Before a single stitch can happen, there are a few simple but crucial tasks to get your machine ready. Please don't rush this part! I promise, taking the time to master these fundamentals will save you from so many headaches down the road. These are the skills you’ll use every time you sit down to sew.
-
Winding the Bobbin: The bobbin is what supplies the bottom thread that locks your stitches together. A perfectly wound bobbin—smooth and tight, not loose and loopy—is the secret to a beautiful, balanced stitch. Most modern machines make this pretty easy with diagrams printed right on the machine to guide you.
-
Threading the Machine: This can look like a maze at first, but it’s really just following the path. Your machine will have numbered guides that show you exactly where the thread needs to go. Take it slow the first couple of times, and I swear, it’ll become muscle memory before you know it.
-
Changing the Needle: A fresh needle is a quilter’s best friend, seriously. For quilting, you’ll want to pop in a 90/14 Quilting needle. Make it a habit to start every new project with a new needle, and always remember to insert it with the flat side facing the back of the machine.
-
Attaching a Presser Foot: Presser feet are what hold the fabric down as you sew. Most just snap on and off with the push of a button or lever. For your first go, you’ll want to attach your 1/4-inch seam foot for piecing or a walking foot if you’re jumping straight to quilting.
How-To: Sew Your First Quilt Block
Okay, now for the magic—making something real! A simple nine-patch block is the perfect first project. It's just nine identical squares of fabric sewn in a three-by-three grid, but it teaches you the most fundamental skill in all of quilting: the perfect quarter-inch seam. This tangible example is easy to replicate and builds foundational skills.
Start by cutting nine squares of fabric. For a classic look, try using five squares of a darker or patterned fabric and four squares of a light, solid fabric. Then, arrange them in a checkerboard pattern.
First, sew the squares into three rows of three. Next comes a crucial step: pressing your seams. Press the seams of the top and bottom rows in one direction (say, to the right), and then press the seams of the middle row in the opposite direction (to the left). This little trick is called "nesting," and it helps your points line up perfectly when you sew the rows together.
Finally, sew your three rows together to complete the block. And just like that—congratulations! You’ve just made the foundational unit of a quilt.
Your sewing machine's tension is what keeps your stitches looking neat and tidy on both the top and bottom of your fabric. If you're seeing little loops or knots, it’s a tell-tale sign that your top and bobbin threads aren't playing nicely. Taking a minute to understand this setting can honestly solve 90% of common stitch problems.
Once you’ve mastered this one block, you have the skills to create countless classic quilt designs. If your stitches look a little wonky at first, don't panic. It's almost always a simple fix, and you can learn more about sewing machine tension adjustment in our super helpful guide.
How-To: Master Straight-Line Quilting
After you've pieced your quilt top, it’s time to actually quilt it. Straight-line quilting is by far the most beginner-friendly technique, and it gives a gorgeous, modern finish. This is where that walking foot you heard about becomes the star of the show.
First, you’ll need to make your "quilt sandwich." Layer your backing fabric (wrong side up), then your batting, and finally your pieced quilt top (right side up). Smooth out every wrinkle and use safety pins or a temporary basting spray to hold all three layers together securely.
Always start quilting in the middle of your quilt and work your way out toward the edges. This is a non-negotiable! It pushes any excess fabric outward and prevents nasty puckers from forming right in the center. You can sew straight lines on either side of your seams (this is called "stitching in the ditch") or get creative and make a grid pattern across the whole quilt.
The real key to success here is to relax and let the machine do the work. The walking foot and the feed dogs are designed to pull the fabric through evenly. Your job is just to guide the quilt gently with your hands, keeping the lines straight. Take your time, use your machine’s speed control if it has one, and just enjoy the rhythm of adding that beautiful texture to your very first quilt. With these skills, you are well on your way to becoming a quilting pro with your beginner sewing machine for quilting.
Got Questions? Let's Talk Sewing Machines
Jumping into a new hobby like quilting is exciting, but it almost always comes with a mountain of questions. When you're about to invest in your most important tool, it’s only natural to want to get it right. We hear these questions all the time from new quilters, so let's clear things up and get you sewing with confidence.
Getting to know your machine is the very first step toward having fun and avoiding frustration. Think of this as a friendly chat to help you over those first few hurdles so you can get right to your first project with your new beginner sewing machine for quilting.
Should I Choose a Mechanical or Computerized Machine?
This is the big one, and honestly, there’s no single right answer. It all comes down to what feels right for you.
-
Mechanical Machines are the trusty workhorses of the sewing world. You control everything with physical knobs and dials, making them incredibly straightforward. They're built like tanks, are usually easier on the wallet, and are fantastic for really learning the nuts and bolts of sewing and piecing.
-
Computerized Machines are all about helpful, modern conveniences. With an LCD screen and push-button controls, you get handy features like speed control, a needle up/down setting, and maybe even an automatic thread cutter. These little luxuries can make quilting feel so much smoother and more precise, especially as your skills grow.
Here's an analogy I like: a mechanical machine is like driving a manual car. It’s simple, totally reliable, and forces you to master the fundamentals. A computerized machine is like an automatic with cruise control; it handles some of the tedious stuff for you, letting you focus more on the creative journey.
The best machine is the one you feel comfortable with. At bsewinn.com, we designed our custom sewing machines to be incredibly intuitive, blending the rock-solid reliability of a mechanical model with the smart features of a computerized one. It's the best of both worlds for beginners.
How Many Stitches Do I Actually Need for Quilting?
It's so easy to get wowed by a machine that boasts hundreds of fancy stitches. But for quilting, you really only need a couple of superstars. My advice? Don't let a huge stitch count be your deciding factor—focus on stitch quality.
Your most important stitch, by a long shot, is a high-quality straight stitch. It's the foundation of every single quilt you'll make, so it has to be strong, consistent, and perfectly even. The only other stitch you'll really need is a simple zigzag stitch, which is great for appliqué or finishing raw edges.
Sure, all those decorative stitches can be fun for embellishing projects down the road, but they are absolutely not essential for learning how to quilt. A machine that makes a flawless straight stitch is a thousand times more valuable to a new quilter than one with 200 fancy stitches you'll rarely, if ever, use.
Can I Start Quilting with a Regular Sewing Machine?
Absolutely! You can 100% start your quilting journey on a standard sewing machine. In fact, most of us did! If you have a machine you use for mending or making curtains, you can use it to make your first quilt, especially for smaller projects like table runners or baby quilts.
The main difference you’ll run into is convenience, not capability. A machine built with quilting in mind just makes handling bulky projects a lot easier. These machines usually have:
- Larger Throat Space: This is the area to the right of the needle. More space means less wrestling with your quilt sandwich.
- An Extension Table: A flat surface that attaches to the machine to support your quilt's weight and keep it from pulling.
- Specialized Feet: A walking foot and a 1/4-inch seam foot are total game-changers for accuracy and ease.
The great news is that you can often buy these key accessories separately to upgrade a regular machine. So, while a dedicated quilting machine makes life easier, don't let the lack of one stop you. The most important thing is to just start sewing.
Ready to find a machine that will grow right along with you? bsewinn.com offers a handpicked selection of custom-designed sewing machines perfect for beginners. We've also got the financing options and learning resources to make sure you succeed.

