

Welcome to the world of machine quilting! This is where the real magic happens, transforming your carefully pieced quilt top into a finished, textured work of art. If you're feeling a little nervous, don't be. This guide is designed to be a comprehensive how-to, showcasing tangible examples you can replicate today.
We’re going to walk through some fantastic beginner quilting stitch patterns that will help you build your skills and confidence right from the very first project.
Building Your Quilting Confidence from Scratch
Starting any new craft can feel a bit overwhelming, but machine quilting is an incredibly rewarding process. It's that final, creative step that brings your whole project to life, adding texture, durability, and that gorgeous professional finish we all crave.
The key to getting off on the right foot is to demystify the process and make sure you have a solid foundation. This guide is your first step on a really exciting creative journey. Forget about complicated jargon or intimidating techniques for now—we’re going to focus on simple, tangible skills you can start using today.
Setting Yourself Up for Success
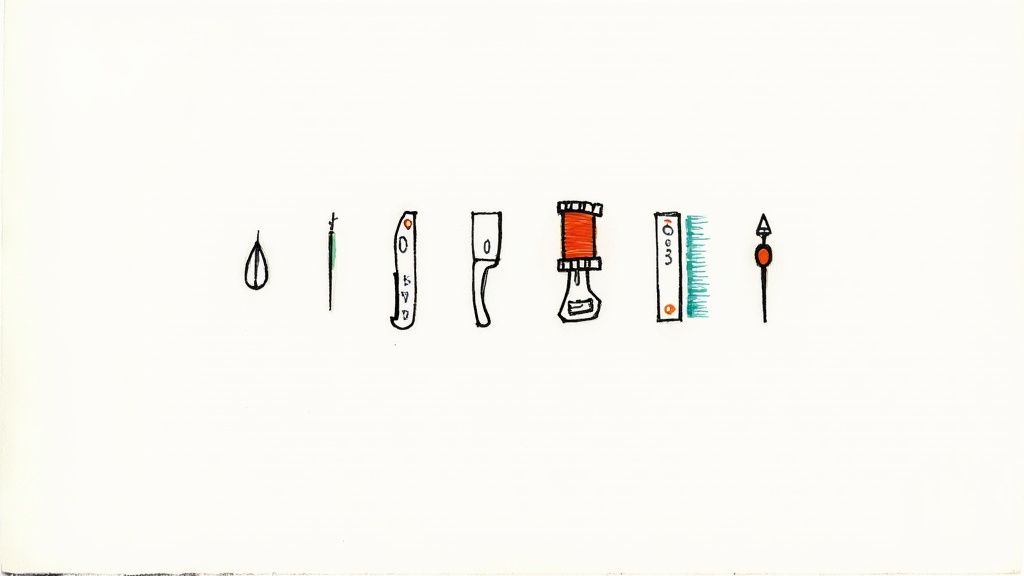
Before you even think about making your first stitch, let's talk tools. Having the right setup is crucial and can be the difference between a fun afternoon and a frustrating mess. The right gear allows you to focus purely on learning the stitching motions. You don’t need every gadget on the market, but a few key items will make a world of difference.
Here’s what you’ll want to have ready:
- The Right Needles: Always start with a sharp, new needle. Something like a 90/14 Quilting needle is perfect—it prevents skipped stitches and won’t damage your fabric.
- Quality Thread: A good 40 or 50-weight cotton thread is the go-to for most machine quilting. It offers great strength without being too bulky.
- A Walking Foot: Honestly, this specialized presser foot is a game-changer for beginners. It grips and feeds all three layers of your quilt sandwich through the machine evenly, which is a lifesaver for preventing puckers.
For a deeper dive into all the essentials, check out our complete guide to quilting supplies for beginners.
At bsewinn.com, we are committed to empowering every crafter. Our custom sewing machine designs, supportive online classes, training, and extensive resources are created to help beginners like you build skills with confidence.
Our goal is simple: to help you unlock your machine’s potential. With the right guidance and tools, you’ll go from feeling uncertain to being incredibly proud of your work. Let's start stitching some beautiful quilts together.
Mastering Foundational Straight Line Quilting
If there's one skill that forms the bedrock of machine quilting, it’s the straight line. It's the first and most important technique to get comfortable with, setting the stage for almost every other pattern you'll learn. Getting that clean, professional finish starts right here, and this how-to will show you it’s much easier than you might think once you have the right setup.
Think of straight-line quilting less as a single stitch and more as a whole family of versatile patterns. You can create simple grids that echo classic patchwork or go for a modern, minimalist vibe with channel quilting. This technique can totally change the look and feel of your quilt. The best part? It’s all about control and consistency—perfect skills to build when you're just starting out.
Setting Up for Perfect Straight Stitches
Before you even think about putting needle to fabric, getting your machine set up properly is key. Taking a few minutes to do this will save you from common headaches like puckered fabric or wonky stitches. A little prep work makes the whole process smoother and way more fun.
Your absolute best friend for this technique is a walking foot. This amazing attachment works in tandem with your machine's feed dogs to pull all three layers of your quilt sandwich—the top, batting, and backing—through the machine at the same time, nice and even. This simple change almost completely eliminates shifting and puckering. If you're new to this gadget, we've got a detailed guide on how to use a walking foot that will get you up to speed.
Next up, let's talk stitch length. For quilting, you'll want to lengthen your stitch a bit. We find that something around 2.5 to 3.0 mm is the sweet spot. This lets the stitches sit beautifully on top of the fabric layers without pulling them too tight and causing puckers.
Always, always test your tension on a practice "quilt sandwich" made from scraps before you start on your actual project. It’s a small step that can save you a lot of seam-ripping later!
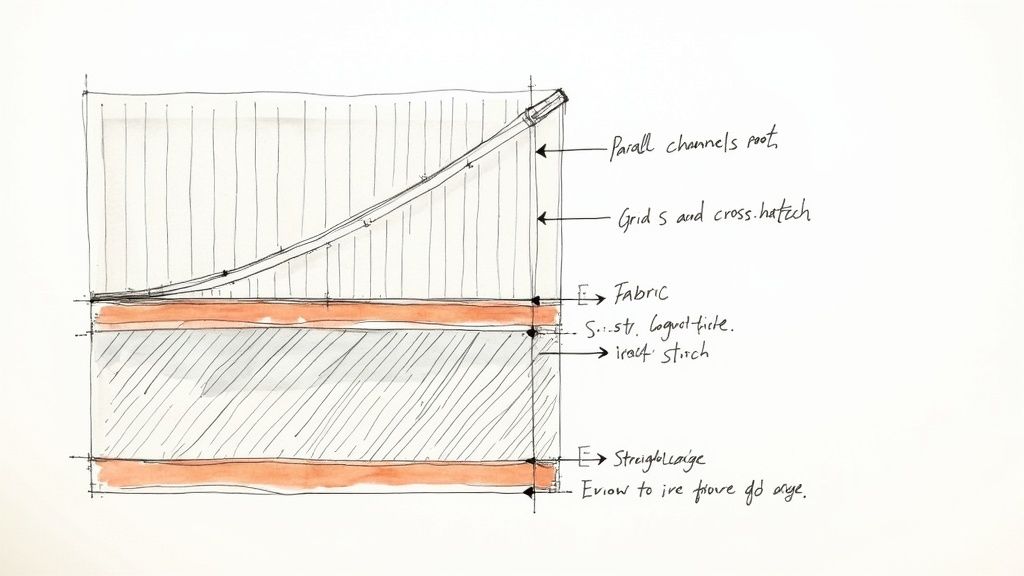
Exploring Beginner-Friendly Straight Line Patterns
Okay, your machine is ready to go! Now it’s time to replicate a few simple but really effective patterns. Don't worry about being perfect right away. The real goal here is to get into a steady rhythm and build that muscle memory.
- Simple Grids: This is exactly what it sounds like—stitching straight lines horizontally and vertically across your quilt. You can follow the seams of your blocks ("stitching in the ditch") or make your own grid for a more modern look.
- Cross-Hatching: This is just like a grid, but you stitch the lines diagonally. It adds a beautiful texture and dimension, and it looks especially striking on solid-colored fabrics.
- Channel Quilting: This pattern is just a series of parallel straight lines stitched closely together. It creates a fantastic texture and is a great way to practice keeping your spacing consistent.
Quilting is as much about muscle memory as it is about creativity. Practicing these foundational patterns on a small sample piece will build the confidence you need to tackle your full-sized quilt with ease.
Machine Settings for Beginner Stitch Patterns
Use this table as your quick-start guide for setting up your sewing machine for the foundational stitches covered in this article.
| Stitch Pattern | Recommended Foot | Stitch Length | Tension Setting |
|---|---|---|---|
| Straight Line | Walking Foot | 2.5 - 3.5 mm | 4.0 (or machine's default) |
| Echo Quilting | Walking Foot | 2.5 - 3.5 mm | 4.0 (or machine's default) |
| Free-Motion Meander | Darning/Free-Motion Foot | 0 (Feed dogs down) | 4.0 (or machine's default) |
| Stippling | Darning/Free-Motion Foot | 0 (Feed dogs down) | 4.0 (or machine's default) |
| Pebbles | Darning/Free-Motion Foot | 0 (Feed dogs down) | 4.0 (or machine's default) |
| Clamshells | Walking or Darning Foot | Varies with method | 4.0 (or machine's default) |
Remember, these are starting points! Always test on a scrap sandwich to fine-tune the settings for your specific machine, thread, and fabric combination.
Adding Movement With Gentle Curves And Echoes
Once you’ve mastered straight lines, it’s time to let your quilting breathe. Curved designs bring a soft, organic energy that turns a flat surface into something alive. It’s in these gentle arcs and ripples that your unique quilting voice really finds its stride.
You don’t need to dive into free-motion just yet. With your walking foot in place, you can explore two forgiving quilting stitch patterns for beginners—echo quilting and organic wavy lines—while keeping everything under control and stress-free.
The Elegance Of Echo Quilting
Echo quilting is deceptively simple. You trace the outline of a shape—whether it’s a block’s seam or a favorite appliqué—and then repeat that line, over and over, at a consistent distance. The result? A series of concentric rings that frame your work and draw the eye in.
• Use Your Foot as a Guide
Align the edge of your walking foot with an existing seam or stitching line. As you move forward, keep that edge snug against your guide so your echoes stay perfectly parallel.
• Create Concentric Shapes
After finishing one pass, let that new line become your next guide. Each successive ring builds on the last, producing a ripple effect that looks intricate but stitches out in no time.
• Start in the Center
Quilting from the middle of your block outward helps ease any extra fullness toward the edges. That little detail goes a long way toward preventing puckers and bags.
At bsewinn.com, our commitment is to empower crafters by making new skills feel approachable. Our custom sewing machine designs are supported by online classes, training, and extensive resources packed with tangible examples like these, showing you how to achieve beautiful results and build your creative confidence.
Embracing Organic Wavy Lines
In contrast to the precision of echo quilting, organic wavy lines celebrate gentle imperfection. Think of drawing long, flowing “S” shapes across your quilt. No two curves need to match exactly—that slight variation gives the texture its charm.
Keep a steady pace on the pedal and guide your quilt side to side. Avoid jerky motions; smooth, continuous feeding makes those hills and valleys truly graceful. Before you know it, your quilt will have a delightful, crinkly surface that’s both tactile and visually engaging—a perfect next move after straight-line quilting.
Your First Dive into Free-Motion Quilting
Are you ready to feel like you're drawing with your sewing machine? That’s exactly what free-motion quilting (FMQ) is all about, giving you total creative freedom to stitch any design you can dream up. This is where a quilt’s personality really shines, moving past simple straight lines into something fluid and artistic.
Unlike quilting with a walking foot where the machine does the pulling, FMQ puts you in the driver's seat. You’re the one guiding the fabric, while the machine just provides the stitch. It feels a bit odd at first, but once you get the hang of it, you’ll be able to replicate beautiful, flowing textures with confidence.
The Essential Free-Motion Setup
Before you can start sketching with thread, there are two non-negotiable adjustments you have to make to your sewing machine. These steps are what allow you to move your fabric in any direction you please.
First, you need to lower your feed dogs. Those are the little metal teeth under your needle that usually grip and pull the fabric through. By dropping them down and out of the way, you take over the job of moving the quilt sandwich. Suddenly, you have 360-degree control.
Second, you absolutely must attach a special presser foot. You'll use either a darning foot or a dedicated free-motion quilting foot. These feet are designed to hover just over the fabric instead of clamping down on it. This prevents the layers from flapping up and down with every stitch—a small change that makes all the FMQ magic possible.
Pro Tip: Before you even sit at your machine, grab a pen and paper and doodle the pattern you want to try. This helps build the muscle memory in your hands and brain, making the transition from paper to fabric feel so much more natural.
Your First FMQ Pattern: The Simple Meander
The meander, which some people call stippling, is the classic starting point for any new FMQ quilter. Just imagine a single, continuous, squiggly line that wanders all over your quilt top but never crosses itself. It’s the perfect design for learning the most fundamental skill of FMQ: finding that sweet-spot rhythm between your hand speed and your machine speed.
Don't aim for perfection here; the real goal is consistency. Focus on making your curves smooth and rounded, not sharp and jerky. Try to keep your meandering lines a relatively even distance from each other to create a nice, uniform texture. If you want a deeper dive into the technique, our guide on what is free-motion quilting is a great place to start.
Building Skill with Playful Loops
Once you’ve gotten comfortable with that wandering meander, let’s try loops. This pattern uses a very similar flowing motion, but you get to intentionally cross over your stitching lines to create fun, loopy shapes.
A few tips to get your loops looking lovely:
- Vary Your Size: Mix up big, open loops with smaller, tighter ones. This creates much more visual interest and a more organic, hand-drawn look.
- Keep It Moving: The secret to smooth curves is continuous motion. Try not to stop and start in the middle of a loop.
- Don't Overthink It: Seriously. Just relax and let your hands guide the fabric in a loopy little dance. The more you chill out, the more natural your stitches will look.
This visual guide is a great little roadmap for how to start your journey into curved quilting patterns.
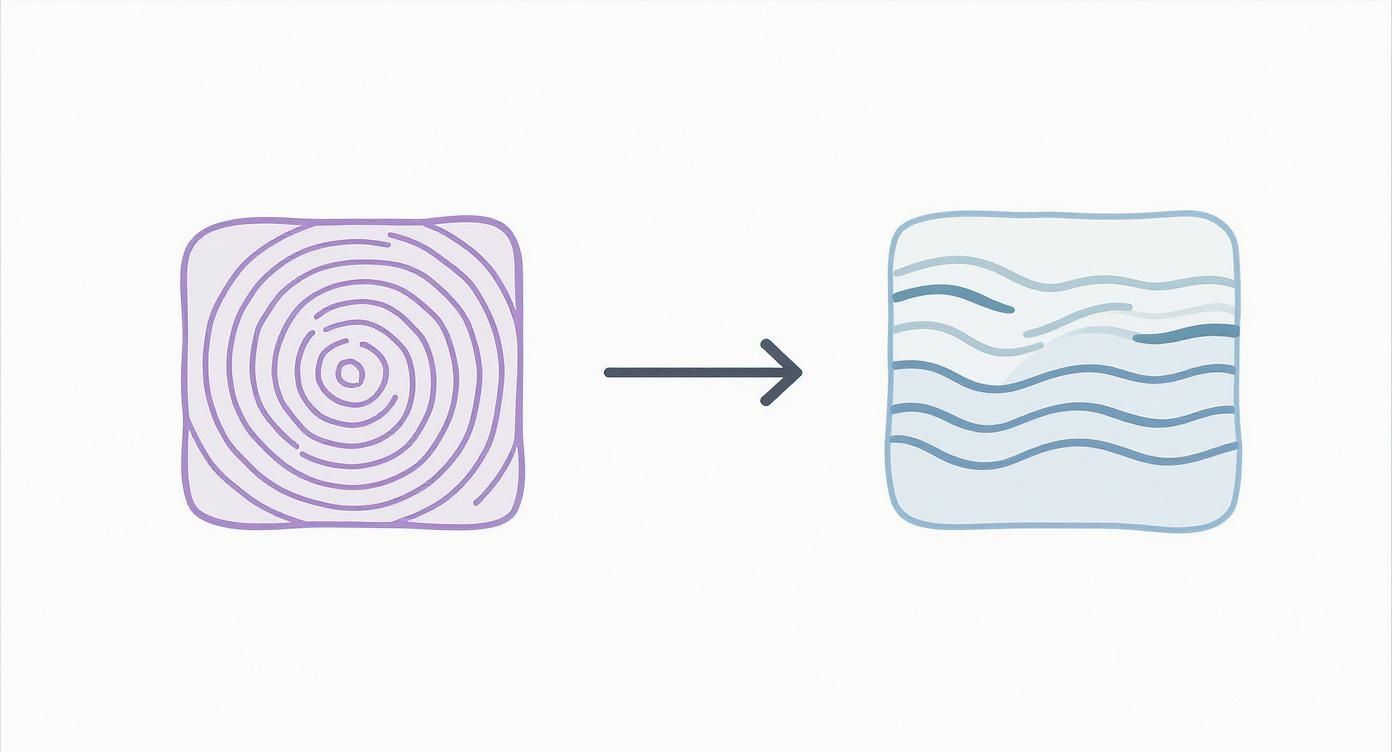
As you can see, foundational skills like echo quilting are the building blocks that lead you to more free-form patterns like wavy lines. It's all about building skills one step at a time. Here at bsewinn.com, we’re all about that step-by-step approach. Our commitment is to empower every single quilter with custom sewing machine designs, online classes, training, and extensive resources to make learning fun.
Once you've gotten the hang of lines and curves, you're ready to start playing with some serious texture. Pebbles and clamshells are two of my favorite quilting stitch patterns for beginners when it comes to adding that dense, rich look to a project. They take a simple quilt and just make it sing.
At first glance, these patterns might seem intimidating, but they’re really just built from simple, repeated shapes that you can replicate. They're fantastic for filling in background space, which in turn makes your main piecing or appliqué stand out. The dense stitching also gives the quilt a wonderful, substantial feel in your hands. This is where you can add a truly custom, high-end look to your work with just a little bit of practice.
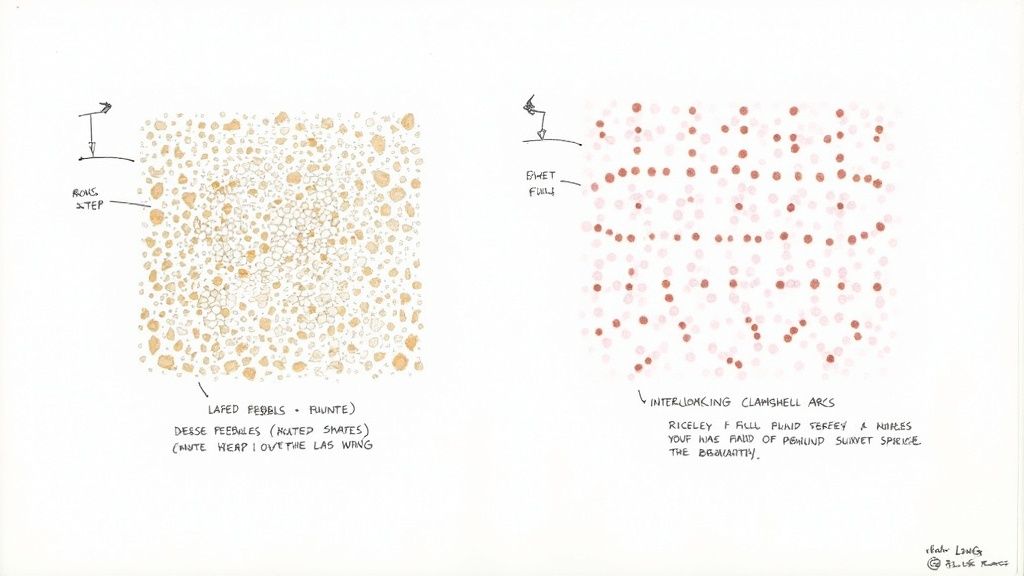
Quilting a Field of Pebbles
The pebble pattern is a modern classic for a reason. It involves quilting lots of dense, varied circles to create a rich, bubbly background. Here’s the secret: embrace imperfection. Your pebbles are not supposed to be perfect circles. It's actually the slight variations in size and shape that give this design its organic, charming character.
To get started, just find a comfortable rhythm and stitch your first circle. From there, travel along its edge and stitch another one right next to it, then another, and another. The goal is to fill the space snugly without leaving big gaps.
- Vary Your Sizes: We always recommend mixing small, medium, and large pebbles. This not only looks more interesting but also makes it way easier to fill in those awkward, leftover spaces.
- Echo for a Quick Fix: If you stitch a lumpy circle (and we all do!), don’t sweat it. Just travel around it a second time to smooth it out. This little trick works wonders and nobody will ever know.
- Mind the Gaps: As you work, you’ll notice tiny triangular gaps popping up between your pebbles. A great way to handle these is to fill them with a single stitch or a tiny, pointed oval. It adds yet another layer of texture.
At bsewinn.com, we're dedicated to empowering crafters by making advanced-looking techniques achievable. Through our online classes, training, and extensive resources, we provide tangible examples and support to help you master patterns like pebbles, turning your creative vision into a beautifully finished quilt.
Crafting Classic Clamshells
For a more structured and elegant finish, you can’t go wrong with clamshells. This timeless pattern creates interlocking arcs, row by row, for a beautiful scalloped effect. You can do this with a walking foot and marked lines, but learning to free-motion them gives you so much more flexibility and speed.
Begin by stitching a row of connected, upward-curving arcs all the way across your quilt. For the next row, you'll nestle the peak of each new arc right into the "valley" of the row above it.
This one requires a bit more spatial awareness than pebbles, but the results are absolutely stunning. If you're feeling nervous, try drawing it on paper first to get the motion into your muscle memory. A common challenge is managing thread build-up where the arcs meet. The key is to stitch smoothly over these intersections without pausing, which helps avoid ugly knots.
With a little practice, you’ll be quilting these beautiful designs with confidence and creating a texture that truly looks heirloom-quality.
Got Questions? We've Got Answers
Starting something new always brings up a million questions, and quilting is no different! It's totally normal. Here are some of the most common things new quilters ask, with straightforward answers to get you past those little roadblocks and back to the fun part.
What’s the Absolute Easiest Quilting Stitch to Learn?
Hands down, the easiest stitch to get started with is the humble straight line. It's the perfect first step and is usually done with a walking foot.
This foot is a game-changer. It has a set of feed dogs on it that work with the feed dogs on your machine, grabbing all three layers of your quilt sandwich and pulling them through evenly. This is your secret weapon against puckers and stretched-out fabric. You don't have to worry about the tricky hand-eye coordination that free-motion quilting demands; your only job is to guide the quilt straight. It's honestly the best way to get a feel for how your quilt moves and build up that quilting confidence.
Do I Really Need a Special Foot for Free-Motion Quilting?
Yes, you absolutely do. This is one of those non-negotiable things. For any kind of free-motion quilting (FMQ), you'll need either a darning foot or a special FMQ foot.
These feet are designed to hover just over the fabric instead of clamping it down like a standard presser foot. This is what gives you the freedom to move your quilt in any direction you want—forward, backward, sideways, and all around. It's the key that unlocks that "drawing with thread" motion. Without one, you're just fighting your machine.
Every question you ask is a stitch forward in your quilting journey. At bsewinn.com, we're here to help you quilt with confidence, offering everything from custom sewing machine designs to online classes, training, and extensive resources that answer all your "what ifs" and "how tos."
Why Are My Free-Motion Stitches So Wonky and Uneven?
If you're new to FMQ, seeing uneven stitches is incredibly common, so don't get discouraged! The problem almost always boils down to one thing: the relationship between how fast your hands are moving and how fast your machine is sewing.
- Getting long, stretched-out stitches? Your hands are probably moving the quilt too fast for the speed of the needle.
- Seeing tiny, bunched-up stitches? You're likely moving the quilt too slowly, and the stitches are piling on top of each other.
The only real fix for this is practice. Seriously. Try to find a comfortable, steady speed with your foot pedal that you can maintain. Then, work on matching your hand movements to that rhythm. A fantastic trick is to doodle your quilting design on paper first. This helps build the muscle memory you need for smooth, gliding movements at the machine.
Ready to take these stitches from practice to project? B-Sew Inn is committed to empowering your craft with everything from custom sewing machine designs to expert training and online classes that feel like sewing with a friend. Check out our custom sewing machine designs and educational resources and let's take your craft to the next level.

