

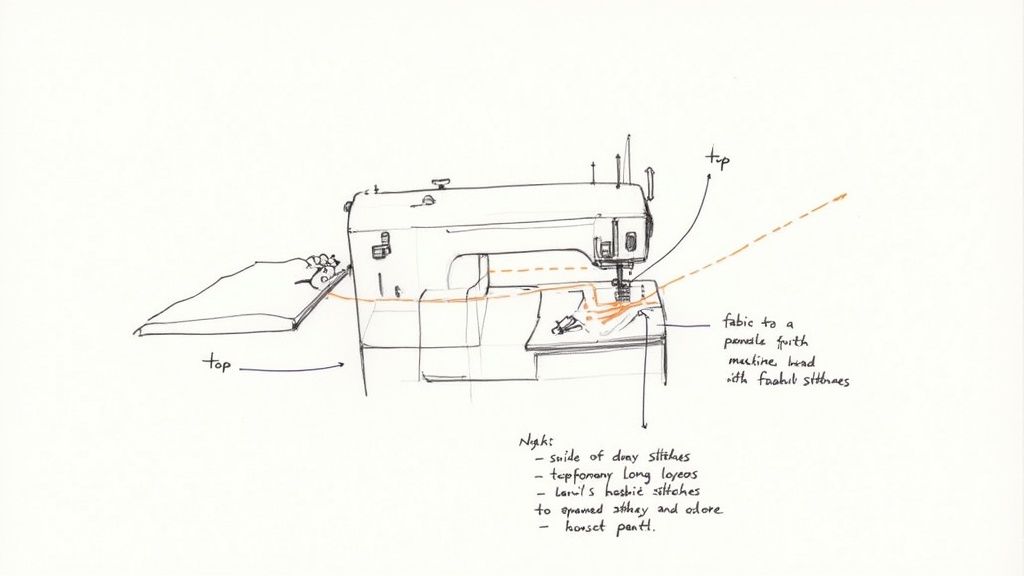
A basting stitch is simply a long, temporary stitch you make with your sewing machine. It’s designed to hold layers of fabric together before you sew the final, permanent seam.
Think of it as a removable guideline. It keeps slippery or bulky fabrics from shifting around and ensures your finished project comes out looking clean and precise. It's a simple technique, but it's one of those professional shortcuts that makes tricky projects feel so much more manageable. B-Sew Inn is committed to empowering crafters like you, and mastering foundational skills like this is the first step.
What a Basting Stitch Is and Why It Matters
I like to think of a basting stitch as the sewing equivalent of painter's tape. It holds everything perfectly in place so you can focus on getting the final result just right, without any wobbles or misalignments. Here at B-Sew Inn, we know that getting a handle on foundational skills like using the basting stitch sewing machine function is what really unlocks your creative potential. Our custom sewing machine designs are built to make these techniques intuitive, and we back them up with online classes and resources to support you every step of the way.
A Modern Take on a Classic Technique
Today, a basting stitch is your best friend when you're tackling something challenging. It’s the secret weapon for achieving crisp collars, perfectly aligned zippers, and smoothly set-in sleeves.
It also lets you test the fit of a garment before committing to a permanent seam, which is absolutely critical for custom tailoring. How your fabric layers are controlled has a direct impact on the garment's final structure and fit. If you're curious about the nuances of fit, you should read our guide on what is ease in sewing.
While machine basting is a game-changer, it’s just one of many skills to have in your toolkit. Brushing up on other essential sewing techniques will dramatically improve your garment construction from start to finish. Trust me, integrating basting into your workflow will save you countless hours of frustration and seam-ripping.
A basting stitch isn’t just a preliminary step; it’s an insurance policy for your project. It guarantees that what you’ve pinned and prepared is exactly what you’ll get after the final stitch.
Here’s where a basting stitch really shines:
- Preventing Fabric Shifting: It’s an absolute must for slippery fabrics like silk or for managing multiple layers in quilting projects.
- Ensuring Accurate Seam Alignment: Perfect for matching up plaids, stripes, or attaching pockets exactly where you want them.
- Simplifying Garment Fittings: You can check and adjust the fit on a real person without worrying about difficult-to-remove stitches.
- Securing Zippers and Trims: Basting holds zippers, piping, and other trims in place for a flawless, professional-looking application.
When to Use a Basting Stitch Quick Guide
To make it even clearer, I've put together this quick-reference table. It covers some of the most common sewing situations where a basting stitch will save you a ton of time and effort. These are tangible examples that you can replicate in your next project.
| Sewing Task | Why Basting Is a Game-Changer | Recommended For |
|---|---|---|
| Fitting Garments | Allows you to test the fit and make adjustments easily before sewing permanent seams. | Dresses, blouses, trousers, bespoke tailoring |
| Setting in Sleeves | Helps ease the sleeve cap into the armhole smoothly without puckers. | Coats, jackets, tailored shirts, dresses |
| Attaching Zippers | Keeps the zipper perfectly straight and prevents the fabric from bubbling or stretching. | Skirts, pants, bags, dresses |
| Quilt Sandwiches | Holds the quilt top, batting, and backing together, preventing layers from shifting during quilting. | All quilting projects, from wall hangings to bedspreads |
| Matching Patterns | Ensures plaids, stripes, or large prints align perfectly across seam lines. | Patterned shirts, skirts, dresses |
| Applying Trim or Pockets | Secures delicate lace, piping, or patch pockets in the exact position before final stitching. | Decorative projects, children's clothes, outerwear |
| Gathering Fabric | Two parallel rows of basting stitches create even, beautiful gathers for ruffles and skirts. | Skirts, sleeve cuffs, decorative ruffles |
| Working with Slippery Fabrics | Tames tricky fabrics like silk, chiffon, or satin, keeping them from sliding around. | Lingerie, blouses, formal wear |
Think of this table as your go-to cheat sheet. The next time you're about to tackle one of these tasks, remember that a few minutes spent basting can save you from a major headache later on. It’s a small step that makes a huge difference in the quality of your finished work.
Getting Your Machine Ready for Basting
Alright, let's get your machine dialed in. Setting up for basting is pretty straightforward, and the good news is that these steps work on just about any machine out there, from your grandma's trusty mechanical Singer to a fancy new computerized model.
Our goal is simple: create a long, loose stitch that holds things together but comes out easily when we're done. Even if you have a top-of-the-line machine from B-Sew Inn with a dedicated basting stitch, it's so helpful to know how to do it manually. It gives you a much better feel for how your machine works.
It’s easy to take these features for granted, but adjustable stitch lengths became standard because of the massive boom in home sewing in the mid-20th century. By 1971, Brother had already churned out its 10 millionth machine! This incredible demand made features like the basting stitch sewing machine function a household staple. If you're a history buff, you can read more about Brother's journey here.
Dialing in the Stitch Settings
First things first, we need to pick our stitch. For basting, it's always the classic straight stitch. No zig-zags or decorative stitches needed here.
Now for the most important part: the stitch length. Find the dial or button that controls your stitch length and crank it all the way up to the longest setting possible. On most home machines, this will land somewhere between 4.0mm and 5.0mm. That extra length is what keeps the stitch temporary and prevents it from digging into your fabric permanently.
Loosening Up the Tension
This is my secret weapon for frustration-free basting. The trick is to lower your upper thread tension. When you do this, you create a slightly unbalanced stitch where the top and bottom threads don't lock together as tightly. It might sound wrong, but for a temporary stitch, it's exactly what we want. It makes pulling the stitches out later with a seam ripper an absolute breeze.
I usually start by dropping my tension dial by one or two full numbers—say, from a standard 4 down to a 2 or 3. The exact number isn't the point; the result is. You want a stitch that's secure enough to hold but loose enough to surrender without a fight. If you really want to get into the weeds on this, we've got a whole guide on how to master tension adjustment on your sewing machine.
Pro Tip: Never skip a test run! Grab a scrap of the fabric you're using for your project and sew a few inches. Then, try pulling the bobbin thread. If the stitches pop out easily, you're golden. If you have to wrestle with it, drop the tension a bit more and try again.
Needles, Thread, and Feet: The Supporting Cast
You can usually get by with your standard setup, but making a few smart choices here can make the process even smoother.
- Needle: Just stick with a universal needle that's the right size for your fabric's weight. No need to get fancy unless you're working with something tough like denim or leather.
- Thread: This is where you can have some fun. Pick a thread color that contrasts sharply with your fabric. Think bright yellow thread on a navy wool coat. This makes those temporary stitches pop, so you won't miss any when it's time to take them out.
- Presser Foot: Your standard all-purpose foot (sometimes called a zigzag foot) will work perfectly fine for most jobs. But if you're tackling something thick, like basting a quilt sandwich, a walking foot is a game-changer. It grabs the top and bottom layers of fabric and pulls them through at the same rate, preventing any shifting or puckering.
Putting Your Basting Stitch to Work on Real Projects
Alright, you've got your machine dialed in. Now for the fun part: moving from theory to actual sewing. Knowing the right settings is one thing, but seeing how a simple basting stitch can make or break a project is where the real magic happens.
Think of basting as the unsung hero of your sewing room. It’s that foundational prep work that leads to those crisp, professional-looking results everyone wants, whether you're quilting, making clothes, or diving into embroidery. Our educators here at B-Sew Inn always say that basting isn't just a temporary step—it's the key to precision.
Let's look at a few common scenarios where machine basting can elevate your work from "homemade" to "handmade."
Basting for Quilt Making
If you're a quilter, you know the struggle of the "quilt sandwich." Getting that top, batting, and backing to all play nicely together is a huge challenge. Pins are helpful, but they can only do so much. Layers inevitably shift as you quilt, and suddenly you've got frustrating puckers and pleats on your backing.
This is where machine basting is a total game-changer. By sewing long basting stitches in a grid across your entire quilt, you're effectively locking all three layers together. This grid gives you an incredibly stable foundation, so when you go to sew your final quilting design, everything stays perfectly smooth. It’s like creating a temporary, machine-sewn web that holds better than even the most careful pinning.
Quilting shrinks the fabric panel, and the denser your quilting design, the more it will shrink. Basting the layers first means everything shrinks together uniformly, preventing any weird distortion in your finished quilt.
Here’s how to do it right:
- Start in the middle. Always. Begin basting from the center of your quilt and work your way out to the edges. This smooths everything out and pushes any excess fabric outward, so you don't trap any bubbles in the middle.
- Use a walking foot. This is non-negotiable for quilt basting. A walking foot is designed to feed the top and bottom layers of your quilt sandwich through the machine at the exact same rate, which is the secret to a pucker-free finish.
- Sew a wide grid. Your basting lines don’t need to be right on top of each other. A grid with lines spaced about four to five inches apart is plenty to hold everything securely in place.
Perfecting Garment Fits and Details
When you're sewing clothes, a basting stitch is your best friend for getting that perfect, tailored fit. Before you commit to a permanent seam on a dress or a pair of pants, just baste the main seams together. You can try the garment on, see how it feels, and make any adjustments you need. Taking out a basted seam is a breeze, but unpicking a tiny, permanent stitch? That's a sewing nightmare.
Beyond fitting, basting is a lifesaver for those tricky construction details that can trip up even experienced sewists.
Setting in Sleeves: Getting a sleeve cap to ease smoothly into an armhole without puckers is a classic sewing challenge. The trick is to run two parallel lines of basting stitches along the curve of the sleeve cap. You can then gently pull the threads to create the slightest of gathers, which helps the sleeve fit perfectly into the armhole before you sew that final seam. If you want to dive deeper into this technique, we have a whole article on how to sew gathers.
Installing Zippers: Basting a zipper in place before topstitching will change your life. It holds the zipper exactly where you want it, preventing it from wiggling around and ensuring your final stitch lines are perfectly straight and even.
Attaching Patch Pockets: Nothing screams "I made this myself" faster than a crooked pocket. Basting the pocket onto your garment first guarantees it's perfectly aligned before you sew it down for good.
Securing Embroidery Projects
With machine embroidery, stability is everything. Fabrics that are delicate or slippery have a tendency to shift around in the hoop during the stitching process, which can lead to misaligned designs and puckering. A quick basting stitch can fix all of that.
Most modern embroidery machines have a "baste-in-the-hoop" function. This handy feature sews a big rectangular stitch around the perimeter of your design, tacking the fabric directly to the stabilizer underneath. This extra security is a must-have for:
- Slippery fabrics like silk, satin, or charmeuse.
- Stretchy knits that can easily get distorted in the hoop.
- Fabrics with a pile, like velvet or terry cloth, where the hoop itself can crush the texture.
This simple basting box ensures your fabric stays taut and stable from the first stitch to the last, giving you a crisp, professional-looking embroidery design every time.
Adjusting Your Basting Stitch for Different Fabrics
Let’s be honest: not all fabrics are created equal. A floaty chiffon is going to behave completely differently under the needle than a sturdy denim, and your approach to basting shouldn't be a one-size-fits-all deal. Mastering these little adjustments is what really separates a good sewist from a great one. This is where your skills and the settings on your basting stitch sewing machine come together to tackle any material you throw at it.
Before you even touch your machine, take a moment to understand the fabric itself. Having a good handle on different fabric characteristics is invaluable. Is it heavy? Does it have a lot of drape? Is it stable or shifty? The answers will guide every decision you make, from which needle to grab to how long your stitch should be.
Handling Slippery and Delicate Fabrics
We’ve all been there—trying to sew silk, chiffon, or charmeuse feels like trying to catch a fish with your bare hands. These fabrics are notorious for shifting and sliding all over the place.
To tame them, your walking foot is an absolute game-changer. It has its own set of feed dogs that grip the top layer of fabric while the machine’s feed dogs move the bottom layer. The result? Both layers move in perfect sync, preventing those frustrating ripples and puckers.
Pro Tip: I swear by this trick: place a layer of tissue paper on top of and underneath your slippery fabric. It gives everything extra grip and stability. When you’re done basting, it just tears away easily.
Taming Heavyweight and Bulky Materials
When you're wrestling with heavy-duty materials like canvas, wool, or denim, your main concerns are stitch penetration and strength. A standard needle might just give up, leading to skipped stitches or, even worse, breaking right in the middle of a seam.
To avoid a headache, switch to a stronger needle, like a denim or heavyweight needle (a size 90/14 or 100/16 should do the trick). You’ll also want to max out your stitch length—often 5.0mm—to make sure the stitches are easy to pick out from those thick fibers later on.
Navigating Knits and Stretchy Fabrics
Knit fabrics bring their own special challenge to the sewing table: they love to stretch. If you aren't careful, you can easily pull the fabric out of shape while you’re basting, leaving you with wavy, distorted seams. No thank you.
The key here is a light touch and the right tools.
- Needle Choice: Always, always use a ballpoint or stretch needle. These needles have a rounded tip that pushes the knit fibers aside instead of piercing and breaking them, which is what causes those dreaded snags and runs.
- Stitch Selection: A standard straight basting stitch is perfectly fine, but the most important thing is to avoid pushing or pulling the fabric. Just guide it gently and let the feed dogs do all the work.
- Presser Foot: If you have a walking foot, now is the time to use it! It will help feed that stretchy fabric through evenly and prevent it from "growing" as you sew.
To help you visualize how your project influences your basting approach, this decision tree breaks down the best starting points for common sewing jobs.
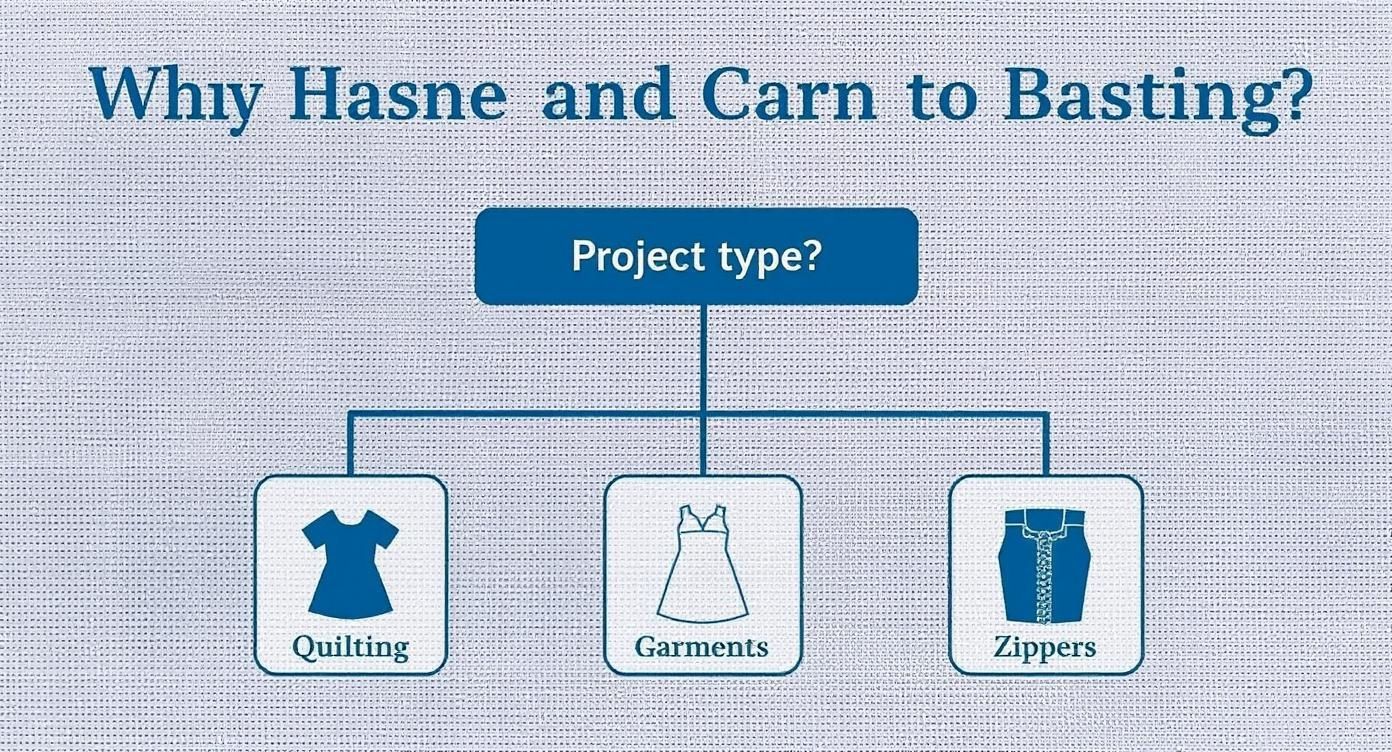
As you can see, techniques often overlap, but each project really benefits from a specific basting strategy to get the best results.
To make things even easier, here’s a quick reference table I’ve put together from years of trial and error.
Basting Stitch Settings by Fabric Type
| Fabric Type | Recommended Stitch Length | Tension Adjustment | Needle Type | Presser Foot |
|---|---|---|---|---|
| Lightweight (Cotton Lawn, Voile, Chiffon) | 4.0mm - 4.5mm | Lower to 2-3 | Universal 70/10 or Microtex 60/8 | Standard or Walking Foot |
| Medium-Weight (Quilting Cotton, Linen) | 4.5mm - 5.0mm | Standard (3-4) | Universal 80/12 | Standard Foot |
| Heavyweight (Denim, Canvas, Wool) | 5.0mm (or max length) | Standard (4-5) | Denim 90/14 or Heavyweight 100/16 | Standard or Roller Foot |
| Knit/Stretch (Jersey, Spandex) | 4.0mm - 5.0mm | Slightly lower (2.5-3.5) | Ballpoint or Stretch 75/11 | Walking Foot (highly recommended) |
| Slippery/Delicate (Silk, Satin) | 4.0mm | Lower to 2-3 | Microtex 60/8 or 70/10 | Walking Foot or Teflon Foot |
Think of these settings as a starting point. Always test on a scrap of your project fabric first to see what works best!
Working with Unconventional Materials
So what happens when you’re working with something like leather, vinyl, or laminated cottons? Pins are a big no-no because they’ll leave permanent holes. Here, sewing clips become your best friend for holding layers together.
Your standard presser foot will probably stick to these materials, causing uneven, messy stitching. A non-stick (Teflon) foot or a roller foot will glide right over the surface, giving you a much cleaner basting line. Making these small adjustments is what empowers you to take on any custom project that comes your way and builds the kind of skills our B-Sew Inn community really values.
Working Through Common Basting Stitch Hiccups
Even when you've done everything right, your sewing machine can still throw you a curveball with a basting stitch. The good news? Most of these little snags are simple fixes and, honestly, they're a great way to get to know your machine on a deeper level. We believe that becoming a confident troubleshooter is a key part of the craft, and we're here to walk you through it.
One of the most common complaints I hear is a basting stitch that's just too tight and a real pain to pull out later. This almost always comes down to your thread tension. You might have remembered to set the longest possible stitch length, but if you forgot to lower the upper tension, that stitch is going to lock in way too tight. It totally defeats the purpose of a temporary seam! A quick turn of the tension dial to a lower number usually solves this in a second.
Another source of frustration is puckered fabric. While this can also be a tension problem, don't forget to check your presser foot pressure. If it's cranked up too high, the foot can actually stretch and warp delicate fabrics as it feeds them through, creating those annoying little waves. Dig out your machine's manual and see if you can adjust it for a lighter touch.
Tackling the Dreaded Thread Nest
Ah, the "bird's nest"—that horrible, tangled mess of thread that suddenly appears on the bottom of your fabric. It looks disastrous, but the fix is actually pretty straightforward. Whatever you do, do not try to power through and keep sewing.
Instead, take a deep breath and follow this simple process to clear the jam:
- First, stop sewing and turn off your machine. Safety first!
- Lift the needle and the presser foot, then gently work the fabric out. You'll probably need to snip a few threads to get it free.
- Now, completely unthread the top of your machine and take out the bobbin.
- Carefully clean out any bits of tangled thread you see in the bobbin area.
- Finally, rethread the entire machine from scratch. Pay close attention to make sure the thread clicks into every guide and is seated properly in the tension discs. Always thread the top with the presser foot up.
Going through this methodical re-threading process solves tangled thread issues over 90% of the time. It forces you to reset the upper thread path, which is absolutely critical for forming a balanced stitch.
The engineering that goes into these simple functions is surprisingly complex; manufacturers have spent more than a century perfecting them. These days, best practices suggest keeping your basting stitches well within the seam allowance, about 1/8 to 1/4 inch away from your final stitch line. The very fact that there are specialized patents for basting just shows how vital this temporary stitch is for achieving a professional finish. If you're a history buff, you can explore the history of these sewing machine innovations and see just how far the technology has come.
Answering Your Top Machine Basting Questions
When you're first getting the hang of machine basting, a few questions always seem to pop up. Let's tackle some of the most common ones I hear from fellow sewers. Getting these little details sorted out is how you build real confidence at your machine, which is what our community here at B-Sew Inn is all about.
Can I Use Any Old Thread for Basting?
You absolutely can use your regular sewing thread, but grabbing a spool in a totally different color makes those temporary stitches a breeze to spot and pull out later. It's a great way to use up that weird-colored thread you bought on a whim or some of your older spools that you don't trust for permanent seams.
Just be careful not to use thread that’s super weak or linty. You don't want it snapping mid-seam or leaving a trail of fluff behind in your beautiful final stitch line. The name of the game here is visibility and easy removal, not strength.
What if My Machine Doesn’t Go Up to a 5.0mm Stitch Length?
Don't sweat it! Plenty of machines, especially my trusty old mechanicals, top out before 5.0mm. If that's you, just crank the stitch length dial to the highest number it has.
A 4.0mm or 4.5mm stitch will work beautifully for basting. The goal is simply to get a long, loose stitch that holds things together for now. The other critical part of the equation is lowering your top thread tension—that's what really makes the stitches easy to pull out later.
A true basting stitch is a team effort between two settings: the longest stitch length you can get and reduced upper thread tension. Nine times out of ten, when someone tells me their basting stitches are a pain to remove, it's because they forgot to lower the tension.
When’s the Right Time to Pull Out the Basting Stitches?
Hold your horses! Don't even think about touching those basting stitches until after you’ve sewn the final, permanent seam. A good rule of thumb is to sew your basting line just inside your final seam line, squarely in the seam allowance where it will never be seen.
Once your permanent seam is stitched and pressed, you can grab your seam ripper. I find it easiest to snip the basting stitches every few inches and then just gently pull on one end of the thread. It should slide right out, proving your fabric layers stayed perfectly put right where it counted.
Is Machine Basting Always Better Than Doing It by Hand?
Honestly, it depends on what you're working on. Firing up the basting stitch on your sewing machine is a huge time-saver and my go-to for long, straight runs—think side seams on a dress or holding a quilt sandwich together. It’s fast and effective.
But for tricky spots with lots of curves or for super delicate fabrics, hand basting still reigns supreme. You just can't beat the control you get when setting in a tailored sleeve or working with slinky charmeuse. Most pros I know, myself included, use a mix of both. We use the machine for speed where we can and switch to hand basting for precision where we need it.
Ready to make your sewing dreams a reality? At B-Sew Inn, we’re here with the machines, the training, and the community to help you nail every technique, from a simple basting stitch to intricate embroidery. Find your perfect machine and check out our huge library of resources at https://www.bsewinn.com today.

