

Learning how to clean your sewing machine is a pretty simple gig. It's really just a matter of gathering a few basic tools, making sure the power is off, and then methodically getting the lint and gunk out of key spots like the bobbin case and feed dogs before doing a final check. Once you get this little routine down, you'll be amazed at how many common sewing frustrations just disappear, keeping your machine humming along happily.
Why a Clean Machine Is Your Best Creative Partner
We've all been there. That moment of sheer frustration when your machine starts skipping stitches, the thread balls up into a bird's nest underneath, or a mysterious clunking sound begins. These aren't just random acts of sewing chaos; they're cries for help from your machine. If you can start seeing maintenance not as a chore, but as a core skill, you'll really deepen your connection with your machine and sew with way more confidence.
Here at bsewinn.com, we're committed to empowering crafters by helping them master every part of their craft. That's why our custom sewing machine designs come with a wealth of support, including online classes, training, and extensive resources to guide you through everything from complex projects to essential machine care.
The True Cost of Neglect
Putting off regular cleaning can lead to bigger headaches than just skipped stitches. Over time, all that packed-in lint and dust acts like fine-grit sandpaper, causing premature wear and tear on delicate gears and moving parts. This buildup also soaks up any lubricant, which leads to friction and overheating. The fallout?
- Dodgy Stitch Quality: Lint crammed into the feed dogs or tangled in the tension discs means your fabric won't feed smoothly and your thread tension will be all over the place.
- Pricey Repairs: What starts as a simple cleaning job can quickly escalate. Before you know it, you're at the repair shop needing a professional to fix your timing or replace parts that have worn out way too soon.
- A Shorter Lifespan: A well-cared-for machine can be a friend for decades. A neglected one might start giving you serious trouble after just a couple of years.
The sewing machine market is booming—it was valued at around USD 4.56 billion in 2024 and is expected to hit USD 7.54 billion by 2032. With over 28 million home sewing machines being used across the globe, knowing how to take care of your investment has never been more important.
A well-maintained sewing machine is indeed your best creative partner. Embracing practical skills like machine upkeep can truly help you to Ignite Creativity With Surprising Practical Skills in all your projects.
Empowering Your Craftsmanship
Learning how to clean your own machine does more than just head off problems; it builds some serious confidence. The moment you know how to pop off the needle plate and clear out the bobbin area yourself, you become a more self-reliant and knowledgeable sewist.
This simple act of maintenance takes the mystery out of the machine, turning it from a complicated piece of equipment into a tool you can trust. It’s the first real step toward being able to troubleshoot bigger issues and truly understanding how your creative partner works.
Assembling Your Essential Cleaning Toolkit
Before you even think about taking a screwdriver to that needle plate, let's talk about getting your gear in order. Prepping the right tools is the first real step to a good, stress-free cleaning session. This isn’t just about making the job easier; it’s about protecting your machine. The whole point is to clean it, not to accidentally scratch a delicate part or create a new problem.
I always think of it like this: you wouldn't scrape a non-stick pan with a metal fork, right? The same logic applies here. The tools we use for cleaning sewing machines are specifically designed to be gentle on all those intricate mechanisms while still being tough on lint and dust bunnies.
Must-Have Tools for Every Sewist
You really don't need a giant, expensive kit to get started. In my experience, the simplest tools are usually the most effective. It's all about knowing what to grab and why it's the best choice for each little nook and cranny.
Here are the absolute essentials I recommend having on hand:
- Soft Nylon Brushes: These are your best friend for fighting lint. I suggest getting a small set with a few different sizes. This lets you get deep into the tight spots around the bobbin case and under the feed dogs without scratching anything. Steer clear of stiff, natural bristle brushes—they can break off and get stuck where you definitely don't want them.
- Screwdrivers: Your machine probably came with a little L-shaped screwdriver for the needle plate. Honestly, having a good quality, small flat-head and Phillips-head from the hardware store is a game-changer. They give you a much better grip and reduce the chance of stripping a screw, which is a headache you don't need.
- Tweezers: A pair of long, fine-tipped tweezers is a must. They're perfect for plucking out those stubborn threads and bigger clumps of lint that the brushes just can't seem to grab.
- Lint-Free Cloth: A simple microfiber cloth is ideal. Use it to wipe down the outside of your machine and to give parts a final polish after you've brushed them off. The key is that it traps dust without leaving any of its own fibers behind.
These basic items will honestly handle 90% of your regular cleaning needs. And the best part? You might already have most of these lying around the house.
To give you a clearer picture, here's a quick breakdown of what your toolkit should look like.
Your Sewing Machine Cleaning Toolkit
This table breaks down the key tools for keeping your machine in top shape, from the daily essentials to the "nice-to-have" extras for a more thorough job.
| Tool | Category | Primary Use | Pro Tip |
|---|---|---|---|
| Nylon Brush Set | Essential | Removing lint from bobbin area and feed dogs. | Use a small, angled brush to get under the feed dogs without removing them. |
| Quality Screwdrivers | Essential | Removing the needle plate and other casings. | A magnetized screwdriver tip helps prevent tiny screws from getting lost. |
| Fine-Tipped Tweezers | Essential | Plucking out stubborn, wrapped threads. | Perfect for grabbing thread tails that have been cut too short by an auto-cutter. |
| Microfiber Cloth | Essential | Wiping down exterior surfaces and cleaned parts. | Lightly dampen it for stubborn grime, but make sure parts are fully dry before reassembly. |
| Magnetic Dish | Optional | Securely holding screws during disassembly. | Any small bowl will do in a pinch, but a magnetic one is a true lifesaver. |
| Headlamp or LED Light | Optional | Illuminating the bobbin and looper areas. | A headlamp frees up both of your hands for cleaning, unlike a handheld flashlight. |
| Micro-Vacuum Attachments | Optional | Deep cleaning fine dust from internal areas. | Test the suction on your hand first; you want it to be gentle enough not to pull on delicate parts. |
Having these tools ready makes maintenance feel less like a chore and more like a simple, satisfying part of your sewing routine.
At bsewinn.com, we believe that empowering crafters starts with knowledge. Our custom machine designs are supported by resources that make maintenance feel less like a chore and more like a natural part of the creative process.
Nice-to-Have Tools for a Deeper Clean
Once you've got the basic cleaning routine down, you might want to add a few more things to your kit. These aren't totally necessary, but they can make the job even more thorough and a little bit easier.
Here’s what I’d consider adding over time:
- A Magnetic Dish: This is one of those "how did I ever live without this?" tools. Just pop your tiny needle plate screws into the dish, and they'll stay right there until you need them. No more crawling on the floor looking for a lost screw.
- Flexible LED Light or Headlamp: Even the best built-in machine lights can leave shadows in the bobbin area. A small, bendable light or even a simple headlamp can help you spot the sneaky lint hiding in the deepest corners.
- Micro-Vacuum Attachments: For a really satisfying deep clean, a set of micro-attachments for your vacuum is amazing. They can gently suck out fine dust from places your brushes can't quite reach. Just make sure the suction isn't on full blast!
Building your perfect toolkit happens over time. For a more complete list of gear for your sewing space, check out our guide on the top sewing tools for beginners, which covers everything from project essentials to maintenance must-haves. Now that you've got your tools laid out, you're ready to get started.
A Practical Guide to Cleaning Your Machine
With your tools all laid out, we get to my favorite part: the actual cleaning. This is where you really get to see how hard your machine has been working for you. Let's walk through each area one by one for a deep clean that’s surprisingly straightforward.
First thing’s first, and this is the most important rule of all: unplug your sewing machine. Seriously. This isn't just a friendly tip; it's a non-negotiable safety step. You don't ever want to be in a situation where you accidentally hit the foot pedal while your fingers are near the needle.
Starting with the Needle Plate and Bobbin Area
If there's one place that lint loves to party, it's the bobbin area. Every single stitch sheds tiny fibers from your thread and fabric, and they all end up congregating here. Let that build up for too long, and you'll start seeing skipped stitches, frustrating thread nests, and it can even mess with your machine's timing.
To get in there, you have to remove the needle plate—that little metal plate your fabric glides over.
- Remove the Presser Foot and Needle: This just gets them out of your way and gives you more room to maneuver without poking yourself.
- Unscrew the Needle Plate: Most machines use one or two small flat-head screws. Grab the right screwdriver from your kit to avoid stripping the screw heads. I always keep these tiny screws in a magnetic dish so they don't vanish into another dimension.
- Lift the Plate Off: Gently pry it up. Be prepared for a "lint bunny" explosion. It might look shocking, but it's totally normal, especially if it's been a while since your last cleaning.
Pro Tip: Before you pull anything else out, snap a quick photo with your phone. Trust me, having a picture of how the bobbin case fits back in can be a real lifesaver when you're putting it all back together.
At bsewinn.com, we know that getting hands-on with your machine can feel a little intimidating. That's why our online classes and training resources, designed to complement our custom sewing machine designs, often feature close-up video guides of these exact steps. We are committed to empowering every crafter to care for their machine with total confidence.
Tackling the Bobbin Case and Hook Race
With the needle plate gone, you've got a clear shot of the bobbin case and the hook race. This little area is the heart of your machine—it’s where the top and bottom threads lock together to create a stitch. A clean hook race is absolutely essential for your machine to run smoothly.
Grab your soft nylon brush and start sweeping out all that lint. I like to start with the big, fluffy clumps and then work my way into the nooks and crannies. The key is to brush the lint out of the machine, not push it deeper inside.
Your tweezers will be your best friend here, perfect for plucking out stubborn threads that have wound themselves around the hook. Whatever you do, don't use a pin or anything sharp to dig around in there; you can easily scratch the delicate metal surfaces.
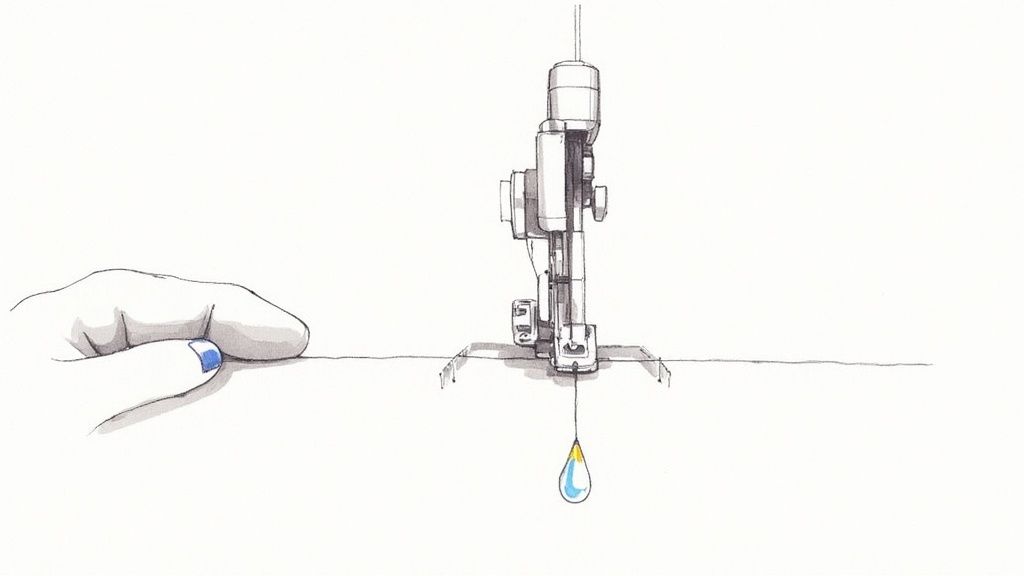
This simple infographic shows you pretty much everything you'll need for this part of the job.
As you can see, it really just comes down to a few basic tools: a good brush, the right screwdriver, and decent light.
Clearing the Feed Dogs
See those little metal teeth under the needle plate? Those are your feed dogs. They’re responsible for gripping your fabric and pulling it along. When they get clogged with lint, they can’t get a good grip, which leads to uneven stitches or fabric that just won't feed straight.
While the needle plate is still off, use your brush to clean thoroughly between each row of teeth. A small, angled brush works wonders for getting right in there. You want them to be able to move up and down without any gunk holding them back.
Think about quilting with flannel—a notorious lint-shedder. Your feed dogs can get packed solid in just one afternoon. A quick clean-out prevents that annoying moment when your fabric starts bunching up mid-seam. This practical step, for example, is essential before starting a project like a flannel rag quilt, ensuring every seam is perfect.
This kind of careful maintenance isn't just for us home sewers. The global industrial sewing machine market hit about USD 3.4 billion in 2024, and in that world, uptime is everything. With new IoT-enabled machines, keeping sophisticated parts clean is more critical than ever. You can discover more insights about the industrial sewing machine market and see how technology is changing the game.
Cleaning the Upper Thread Path
The bobbin area gets most of the attention, but don't neglect the top half of your machine! The thread path—from the spool pin through the tension discs and take-up lever—collects its own share of dust and fibers.
My favorite trick for this is "flossing." Grab a piece of thick, unwaxed dental floss or a sturdy bit of thread. Make sure your presser foot is lifted (this is key, as it opens the tension discs) and run the floss through the entire thread path, just like you're threading the needle. It does an amazing job of pulling out hidden lint from inside the tension assembly.
To finish up, give the whole exterior of your machine a good wipe-down with a soft, dry cloth. Dust loves to settle on the handwheel and spool pins, so give them a little extra attention.
Once everything is sparkling, it's time for reassembly.
- Pop the bobbin case back into the hook race (use that photo you took if you need a reminder!).
- Screw the needle plate back on, making sure it’s snug but not cranked down too tight.
- Reattach the presser foot and, most importantly, put in a fresh needle.
When you break it down like this, cleaning your sewing machine isn't some scary technical task. It’s just a simple routine that pays off big time with better stitches, fewer headaches, and a much longer life for your favorite creative tool.
Oiling Your Machine and Final Checks
Okay, you've done the hard part—your machine is sparkling clean. Now it's time for what can feel like the most intimidating step: oiling. I get it, applying oil to the inner workings of your machine sounds technical, but it’s actually pretty straightforward once you know what you’re doing. A little bit of oil is the secret sauce to a machine that runs quietly, smoothly, and without the grinding friction that causes parts to wear out way too soon.
But before you even think about picking up that oil bottle, there’s one golden rule. Seriously, this is the most important part: always check your user manual.
Many modern, computerized machines have self-lubricating systems or parts that are permanently lubricated at the factory. Oiling one of these can actually damage the internal nylon or plastic components. If your manual says "do not oil," your work is done! You can skip right to reassembly.
Finding the Right Spots and Using the Right Stuff
If your machine does need oiling, your manual is your treasure map. It will point out the exact oiling points—usually tiny holes or specific metal-on-metal spots, like in the hook race area or along the needle bar.
And the oil itself? This is not the place to improvise.
- Only Use Sewing Machine Oil: This stuff is specifically made for the job. It’s a clear, lightweight mineral oil that won’t get gummy or, worse, stain your precious fabric.
- No Household Oils Allowed: Step away from the WD-40, 3-in-1 oil, or (I can't believe I have to say this) cooking oil. They are all way too thick, attract lint like a magnet, and will eventually harden into a varnish that can completely seize your machine. Trust me, that’s a one-way ticket to a very expensive repair bill.
When it comes to application, remember this: less is more. A single, tiny drop on each point is all it takes. Over-oiling is just as bad as using the wrong kind of oil. Excess will just collect more dust and lint, and eventually, it’ll end up on your project. No one wants that.
At bsewinn.com, we are committed to empowering crafters by supporting them through every step. Our custom sewing machine designs are backed by extensive resources, including online classes and training videos, to help you understand and maintain your specific model with complete confidence.
Putting It All Back Together and the Final Test
Once the oiling is done (or skipped!), it’s time to reassemble. If you’re feeling a bit lost, just look back at that photo you took before you started.
Pop the bobbin case back in, then carefully replace the needle plate. Get the screws snug, but don’t crank them down like you're building a battleship. Put in a fresh needle and snap on your presser foot.
Now for the final, crucial step: the test run. Don't skip this! This little test protects your next project from any leftover gunk or excess oil.
- Thread your machine. Pick a light-colored thread so you can easily spot any oil drips.
- Grab a scrap. A piece of plain cotton or muslin is perfect.
- Start sewing. Stitch a few straight lines, maybe a zigzag. This gets the oil worked into all the right places and pushes out any extra.
Take a close look at your scrap fabric. See any oil spots? If you do, just keep sewing on the scrap until the stitches are perfectly clean. It's a simple step that guarantees when you move on to that beautiful quilt top, your fabric will stay absolutely pristine. A smooth, quiet machine stitching perfectly is your reward for a job well done.
Building a Smart Maintenance Routine
Giving your machine a good clean is a great start, but the real magic happens when you turn that one-time task into a simple, regular habit. A smart maintenance routine isn't about adding another chore to your never-ending list. It’s about building in small, consistent efforts that stop big, frustrating problems before they even start.
Think of it like this: you wouldn't just jump up and run a marathon with zero training. In the same way, you can’t expect your machine to flawlessly power through a heavy denim project after it’s been gathering dust for a year. A steady schedule keeps it in peak condition, ready for whatever idea sparks your creativity next.
Tailoring Your Cleaning Frequency
Let’s be honest, not all sewing projects are created equal, and your cleaning schedule shouldn't be either. A rigid, one-size-fits-all approach just doesn’t work. The best way to do it is to let your materials and how often you sew be your guide.
For example, if you're quilting with flannel, fleece, or Minky, you're basically running a lint-making factory. Those projects demand a quick clean-out of the bobbin area as soon as you snip the last thread. On the flip side, sewing with a crisp, tightly woven cotton or a fine silk creates way less mess, so you can probably go a bit longer between cleanings.
Here’s a good rhythm to get into:
- After Every Project: Think of this as a quick, five-minute reset. Brush out the bobbin case and feed dogs, give the outside a wipe-down, and change your needle. This is non-negotiable after you've worked with high-lint fabrics.
- Monthly Deeper Clean: This is your more thorough check-up. Set aside a little time to do the full cleaning process we've covered—taking off the needle plate for a complete bobbin area deep-clean and flossing the thread path.
- Annual Professional Service: Time for a tune-up. Once a year, it’s a really good idea to have a professional technician take a look under the hood. They can check your machine's timing, belts, and all the internal mechanics you can’t easily get to.
The home sewing machine market is a huge community of passionate crafters, valued at USD 1.39 billion in 2024 and expected to hit USD 1.79 billion by 2033. With over 28 million home machines being used around the world, knowing how to protect that investment with a solid maintenance routine is a must. You can discover more insights about this growing market's vitality and see why keeping your machine happy is more important than ever.
When to Call for a Professional
While your regular at-home cleaning will handle most day-to-day issues, some problems are a clear signal that it's time to call in an expert. If you've done a thorough cleaning and you’re still dealing with grinding noises, skipped stitches that just won't go away, or completely wild tension, you're likely facing a deeper mechanical or timing issue.
At bsewinn.com, our commitment to empowering crafters extends to providing support for the entire life of your machine. Our custom designs are backed by extensive resources, online classes, and a community ready to help you succeed, ensuring your creative journey is a smooth one.
Don't let a major issue sideline your creativity. Knowing when a problem is beyond a simple cleaning is a skill in itself. To get a better idea of when it's time to seek professional help, check out our detailed guide on sewing machines service and repairs. Building this smart routine ensures your machine remains a reliable creative partner for years to come.
Common Sewing Machine Cleaning Questions
Even after you've developed a solid cleaning routine, some questions always seem to pop up. Let's tackle a few of the most common ones I hear from fellow crafters. Getting these answers straight will give you more confidence and help you make the best choices for your machine's long-term health.
Can I Use Canned Compressed Air to Clean My Machine?
I know it's incredibly tempting to grab that can of compressed air for a quick fix, but please don't! This is hands-down one of the most common—and damaging—cleaning mistakes you can make.
That forceful blast of air doesn't actually remove the lint and thread bits; it just shoves them deeper into your machine's delicate gears and electronics. Over time, that compacted debris can solidify and cause some really serious mechanical problems. Plus, the propellants in canned air can release moisture, which is the last thing you want near the metal parts you're trying to protect. A soft nylon brush or a micro-vacuum attachment is a much safer bet because they actually remove the gunk instead of just relocating it.
How Often Should I Really Change My Sewing Needle?
A fresh needle is the cheapest and most effective "tune-up" you can give your machine. Seriously. The general rule of thumb is to swap it out after 8 to 10 hours of sewing. But who’s really timing that? A more practical approach is to just start every new project with a fresh needle.
Why is this so critical? A needle's point gets dull with use, even if you can't see it with the naked eye. A dull or slightly bent needle is the number one culprit behind skipped stitches, shredded thread, snags, and that awful "thwump-thwump-thwump" sound it makes punching through fabric instead of piercing it. If you're tackling heavy-duty materials like denim or sticky stuff like vinyl, you'll want to change it even more often.
At bsewinn.com, we are committed to empowering crafters by providing the knowledge they need to succeed. Our custom sewing machine designs are supported by extensive resources, online classes, and a community ready to help you master every aspect of your craft, from replicating complex designs to performing essential maintenance.
What Are the Signs I Need Professional Servicing?
Regular cleaning at home is non-negotiable, but it can't replace a periodic professional tune-up. Some jobs just need a trained technician. If you've given your machine a thorough cleaning and are still running into these issues, it's time to call in a pro:
- Loud Grinding or Clunking Noises: Strange mechanical sounds usually point to bigger problems like timing issues or worn-out internal parts. Don't ignore them.
- Inconsistent Stitch Quality: You've cleaned everything, changed the needle, re-threaded the machine, and still have wonky tension or skipped stitches. This often signals a deeper mechanical problem.
- Electrical Problems: If you're having any issues with the motor, foot pedal, or lights, it's best to let a professional handle it for safety's sake.
For a deeper dive into figuring out when a problem is beyond a DIY fix, check out our comprehensive sewing machine troubleshooting guide. Getting your machine professionally serviced every year or two is a great investment. It keeps the timing, tension, and all those important internal parts in perfect working order, ensuring you can keep creating for years to come.
At B-Sew Inn, we're here to support your entire creative journey. From finding the perfect custom machine to offering the training and resources you need to care for it, we want to help you sew with confidence and joy. Explore our extensive selection of machines, accessories, and online classes to take your craft to the next level. Visit bsewinn.com today.

