

When your foot pedal suddenly gives up, it can stop a great sewing project dead in its tracks. It's a frustrating moment we've all had, but take a deep breath—it's often a fix you can handle yourself.
First things first: unplug your machine completely. Safety is everything. From there, if you have a simple external plug-in pedal, it's usually just a matter of swapping the old one for a new, compatible model. If the problem's a little deeper, like an internal jack issue, it might mean opening up the machine's housing to replace the faulty part.
Your Guide to Replacing a Brother Foot Pedal
That sinking feeling when your Brother foot pedal just stops working is the worst. But the good news is, getting things running again is usually pretty straightforward. The most important thing is to figure out what exactly is broken. Is it the pedal itself? The cord? Or is it the jack where the pedal plugs into the machine? A few minutes of detective work now can save you a lot of time and money later.
Here at bsewinn.com, we’re big believers that knowing your machine inside and out is what takes your creativity to the next level. We are committed to empowering crafters like you, not just with custom sewing machine designs but with the skills to keep them humming. Think of this guide as another resource to build your confidence—our online classes and training are here to support you with extensive resources and expert instruction.
Foot Pedal Replacement Checklist
Before you grab any tools, running through a quick mental checklist will make the whole process smoother and safer. A little prep work goes a long way in avoiding common slip-ups.
This little table summarizes the key things to keep in mind before you dive in.
| Phase | Action Item | Key Consideration |
|---|---|---|
| Safety First | Unplug the sewing machine | Always disconnect from power to prevent electrical shock. |
| Diagnosis | Pinpoint the failure | Determine if the problem is the pedal, cord, or internal jack. |
| Sourcing Parts | Find the correct replacement | Use your machine's model number for a perfect match. |
| Execution | Follow model-specific steps | The repair could be a simple plug-in or a more detailed internal replacement. |
Getting this sorted out will help you approach the fix with a clear plan.
A successful repair starts with confidence. By tackling this yourself, you're not just fixing a machine; you're building a deeper connection with your craft and gaining valuable skills that will serve you for years to come.
This guide will walk you through each phase, from figuring out the problem to getting that new pedal hooked up and running.
How To Tell If Your Brother Foot Pedal is Faulty
Before you jump online and order a new part, let's play detective for a minute. Just because your foot pedal isn't responding doesn't automatically mean the pedal itself is dead. I've seen it dozens of times—taking a moment to properly diagnose the issue saves you from spending money on a part you don't actually need.
Common culprits I see are frayed internal wires from years of being kicked around, physical damage from a drop (we’ve all been there), or even a cracked jack inside the machine. It helps to have a general idea of identifying faulty appliances before you start, just to get into the right troubleshooting mindset.
Simple Diagnostic Checks
Let's start with the easy stuff. These checks are simple, don't require any tools, and often reveal the real problem right away.
- Inspect the Cord: Slowly and carefully run your fingers along the entire length of the pedal's cord. You're feeling for any sneaky breaks, sharp kinks, or frayed spots that scream "damaged internal wire!"
- Check for Physical Damage: Give the pedal housing a good look-over. Do you see any cracks or signs of a hard impact? It doesn't take much of a fall to damage the sensitive electronics inside.
- Do the "Wiggle Test": This is my go-to first step. With the machine turned on, gently wiggle the pedal's cord right where it plugs into the machine. If the motor sputters to life or the light flickers, your problem is likely the internal jack, not the pedal itself.
I can't tell you how many machine issues come down to small, overlooked details. This wiggle test is a perfect example—a five-second check that can save you from buying the wrong part.
Fixing a Brother sewing machine can get technical depending on the model. On the super popular Brother CS-6000i, for instance, the foot pedal jack is tucked away at the back, and its plastic housing has a reputation for being a weak point. Getting to it means carefully removing the machine's back panel, which can feel a little intimidating. This tangible example is one that many crafters can relate to and replicate on their own machines.
If these initial checks don't get you anywhere, our sewing machine troubleshooting guide has some more in-depth solutions to try.
Getting Your Tools and Replacement Part Ready
Any repair job feels ten times easier when you have everything you need laid out before you even start. It turns a potential headache into a satisfying project. Good news: if you've figured out it's just the external pedal that's given up the ghost, you probably won't need any tools at all.
But if you're like most of us and need to replace the internal jack, you'll want to pull together a small toolkit. I usually have a basic Phillips head screwdriver (a #1 or #2 size is almost always the right fit), a little flathead for gently prying open plastic casings, and a pair of needle-nose pliers for those fiddly wires inside. Trust me, those pliers are a lifesaver in tight spots.
Sometimes, you'll run into a screw that's stripped or just refuses to budge. It happens to everyone. Having a screw extractor kit in your drawer can save the day and prevent a lot of frustration.
Sourcing the Correct Component
Now for the most important part of this whole process: getting the right replacement part. This is not the place to guess. Using a pedal or jack that isn't made for your machine isn't just a waste of money—it can fry the electronics in your beloved Brother. I’ve seen it happen, and it’s heartbreaking.
Your model number is your golden ticket here. Flip your machine around and look for a little sticker or plate, usually near where the power cord plugs in. Jot that number down. With that, you can find a part that’s guaranteed to work.
For example, a part like this Baby Lock dual-function foot control is made for very specific models, ensuring it clicks in and works perfectly without any drama.
Here at bsewinn.com, we’re all about making sure you can do these repairs yourself. We have tons of resources to help you match your machine's model number to the exact component you need. It’s a core part of our mission to empower crafters, which is why we also offer online classes and training to build your confidence.
Getting Your Hands Dirty: The Replacement Process
Alright, let's roll up our sleeves and get this done. Don't be intimidated; this is more about taking your time than needing any kind of engineering degree. We'll go through both the simple pedal swap and the slightly more involved jack replacement, so you'll know exactly what to do either way.
This handy little graphic breaks down the first part of the process—making sure you have the right components before you even touch a screwdriver.
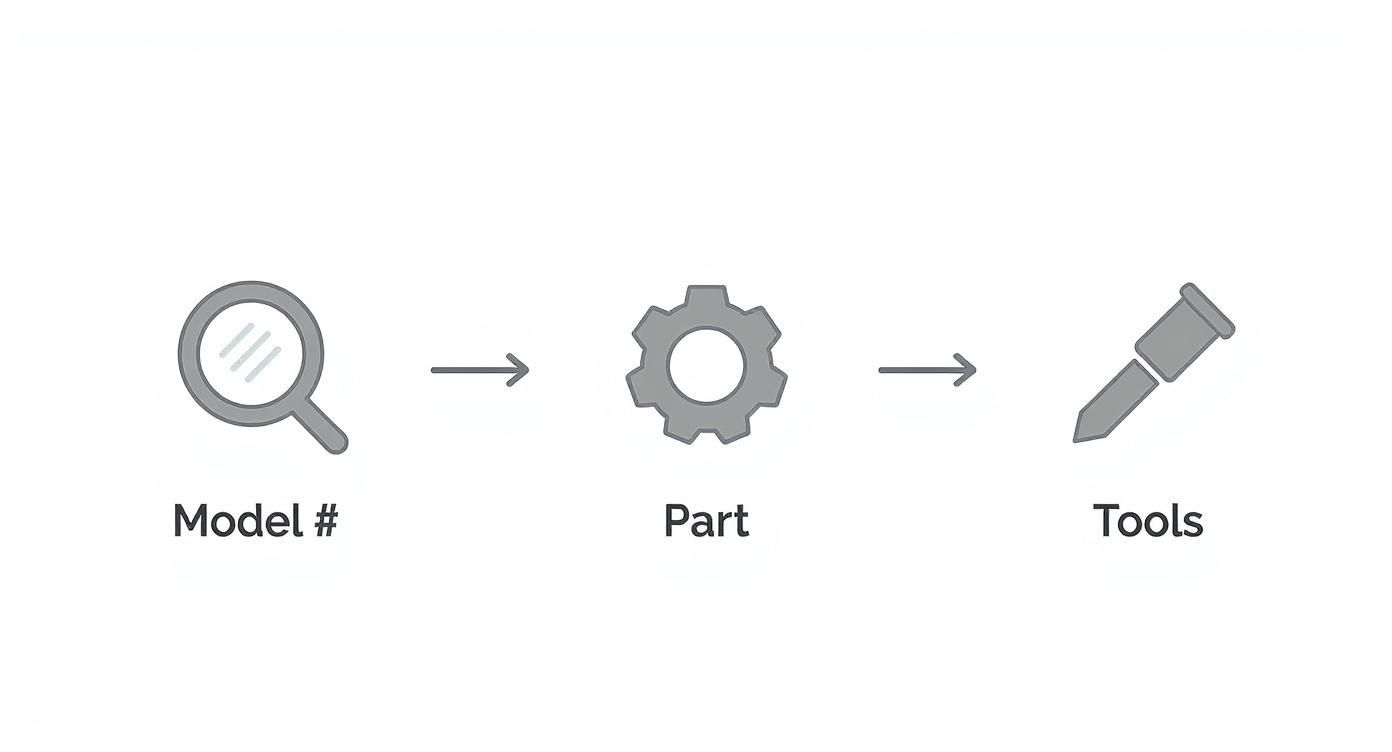
As you can see, everything starts with your machine's model number. Getting that right is the key to a smooth, headache-free repair.
For a Simple Plug-and-Play Pedal Swap
If you've figured out the problem is just the external pedal itself, congratulations! You've got the easiest fix on your hands. This is a tool-free, five-second job.
Just unplug the old, misbehaving pedal from your machine's jack and toss it aside. Grab your new, shiny, model-compatible pedal and plug it in. That’s it. You're ready to test it out.
Tackling an Internal Jack Replacement
This is where things get a bit more interesting, but it's totally manageable for most people. The secret here is to be methodical and patient. Before you do anything else, grab your phone. You're going to become a photographer for the next ten minutes, and trust me, you'll thank yourself later.
First, lay your unplugged machine on a soft towel to avoid scratching it up. Now, hunt down all the screws holding the plastic casing together. I recommend using a little magnetic tray or a dish to keep them from rolling away into another dimension.
With the screws out, you'll need to gently separate the plastic housing. There are usually little hidden clips along the seam, so use a plastic pry tool or even a sturdy guitar pick to work your way around the edge. Slow and steady wins the race and prevents cracked plastic.
Once it's open, you'll see the machine's guts. Find the small jack assembly—it’s the part where your foot pedal plugs in from the outside. You’ll see a couple of small wires running from it to the main circuit board. Before you even think about touching them, take a clear photo of how they're connected.
Now you can disconnect the wires. They often have a tiny plastic clip you can press to release them. Unscrew the old, broken jack from the housing, pop the new one into its place, and screw it in. Then, using that photo you just took, reconnect the wires. They should click right into place.
A Quick But Crucial Warning: As you're putting the case back together, be incredibly careful with the wiring. Make sure no wires get pinched between the two halves of the plastic shell. A pinched wire can short out and cause serious damage to your machine's electronics when you power it on.
With the new jack installed and all the wires safely tucked inside, carefully snap the housing back together. Re-insert all the screws and tighten them until they're snug—no need to go crazy. And that's it! The hands-on part is over, and it's time to see your work pay off.
Testing Your Repair and Important Safety Checks
Alright, with your machine all buttoned up, it's time for the moment of truth. Before you dive back into your next big project, it's always a good idea to run a few quick tests. This isn't just about making sure the repair worked—it's about safety and peace of mind.
Plug the machine back in and hit the power switch. The first good sign is the machine's light turning on instantly, without any weird buzzing sounds or flickering. Now, before you even think about threading it, gently press down on your new foot pedal. The needle should start moving up and down without any hesitation.
Functional Control and Response
Next, let's test the pedal's variable speed control. This is the real test. Does the needle move slowly when you apply just a little pressure? Does it pick up speed smoothly as you press down harder? What you're looking for is a responsive, seamless transition from a slow crawl to full speed. If it feels right, that's a great sign that all the internal connections are solid and your replacement was a success.
Safety should be your top priority during any machine maintenance, not just a pedal swap. While this guide covers the foot pedal, the core principles apply everywhere. For instance, always, always turn off and unplug the machine before changing a presser foot. It's a simple step that prevents any chance of the needle accidentally engaging.
Following the proper procedures keeps you safe and protects your machine from damage.
If you've run through these checks and everything feels right, congratulations! You're ready to get back to creating. If something still seems off, don't worry. Check out our resources on Brother sewing machine repairs for more in-depth guidance.
More Than Just a Repair with Bsewinn
Doesn't it feel great to fix your own machine? There's a huge confidence boost that comes from successfully tackling a repair yourself. Here at bsewinn.com, we genuinely believe that getting to know your equipment inside and out is the key to unlocking your creative freedom. This little repair is just one more step on that journey.
We're really passionate about empowering crafters like you, not just with our custom sewing machine designs, but with the comprehensive support to back them up. Through our online classes, training sessions, and an extensive library of resources, we want to give you the tools you need to build your skills and take on any project that sparks your imagination.
We're celebrating your new repair skills and want to invite you to see what our community is all about. Our goal is simple: keep your focus on creating, not on equipment headaches.
Learning how to swap out the foot pedal on your Brother machine is a fantastic skill to have in your back pocket for the future. We're here to support that growth every step of the way, making sure you have the knowledge and the parts you need to keep on sewing.
Questions From the Sewing Room
Over the years, I've heard just about every question there is when it comes to foot pedals. Here are a few of the most common ones that pop up in our community, along with my take.
Can I Just Use a Universal Foot Pedal?
I get this one a lot, and my answer is always a firm—but friendly—no. Please don’t risk it.
Brother machines are pretty particular about the voltage and resistance they expect from their parts. Plugging in a generic pedal can send the wrong signals, potentially frying your machine's motor or its sensitive electronic brain. It's a costly mistake I've seen people make. The best way to stay safe is to use your machine's model number to track down a genuine Brother part or a replacement that's certified to be compatible.
What if My New Pedal Doesn’t Work?
So you've plugged in a brand-new pedal, and... nothing. It’s frustrating, I know. But if a fresh-out-of-the-box pedal doesn't fix it, the culprit is almost always the jack inside the machine where the pedal connects.
Go back and look at our diagnosis section to double-check the symptoms. If they still point to an internal issue, you'll likely need to replace that jack component itself.
My Machine Is Stuck on Full Speed! Why?
This is the classic, tell-tale sign of a dying foot pedal. When your machine suddenly decides it only has one speed—super fast—it means the internal circuitry that controls the speed has shorted out. It’s basically stuck with the pedal to the metal. A new foot control will get you back in the driver's seat.
At B-Sew Inn, we're all about empowering your creativity. Whether you need a custom machine, some expert advice, or just want to take an online class, we're here to support every step of your sewing journey. You can find all the parts and resources you need over at https://www.bsewinn.com.

