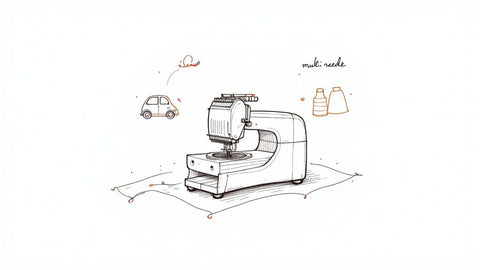
When you're just starting out, the best quilting machine is one that feels more like a helpful partner than a complicated piece of equipment. You'll want something that balances a few key quilting functions with features that are genuinely easy to use. I always tell new quilters to focus on three non-negotiables: a wide throat space, an included walking foot, and a handful of basic quilting stitches. Getting these right from the start makes all the difference in handling those bulky quilt layers and getting results you're proud of.
Choosing Your First Quilting Machine
Jumping into quilting is an incredible feeling, and picking the right machine is your first big, exciting step. I’ve seen so many people get hung up on a long list of bells and whistles, but a great starter machine isn't about having the most features. It's about having the right ones that make the learning curve feel less steep and keep the frustration at bay.
Here at bsewinn.com, we are committed to empowering crafters through our custom sewing machine designs. Our goal is to help you bring those amazing ideas in your head to life with the right tools and knowledge.
That’s why we don’t just sell you a box. We want to make sure you have everything you need to succeed. We offer extensive support through our online classes, training, and resources, including:
- Online classes created just for new quilters, walking you through projects step-by-step.
- Hands-on training so you can really get to know your new machine's capabilities.
- Tons of resources and project guides to help you tackle any design.
Essential Features for a Beginner Quilting Machine
Before we get into specific machine comparisons, let's nail down what you should actually be looking for. It's easy to get overwhelmed, but a few features truly are must-haves for anyone starting their quilting journey.
This table breaks down the essentials—think of it as your cheat sheet for what really matters.
| Feature | Why It Matters for Beginners | What to Look For |
|---|---|---|
| Wide Throat Space | This is the room you have to maneuver your quilt. More space means less struggling with bulky projects. | At least 6 inches is good, but 8 inches or more gives you room to grow into bigger quilts. |
| Walking Foot | A total game-changer. It feeds all layers of your quilt sandwich through evenly to prevent puckering. | Look for machines that include one. It saves you an extra purchase later. |
| Stitch Variety | A straight stitch is your workhorse, but having a blind hem and a simple decorative stitch is fantastic. | 15-50 built-in stitches is the sweet spot. Plenty of options without being overwhelming. |
| Automatic Needle Threader | This little feature saves so much time and eye-strain, letting you focus on the fun part—the sewing! | Thankfully, this is pretty standard now on most reliable beginner-friendly models. |
There's been a huge renewed interest in hands-on hobbies lately. Did you know that sewing machine sales saw a 40% spike in the U.S. during the pandemic? That surge in home-based crafting pushed manufacturers to design better, more intuitive machines for beginners, often with quilting-specific features like bigger work areas and specialized feet.
Of course, once you've got your machine, you'll need a few other key supplies. To see what else belongs in your toolkit, check out our handy guide on the top sewing tools for beginners.
Getting to Know the Features That Really Matter for Quilters
Before you even start looking at specific machines, let's talk about what features actually make a difference when you're quilting. Machine specs can look like a foreign language, but honestly, only a handful of them will define the best sewing machine for beginners quilting. Knowing what to prioritize turns a confusing shopping trip into an empowering one.
These aren't just flashy bullet points on a box; they're the practical tools that will save you from headaches and help you make beautiful quilts from day one. Let’s break down what you need and, more importantly, why it matters in the real world.
Throat Space: Your Quilting Workspace
The first thing I always tell new quilters to look at is the throat space, sometimes called the harp space. This is simply the open area to the right of your needle, and it determines how big of a quilt you can comfortably work on. Trust me, a tiny throat space means you'll spend more time wrestling your quilt than sewing it.
For a beginner sticking to smaller projects like baby quilts or table runners, a machine with at least six inches of throat space will get the job done. But if you’re already dreaming of throw quilts or bigger, aim for eight inches or more. It will make a world of difference and save you a ton of frustration down the road.
Key Takeaway: Think of throat space as your workbench. The bigger it is, the smoother your quilting will be. A larger area prevents the fabric from bunching up, which is a major cause of puckered stitches.
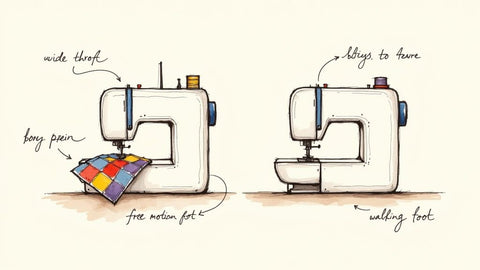
The Power of the Right Presser Feet
Next up: presser feet. Your new machine will come with a standard all-purpose foot, but for quilting, a couple of specialized feet are non-negotiable if you want clean, professional results.
-
Walking Foot: This is your absolute best friend for straight-line quilting. It has its own set of feed dogs on the bottom that move in sync with the machine's feed dogs, pulling all three layers of your quilt sandwich (top, batting, and backing) through evenly. This little attachment is the secret to avoiding puckers and shifted layers.
-
Free-Motion Quilting Foot: This foot, also called a darning foot, lets you "draw" with your thread. It hovers just above the fabric, giving you the freedom to move the quilt in any direction to create beautiful curves, stipples, and other fun designs. It really unlocks a whole new level of creativity.
Many of the best beginner quilting machines come with these feet included, which is a huge bonus and a great value.
Stitches and Other Smart Features
Don't get dazzled by a machine that boasts hundreds of built-in stitches. As a quilter, you'll use a simple straight stitch for over 90% of your work. What’s far more important is the quality of that stitch, along with a few clever functions that make life easier.
One of my must-haves is a needle up/down button. This feature lets you set the needle to always stop in the down position when you pause. It's a game-changer for pivoting perfectly at corners without your fabric shifting. Another feature you’ll thank yourself for choosing is an automatic needle threader—it saves so much time and eye strain.
As you consider your options, you'll also notice that some machines are computerized while others are mechanical. Many beginners find computerized models a bit more user-friendly for selecting stitches and tweaking settings. If you want to dive deeper, we have a whole guide comparing computerized sewing machines vs mechanical models.
Once you understand these core features, you can confidently look past the marketing hype and pick a machine that will truly support you on your quilting journey.
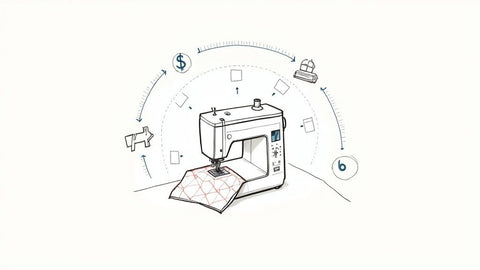
Comparing the Best Machines for Beginner Quilters
Okay, this is the fun part—finding your perfect creative partner. Picking the best sewing machine for beginners quilting isn’t about some mythical "perfect" model. It’s about finding the one that just clicks with what you want to do, how much you want to spend, and where you see your quilting hobby going.
Instead of just rattling off a list of machines, I want to walk you through a couple of common scenarios. Are you just dipping your toes in, looking for a reliable machine for weekend projects? Or do you already have big quilting dreams and want a machine that can keep up? Let's figure out which camp you're in.
The Budget-Conscious Hobbyist
If you're just starting out and aren't ready to drop a ton of cash, your goal is simple: find a machine that's dependable, easy to use, and nails the basics. You don't need a thousand decorative stitches or a fancy computer screen. You need a workhorse. A machine that gives you a beautiful, straight stitch every single time and doesn't complain when you feed it a three-layer quilt sandwich.
A solid machine in this category will usually have:
- A sturdy, mechanical build that’s easy to figure out and maintain.
- Somewhere between 15 to 30 essential stitches. Honestly, you'll live on the straight stitch, but a few others are nice to have.
- A throat space of about 6 to 6.5 inches. That’s more than enough room for baby quilts, table runners, and smaller throws.
The trick here is to prioritize build quality over a long list of features. I've seen it time and again: a well-built mechanical machine will almost always sew a better, more consistent stitch than a cheap, plastic-y computerized one at the same price.
The Ambitious Beginner
Then there are those of you who just know quilting is going to be your thing. If that's you, it makes a lot of sense to get a machine you can grow into. You’re looking for something that’s still beginner-friendly but has a few key features that will save you from wanting an upgrade in a year. This is where computerized machines really start to make sense.
Here’s what I’d look for if you’re in this group:
- A bigger throat space, ideally 8 inches or more. This makes wrestling larger quilts so much less of a headache.
- A needle up/down button. This is a game-changer for pivoting at corners and chain piecing.
- Speed control. It lets you slow things way down for tricky spots, giving you more control as you learn.
- An included walking foot and a free-motion quilting foot. These are essential for quilting, and getting them in the box is a huge plus.
For quilters who know they're in it for the long haul, checking out a model like the Baby Lock Allegro is a great move. We actually have a whole guide on how its features help quilters grow their skills—you can read our Baby Lock Allegro guide to see what I mean. It really hits that sweet spot between easy-to-use and packed with potential.
Expert Insight: Trust me on this one. Spending a little extra for a machine with a larger throat and speed control is one of the smartest things a new, serious quilter can do. These two features tackle the biggest frustrations in quilting—managing the bulk of the quilt and keeping your stitches even. They make the whole process more fun and your finished quilts look so much more professional.
And you're not alone! Quilting is a huge deal, with a community of 9 to 11 million quilters worldwide. What's really exciting is that 18% of quilters are new to the craft, up from 11% just a few years ago. This boom means there's a real demand for machines that make life easier for beginners, with things like extension tables becoming more common. If you're interested in the numbers, you can find more on the quilting market's growth on craftindustryalliance.org.
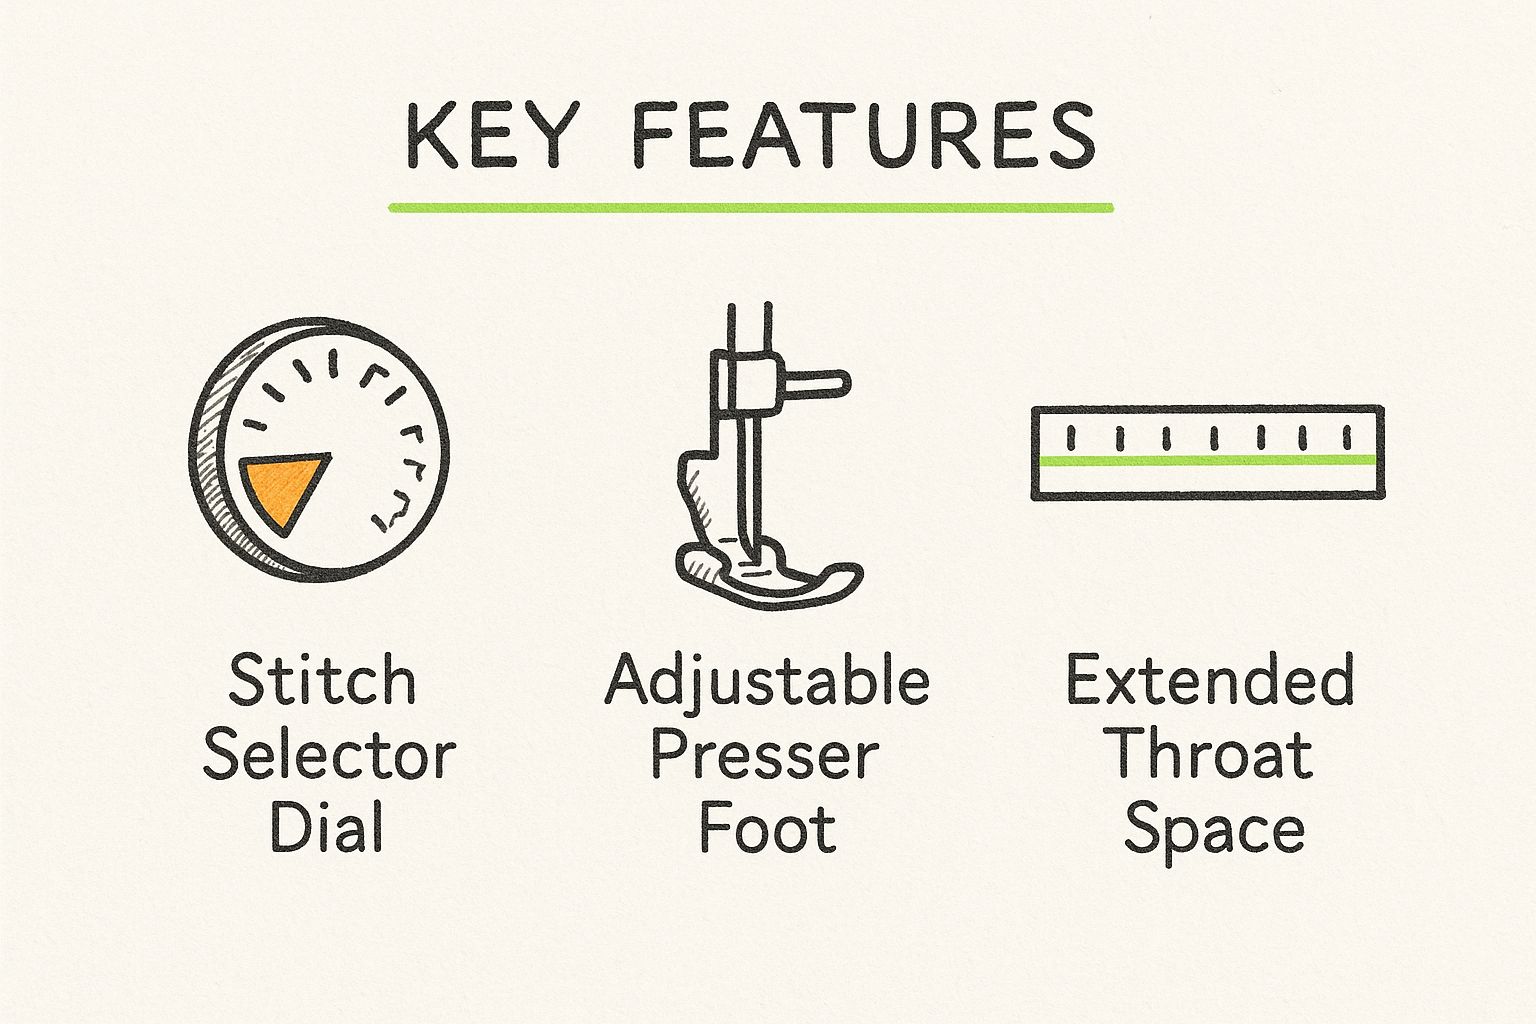
The image below breaks down the three things I think are most critical for a beginner: stitch options, presser foot control, and throat space.
It’s all about finding that balance between simple controls and features that are actually designed for quilting. That’s where you’ll find the best learning curve.
Side-by-Side Machine Comparison for Beginner Quilters
To help you see how this plays out, I’ve put together a little comparison of different machine types you'll run into. This isn't about specific brands, but about the profiles of machines and who they're really for. It’s less about the specs on paper and more about what it feels like to actually sit down and quilt with them.
| Machine Model | Key Quilting Features | Ideal Beginner Profile | Price Range | Our Verdict |
|---|---|---|---|---|
| The Essential Workhorse | Mechanical controls, ~6.5" throat space, 20-30 built-in stitches, includes walking foot. | The Budget-Conscious Hobbyist who primarily makes small to medium projects. | $$ | A fantastic starting point. It's built to last, does the basics perfectly, and won't overwhelm you with bells and whistles. |
| The Growth Partner | Computerized, ~8.5" throat space, speed control, needle up/down, 50-100 stitches, includes quilting feet. | The Ambitious Beginner who plans to tackle larger quilts and explore free-motion techniques. | $$$ | An excellent long-term investment. It gives you the support you need now with the advanced features you'll want later. |
| The Creative Powerhouse | Computerized, 9"+ throat space, automatic thread cutter, advanced decorative stitches, knee lift. | The Tech-Savvy Crafter who wants top-tier features for both quilting and general sewing. | $$$$ | This is the luxury experience. Features that automate the tedious stuff make sewing a dream and open up a world of creativity from day one. |
So how do those features really affect your projects? Let's take a real-world example.
Imagine you're quilting straight lines on a baby quilt.
-
With The Essential Workhorse, you'll pop on the walking foot, pick your straight stitch, and guide the fabric. It does a beautiful job! You'll just need to manually stop with the needle down to pivot at the corners.
-
With The Growth Partner, you'll hit that needle up/down button so it automatically stops in the down position every single time you pause. You can also slide the speed control down to a crawl, which gives you amazing control for perfectly straight lines.
-
With The Creative Powerhouse, the automatic thread cutter snips your threads for you at the end of each line, saving tons of time. The knee lift lets you raise the presser foot without taking your hands off the quilt, which is incredible for stability.
Here at bsewinn.com, we live and breathe these little details. We design our custom sewing machines thinking about the entire journey of a crafter. And with our resources, from online classes to hands-on training, we’re here to make sure you feel totally confident with every feature on your new machine. Our goal is to give you the tools and the skills to bring your vision to life.
Creating Your First Quilt Block

Alright, unboxing that shiny new machine is exciting, but now for the real fun. The true magic happens when you stop looking at the features and actually start using them to turn fabric into something real. This little guide is your first step—we're going to make a classic four-patch quilt block together.
This isn’t just theory. It's a tangible, step-by-step project you can replicate right now. I'll walk you through how to use some of those key machine features, so you can see just how easy it is to get started. This quick exercise will make it crystal clear why certain functions are so important when you're looking for the best sewing machine for beginners quilting.
Gathering Your Materials
Before we fire up the machine, let's get our supplies in order. The good news? You don't need a mountain of stuff for your first block, which is half the fun.
Here’s what you’ll need to grab:
- Two contrasting fabric squares: Go ahead and cut two squares measuring 5" x 5" from one color, and two more 5" x 5" squares from another.
- A walking foot: If your machine included one, now is the perfect time to pop it on. It's a game-changer.
- 100% cotton thread: A neutral color like white or gray is always a safe bet.
- Your sewing machine: Threaded up and ready to sew!
This simple project is the perfect confidence builder. You’ll get a feel for how your machine handles basic piecing, which is truly the foundation of everything in quilting.
Step 1: Sewing Your First Seam
The heart and soul of quilting is the quarter-inch seam. I know it sounds a little intimidating, but getting this right is the secret to making sure all your pieces fit together like a perfect puzzle.
First, take two of your contrasting fabric squares and place them right-sides together, making sure the edges are lined up nicely. Set your machine to a straight stitch—a stitch length of 2.0 to 2.5 mm is pretty much the sweet spot for piecing. Now, slide the fabric under your walking foot and sew along one edge, keeping that crucial 1/4-inch seam allowance.
A lot of machines designed for quilting will have a special foot or markings on the needle plate to help guide you. Don't rush this part. Just focus on keeping the fabric edge lined up with your guide. Do this again with your other pair of contrasting squares.
At bsewinn.com, we believe that you learn by doing. That’s why we pair our custom sewing machine designs with tons of online classes and training. We want to empower you to get from unboxing to making beautiful quilts with zero frustration.
Step 2: Pressing and Assembling the Block
Once you've sewn your pairs, it's time to head to the ironing board. Trust me, pressing is just as important as the sewing itself.
Gently press the seams. You can press them open or to one side. A common trick is to press toward the darker fabric to keep it from peeking through the lighter side. You should now have two identical little rectangles.
Place these two units right-sides together. The secret here is to "nest" the seams where they meet in the middle. This just means you make one seam allowance point up and the other one point down. They should lock together snugly, which is the key to getting that perfect, sharp point in the center of your block.
Step 3: Finishing Your Four-Patch Block
You're in the home stretch! Sew along the last edge of your paired-up units, again sticking to that precise quarter-inch seam.
Once it's sewn, press this final seam open to help reduce some of the bulk in the middle. Now, flip your block over... and you did it! You’ve just made your very first four-patch quilt block. This one skill opens the door to so many amazing quilt designs.
If you're feeling adventurous, you could even try a simple decorative stitch around the outside of the block. It’s a great, low-pressure way to play around with the different stitch options on your machine.
This simple block shows you how essential features—like a solid straight stitch and a good walking foot—directly lead to a great result. With the help of our resources at bsewinn.com, this is just the first of many beautiful things you’re going to create.
So, Which Machine Should You Buy?
Picking your first quilting machine is a huge deal. I remember that feeling well! After diving into all the features and comparing what feels like a million different models, it's time to circle back to what really matters: your own quilting dreams. There's no single "best" machine for a beginner; the right one is the one that feels like a creative partner you can grow with.
My goal here is to help you cut through the noise and pick a machine that works for you right now but also has room for you to spread your wings. This is about more than just the price tag—it’s about investing in your craft for the long haul.
Matching a Machine to Your Quilting Goals
Let’s boil it all down to a couple of simple scenarios. Think honestly about what you want to create, because that's the best compass you have for choosing a machine.
-
For the Small Project Quilter: If you're picturing yourself whipping up adorable baby quilts, table runners, and other smaller projects, you absolutely don't need a massive, decked-out machine. A solid, reliable model with about 6.5 inches of throat space, a sturdy build, and an included walking foot is your sweet spot. It'll give you all the power and precision you need without a bunch of features you'll never touch.
-
For the Future Quilt Artist: Do you dream of making queen- or king-sized quilts? Are you itching to try free-motion quilting? If that's you, do yourself a huge favor and invest in a machine with a bigger throat space from the get-go. Going for something with 8 inches or more will save you so much frustration down the road. Trust me, wrestling a giant quilt through a tiny space is no fun and really kills the creative vibe.
Thinking ahead like this is what makes a machine a good investment. It’s no surprise the global quilting machine market was valued at around USD 850 million in 2023. Manufacturers are finally catching on, creating machines specifically for new quilters—often under $1,000—that include those larger work areas and essential quilting feet. If you're curious about the industry trends, you can explore this full report about the sewing machine industry.
The Machine is Just the Start
Here at bsewinn.com, we know that buying the machine is only step one. We've designed our custom sewing machines with a quilter’s entire journey in mind, from that very first seam to sewing on the final binding. We’re not just selling machines; we are committed to empowering you to succeed.
When you choose a machine from us, you're not just getting a tool; you're joining a community. We believe that confidence is built through practice and guidance, which is why we offer a wealth of resources designed to help you succeed.
This means you get access to our library of online classes that cover everything from basic piecing to more advanced techniques. Our training sessions are designed to get you comfortable with every single button and feature on your new machine. We’re here to provide the support and inspiration you need to turn your ideas into beautiful quilts you'll be proud of for years to come.
Still Have Questions? Let's Talk.
Diving into the world of quilting machines can feel a little daunting, and it's totally normal to have a few questions swirling around. I get it. Getting those questions answered is the last step before you can finally pick a machine and feel truly great about it. Let's tackle some of the most common things new quilters ask so you can get started on your creative journey with confidence.
We'll cover everything from whether you really need a special machine to what you should expect to spend and how to keep it humming along for years to come.
Can I Just Use My Regular Sewing Machine for Quilting?
Absolutely! I'll let you in on a little secret: you don't need a machine with "quilting" in its name to make a quilt. So many of us started on a standard, trusty sewing machine, and they're perfectly capable of handling quilting, especially when you're working on smaller projects. The trick is knowing if it has a few key features.
Your everyday machine is a fantastic starting point if it lets you:
- Drop the feed dogs (those little teeth under the needle) so you can do free-motion stitching.
- Attach a walking foot, which is a lifesaver for sewing through all those layers of fabric and batting without everything shifting around.
- Sew a good, consistent straight stitch. That's the foundation of all piecing!
Lots of quilters make beautiful things on a standard machine for years. It's only when you start dreaming of bigger quilts that you might find yourself wishing for more throat space—that's the area to the right of the needle. It's a common feature on the best sewing machine for beginners quilting for a reason; it makes wrestling the bulk of a large quilt so much easier.
How Much Should I Expect to Spend on a Beginner Quilting Machine?
This is a big one. The good news is you can get an excellent, reliable machine without taking out a second mortgage. A really solid beginner machine will typically run you somewhere in the $300 to $700 range. The models in this sweet spot usually hit the perfect balance of durability, the quilting features you actually need, and controls that don't require a PhD to figure out.
Here's something to remember: a higher price tag doesn't automatically mean it's a better machine for a beginner. Your goal is to invest in quality where it counts—like a strong motor and precise stitch control—not a machine loaded with hundreds of decorative stitches you'll probably never touch.
Spending a little extra for a model with a bit more throat space or one that comes with a walking foot is usually a smart move. It’ll save you from wanting to upgrade just a few months down the road.
What Kind of Maintenance Does a Quilting Machine Need?
Taking care of your machine is probably the most important thing you can do to keep it running smoothly. Think of it like this: a little love goes a long way. Thankfully, the day-to-day upkeep is super simple and doesn't take much time at all. Doing these few things will ensure your stitches stay beautiful and your machine is always ready for your next project.
Here are the non-negotiables for machine care:
- Clean Out the Bobbin Area: Lint is the enemy! It builds up fast, especially with all that fluffy cotton and batting. Use the little brush that came with your machine to clear out the bobbin case after every couple of projects.
- Change Your Needle Often: This is the cheapest, easiest way to guarantee great-looking stitches. My rule of thumb? A new needle for every 8-10 hours of sewing, or before you start any big new project. It makes a huge difference.
- Get it Professionally Serviced: Just like your car needs a tune-up, so does your machine. Taking it to a qualified technician every year or two will keep everything inside lubricated and perfectly aligned. It’s an investment in your machine's longevity.
Here at bsewinn.com, we know that buying the machine is just the beginning of your journey. Our custom sewing machine designs are built to last, and our huge library of online resources, classes, and training is here to guide you through everything from that first cleaning to mastering tricky quilting techniques.
Your creativity deserves a machine that can keep up. At B-Sew Inn, we don’t just sell you a box; we provide the support and education you need to bring your quilting dreams to life. Come explore our collection of beginner-friendly quilting machines and let's find the perfect one for you. Find your perfect quilting machine at bsewinn.com