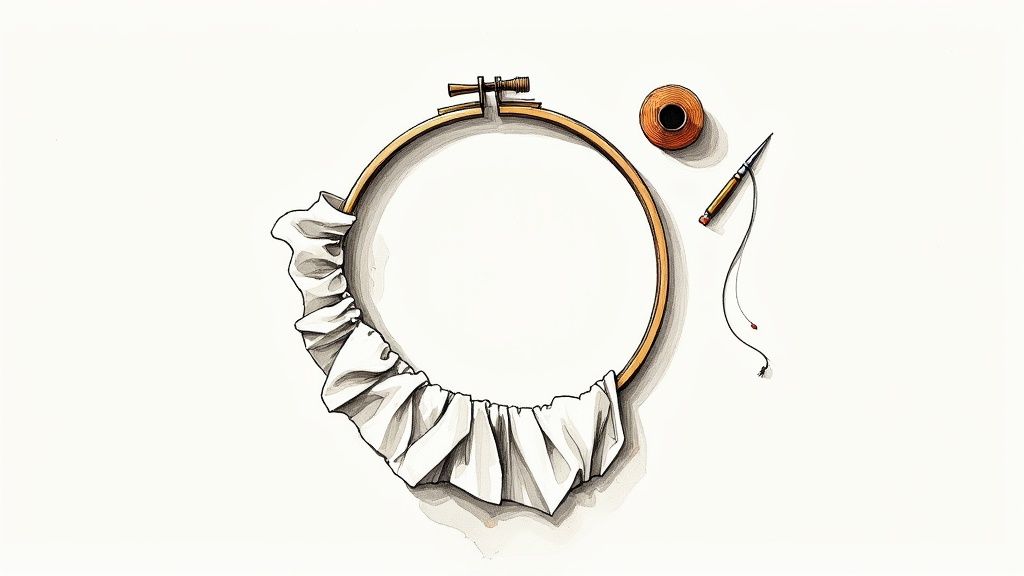
An embroidery hoop size chart is one of the most useful tools you can have. It helps you pick the right hoop for whatever you're stitching up, which is key to getting that perfect, drum-tight fabric tension and beautiful stitch quality. As a crafter, mastering your tools is the first step to creating stunning, replicable sewing machine designs.
You’ll see hoops measured in inches—common sizes are 4x4, 5x7, and 6x10 inches. But here’s something experienced stitchers learn fast: the actual stitching area is always a little smaller than the hoop’s name implies. Nailing the right size from the start is your best defense against puckering and distortion, ensuring your final piece looks just like the example you're aiming for.
Why Hoop Size Is a Big Deal
Honestly, choosing the right embroidery hoop is probably the first big step toward a gorgeous, professional-looking design. The hoop’s entire job is to keep your fabric taut and smooth, which is absolutely critical for forming uniform, even stitches.
If you grab a hoop that’s way too big for your design, the fabric can start to sag in the middle. This almost always leads to wonky stitches and puckering. On the flip side, using a hoop that’s too small means you have to keep re-hooping your project, which is a huge pain and seriously risks messing up your design's alignment.
Here at Bsewinn.com, we're committed to empowering crafters by creating our custom sewing machine designs to fit standard hoop sizes, which helps take a lot of that guesswork out of your planning. Through our extensive resources, online classes, and training, we provide the support you need to confidently replicate beautiful projects.
- Optimal Tension: The right size gives you that perfectly even tension across the whole stitching area. No slack, no sags.
- Design Integrity: It’s your best insurance against a design that ends up looking stretched, skewed, or just plain off.
- Reduced Puckering: Good hooping is the secret to minimizing that frustrating fabric gathering that can ruin a project.
And for those really ambitious projects? When you need a bigger canvas for quilting or sprawling designs, you can explore options like the Jumbo Embroidery Hoop 14" x 14". Getting a handle on these basics is what helps you get those flawless results, time and time again.
Quick Lookup Embroidery Hoop Sizes and Uses
To make things a bit easier, I've put together this quick-reference table. It's a handy how-to guide for matching common hoop sizes with the kinds of tangible projects they're perfect for.
| Hoop Size (Inches) | Metric Equivalent (mm) | Common Project Types |
|---|---|---|
| 4" x 4" | 100 x 100 mm | Small logos, monograms, baby clothes, patches, napkins |
| 5" x 7" | 130 x 180 mm | Towels, shirt fronts, larger monograms, quilt blocks |
| 6" x 10" | 160 x 260 mm | T-shirts, jacket backs, tote bags, decorative pillows |
| 8" x 8" | 200 x 200 mm | Quilting, large single designs, pillowcases, wall hangings |
| 8" x 12" | 200 x 300 mm | Large jacket backs, full-front shirt designs, banners |
| 14" x 14" | 360 x 360 mm | Quilting large blocks, expansive wall art, tablecloths |
Keep this chart bookmarked! It’s a great starting point, but remember that the best hoop is always the smallest one that comfortably fits your entire design.
Why Hoop Size Is Crucial for Your Embroidery Success
If you've ever been frustrated with an embroidery project, there's a good chance the hoop was the culprit. Picking the right size hoop from an embroidery hoop size chart isn't just a suggestion—it's the bedrock of a successful project. Think of it like a painter stretching a canvas; the right tension is everything. It allows your machine to lay down perfect, consistent stitches without a fight.
The hoop's size directly impacts fabric tension, which is the key to that crisp, professional look we all want.
A hoop that’s too big for your design is just asking for trouble. All that extra, unsupported fabric will inevitably sag, leading to puckering and a distorted final image. On the flip side, using a hoop that’s too small means you have to constantly re-hoop the fabric. This is a risky game that often ends in misaligned designs and even fabric damage.
Avoiding Common Hooping Pitfalls
Even a small mistake in choosing your hoop can cause some pretty noticeable problems. These aren't just cosmetic issues, either; they can lead to real headaches with your machine.
- Fabric Puckering: This is that annoying bunching-up that happens around your stitches when the fabric isn't held evenly taut.
- Design Distortion: If the fabric shifts even slightly during stitching, the design can look stretched or skewed.
- Needle Breaks: Poor tension creates more friction and resistance than your machine is meant to handle, which can strain the motor and sometimes even snap a needle.
Here at Bsewinn.com, we are committed to helping crafters sidestep these frustrations. Our extensive resources, from online classes and training to our custom sewing machine designs, are all about giving you the expert guidance you need. We want to help you get your project set up right so you can enjoy a smooth and rewarding creative process, right from the very first stitch.
Understanding the Standard Embroidery Hoop Size Chart
Getting the hang of an embroidery hoop size chart is one of those foundational skills every stitcher needs. It’s all about understanding the link between the size printed on the hoop, its actual metric dimensions, and the real-world stitching area you can use. Nailing this down is the key to making sure those beautiful custom designs from places like Bsewinn.com translate perfectly from your screen to your fabric.
One of the first things that trips people up is realizing that a 5x7 inch hoop doesn't actually give you a full 5 by 7-inch space to stitch in. The hoop's frame and the mechanics of the embroidery machine's arm eat up some of that real estate, which shrinks your maximum usable area. Knowing the true dimensions ahead of time saves you from the headache of discovering your design file is just a bit too big for your hoop.
Decoding Common Hoop Dimensions
Most of the common hoop sizes you'll see are made to handle a huge variety of projects, from tiny personalizations to much bigger pieces.
Let's break down the popular ones with tangible examples:
- The classic 4x4 inch hoop (which is really about 100x100 mm) gives you a usable stitching field of around 3.9 inches. It’s the go-to for monograms on shirt cuffs, small logos on hats, and little decorative touches on baby onesies.
- You'll find the 5x7 inch hoop (130x180 mm) is the versatile workhorse for most home machines. It's fantastic for more detailed and slightly larger designs, like a floral pattern on a kitchen towel or a name on a Christmas stocking.
- When you’re ready to go bigger, the 6x10 inch hoop (160x260 mm) opens up a whole new world of possibilities. Think larger designs for tote bags, a quote on a decorative pillow, or a custom design on the back of a denim jacket.
- For really ambitious projects, an 8x8 inch hoop (200x200 mm) is perfect for things like full quilt blocks.
Most starter machines will top out at the 5x7 size, while professional machines can handle the much larger hoops. If you want to dive deeper into matching hoop sizes with different project types, bycurated.com has a great guide.
Detailed Embroidery Hoop Dimensions and Stitching Fields
To make it even clearer, here's a table that lays out the labeled hoop sizes next to their actual metric dimensions and, most importantly, the maximum area you can actually stitch in. Think of this as your cheat sheet for project planning.
| Labeled Hoop Size (Inches) | Actual Dimensions (mm) | Max Stitching Field (Inches) | Ideal For |
|---|---|---|---|
| 4x4 | 100 x 100 mm | 3.9" x 3.9" | Monograms, small logos, baby clothes, patches |
| 5x7 | 130 x 180 mm | 4.9" x 6.9" | Most standard designs, tea towels, t-shirts, decorative pieces |
| 6x10 | 160 x 260 mm | 6.2" x 10.2" | Large designs, tote bags, jacket backs, pillowcases |
| 8x8 | 200 x 200 mm | 7.8" x 7.8" | Quilting blocks, large square designs, centerpieces on home decor |
| 8x12 | 200 x 300 mm | 7.8" x 11.8" | Large rectangular designs, banners, full-front shirt embroidery |
| 9.5x14 | 240 x 360 mm | 9.4" x 14.1" | Very large projects, quilt borders, intricate jacket back art |
As you can see, the difference between the labeled size and the stitching field can be significant. Always double-check your machine's specific limitations and use the "Max Stitching Field" column as your true guide.
This chart really drives home how a hoop's diameter directly impacts your stitchable area.
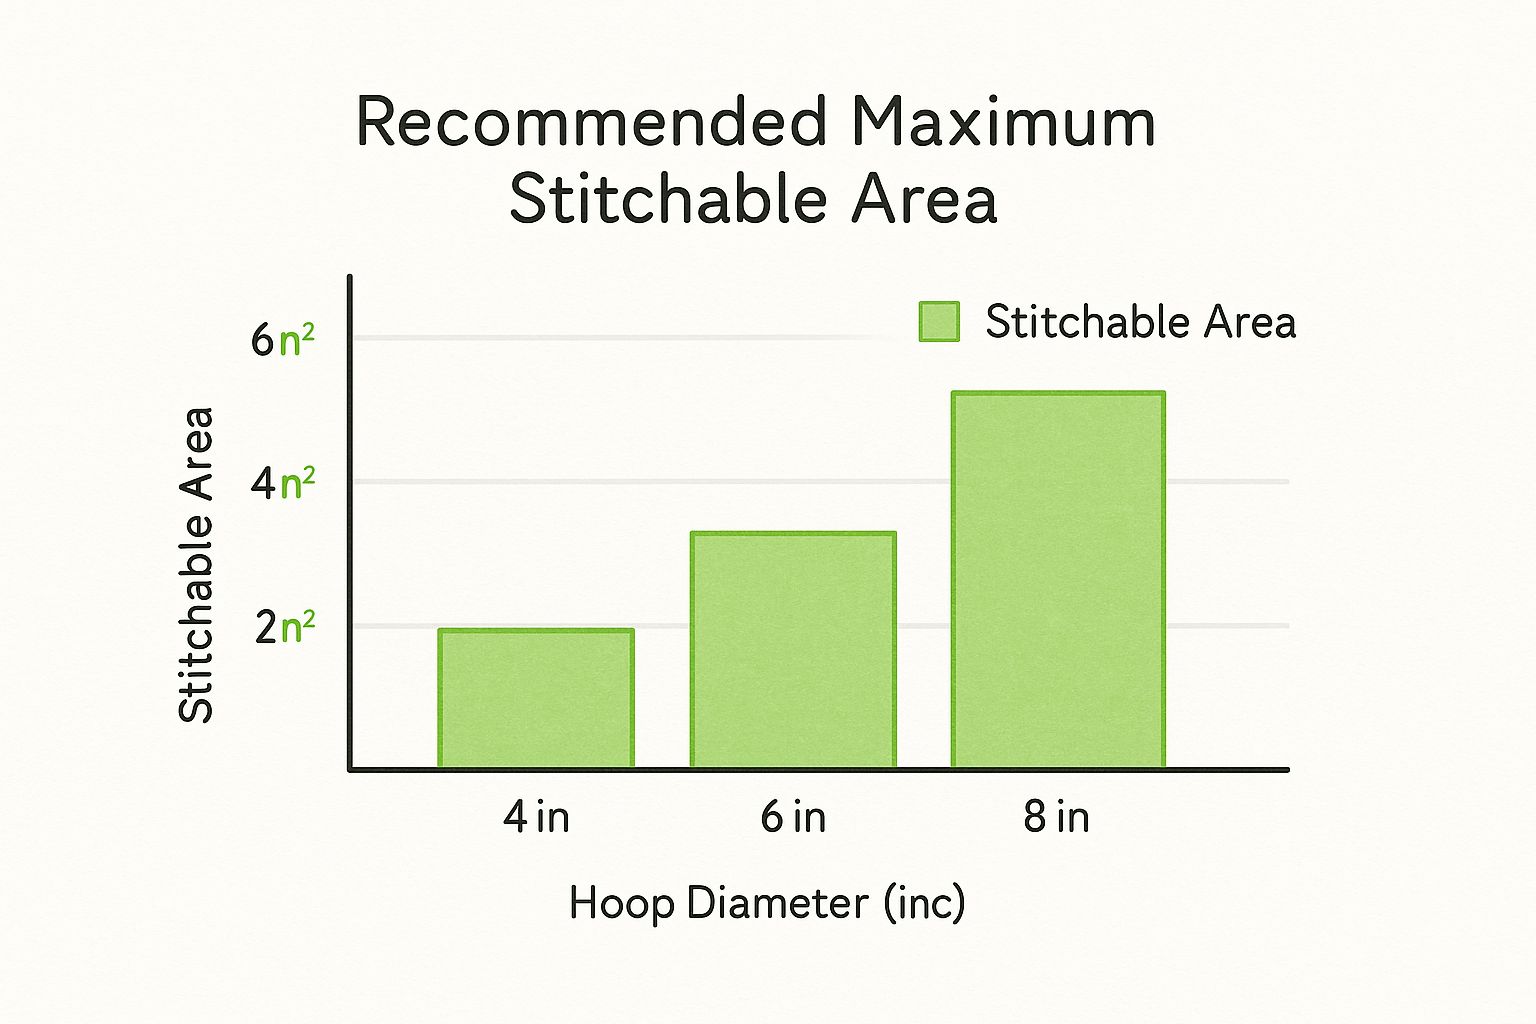
It’s easy to see why even a small jump in hoop size can dramatically expand your creative canvas. That’s exactly why picking the right hoop from the get-go is such a critical part of planning any successful embroidery project.
Understanding Hoop Names vs. Actual Stitching Area
If you’ve ever bought a design file labeled “6x10” only to find it won’t load on your machine with your 6x10 hoop, you’ve run into one of the most common frustrations in machine embroidery. It's a rite of passage, really. The confusion comes from the gap between a hoop’s advertised name and its true stitching field.
It’s an easy mistake to make. You’d think a 6x10 hoop would stitch a 6x10 design, right? Unfortunately, the hoop's name usually refers to its approximate overall dimensions, not the maximum area your machine can physically stitch within it. The machine's embroidery foot and needle mechanism need a little elbow room around the edges, which shrinks the usable space. The key takeaway here is that the actual stitching area is always smaller than the hoop's name suggests. Getting a handle on this little detail is crucial for buying the right design files and saving yourself a lot of time and thread.
Why the Measurements Differ
This discrepancy is just a standard industry practice, but it trips up new embroiderers all the time. For instance, some hoops sold as "6x10" might only offer a stitching area of 6 by 9.6 inches. That small difference is enough to make them incompatible with a design that’s a true 6x10.
You'll see this across the board. Sizes like 4x4 or 8x8 typically have embroidery fields just shy of their names, while others, like a standard 5 x 7 embroidery hoop, are often much closer to their listed dimensions. Knowing your machine's specific stitch field for each hoop is the only way to be certain.
At Bsewinn.com, our goal is to empower crafters by cutting through these technical details. It’s why our online classes and extensive training resources are designed to give you clear, straightforward guidance on everything from choosing the right hoop to executing your project with confidence. We believe that with the right support, you can master your machine and bring your creative visions to life without all the guesswork.
Choosing the Right Hoop for Any Project
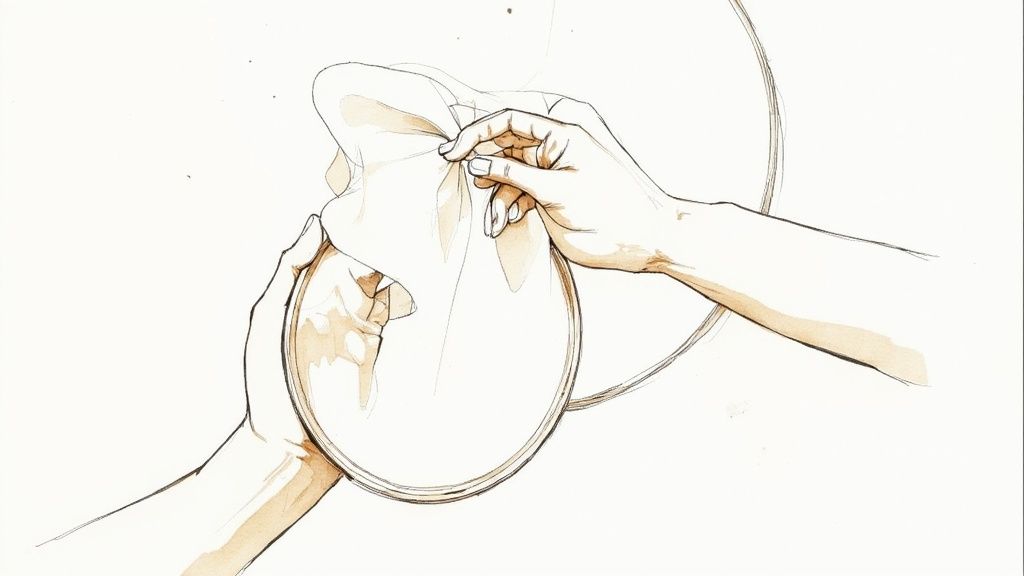
Picking the best hoop for your project is about more than just matching numbers on a size chart. This how-to guide will show you the golden rule: always reach for the smallest hoop that comfortably fits your entire design. Why? Because this gives you the absolute best fabric tension and support. A nice, snug fit is your best defense against shifting and puckering, especially when you're tackling really detailed patterns.
Let me give you a few tangible examples that you can replicate. Say you're adding a crisp monogram to a shirt cuff or personalizing a set of napkins. A small 4x4 hoop is perfect for that. Its compact size keeps the surrounding fabric perfectly taut, which is exactly what you need for clean, precise stitches on smaller items.
But what if you're working on a tea towel with a design in the center? That’s where a versatile 5x7 hoop really shines. It gives you plenty of space for the pattern without leaving too much fabric unsupported around the edges. For the big stuff, like a full jacket back design, you'll need to pull out an 8x12 hoop to get the whole pattern hooped up in one go.
Matching Hoops to Fabric and Design
The kind of fabric you're using and how dense your design is also play a huge part in your hoop choice. It's a bit of a balancing act.
- Fabric Type: Stretchy knits, like your basic t-shirt material, can be tricky. They absolutely need a smaller, snug hoop paired with the right stabilizer to keep the fabric from warping under the needle. On the other hand, a stable woven cotton is much more forgiving and can handle a slightly larger hoop without much fuss.
- Design Density: If your design has a high stitch count, you're going to need excellent stabilization. Using a hoop that provides tight, even tension is the key to preventing the fabric from bunching up and creating those dreaded "bulletproof" patches.
Here at Bsewinn.com, we create our custom sewing machine designs with specific hoop sizes in mind, which takes a lot of the guesswork out of your project setup. With our extensive resources and training, you'll feel confident picking the right tools for any job, whether it's a simple outline or a complex, multi-layered piece. To get started with the most common sizes, check out our round embroidery hoop set.
A Little Hoop History
It's easy to take the modern embroidery hoop for granted, but this simple tool has a surprisingly rich story that really shaped the craft we love today. While needlework itself is ancient, the adjustable hoop is a much more recent invention that made embroidery portable and way more accessible for everyone.
This humble little tool does one critical job: it keeps the fabric taut. That perfect tension is just as vital now for machine embroidery as it was for hand stitching centuries ago.
Things really started to take off in the early 20th century. The adjustable hoop as we know it began to emerge with clever inventors like Helen Harmes. In 1903, she was awarded a patent for a hoop with a variable diameter—a game-changing idea that allowed one hoop to work for various design sizes. This spirit of constant improvement connects the tools in our embroidery hoop size chart directly to a long line of creative problem-solvers.
Here at Bsewinn.com, we see ourselves as part of that tradition. We get excited about pushing the craft forward with our custom sewing machine designs, in-depth resources, and expert-led online classes and training. It’s all about empowering you to master your tools and turn a timeless craft into your own modern art.
Common Questions About Embroidery Hoops
Getting a new project started always brings up a few questions. Let's tackle some of the most common ones stitchers ask about hoops so you can feel more confident firing up your machine.
What Happens If My Hoop Is Too Big?
This is a classic mistake, and it can cause some real headaches. When you use a hoop that’s way too big for your design, the fabric in the middle doesn't have enough support and starts to sag. You lose that drum-tight tension that’s absolutely critical for clean, neat stitches.
This often leads to puckering, a distorted design, and a finished piece that just doesn't look as sharp as it should. The golden rule? Always pick the smallest hoop that your entire design fits into comfortably. You’ll get much better results this way.
Can I Use a Hoop from a Different Machine Brand?
I really wish the answer was yes, but hoops are almost never interchangeable between different brands. Each company has its own unique way of attaching the hoop to the machine, and they’re designed to work with a specific setup.
Trying to force a hoop from another brand onto your machine is a recipe for disaster—you could end up damaging the hoop, the attachment mechanism, or even the machine itself. It’s always safest (and smartest) to stick with hoops made specifically for your machine model.
How Do I Choose the Right Stabilizer?
Ah, the great stabilizer question! The right choice really boils down to your fabric, the hoop size you're using, and how dense the stitching is in your design.
- Light fabrics in small hoops: A simple cut-away or tear-away stabilizer usually does the trick.
- Stretchy fabrics (like t-shirts): You absolutely need a cut-away stabilizer. It's essential for preventing the fabric from stretching out of shape while you're stitching and after it's washed.
- Heavy, dense designs: For designs with a lot of stitches packed into a small area, you might need to layer your stabilizer or opt for a heavy-duty specialty version to give it the support it needs.
At Bsewinn.com, our goal is to empower crafters like you by providing the know-how and tools you need to succeed. We invite you to explore our custom sewing machine designs, online classes, and extensive training resources to take your skills to the next level. Find your next great project at https://www.bsewinn.com.