

Think of a free motion quilting machine as a tool that lets you literally "draw" with thread. You get to move the fabric freely under the needle, turning your standard sewing machine into something more like an artist's brush. It’s a game-changer that gives you complete control over every stitch and design.
Unleash Your Creativity with Free Motion Quilting
Imagine being able to stitch intricate feathers, flowing swirls, or even your own signature right onto your quilts. That's the heart and soul of free motion quilting. Instead of letting the machine pull the fabric forward in a straight line, you drop the feed dogs—those little metal teeth under the needle—and you take over. It’s a simple change, but it transforms you from just operating a machine into a true textile artist.
This whole technique is built on creative freedom. You guide the fabric with your hands, pushing it in any direction to create fluid, organic patterns that are just impossible with regular sewing. It feels a lot like sketching on paper, but your medium is thread and your canvas is a quilt top just waiting to become a masterpiece. Every little movement you make shows up in the design, making each project one-of-a-kind.
The Art of Drawing with Thread
The idea behind free motion quilting is pretty simple: your hands control the pattern, and your foot pedal controls the speed. The real magic happens when you find a good rhythm between the two, which is the key to getting those smooth, even stitches we all strive for. It's what lets you add that personal touch that truly brings a quilt to life.
Here's a little taste of what this kind of control lets you do:
- Create Custom Designs: Forget being stuck with straight lines. You can stitch anything from a simple meander to incredibly complex, artistic motifs.
- Add Unique Texture: The way you stitch—and how dense you make it—adds an amazing amount of depth and dimension to your finished quilt.
- Finish Projects Personally: You get to take complete ownership of your quilt from the very first cut of fabric to that final, beautiful stitch.
Here at bsewinn.com, our whole mission is to help you on this exciting journey. We empower crafters through our custom sewing machine designs, built for creative expression, and we back them up with extensive resources, including online classes and training. Our goal is to give you the right tools and the confidence to really explore your artistic side. Whether you're stitching your first simple swirls or tackling a detailed showpiece, we believe the only limit should be your imagination.
Free motion quilting is an adventure in texture and line. By dropping the feed dogs, you unlock a machine's potential to move beyond utility and into the realm of pure artistry, making every stitch a deliberate mark of creativity.
With the right machine and a little guidance, this incredibly rewarding skill is something anyone can learn. If you're looking for a place to start, check out our guide on quilting stitch patterns for beginners. The patterns you'll find there are perfect for building muscle memory and confidence as you kick off your free motion quilting adventure.
Comparing Different Types of Quilting Machines
Stepping into the world of free motion quilting machines can feel a bit like learning a new language. With so many different models and features, it’s easy to feel overwhelmed. But don't worry—choosing the right machine really just boils down to matching the right tool to your creative vision, your workspace, and your budget.
Think of it this way: a standard home sewing machine is like a sketchbook. It's wonderfully versatile, you can take it anywhere, and it’s perfect for practicing new ideas on smaller projects like baby quilts or wall hangings. It's the ideal starting point for nearly every quilter dipping their toes into free motion.
A dedicated long-arm machine, on the other hand, is like a massive artist's easel in a professional studio. It’s a specialized, stationary tool built to handle huge canvases—or in this case, king-sized quilts—with incredible ease and precision.
The Domestic Machine: Your Creative Sketchbook
Your everyday domestic sewing machine is where most of us start our free motion quilting journey, and for good reason. Most modern machines have the one feature that's non-negotiable: the ability to drop or cover the feed dogs. This simple function disengages the little teeth that pull fabric forward, putting you in complete control of the movement.
While these machines are fantastic for piecing and garment sewing, their biggest limitation for quilting is the throat space—that’s the distance between the needle and the body of the machine. With a typical throat space of 5 to 8 inches, trying to maneuver a large, bulky quilt can feel more like a wrestling match than a creative dance. But for smaller projects, it's the perfect way to build your skills without a huge investment.
Mid-Arm and Long-Arm Machines: An Expanded Canvas
As your quilts get bigger and your designs more ambitious, you'll eventually crave more room to play. This is where mid-arm and long-arm machines shine. A mid-arm offers a much larger "canvas," with a throat space usually between 12 to 17 inches. It’s a great middle-ground, giving you significantly more creative space without demanding the dedicated room a full long-arm setup requires.
Long-arm machines are the true workhorses of the quilting world. These beasts are mounted on large frames and boast massive throat spaces of 18 inches or more. The quilt is stretched taut on the frame, and instead of pushing the fabric, you move the machine's head over the quilt. This setup completely eliminates the struggle of wrangling a heavy quilt, allowing for silky-smooth stitches and incredibly intricate designs on even the largest projects.
This chart breaks down the key differences to help you see which machine type might be the right fit for your quilting adventure.
Comparing Free Motion Quilting Machine Types
| Machine Type | Best For | Throat Space | Typical Cost Range | Space Requirement |
|---|---|---|---|---|
| Domestic | Beginners, small projects (baby quilts, wall hangings), quilters on a budget. | 5-8 inches | $300 - $2,500 | Fits on a standard sewing table. |
| Mid-Arm | Quilters ready for an upgrade, larger projects (lap to queen-size), limited dedicated space. | 12-17 inches | $4,000 - $10,000 | Can be used on a large table or a smaller frame system. |
| Long-Arm | Serious hobbyists, professionals, quilting king-size projects, dedicated quilting studios. | 18+ inches | $10,000 - $35,000+ | Requires a large, dedicated frame (often 10-14 feet long). |
Ultimately, the best machine is the one that removes barriers and lets your creativity flow freely.
This diagram really captures how the right tools and techniques are the foundation that supports your quilting artistry.
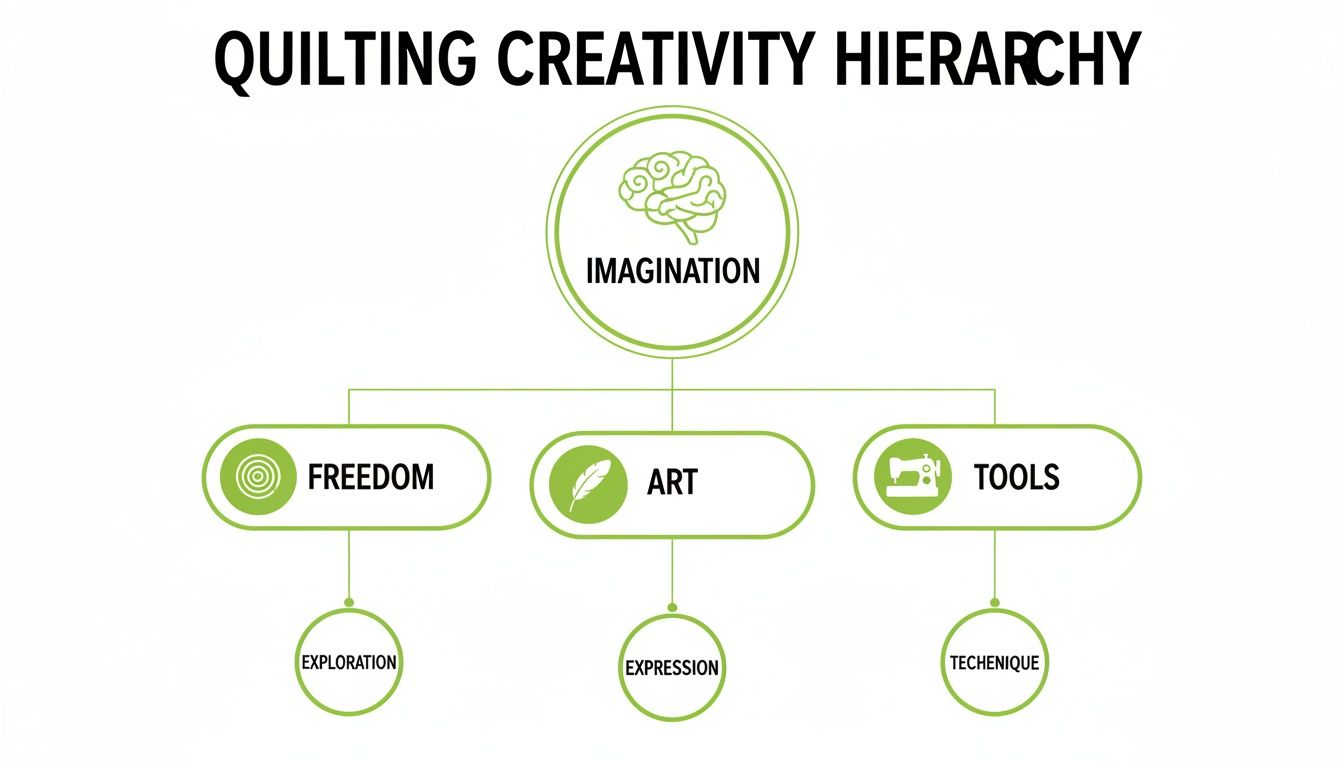
It’s all about pairing your imagination with the right tools to unlock true artistic freedom.
Finding Your Perfect Quilting Partner
So, how do you choose? It really comes down to your personal quilting journey. Ask yourself a few key questions:
- What size projects do I love to make? Are you all about baby quilts and pillows, or do you dream of tackling sprawling, bed-sized masterpieces?
- How much space do I have? Can you dedicate a whole room to a frame system, or do you need a machine you can tuck away when it's not in use?
- What’s my budget? Your financial comfort level will be a major factor in guiding you toward the right type of machine.
Free motion quilting machines are a huge part of the fast-growing computerized quilting world. The global market for these machines was valued at $1,036.6 million in 2021 and is projected to hit $1,260 million by 2025. It's a testament to how many quilters are discovering the joy of drawing with thread. If you want to dive deeper into the tech side of things, our guide comparing computerized sewing machines vs mechanical is a great place to start.
What Makes a Great Free Motion Machine?
So, what takes a sewing machine from just "good enough" to a true partner in your free-motion quilting journey? It's not about the logo on the front or a hefty price tag. It boils down to a handful of smart features designed to make the whole process feel smoother, more intuitive, and frankly, a lot more fun. Let’s decode the technical jargon into what it actually means for your quilting.
When you're comparing free motion quilting machines, what you're really doing is looking for the one that removes the most roadblocks between your creative idea and the finished quilt. You want a machine that feels like it's working with you, not against you, as you glide your fabric under the needle. The right combination of features can be the difference between frustration and a finished piece you're proud to show off.

Throat Space: Your Creative Playground
Think of throat space as your personal playground. It's that open area to the right of the needle, and it determines just how much quilt you can comfortably manage. A tight, cramped space turns quilting a big project into an arm-wrestling match, leading to stiff movements and wonky stitches. Nobody wants that.
A machine with a generous throat gives you the room to breathe—and to create those big, sweeping curves and detailed patterns without constantly wrestling with the quilt's bulk. This freedom allows for the fluid, graceful motions that are the heart and soul of free motion quilting.
Stitch Regulation: Cruise Control for Your Needle
Imagine having cruise control for your sewing. That's a stitch regulator in a nutshell. This brilliant bit of tech uses sensors to track how fast you're moving the fabric and tells the machine to speed up or slow down to match. The result? Gorgeous, evenly spaced stitches every time, whether you're zipping along a curve or taking it slow in a tight corner.
Without a regulator, getting consistent stitch length is a skill that takes a lot of practice to master. A stitch regulator flattens that learning curve, letting you focus on your design instead of your speed. It’s an absolute game-changer for beginners craving consistency and pros who demand perfection.
A great free motion machine anticipates what a quilter needs. Features like stitch regulation and a roomy throat aren't just fancy extras; they're fundamental tools that lead directly to better work and a more enjoyable process.
The Powerhouse Behind the Stitches
Underneath the hood of any great quilting machine is a motor with some real muscle. Punching a needle through multiple layers of fabric and batting is tough work. An underpowered motor is going to struggle, which means skipped stitches, broken needles, and a whole lot of frustration. A strong, beefy motor ensures the needle penetrates cleanly every single time, even when you're stitching slowly over thick seams.
But power is nothing without control. That's where variable speed control comes in. It lets you set a "speed limit" for your machine, so you can floor the foot pedal without the machine taking off like a rocket. It's a huge help for finding your rhythm and getting your hand and machine speeds to sync up perfectly.
A Solid Foundation for Smooth Work
Finally, don't overlook the machine's base. A solid, heavy machine with a flat bed or a slide-on extension table gives you a large, stable surface to support your quilt. This is critical. It prevents the weight of the quilt from dragging on the needle—a super common cause of skipped stitches and tension headaches.
Of course, the machine itself is only part of the equation. You absolutely need a specialized presser foot that lets the fabric move in any direction. You can get a closer look at what makes a good free motion quilting foot so essential and see how this little attachment makes all the difference. When you put all these pieces together, you create the perfect environment for quilting success.
Setting Up Your Machine for Quilting Success
Think of this section as your pre-flight checklist before you take off into a world of beautiful meanders and swirls. Getting your machine properly prepped is the foundation of good free-motion quilting. This comprehensive how-to guide ensures your machine works with you, not against you, as you bring your designs to life.
No matter which of the many free motion quilting machines you own, the basic prep work is pretty much the same. A few key adjustments are all it takes to switch your machine from a straight-line workhorse into an artist's tool, giving you total freedom to move the fabric however you please.
Engaging Your Machine's Quilting Mode
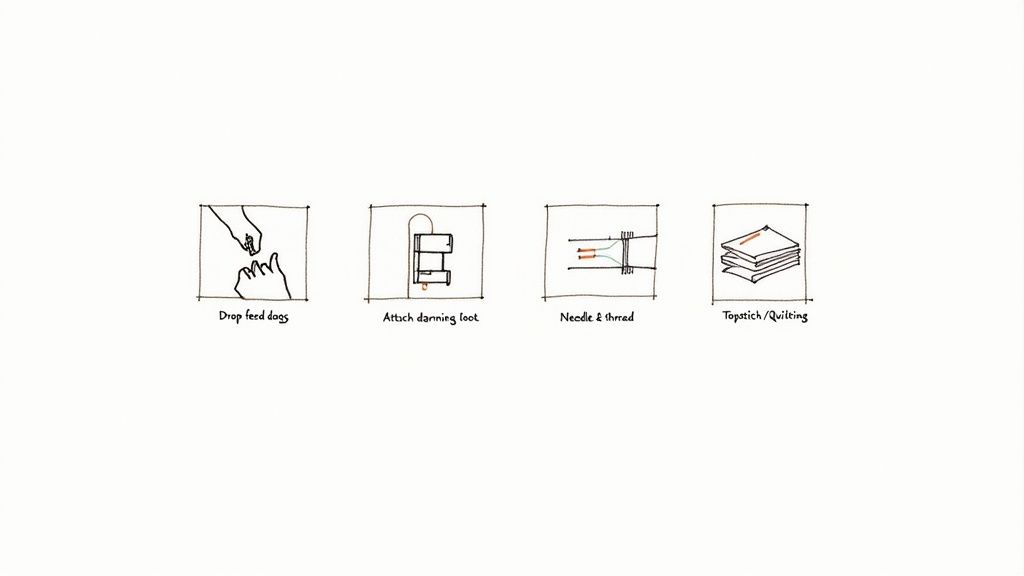
The first thing you have to do—and this is non-negotiable—is get the machine's fabric-pulling mechanism out of the way. This single action is what puts you in the driver's seat.
-
Drop or Cover the Feed Dogs: Those little metal teeth under your needle that grip and pull the fabric? They've got to go. For free-motion work, they need to be completely disengaged. Most modern machines have a switch or lever that lets you drop them down below the needle plate. If your machine is a bit older and doesn't have that feature, no worries—a simple cover plate will accomplish the same thing.
-
Attach a Darning or Free Motion Foot: Time to swap out your standard presser foot. You'll need a specialized free-motion (sometimes called a darning) foot. This foot is designed to "hop" or hover just above your fabric instead of clamping down on it. That little bit of clearance is what lets you glide the quilt sandwich smoothly in any direction you want.
-
Set Your Stitch Length to Zero: This one sounds a little weird, I know, but it’s a crucial step. Since you are now in charge of how long the stitches are based on how you move your hands, setting the machine's stitch length to zero tells the feed dogs to stand down, even if they're already dropped. It's a belt-and-suspenders approach that guarantees you have complete control.
Here's a little secret: your current machine is probably perfectly capable of free-motion quilting. Success usually comes down to a simple tune-up and the right setup, not a pricey new machine. A fresh needle, a clean bobbin case, and the right foot are your real tickets to a great quilting adventure.
Choosing Your Needle and Thread
Getting your needle and thread combination right is like an artist choosing the perfect pen and ink—it makes a huge difference in the final piece. A dull or wrong-sized needle is a recipe for frustration, leading to skipped stitches, shredded thread, and even damaged fabric.
- Needle Type: For most projects using standard cotton fabrics and threads, a brand-new quilting needle is your best friend. It has a slightly tapered point designed to slip through multiple layers without a fight.
- Needle Size: A size 80/12 or 90/14 is a great starting point for the vast majority of quilts.
- Specialty Threads: If you're playing with thicker decorative threads, make the switch to a topstitch needle. It has a larger eye that helps prevent the thread from fraying as it passes through. And remember, it's a good habit to change your needle after every 8-10 hours of quilting for the best results.
Your First Stitches Practice Guide
Great free-motion quilting is all about muscle memory. Before you even think about touching your actual quilt top, you need to get a feel for the rhythm. That's where a practice "quilt sandwich" comes in. This hands-on approach is core to how we teach at bsewinn.com—building real skill through doing.
Grab two scrap pieces of fabric (around 12x12 inches is fine) and stick a small piece of batting between them. Baste them together, and you're ready to take your machine for a spin.
- Find Your Rhythm: Place your hands on either side of the foot on your practice sandwich and gently press the foot pedal. Start moving the fabric in slow, looping motions. The goal here is to match the speed of your hands to the speed of the machine. When they're in sync, you get beautiful, even stitches.
- Practice Basic Movements: Don't even think about perfection right now. This is your playground. Just focus on doodling with your machine to train your hands. Try some simple swirls, some back-and-forth meanders, and a few easy loops. You're just learning how the machine responds to you.
This little bit of practice is what builds the coordination and confidence you need, so when you finally move to your real quilt, the motion feels second nature.
Choosing the Right Machine for Your Skill Level
Trying to pick from the sea of free motion quilting machines can feel a bit overwhelming, but it really doesn't have to be. I promise. The "perfect" machine isn't the one with the most bells and whistles; it's the one that feels like the right partner for where you are right now—and where you want to go.
Think of it like this: you want a machine that matches your current skills but also leaves room for your ambitions to grow. This way, you invest wisely and make sure your quilting journey is full of joy, not frustration.
To break it down, let's look at three quilter profiles I see all the time. Find the one that sounds most like you. We'll pinpoint what features actually matter at each stage, helping you focus on what you need today while peeking ahead at the quilter you're becoming.
The Curious Beginner
So, you're just dipping your toes into the wonderful world of free motion quilting? Welcome! Your main goal is simple: get a feel for the rhythm of moving the fabric while managing the machine's speed. You absolutely do not need a fancy, top-of-the-line model to get this down.
What to prioritize:
- Basic Functionality: All you really need is a machine that lets you drop the feed dogs and pop on a darning or free motion foot. The good news is most standard home sewing machines can do this.
- Variable Speed Control: This feature is a total game-changer when you're starting out. It lets you cap the maximum speed, which is a lifesaver for building that hand-foot coordination without the machine getting away from you.
Right now, it's all about practice, not perfection. A trusty domestic machine is the perfect place to start building your confidence without making a huge financial leap.
The Passionate Hobbyist
Okay, you've got the hang of the basics, you're officially hooked, and your project ambitions are growing. That little domestic machine is starting to feel a bit... snug. You find yourself wrestling with quilts, and you're ready for an upgrade that can keep up with your creative energy.
What to prioritize:
- Generous Throat Space: This is your #1 mission. Moving up to a machine with 12 to 17 inches of throat space will feel like a creative awakening. Suddenly, you can handle larger quilts without the constant struggle and bunching.
- A Sturdy Extension Table: A big, flat surface is non-negotiable for supporting the weight of your projects. It prevents the fabric drag that causes skipped stitches and endless frustration.
This upgrade is all about knocking down the physical walls that are boxing in your creativity. You've built the skills; now you just need the space to let them shine.
The Aspiring Professional
For you, quilting has blossomed into something more than a hobby. Maybe you're dreaming of selling your work, entering shows, or you simply crave that flawless, polished finish on every single piece. You need a machine that's less of a tool and more of a reliable workhorse.
For the quilter aiming for professional-level results, a machine is more than a tool—it's a business partner. Features like stitch regulation aren't just conveniences; they are essential for producing the consistent, high-quality work that sets a professional apart.
What to prioritize:
- Stitch Regulation: This is the big one. For pro-quality results, it's a non-negotiable. Stitch regulation ensures every single stitch is perfectly even, no matter how fast or slow you move the fabric. It’s what gives quilts that crisp, high-end look.
- A Powerful Motor: You'll be asking your machine to sew through thick batting, multiple layers, and dense seams for hours on end. You need a motor that won't complain or skip a beat. A powerful, durable motor is the heart of a true quilting workhorse.
At bsewinn.com, we know this is a major investment in your craft. Our commitment to empowering crafters includes offering expert guidance to help you find a machine that not only meets your needs today but has the power and features to grow with you for years to come. Let's find the machine that will ensure your long-term success and happiness.
Got Questions About Free Motion Quilting?
Jumping into free motion quilting is a huge thrill, but let's be honest, it brings up a lot of questions. It's totally normal. Think of this as your personal cheat sheet, here to clear up those nagging uncertainties and get you over the first few bumps in the road. Getting solid, practical answers is the secret sauce to building the confidence you need to make amazing quilts.
Trust me, the struggles most beginners have are universal—from wondering if you have the right gear to figuring out why your stitches look so wonky. We'll tackle the most common questions head-on, building on what we've already covered and giving you the know-how to quilt like you mean it. The goal here is to take the mystery out of it so you can focus on the fun part: drawing with your sewing machine.
What’s the Difference Between Free Motion and Walking Foot Quilting?
This is a great place to start. Think of a walking foot as your trusty guide for anything straight and orderly. It's brilliant for "stitching in the ditch" along your seam lines or quilting clean, geometric grids. The walking foot has its own set of feed dogs on top that work in sync with the machine's feed dogs below, gripping all three layers of your quilt sandwich and moving them along together. No shifting, no puckering—just crisp, straight lines.
Free motion quilting, on the other hand, is where you let your hair down. You drop the feed dogs, pop on a darning foot, and suddenly you're in charge of the movement. You can glide the quilt in any direction—forward, backward, sideways, in loopy-loos—literally drawing with thread. A walking foot gives you structure; free motion gives you painterly freedom for swirls, stipples, and everything in between.
Do I Need a Super Expensive Machine to Start?
Absolutely not. It's so easy to get dazzled by the fancy, high-end free motion quilting machines with their massive throat spaces and built-in stitch regulators. And yes, they're incredible. But you can absolutely learn the ropes and become a fantastic quilter on most standard home sewing machines. The real skill is learning the rhythm of moving the fabric, and you can practice that on almost any machine.
Really, you only need two things to get started:
- The ability to lower (or cover) your feed dogs.
- The ability to attach a free motion or darning foot.
The biggest headache you'll run into on a smaller machine is the limited throat space. It can feel like wrestling a sleeping bag through a mail slot when you're working on a big quilt. But at bsewinn.com, we're big believers in building a solid foundation first. Our online classes and extensive resources are designed to help you get amazing results with the machine you've already got, so you can master the core skills before you even think about upgrading.
Why Are My Stitches So Uneven or Skipped?
Welcome to the club! This is, without a doubt, the number one frustration for new free motion quilters. Nine times out of ten, the culprit is a simple lack of rhythm. You have to find that sweet spot, that perfect harmony between how fast the needle is going up and down and how fast your hands are moving the quilt.
The secret to beautiful free motion quilting is synchronization. When your hands and the machine's motor are dancing to the same beat, your stitches will be beautifully even. Practice is just teaching your body to find and hold that rhythm.
If your hands move too fast for your needle speed, you'll end up with long, gangly stitches. If you move too slow, your stitches will pile up into tiny, dense knots. Skipped stitches? That's usually because the weight of the quilt is dragging on the needle, pulling it just enough to miss the bobbin thread.
Here's a quick troubleshooting checklist to run through:
- Doodle on Scraps: Always warm up on a practice quilt sandwich. Scribble, loop, and meander without the pressure of working on your "real" quilt.
- Check Your Needle: A fresh, sharp quilting needle is your best friend. Make sure it’s the right size for your thread and fabric.
- Confirm Your Setup: Is the machine threaded correctly? Is the tension right? A quick double-check can save a lot of grief.
- Support Your Quilt: An extension table is a non-negotiable for me. It supports the quilt's weight so it doesn't drag, which is a major cause of skipped stitches.
Our training resources at bsewinn.com have detailed video guides walking you through these exact issues, helping you find your groove and get those smooth, gorgeous stitches you're dreaming of.
What Are the Most Essential Accessories for a Beginner?
Besides the machine itself, there are a few key pieces of gear that will make a world of difference. Seriously, investing in these three things will make your quilting smoother, more controlled, and way more fun right from the get-go.
-
A Free Motion Quilting Foot: This is the one thing you absolutely must have. Sometimes called a darning foot, it’s designed to hover just over the fabric, giving your quilt sandwich the freedom to glide around in any direction.
-
Quilting Gloves: They might look a little silly, but quilting gloves are a total game-changer. The grippy fingertips give you amazing control over the fabric with a much lighter touch. This means less hand, shoulder, and back fatigue during those long quilting sessions.
-
An Extension Table: You need a large, flat surface that’s level with your machine's needle plate. An extension table supports the entire weight of your quilt, which gets rid of the drag that causes those pesky skipped stitches and wonky tension. It gives you a stable surface for fluid, easy movement.
Getting these three accessories sets you up for success. In our bsewinn.com beginner workshops, we always tell students to start with this trio before they even think about buying rulers or stencils.
Ready to kick off your free motion quilting adventure with the right tools and support? At bsewinn.com, we’ve put together a collection of machines, accessories, and online classes to fuel your creativity, no matter your skill level. Come explore and find everything you need to bring your quilting dreams to life.

