

There's something truly special about hand-sewn appliqué. It’s the age-old craft of stitching smaller pieces of fabric onto a larger background, letting you build a picture or a pattern one stitch at a time. At B-Sew Inn, we believe this technique adds a level of detail and character that you just can't get any other way. You're not just making something; you're pouring a bit of yourself into the fabric, and we're here to support you on that creative journey.
Starting Your Hand-Sewn Applique Journey
If you're ready to dive in, welcome! There's a certain magic to hand-sewn appliqué—a texture and personality that machine work, for all its speed, can’t quite match. The slower, more deliberate pace of stitching by hand gives you an incredible amount of control. Through our online classes and resources, we help crafters discover how relaxing and satisfying this process can be.
This isn’t just a niche hobby; it’s part of a huge movement back toward artisanal, handmade crafts. In fact, the global embroidery market, which includes all sorts of hand-sewn techniques, is expected to hit $16.1 billion by 2034. It's clear people are craving that handcrafted, personal touch more and more.
What You Will Learn
This guide is designed to walk you through everything you need to know to create beautiful appliqué designs you can replicate at home. Here at B-Sew Inn, we're all about empowering your creativity, whether it's through our extensive online resources, hands-on training, or the custom sewing machine designs we offer for every skill level.
We're going to get hands-on with a few of our favorite techniques:
- Needle-Turn Applique: This is the gold standard for a clean, professional finish where the edges just disappear into the fabric.
- Raw-Edge Applique: A more modern take that gives your work a charming, slightly rustic feel. It's fantastic for creating tangible examples like decorative pillows or wall art.
- Decorative Stitches: We'll look at classics like the blanket stitch that frames your appliqué pieces and adds a beautiful, handcrafted border.
Think about how often you see appliqué in the wild, from applying fabric patches for decorative purposes on graduation stoles to intricate art quilts. The skills you'll learn are foundational and can be used on almost anything—quilts, clothes, bags, and home decor. This guide will provide you with the how-to knowledge to start creating your own tangible projects.
Gathering Your Essential Applique Tools
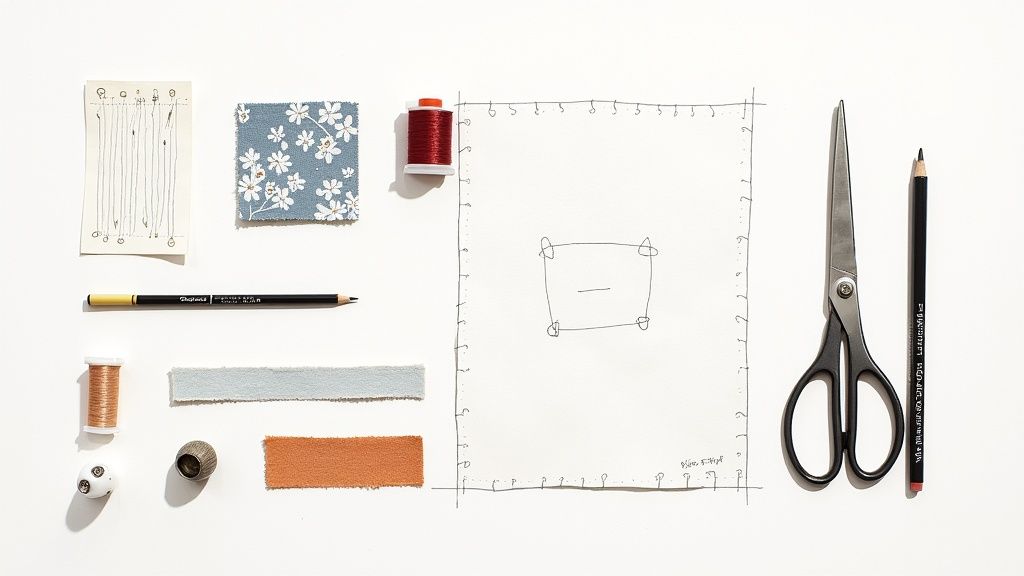
There’s nothing quite like the feeling of spreading out your tools and fabrics before starting a new project. For hand-sewn applique, getting this part right is half the battle. Your choice of fabric, thread, and needles can make the difference between a frustrating afternoon and a beautifully finished piece you can proudly display.
You don't need a fancy studio to get started. Honestly, a comfy chair with good light and a small table for your supplies will do just fine. Here at B-Sew Inn, we believe in empowering crafters by setting them up for success. If you're building your kit from scratch, our guide on the top sewing tools for beginners is a fantastic starting point.
Choosing Fabrics and Threads
This is where the real fun begins! Picking your fabrics is a chance to let your creativity shine. For both your background and applique shapes, you can't go wrong with a high-quality, 100% cotton with a tight weave. It’s sturdy, holds a press like a dream, and is a joy to stitch through.
A quick tip from experience: try to use fabrics of a similar weight. Mixing a heavy denim with a lightweight lawn, for example, can cause puckering and prevent your final piece from lying flat.
Thread is just as critical. The global sewing thread market is valued at around $3.79 billion for a reason—it’s the glue that holds our craft together! Your thread choice will determine how visible your stitches are and ultimately impacts the whole look of your applique.
Choosing the Right Thread for Your Applique Project
Picking the perfect thread can feel a little overwhelming with so many options out there. This little chart breaks down the most common types we recommend in our training classes and what they're best for.
| Thread Type | Material | Best For | Pro Tip |
|---|---|---|---|
| Cotton | 100% Cotton | All-purpose, especially for cotton fabrics. Blends beautifully. | A 50wt cotton thread is our go-to for invisible needle-turn applique. |
| Polyester | Synthetic Polymer | Strong and durable, great for items that will see a lot of wear. | Has a slight sheen, so it's less ideal for "invisible" stitches. |
| Silk | Natural Fiber | Fine, strong, and smooth. Perfect for delicate fabrics and sharp points. | The best choice for hiding stitches in silk or satin applique pieces. |
| Monofilament | Nylon or Polyester | Truly invisible thread for when you absolutely don't want stitches to show. | Can be a bit tricky to handle; it's slippery and can be stiff. |
At the end of the day, matching your thread to your fabric type is always a safe bet. Cotton on cotton, silk on silk—you get the idea!
Expert Tip: To make your stitches disappear, especially with needle-turn, always match your thread color to the applique fabric, not the background. This little trick works like magic, helping the stitches melt right into the edge of your design.
Essential Hand Sewing Notions
Beyond the big two—fabric and thread—a few other small tools will make your life so much easier. These are the little things that save you from frustration and let you get into that wonderful creative zone.
- Needles: A fine, sharp needle is non-negotiable. We love "sharps" or "betweens" in sizes 9 to 12. Remember, the bigger the number, the smaller the needle. A shorter needle often gives you more control for tiny, precise stitches.
- Scissors: You'll want two pairs on hand. One larger pair for cutting your background fabric, and a small, sharp pair—think embroidery scissors—for getting into tight corners and snipping threads.
- Marking Tools: A water-soluble pen or a classic chalk pencil is what you'll need for tracing designs. But always, always test it on a scrap of your project fabric first to make sure the marks will vanish without a trace.
- Thimble: We can't stress this enough: use a thimble! It not only protects your finger but also gives you the power to push the needle through the fabric with ease. Your hands will thank you after a long stitching session.
Getting Your Fabric Ready for Flawless Applique
A truly beautiful piece of hand sewn applique starts long before your needle ever touches the fabric. The real secret to that polished, professional look is all in the setup. Taking a little extra time here saves you a world of headaches later on—no puckering, no shifting, just a smooth and enjoyable stitching process.
Think of this part as laying the foundation for your artwork. A solid foundation means your final piece will lie flat, look clean, and be something you can cherish for years. Here at B-Sew Inn, our instructors always say that mastering these first few steps is what really separates good work from great work.
Creating Your Templates and Shapes
First things first, you need to get your design from an idea into actual fabric shapes. This is the first step in creating a tangible piece you can replicate. There are a couple of tried-and-true methods for this, and the one you pick usually comes down to how complex your design is and which applique technique you're planning to use.
- Freezer Paper: This is a classic for a reason, and it’s our go-to for needle-turn. You just trace your shape onto the paper side, cut it out, and iron the waxy side onto the right side of your applique fabric. It gives you a wonderfully crisp, firm edge to turn your seam allowance against.
- Fusible Web: If you're doing raw-edge applique, a lightweight fusible web is your best friend. Iron it onto the back of your applique fabric before you cut out your shape. This clever trick stops the edges from fraying and holds your piece securely, so you don't have to do a ton of basting later.
One of the most important tips our B-Sew Inn experts share is this: always trace your templates in reverse if your design is asymmetrical! This is especially critical when using fusible web, since you're working from the back of the fabric. It’s a simple mistake that’s easy to make.
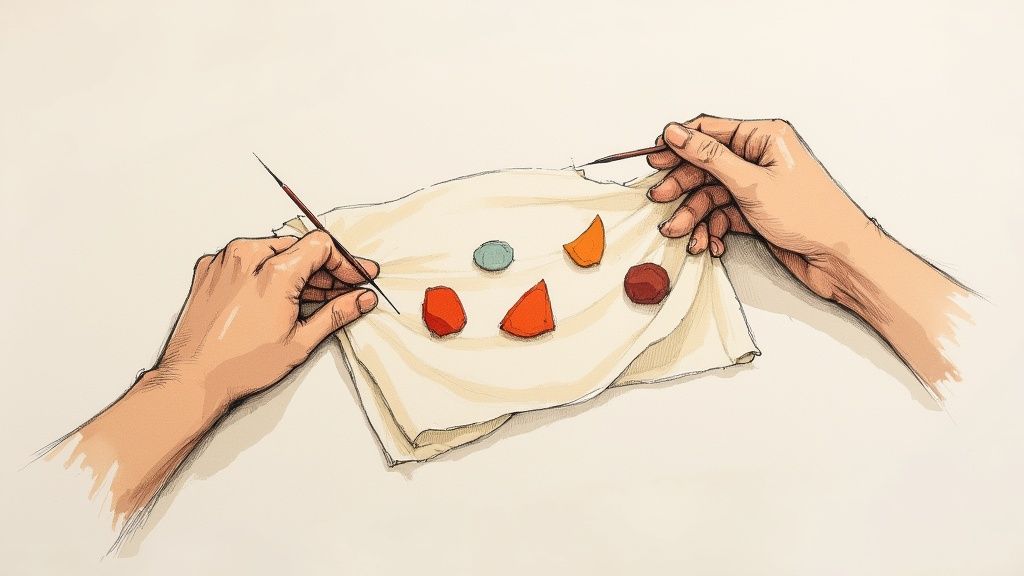
Arranging and Basting Your Design
Once your pieces are all cut out, it’s time for the fun part: arranging them on your background fabric. Don't rush this! Play with the composition, move things around, step back and look at it from a distance. A well-placed design just has so much more impact.
When you've got the layout just right, you need to temporarily stick the pieces down before you start stitching. We call this basting, and trust us, it’s a non-negotiable step to keep your beautiful design from wiggling around.
You've got a few options for basting:
- Thread Basting: Grab a contrasting thread and make long, loose stitches to hold everything in place. They’re super easy to pull out once you're done with your permanent stitching.
- Pin Basting: Small, sharp applique pins work great. Just be smart about where you place them—keep them away from where you'll be stitching first, and remember to remove them as you sew up to them.
- Fabric Glue: A tiny dab of temporary fabric glue or a glue stick made for sewing can be a real time-saver. The key is to use it sparingly so your fabric doesn't get stiff. Always double-check that it’s the kind that washes out or softens after it dries.
Once you get the hang of creating your templates, arranging your design, and basting it down securely, you're setting yourself up for a perfect hand sewn applique project every single time.
Mastering Core Hand Applique Stitches
This is where all that careful prep work finally meets your creative vision. The stitches you choose for your hand sewn applique really define the personality of your project. Are you going for that seamless, almost invisible look? Or maybe something with a folksy, decorative border? Learning these core stitches gives you a whole new language to express yourself in fabric.
The workflow below is a great visual reminder of the basic setup for pretty much any applique project.
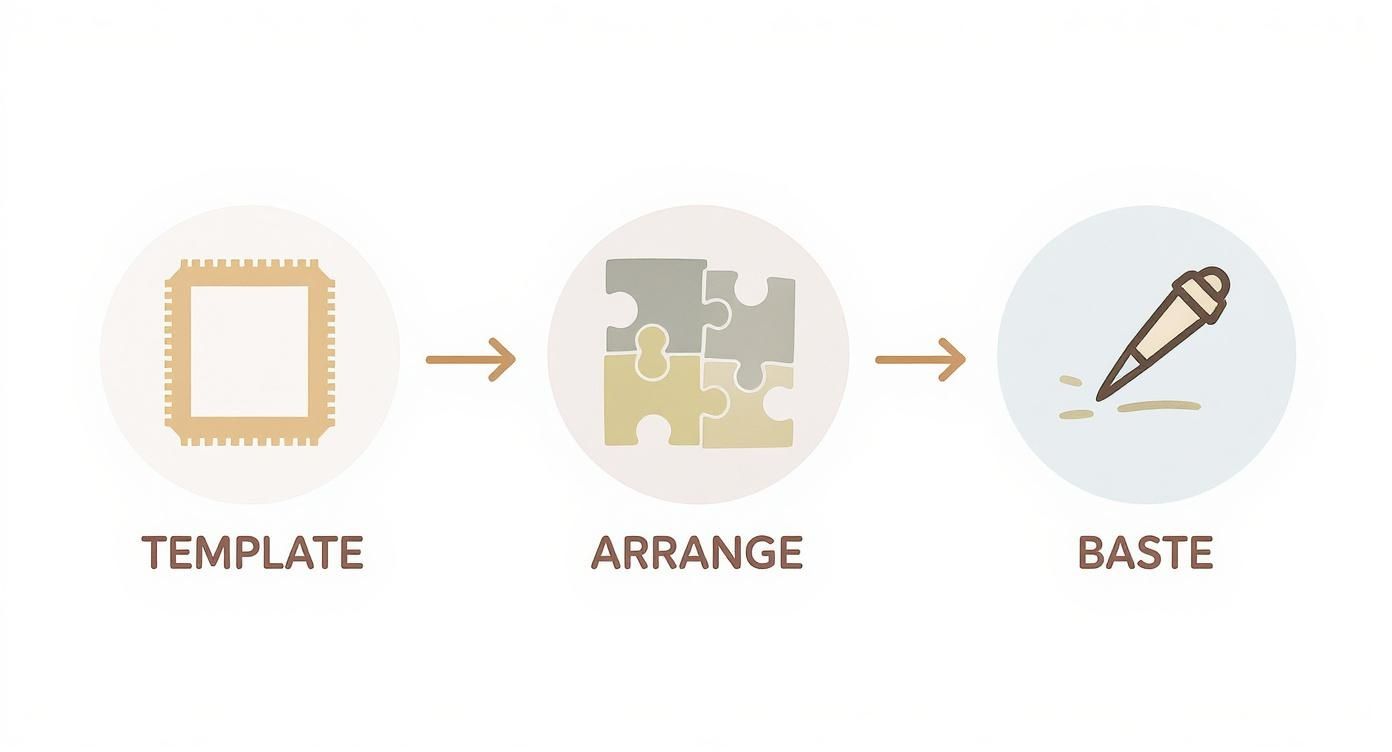
From making your templates to getting everything basted down securely, this is the universal starting point before you even think about making that first stitch.
The Classic Needle-Turn Applique
Needle-turn is the gold standard for traditional applique, famous for that clean, invisible finish that makes everything look so professional. The whole trick is turning the raw edge of your applique fabric under with the tip of your needle right as you stitch it down. It takes some patience, but the results are absolutely worth it.
For a tangible project example, try creating a simple floral design on a tea towel. For the smooth curves of the petals, take smaller stitches and gently ease the fabric under as you go. For the sharp, perfect points of the leaves, stitch all the way to the very tip, make a tiny securing stitch, and then fold the next side's seam allowance under. Using a fine, 50wt thread that matches your applique piece is the key to making those stitches just melt into the fabric.
Raw-Edge Applique for Modern Texture
Looking for a more rustic or contemporary vibe? Raw-edge applique is a fantastic and much faster choice. Just like the name says, you leave the edges of your applique shape exposed and simply stitch them down. Over time, the fabric frays just a little, adding this wonderful, soft texture and character to the piece.
Here’s a great example you can replicate: create a set of coasters with geometric shapes.
- Apply a liquid seam sealant lightly to the edges before you start stitching to control fraying.
- Back your fabric with a fusible web to give it more stability.
- Stitch nice and close to the edge to lock those threads in place.
This technique is just perfect for wall hangings, art quilts, and other decorative items where that little bit of texture is exactly what you want.
Decorative Finishing Stitches
Sometimes you want your stitches to be seen! Decorative stitches can frame your applique pieces, turning the sewing itself into a design element. They add color, texture, and a look that is unmistakably handcrafted.
The most beautiful applique often happens when you let the fabric guide you. Don't be afraid to just play around with different stitches on some scrap fabric. It’s this playful, hands-on approach that we really encourage in all our B-Sew Inn online classes and training sessions. We're committed to empowering crafters by helping them explore their creativity.
Two of our absolute favorite decorative stitches are the Blanket Stitch and the Slip Stitch.
Blanket Stitch
This stitch creates such a beautiful looped border along the edge of your applique. It's strong, super decorative, and perfect for adding a cozy, handmade feel to projects with felt, wool, or fleece. The secret to a neat finish is just keeping your stitches evenly spaced.
Slip Stitch
For a delicate and almost invisible alternative to needle-turn, the slip stitch is an amazing option. You just pick up a tiny thread from the background fabric and then slip the needle through the folded edge of your applique piece. This stitch is ideal for attaching shapes you've already pre-turned, like those made with freezer paper templates.
Think of every new stitch you learn as another tool in your creative toolkit, supported by the extensive resources and community at B-Sew Inn.
Finishing and Caring For Your Applique Project
You’ve placed the final stitch, and your appliqué masterpiece is almost complete! But hold on—the next few steps are what really make your work sing and ensure it lasts for generations. This isn't just about cleaning up; it's about giving your project a polished, professional look that honors all the hours and love you poured into it.
Taking the time for these finishing touches connects your work to a massive global tradition. The art of embroidery and appliqué is booming, showing that unique, handcrafted details are more valued than ever. This isn’t just a hobby; it’s a cherished skill you are developing. You can dive deeper into the embroidery market’s promising future to see just how much this art form is treasured.
Pressing Your Finished Work
The first thing to do after your last stitch is give your project a final, careful press. Now, this isn't your everyday ironing job. The goal here is to smooth everything out without crushing your beautiful stitches or flattening the lovely dimension you’ve worked so hard to create.
The golden rule? Always press from the back.
Lay your project face down on something soft and thick, like a fluffy towel or a dedicated pressing mat. This gives your stitches a cushion to sink into, protecting them from being squashed. We always recommend using a press cloth over your project to shield it from direct heat. Set your iron to the right temperature for your fabric, and gently press—don't drag. Lift the iron and place it on the next section to avoid distorting your fabric or stitches.
Tidying Up Your Project
With your project beautifully pressed, it’s time for the final cleanup. This is when you get to see your work in all its glory.
- Remove Basting Threads: Grab a pair of small, sharp scissors and carefully snip and pull out any basting stitches you used. Take your time here to avoid catching any of your permanent stitches.
- Erase Markings: Did you use a water-soluble marker? A little spritz of water or a quick dab with a damp cloth should make those lines vanish. If you used chalk, a soft brush usually does the trick. Always double-check the manufacturer’s instructions for whatever marking tool you used.
One of the biggest takeaways from our B-Sew Inn instructors is to treat this finishing stage with the same patience you gave the stitching. Rushing at the end is the fastest way to undo your hard work. These final touches are what truly elevate a piece from homemade to handmade.
Long-Term Care and Washing
To keep your appliquéd treasures looking their best for years to come, a little bit of careful maintenance goes a long way.
For most projects like quilts, wall hangings, and other decorative pieces, hand washing is your safest bet. Use cool water and a mild, pH-neutral soap. Gently squeeze the water out—never wring or twist your project, as that can stretch the fabric and damage the stitches.
To dry it, roll the item up in a clean towel to blot out most of the moisture, then lay it flat on a dry surface, away from direct sunlight. If you've made appliquéd clothing that will get more wear and tear, you can use a gentle machine cycle with the item in a mesh laundry bag, but always check your fabric’s care label first. Storing your piece by folding it loosely or hanging it will prevent deep creases and keep it looking perfect.
Common Questions About Hand Sewn Applique
As you start your journey with hand sewn applique, you're bound to run into a few questions. Trust me, it’s a totally normal part of learning any new skill. Here at B-Sew Inn, our instructors have seen and heard it all, and we're here to share some clear, practical advice to get you over those common hurdles and build your confidence, one stitch at a time.
This section tackles some of the most frequent challenges we see, turning those little frustrations into valuable learning moments.
How Do I Stop My Fabric From Puckering?
Puckering is probably the most common headache for applique beginners, and it almost always boils down to one of two things: thread tension or fabric stability. You know those little wrinkles you see? That's what happens when the background fabric stretches but your applique piece doesn't.
A great first step is to use fabrics of a similar weight. You should also consider applying a lightweight stabilizer to the back of your background fabric. This gives it the extra support it needs to stay put and resist stretching while you stitch.
When you're sewing, think about relaxed, even tension. Your goal is just to lay the thread on the fabric, not to pull it tight. Small, consistent stitches are your best friend here, as they help spread that tension out evenly across the whole design.
A little tip from our B-Sew Inn instructors: Try to think of your stitches as gently tacking the fabric down, not cinching it tight. This simple mental shift, which we emphasize in our online classes, can make a world of difference in how you handle your needle and thread.
What Is The Best Way To Handle Sharp Points And Curves?
Don't be intimidated by intricate shapes! They just require a little patience and a methodical approach, but crisp points and smooth curves are totally achievable. They're really the hallmark of beautifully done applique.
- For Sharp Points: Stitch all the way to the very tip. Take a tiny securing stitch right in place, then carefully fold the fabric for the next side under. I like to use the tip of my needle to tuck the fabric in perfectly to create that sharp point before I keep sewing.
- For Inner Curves: To get the fabric to lie flat on an inside curve, you've got to release its tension. Make a few small clips into the seam allowance, cutting almost to your stitching line. This lets the fabric spread out and lay flat smoothly.
- For Outer Curves: An outer curve has the opposite issue—too much fabric. To handle this, cut small V-shaped notches out of the seam allowance. This removes the extra bulk and stops those annoying lumps from forming when you turn the edge under.
Using a freezer paper template can be a real game-changer for complex shapes. It gives you a nice, firm edge to turn your fabric against, making the whole process much more manageable.
Can I Combine Hand Applique With Machine Sewing?
Absolutely! We love mixing hand and machine work. It's a fantastic way to create projects with incredible depth and texture, leveraging B-Sew Inn’s custom sewing machine designs with your personal touch. This hybrid approach lets you use the speed of a machine for basic construction while still savoring the artistic, detailed touch of hand stitching.
For example, many quilters will piece a quilt top or build a garment on their sewing machine, then come back and add detailed hand sewn applique as the final, artistic flourish. Another idea is to machine-apply a fusible web for a raw-edge applique piece, and then add a decorative blanket stitch by hand for that charming, handcrafted finish. It’s the perfect blend of efficiency and artistry.
Once you get really good at your hand-sewn applique projects, you might even think about turning your hobby into a little business. There's a great resource that offers guidance on selling your handmade products on Amazon, which could be a fun next step for enterprising crafters.
At B-Sew Inn, we're here to empower your entire creative journey, from the very first stitch to the final press. Our commitment is to provide the support, training, and resources you need to succeed. Come explore our huge selection of fabrics, notions, and machines to find everything you need for your next hand sewn applique masterpiece. Visit us online to discover a world of creative possibilities.

