Threading a serger really just boils down to guiding four separate threads through a very specific path of loopers and needles. It looks like a tangled mess at first glance, but once you get the hang of it, it's second nature. The process is a foundational skill for creating all sorts of beautiful sewing designs, from perfectly finished garments to intricate home decor.
The key is following the correct order—almost always upper looper, lower looper, right needle, then left needle. Your machine’s color-coded guides are your best friend here. A little prep work and knowing your machine's parts will make the whole process click, empowering you to replicate any design with confidence.
Getting Your Serger Ready for Flawless Threading
Staring down that maze of thread guides can be intimidating, I get it. But ask any seasoned sewist, and they'll tell you that a smooth threading experience starts way before you even touch a spool of thread. Taking a few minutes to prep your machine and grab your tools is the secret to avoiding those all-too-common headaches like tangled thread nests and skipped stitches, allowing you to focus on the creative part of your project.
This initial setup isn't just about busy work; it's the first real step in mastering your machine. At bsewinn.com, we are committed to empowering crafters through our custom sewing machine designs. We believe that confidence comes from understanding your tools, which is why we offer extensive support through online classes, training, and resources to help you master skills like this and bring your creative visions to life.
Knowing Your Way Around the Machine
Before you even think about threading, let’s get acquainted with the main players. There are three key parts you need to identify:
- The Upper Looper: This is the one that moves over the top edge of your fabric. It’s responsible for creating the top half of the overlock stitch.
- The Lower Looper: This one works in tandem with the upper looper, but it forms the stitch on the underside of the fabric.
- The Needles: You’ll usually have two of them. Their job is to anchor the looper threads into the fabric, creating that strong, professional-looking seam.
Getting these threaded correctly is absolutely crucial for your machine to perform well. It's a process that has come a long way since the sergers of the 1960s, which required some seriously complex manual gymnastics to create a durable stitch. Thankfully, modern machines, especially game-changers like the Baby Lock Acclaim with its RevolutionAir™ Threading System, have made our lives so much easier.
A perfectly threaded serger is the secret sauce for a professional finish. If you take the time to really understand each step, your machine will work with you, not against you. What seems like a chore will quickly become a satisfying part of your sewing process.
To make things even easier, I always keep a small kit of go-to tools right by my serger. You don't need much, but having the right things on hand can turn a frustrating moment into a quick fix.
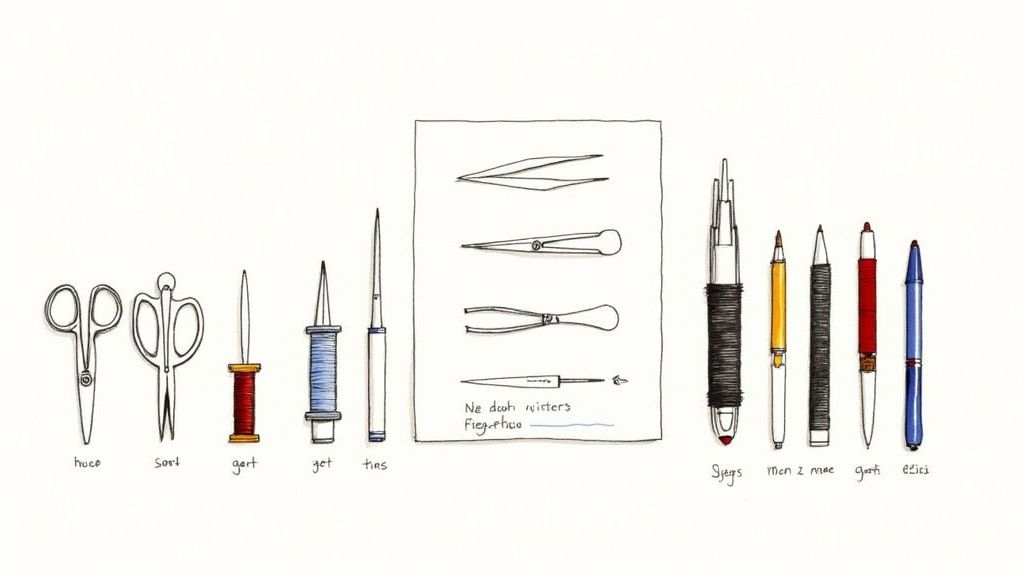
Essential Serger Threading Toolkit
Here’s a quick rundown of the tools I find indispensable. They make threading and troubleshooting so much simpler.
| Tool | Why You Need It | Pro Tip |
|---|---|---|
| Long Tweezers | Essential for grabbing threads and guiding them through tight spots that fingers can't reach. | Look for a pair with a bent nose—they give you a much better angle for getting into the looper paths. |
| Needle Inserter | Holds the needle steady, making it incredibly easy to insert and change needles without dropping them. | This is a lifesaver for anyone with shaky hands or less-than-perfect eyesight. |
| Small Brush | For cleaning out lint and dust from the thread path and tension discs before you start. | A clean path prevents thread from snagging or breaking. A quick brush-down should be part of every re-threading. |
| Magnifying Glass with Light | Helps you see those tiny holes and guides clearly, especially on older or more complex machines. | Some come on a flexible stand, which is great for hands-free use. |
Having these tools within arm's reach means you're always prepared. You'll spend less time struggling and more time sewing.
The Unbreakable Rule of Serger Threading Order
If there’s one secret to mastering your serger without pulling your hair out, it’s this: always follow the correct threading sequence. I can’t tell you how many times I've seen beautiful projects derailed by a simple mix-up in the threading order. It's the number one reason for tangled messes, skipped stitches, and that overwhelming urge to just quit.
Think of it like building with LEGOs—you can't add the roof before the walls are up. Serger threading works on the exact same principle.
The universally accepted order for most four-thread sergers is a simple, logical path. Each step builds on the one before it, creating that beautiful, stable, interlocked stitch chain we all love.
The Critical Threading Path
Sticking to the proper sequence is what prevents the threads from tangling with each other as they form the stitch. You absolutely have to follow this order:
- Upper Looper: This thread travels over the top of the fabric. It has to go first so it’s in position for the lower looper to do its job.
- Lower Looper: Next up, the lower looper thread comes from underneath to lock with the upper looper thread. This forms the foundation of your overlock stitch.
- Right Needle: With the loopers in place, the right needle’s thread pierces the fabric and secures that looper chain.
- Left Needle: And finally, the left needle adds the second straight stitch for reinforcement, completing the seam.
Following this order—Upper Looper, Lower Looper, Right Needle, Left Needle—is non-negotiable. It’s the only way to ensure the looper threads can form their chain without getting tangled up by the needle threads.
This process has historically been a real headache for many sewists. In fact, some survey data shows that 35% of new serger owners find the initial threading process to be a major hurdle. To fix this, many modern machines, like the Baby Lock Vibrant serger with its color-coded threading system, now have features that can cut that frustrating setup time by as much as 25-35%.
At bsewinn.com, our commitment is to empower crafters with custom machine designs that simplify the creative process. Our online classes and extensive resources are designed to turn this once-daunting task into a simple, repeatable skill you'll master in no time.
A Visual Guide to Mastering the Loopers
The loopers are where the real magic of a serger stitch happens. It’s what creates that strong, professional-looking edge you’re after. But let's be honest, they're also usually the most intimidating part of threading the machine. This visual roadmap will help you navigate both the lower and upper looper without the usual headache.
So many of us have gotten stuck squinting at confusing diagrams in a manual. We're going to simplify all that by focusing on the color-coded paths most modern machines have, showing you exactly where each thread needs to go. I'm a big believer in hands-on learning, which is why we offer online classes at bsewinn.com that use clear, visual guidance to help every crafter feel confident in replicating beautiful designs.
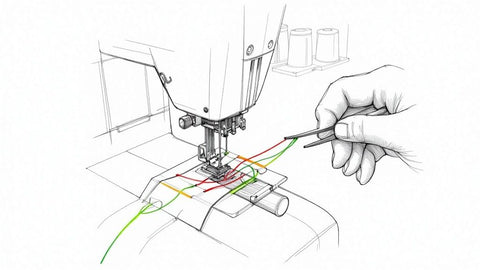
Tackling the Looper Thread Paths
The trick is to handle each looper one by one. Always start with the lower looper. Its path is usually the most complicated, so getting it out of the way first is a huge win. Grab your long-nosed tweezers and gently guide the thread through each hook and channel, following the color or symbols on your machine. Once that’s done, you can move on to the upper looper, which has a much simpler route.
This flow chart maps out the correct sequence for you—starting with the loopers and finishing up with the needles.
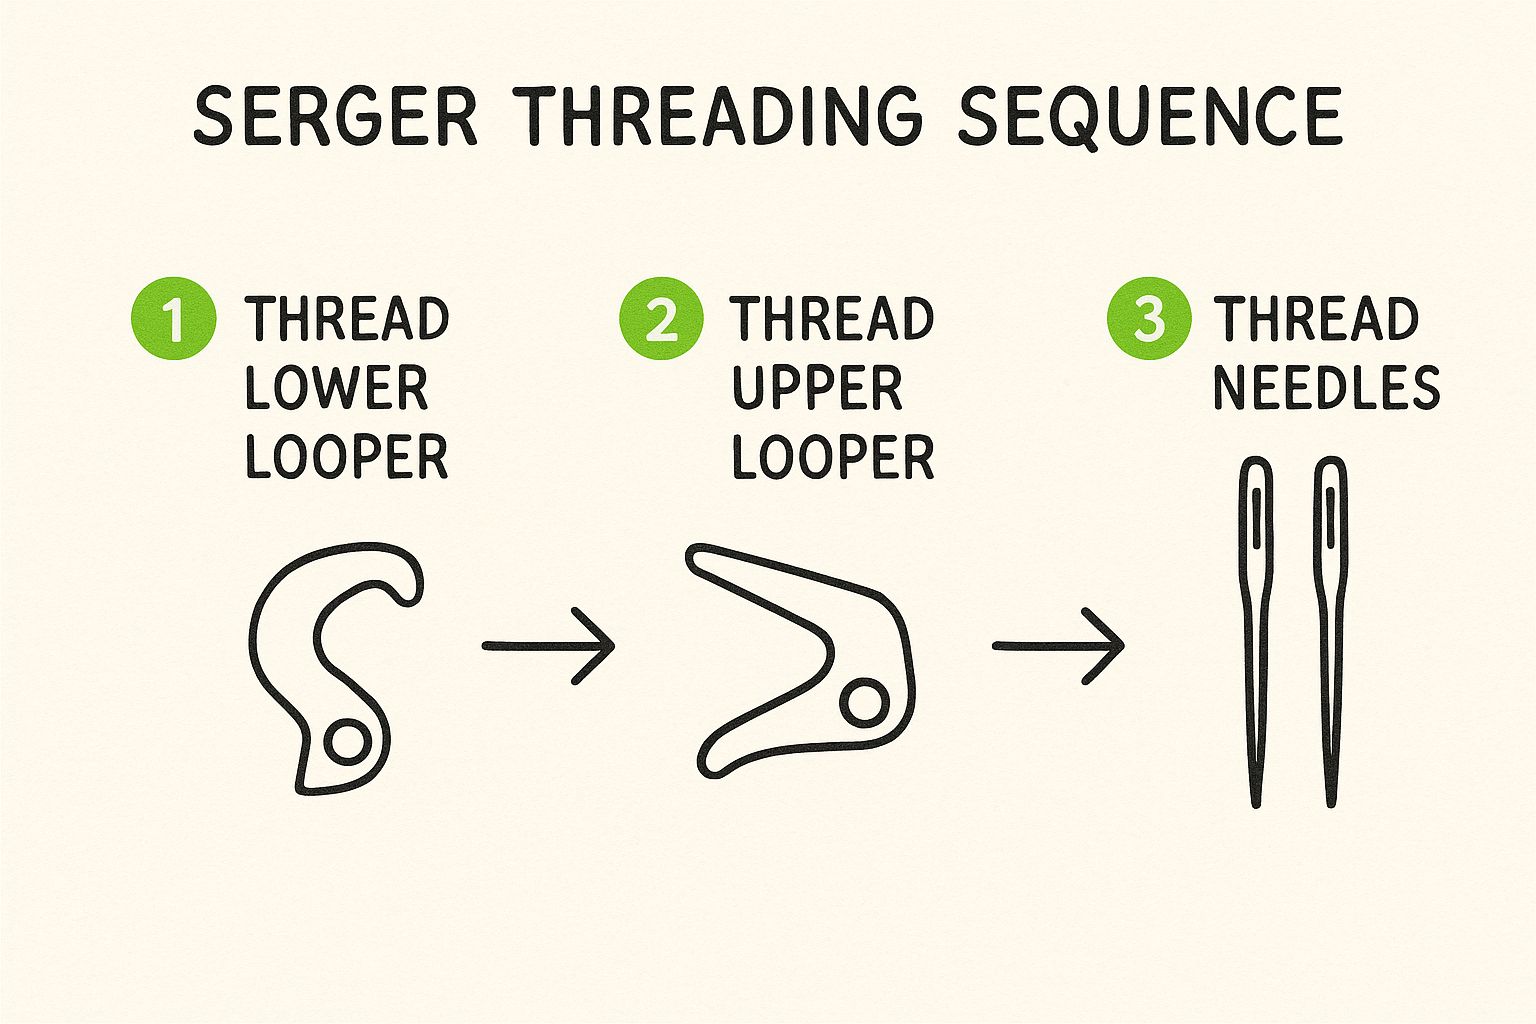
This visual just reinforces the number one rule of serger threading: loopers always come before needles. Getting this order wrong is the fastest way to create tangles and prevent a proper stitch chain from forming.
Want a pro tip for changing colors quickly? Try the "tie-on" method. Instead of rethreading from scratch, just snip the old thread at the spool, tie the new color onto its end with a small knot, and gently pull it all the way through the machine's path. This little trick is a massive time-saver, especially on projects with lots of color changes.
"Don't be afraid to use your tools. Long tweezers aren't just helpful; they're essential for navigating the tight spaces inside the looper area. They give you the precision that your fingers just can't match, turning a frustrating task into a manageable one."
With a bit of practice, you’ll find a rhythm that works for you. Just remember to leave a thread tail of about 4-6 inches after you’re done threading. That gives you enough slack to run a test chain before you start sewing on your actual fabric, making sure everything is locking together perfectly.
Threading the Needles for a Perfect Finish
Once the loopers are threaded, you're on the home stretch. Threading the needles is a much simpler affair, especially if you're already comfortable with a standard sewing machine. Still, there are a few serger-specific quirks to get right for that clean, professional look we're all after.

The path is usually pretty clear: just guide the right needle thread down and make sure you hear it click into its tension disc. Then, do the same for the left needle. If you have a serger with a built-in needle threader, count yourself lucky—it's a fantastic little feature that saves a ton of frustration.
Key Needle Threading Tips
No automatic threader? Don't sweat it. A good pair of long-nosed tweezers and some decent lighting are your best friends here. The absolute most important part of this whole step is making sure the thread is seated firmly in those tension discs. This is what keeps your stitches balanced and beautiful.
The thread you choose makes a difference, too. There's a reason polyester threads account for around 45% of the sewing thread market—they're strong, durable, and can handle the high speeds and tension of a serger without snapping.
If there's one thing to double-check, it's that both needle threads are properly seated in their tension discs. A loose thread here is the number one cause of those frustrating, uneven loops on the top or bottom of your fabric.
Finally, don't skimp on your needles. Using fresh, high-quality serger needles is non-negotiable for avoiding skipped stitches and getting a crisp finish. A variety pack like the Klasse serger needle tin ensures you always have the right tool for the job. Mastering these details is what separates good serging from great serging, and at bsewinn.com, we empower you with the support, training, and resources needed to perfect these skills.
How to Fix Common Serger Threading Problems
You've followed every single color-coded dot and diagram, but your stitches still look… wonky. Take a deep breath. We've all been there. This is a rite of passage when learning to use a serger, and honestly, even experienced sewists have days like this. This is your go-to guide for wrestling with those pesky issues, from threads that snap for no reason to the dreaded "bird's nest" under your fabric.
More often than not, the fix is much simpler than you think. At bsewinn.com, we are committed to empowering crafters not just with custom sewing machine designs, but with the real-world know-how to solve problems on the fly. It's why we back everything up with extensive online training and resources.
Diagnosing Skipped Stitches
Skipped stitches are probably the number one frustration I hear about. Before you even think about unthreading the whole machine, run through this quick checklist. Always start with the easiest and most likely culprits.
- Check the Needles First: Is your needle bent, dull, or just the wrong type for your fabric? A tired or damaged needle is the main cause of skipped stitches. Also, double-check that it's inserted correctly—pushed all the way up into the shaft with the flat side facing the back.
- Verify the Thread Path: It's so easy for a thread to pop out of a tiny guide without you noticing. Run your finger along each thread path to make sure it's securely seated in every single guide, from the spool all the way down to the needle.
Seriously, these two simple checks solve the problem more than half the time.
Taming Snapped Threads and Nests
If a thread keeps snapping or you're getting a tangled mess under your project, it nearly always points to a tension or threading mistake. The problem probably isn't as catastrophic as it looks.
Industry data actually shows that improper threading is a huge source of serger malfunctions. In fact, simple user error can cause up to 40% of the tension and stitch problems serger owners report. You can dig into more of these industry stats over on datahorizzonresearch.com.
The most common reason for a "bird's nest" is forgetting to lower the presser foot before you start sewing. When the foot is up, the tension discs are open, which lets way too much thread pull through and creates a tangled mess on the bottom.
If your presser foot is already down, the next place to look is the tension discs themselves. Give the thread a little "floss" back and forth in the tension discs to make sure it's settled in properly. A thread can look like it's in the right spot but actually be sitting on top of the discs instead of between them. Making that tiny adjustment can fix so many tension headaches in an instant.
Got Questions About Threading Your Serger? Let’s Clear Things Up.
Even when you think you've finally got the hang of threading your serger, some questions always seem to pop up. Don't worry, it happens to everyone. Let's tackle some of the most common ones so you can get back to sewing with confidence.
What’s the Fastest Way to Change Thread Colors?
This is where the "tie-on" method becomes your best friend. It’s a game-changer. Just snip the old threads right near the spools and tie the new ones on with a small, tight knot.
Next, lift the presser foot to release the tension discs. Now you can gently pull the old threads all the way through the machine until the new colors pop out at the needles and loopers. It saves you from having to re-thread the whole thing from scratch.
Help! A Thread Broke While I Was Sewing. What Now?
First thing's first: stop sewing. Take a breath and carefully slide your fabric out. The key is to find that broken thread and pull it completely out of its path.
Once it's out, you only need to re-thread that one specific path, but you have to do it from the very beginning. Make sure the new thread is sitting snugly in every guide and tension disc before you even think about starting up again.
This isn't just a home-sewing headache. Industry reports show that serger threading errors can account for 15-20% of machine downtime in professional shops, which really hits productivity. You can dig into more insights on the sewing machine threads market over at verifiedmarketreports.com.
Why Is the Threading Order So Important?
There's a very good reason for the madness! The standard order—usually upper looper, lower looper, right needle, then left needle—is designed to let the looper threads create an interlocking chain before the needles get involved.
The needles then punch through this little chain, securing the seam right onto your fabric. If you thread them out of order, that crucial chain can't form properly, and you'll end up with a tangled mess and no stitches.
Any Tricks for Those Confusing Color-Coded Paths?
If the colors and diagrams still look like a tangled plate of spaghetti, just focus on one path at a time. Ignore everything else and trace a single thread from the spool all the way down to its end point. A good pair of long tweezers is invaluable for navigating those tight spots.
Here's a pro tip: when you finally get it threaded correctly, take a clear picture with your phone. It's a lifesaver for future reference. And don't forget, there are fantastic visual guides out there. Many of the online classes from bsewinn.com can make it all click, empowering you to create tangible designs with confidence.
Ready to really master your machine and move past the basics? B-Sew Inn has everything you need, from advanced sergers to amazing online classes and tutorials that will take your skills to the next level. Check out our custom machine designs and all the resources we offer at https://www.bsewinn.com.