Winding a bobbin seems like such a tiny, insignificant step, but trust me, it's one of the most foundational skills in sewing. It's the simple process of getting thread from the big spool neatly onto that little bobbin, ready to work from underneath. Getting this right from the get-go is the first real step to achieving beautiful, balanced stitches for any design you can imagine, from a simple quilt block to an intricate embroidered jacket.
Why a Perfect Bobbin Is Your Secret Weapon
Before you even think about sewing that first seam, let's have a little chat about the unsung hero of your sewing machine: the bobbin. I can't tell you how many times I've seen beginners (and even some seasoned sewists!) struggle with their machine, only to find out the real culprit was a poorly wound bobbin.
A perfectly wound bobbin is the literal foundation of every single stitch. When it’s wound unevenly, too loose, or with lumpy bits, you’re basically inviting frustrating thread nests, skipped stitches, and tension headaches to the party. Nobody wants that.
Think of it this way: the bobbin thread has to work in perfect harmony with the top thread from your needle. They meet deep within the fabric to create that flawless, interlocking stitch. If the bobbin thread doesn't have consistent, firm tension, it can’t feed smoothly out of the bobbin case, and that whole delicate dance falls apart.
Getting to Know Your Winding System
To walk up to any machine with confidence, it really helps to know what you're looking at. Most modern home sewing machines use one of two main systems for winding bobbins.
A quick glance at the top of your machine will usually tell you which type you're working with.
| Winder Type | Key Feature | Best For |
|---|---|---|
| Integrated Winder | Spindle and tension disc are built into the top of the machine. | Everyday sewing; it's the most common system you'll find. |
| Independent Motor | A separate motor lets you wind a bobbin while still sewing. | High-volume sewing and large projects where you don't want to stop. |
Knowing the difference helps you understand your machine's capabilities, especially if you're tackling big quilting or garment projects.
The funny thing is, this little preparatory step is a massive deal on a global scale. In 2025, the bobbin winder market is valued at around $500 million and is expected to keep growing. It just goes to show how critical precise winding is for everything from designer apparel to high-tech electronics. If you're curious, you can read the full research about the bobbin winder market and see how this fundamental process makes the manufacturing world go 'round.
At bsewinn.com, we are huge believers in mastering the fundamentals, and it doesn't get more fundamental than winding a bobbin. Our custom machine designs, online classes, and extensive resources are all built to empower crafters like you. We want to help you build those core skills from the ground up, making your creative journey to replicate beautiful designs more successful and a whole lot more fun.
Gathering Your Bobbin Winding Essentials
Before you even think about winding, let's talk prep. Getting your tools lined up first makes the whole process ridiculously smooth. Trust me, a little prep work saves a ton of headaches later.
The absolute first thing to check? Your bobbin.
I can't tell you how many times I've seen sewers grab the wrong one. It's probably the most common mistake out there. A bobbin that's off by just a millimeter can throw your stitch tension completely out of whack, cause thread nests, and—worst case scenario—damage the delicate guts of your machine. When in doubt, always, always check your sewing machine's manual to see what style or class it needs.
Choosing Your Materials
Once you know the right size, you'll see bobbins are usually either metal or plastic. Metal bobbins are workhorses; they're durable and don't warp, which is fantastic for heavy-duty projects. Plastic bobbins are great because they're lightweight and you can easily see how much thread you have left with just a glance.
A quick heads-up: many newer, computerized machines are actually calibrated for the lighter weight of plastic bobbins. So, sticking with what the manufacturer recommends isn't just a suggestion, it's pretty critical. If you're looking for a good all-rounder for popular machines, something like this pack of Class 15 bobbins is a great staple to have in your kit.
And please, don't skimp on your thread. It might be tempting to buy the cheap stuff, but it often creates way more lint. That lint builds up inside your machine and is a fast track to jams and broken threads down the road.
Last but not least, have a good pair of small, sharp scissors or thread snips right by your side. You’ll need them for a nice, clean cut to get started and to finish up. Having these simple tools ready means you’re all set to wind a perfect bobbin.
Winding a Bobbin on a Standard Machine
Alright, let's get that bobbin wound. We'll walk through the process on a typical sewing machine with a built-in winder. It might seem like just another task to check off the list, but really understanding why you're doing each little thing is what separates a frustrating chore from a smooth, satisfying prep for your next project. My goal here is to make you feel confident enough to walk up to just about any machine and know exactly what to do.
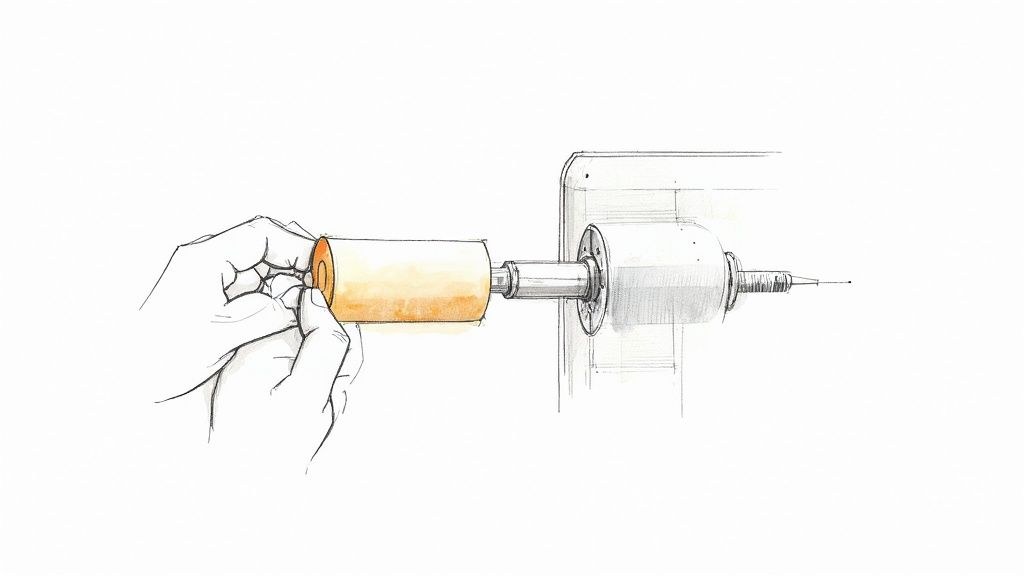
First things first, pop your spool of thread onto the spool pin. Grab a spool cap that fits snugly—this is more important than you might think. A cap that's too small lets the thread catch, and one that's too big can cause it to feed unevenly. Either way, you're looking at tension problems before you even start sewing.
Getting the Tension Just Right
Now, you need to guide the thread along the machine's winding path. Most machines have little diagrams or numbers printed right on them to show you the way. The absolute key player in this journey is the pretensioner disc. As you pull the thread through it, you should feel a little bit of drag. That's what you want! This tiny part is what makes sure the thread winds onto the bobbin with firm, consistent pressure. Skip this, and you'll end up with a loose, squishy bobbin—a perfect recipe for tangled thread nests later.
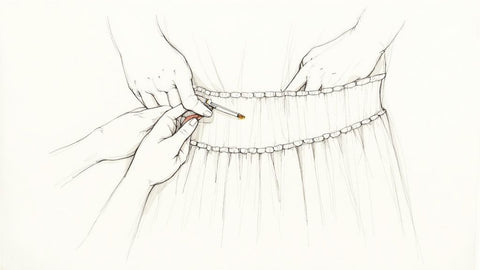
Once the thread is routed correctly, poke the end through one of the little holes on your empty bobbin, going from the inside out. Now, place the bobbin on the winding spindle and give it a little click to the side to engage the winder.
Hold on to that thread tail as you gently press the foot pedal. After a few winds, you can stop, snip the tail off close to the bobbin, and get back to it.
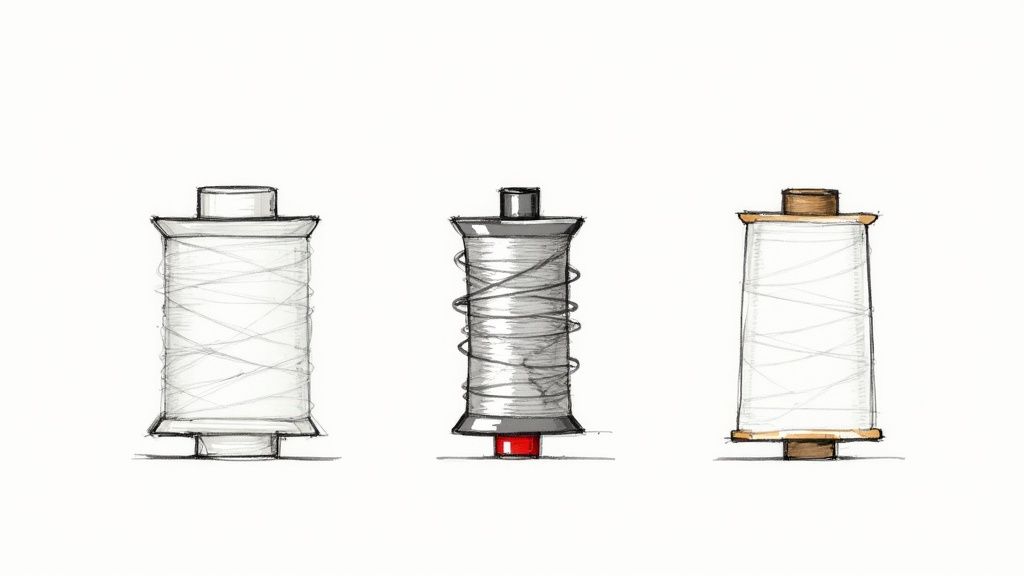
This simple infographic breaks down the core process into three key stages.
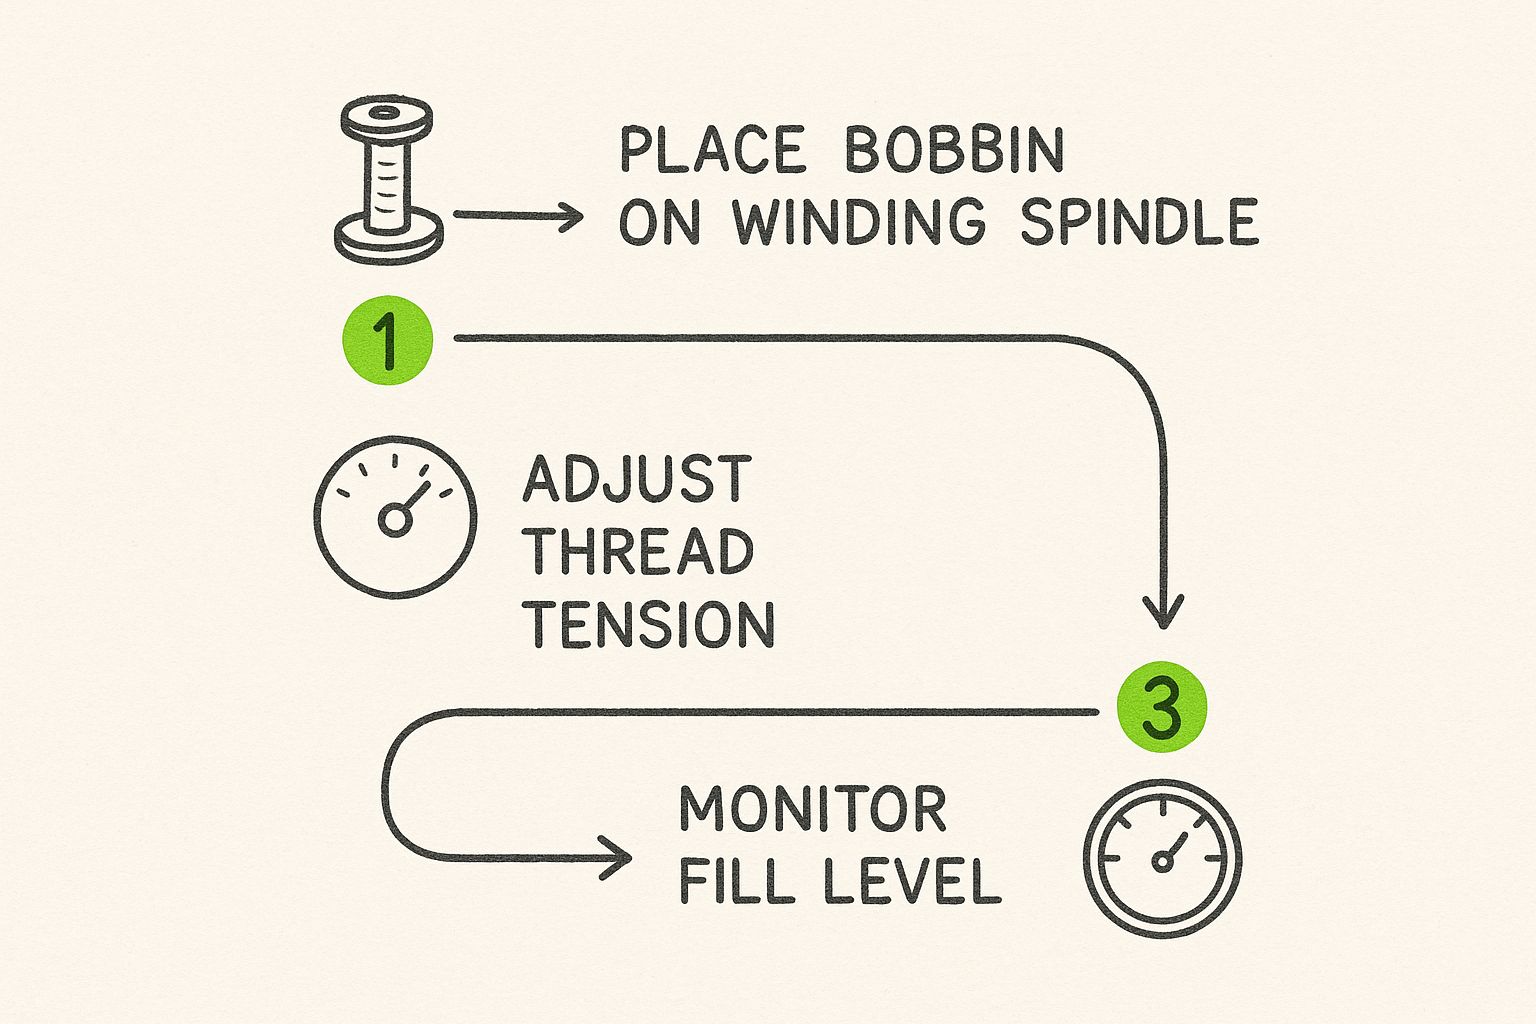
As you can see, a great bobbin comes down to proper placement, tension, and keeping an eye on the fill.
Now, let the machine do its thing. What you're looking for is a nice, even fill—think a perfect roll of coins, not a lumpy, lopsided mess. It’s pretty amazing how far this technology has come. The textile industry is always pushing for more efficiency, and it's driven huge improvements in winding machines. The global market is projected to jump from $8.4 billion in 2025 to $13.4 billion by 2032, all thanks to machines that can do this at incredible speeds. If you're curious, you can learn more about the growth of the yarn winding machine market and see how it's all evolved.
A perfectly wound bobbin should be firm, not spongy. If you press on the thread with your thumb, it shouldn't give. That firmness is the best sign that you nailed the tension.
Most modern machines will automatically stop winding when the bobbin is full. Once it does, just snip the thread, slide the bobbin off the spindle, and you are officially ready to start sewing.
Using an Independent Bobbin Winding Motor
For those of us who really, really value our sewing time, some higher-end machines come with what I consider a total game-changer: an independent bobbin winding motor. It’s an incredible little feature that lets you wind a fresh bobbin while you’re still sewing. You never have to unthread your needle or break your creative stride.
Picture this: you're deep into a big quilting project, and that dreaded moment hits—your bobbin runs out. Instead of stopping everything, you just pop a new bobbin on the winder, engage its separate motor, and keep right on stitching your quilt. This is the kind of thoughtful custom sewing machine design that makes the whole sewing process smoother.
Engaging Your Independent Winder
Now, the process is a little different from a standard winder. You’ll need to find the separate thread path and tensioner built just for this motor.
- Find the Path: Your machine will have its own dedicated guide and tension disc for this winder, completely separate from the main threading path.
- Start the Motor: Once you’ve threaded the winder and placed the bobbin on its spindle, you'll usually just press a button to get it started. Your main machine stays threaded and ready to sew.
This push for more efficiency isn't just happening in our sewing rooms. On an industrial scale, the textile industry is constantly innovating. The bobbin-less winding machine market was valued at an impressive USD 1.2 billion in 2024 and is projected to more than double to USD 2.5 billion by 2033. It’s a huge shift that highlights the drive toward productivity in manufacturing. If you're curious about the industry trends, you can discover more insights about the bobbin-less winding machine market and its impact.
The real beauty of an independent motor is multitasking. You can prepare multiple bobbins of different colors for an embroidery project without ever interrupting the stitch-out.
Don't have this feature built-in? No worries. An external tool can give you similar benefits. A dedicated accessory like the Baby Lock bobbin winder for multi-needle machines lets you prep bobbins completely separate from your machine, ensuring you always have the next color ready to go.
How to Fix Common Bobbin Winding Problems
Even the most seasoned sewists run into bobbin winding issues. It happens to all of us, so don’t worry! Let's walk through some of the most common frustrations and get you back to your project in no time.
One of the top culprits is a lumpy or unevenly wound bobbin—you know the kind, it looks more like a messy beehive than a neat little cylinder. More often than not, this is a sign that the thread didn't get properly seated in the winding tension disc. It’s an easy fix: just unspool the thread and re-route it, making sure you feel a slight, firm pull as it passes through the tensioner.
Diagnosing Loose or Cone-Shaped Winding
Another classic problem is a bobbin that’s wound way too loosely. If you can easily press your thumb into the thread, it’s too soft and will almost certainly cause a tangled mess of "thread nests" under your fabric later. This usually happens when the thread accidentally bypasses the tension guide altogether. Always give your thread path a quick double-check against the diagram on your machine.
What if your thread is forming a cone shape, piling up at the top or bottom of the bobbin? This often points back to the thread spool itself. Take a look at your spool cap—if it’s too large or too small for the spool, it can make the thread feed at a weird angle, leading to that lopsided wind.
At bsewinn.com, we believe troubleshooting is just another part of the creative journey. Our online classes and extensive resources are here to support you in solving these little hiccups, empowering you to understand your machine on a deeper level so you can create with confidence.
If you’ve tried these quick fixes and are still getting frustrating results, the issue might be your machine’s overall tension. A poorly wound bobbin can sometimes be a symptom of a larger tension imbalance. For a deeper dive, you can learn more by checking out our guide on tension adjustment on your sewing machine.
Finally, if the thread keeps breaking while you're winding, slow down. Winding at full speed can create too much friction and snap finer threads. A slower, more controlled pace at about 60% speed often produces a much smoother and more reliable result.
Got Bobbin Winding Questions? I've Got Answers.
As you get more comfortable with your machine, you'll run into little quirks and questions. To wrap things up, let's tackle some of the most common things people ask about winding bobbins. Think of this as clearing up those last little details so you can sew with confidence.
My Bobbin Winder Broke. Can I Just Wind It by Hand?
I know it's tempting, but please don't! While you technically can wrap thread around a bobbin by hand, you'll almost never get the smooth, even tension your machine demands for a beautiful stitch.
Hand-wound bobbins are notorious for causing thread nests, jams, and a whole lot of frustration. For the best results, you really need the machine's winder or a separate bobbin winder tool. They're designed to lay the thread down perfectly flat and even, which is exactly what you need.
How Full Should a Bobbin Actually Be?
You're aiming for full, but not "so-stuffed-it-can't-move" full. Most modern machines are great because they have an automatic stopper that clicks off the winder once the bobbin is perfectly filled.
If you wind it too much, the bobbin might bulge and not fit or spin correctly inside its case. This can throw off your tension something awful. A good rule of thumb I always follow is to stop winding when the thread is smooth and flat, just a hair below the outer rim.
Why Is My Bobbin Thread Showing on Top of My Fabric?
Ah, the classic sign of a tension issue! Nine times out of ten, seeing bobbin thread on your top fabric means the top thread tension is too tight, or the bobbin tension is too loose.
But here’s a pro tip: before you even touch your tension dials, check your bobbin. An unevenly or loosely wound bobbin can absolutely be the culprit. It won't feed the thread smoothly, and your machine will act like it has a tension problem. Always make sure your bobbin is wound nice and firm first.
At B-Sew Inn, we believe every question is a chance to learn something new. Our online classes and extensive resources are packed with tips like these to help you tackle any sewing challenge, from mastering the basics to creating your own amazing, tangible designs. We’re here to support you every step of your creative journey.
Does the Direction the Thread Wraps Around the Bobbin Matter?
It matters a lot. Consistency is everything when it comes to tension.
- For most top-loading (drop-in) bobbin systems, you want the thread to come off the bobbin in a counter-clockwise direction.
- For front-loading systems with a separate bobbin case, it's usually clockwise.
The actual winding process on the spindle is almost always clockwise. The key is making sure the thread unwinds correctly when you pop it in the machine. When in doubt, your machine's manual is your best friend here—it’ll show you the right way for your specific model.
Ready to take your sewing to the next level? Explore custom sewing machine designs, fun online classes, and tons of resources at B-Sew Inn. Let us help you create with confidence. Swing by https://www.bsewinn.com to see what's new