Diving into your first quilt is one of the most rewarding things you can do, and I'm here to break down the whole process into simple, bite-sized pieces. We'll go through everything from picking out your fabrics to making that very last stitch. Think of this as your friendly roadmap for quilting for beginners step by step, a comprehensive "how-to" guide for a tangible project you can replicate. Let's get started creating something beautiful together.
Your Quilting Journey Starts Here
Making your first quilt is a fun creative adventure, and trust me, it's way more doable than you might think. Don't let yourself get bogged down by those super complex patterns you see online. Right now, it’s all about the simple joy of making something, turning basic pieces of fabric into a cozy, personal piece of art.
At its heart, quilting is really just telling a story with fabric and thread. Every choice you make—the colors, the pattern, the way you stitch it—adds a little piece of you to the final product. I’ve designed this guide to give you the solid foundation you need to start with confidence. You'll quickly realize that even the most stunning quilts are just a collection of simple steps, done one after another.
Why Taking It Step-by-Step Really Works
Quilting has made a huge comeback, and a big part of that is because new quilters love learning in a structured, easy-to-follow way. It just works. A recent survey even found that 62% of new quilters got into the craft because they loved the feeling of making tangible progress on a step-by-step project. Plus, tutorials that break things down have been shown to boost beginner success rates by over 40%. You can dig deeper into quilting stats and market trends over at the Craft Industry Alliance.
This method turns what could be an intimidating project into a series of small, satisfying wins. Each little block you finish and every seam you sew builds momentum, keeping you excited from the first cut to the final stitch.
This is exactly why we at bsewinn.com are so committed to empowering crafters. We believe in providing the support you need to succeed, offering custom sewing machine designs, accessible online classes, and an extensive library of training resources. It’s like having an expert quilter and a whole community cheering you on as you go.
Gathering Your Essential Quilting Toolkit
Before you make a single cut, let's talk about setting yourself up for success. Having the right tools on hand makes the entire quilting process so much smoother and, honestly, a lot more fun. Think of these items less as just supplies and more as your creative partners.
Good equipment can be the difference between a joyful afternoon of sewing and a frustrating mess. For instance, you could use scissors, but a rotary cutter is a total game-changer for quilters. When you pair it with a self-healing cutting mat and a clear acrylic ruler, you've got the magic trio. This setup lets you slice through multiple layers of fabric with incredible speed and precision—something that’s nearly impossible to do neatly with scissors. Perfect cuts are the foundation of a beautiful quilt where all your points meet up just right.
Choosing Your First Fabrics
Now for the best part—picking out your fabric! The colors and patterns are what really bring a quilt to life. For your very first project, I can't recommend 100% cotton fabric enough. It’s stable, it presses beautifully, and it doesn't fray too much, which means it’s going to behave itself under the needle.
Feeling a little overwhelmed by the idea of matching fabrics from scratch? I get it. A great way to start is with a pre-cut bundle, like a 'fat quarter' bundle. These are collections of coordinating smaller cuts from a single designer line, so you get a gorgeous, no-fuss palette right out of the gate. For a full rundown of everything you might need, check out our complete guide on quilting supplies for beginners.
It’s no surprise that beginner-friendly options like these have boomed in popularity. The global quilt market was recently valued at around USD 5.32 billion, and pre-cut kits have played a huge role in making it easier for people to jump in. Cotton dominates the market for a reason: it's just so forgiving for newcomers.
Must-Have Tools For a Great Start
Beyond that cutting trio and your fabric, there are a few other essentials that will make a world of difference. Having these items ready to go means you won't have to stop right when you're in a creative groove.
Here's a quick look at the absolute must-haves for your quilting toolkit. Getting these basics right from the start will save you a ton of headaches down the road.
Beginner Quilter's Essential Toolkit
| Tool | Primary Function | Beginner's Tip |
|---|---|---|
| Sewing Machine | Stitching quilt blocks and layers together | Look for a machine with a reliable straight stitch and a "walking foot" attachment. The walking foot is a lifesaver for feeding all quilt layers evenly. |
| Quality Thread | Securing seams and quilting stitches | Start with a good-quality, 100% cotton 50-weight thread in a neutral color like gray or cream. It’ll blend in with almost anything. |
| Seam Ripper | Correcting stitching mistakes | Every quilter I know, from brand-new to expert, keeps one of these within arm's reach. Don't be afraid to use it—it's part of the process! |
| Iron & Ironing Board | Pressing seams flat for accuracy | A hot, dry iron is non-negotiable. Pressing your seams as you go is the secret to getting those crisp, flat, professional-looking quilt blocks. |
Think of these tools as an investment in your new hobby. With this core toolkit, you’ll be well-equipped to tackle your first project with confidence and enjoy every stitch.
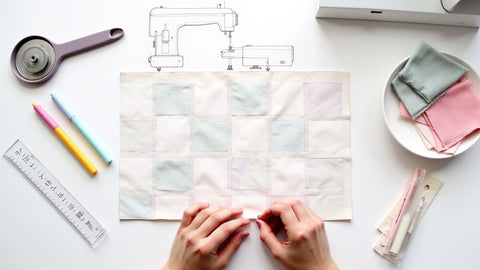
Cutting and Piecing Your First Quilt Top
Okay, this is where the real fun starts—turning that stack of fabric you picked out into an actual quilt top. It feels like magic every time. We'll walk through it together, focusing on being neat and accurate, because that's the secret to a quilt that looks fantastic.
For our first project, we're going with a classic tangible example: the nine-patch block. It's the perfect starting point for crafters to replicate. You'll cut nine identical squares and sew them into a simple three-by-three grid. It’s straightforward enough to build your confidence but teaches you the core skills you'll use in every quilt you ever make. Trust me, taking your time here saves a world of frustration later on.

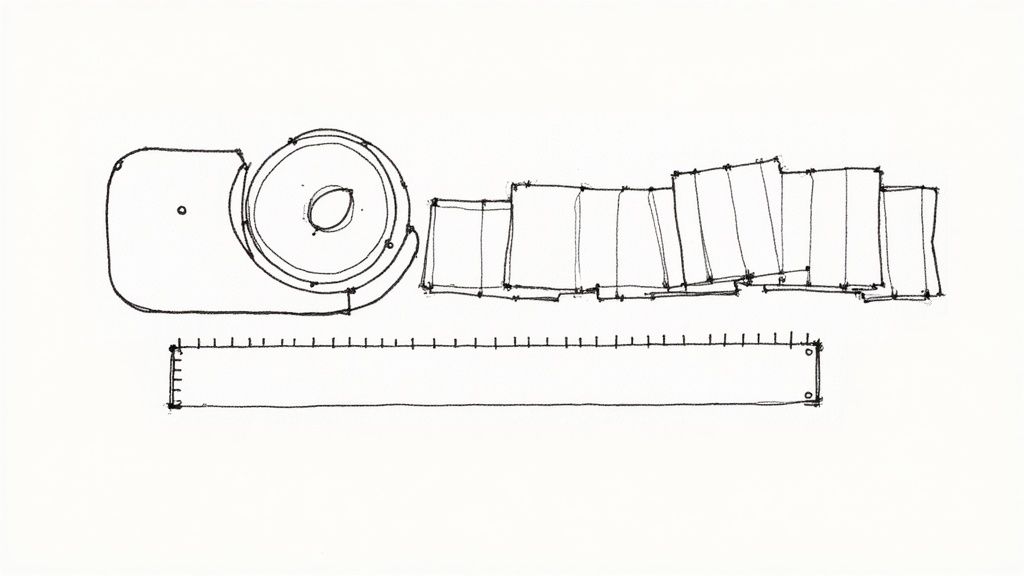
This little guide shows the flow from cutting your strips to laying out your pieces. Following a logical order like this is the key to making sure your blocks come together without any fuss.
Mastering the Perfect Cut
Before a single stitch is sewn, you have to cut. And when it comes to quilting, accurate cutting isn't just a suggestion—it's everything. It's what makes your blocks fit together like puzzle pieces. For our nine-patch, you’ll need nine squares of the same size. The absolute best way to do this is with a rotary cutter, a clear acrylic ruler, and a self-healing mat.
First things first, you need to "square up" your fabric. This just means trimming off that rough selvage edge to give yourself a perfectly clean, straight line to work from. From that straight edge, you can cut precise strips, and then turn those strips into perfect squares.
Most beginners find it easier to work with standard sizes between 2.5 to 5 inches. Getting comfortable with your rotary cutter is a huge step, and you can learn more about the benefits of rotary cutting to really hone your technique.
The Golden Rule: A Quarter-Inch Seam
With your squares all cut and ready, it's time to sit down at the sewing machine. The single most important rule in all of quilting is to sew with a consistent quarter-inch seam allowance. This isn't just a guideline; it's the math that holds every quilt pattern together.
Your machine probably came with a quarter-inch presser foot, which is a lifesaver. If not, you can easily mark a quarter-inch guide on your machine's throat plate with a piece of washi tape. Consistency is what we're after. Even a tiny wobble, when repeated over dozens of seams, can throw your whole block off-kilter.
Quick tip: Before you start on your real pieces, sew a test seam on some scrap fabric. Grab your ruler and measure it. Is it exactly a quarter-inch? Taking a minute to check this now can save you from reaching for the seam ripper later.
Piecing and Pressing for a Flat Finish
Now, let's build our nine-patch block. Lay out your nine squares in a three-by-three grid so you can see how they'll look. The process is to sew the squares into rows first.
Grab the first two squares in the top row, place them right-sides together, and sew along one edge with that perfect quarter-inch seam. Then, open them up and add the third square to finish the row. Do the same thing for the middle and bottom rows.
A fantastic little trick that saves a ton of time is called chain piecing. Instead of stopping and cutting your thread after sewing a pair of squares together, just feed the next pair right behind it. You'll end up with a long "chain" of pieces connected by thread, which saves a surprising amount of both time and thread.
Once your three rows are stitched, it's time to press. And pressing is not the same as ironing! You want to press down with the iron, lift, and move to the next spot—no sliding back and forth, which can stretch your fabric.
Here's the secret to sharp corners:
- For the top and bottom rows, press the seams toward the outer squares.
- For the middle row, press the seams toward the center square.
This little technique is called "nesting." When you go to sew the rows together, the seams will lock into each other perfectly, giving you those crisp points that make a quilt look so professional.
Finally, sew the three rows together, give the whole block one last press, and stand back to admire your work
Assembling the Quilt Sandwich
Okay, your beautiful quilt top is pieced, pressed, and looking fantastic. Now for one of the most satisfying parts of the whole process—turning that flat piece of patchwork into something wonderfully three-dimensional and cozy.
We’re about to build what quilters call the "quilt sandwich." It's a simple idea: you've got your backing fabric on the bottom, a fluffy layer of batting in the middle, and your finished quilt top right on top. The magic is in how you bring these three layers together smoothly, setting yourself up for success when you start the actual quilting.
Getting Your Three Layers Ready
Before you can stack anything, a little prep work is the secret to a pucker-free finish. Each layer needs to be perfectly smooth and ready to join the others.
- The Backing Fabric: This needs to be your biggest piece. My rule of thumb is to make sure your backing extends at least 4 inches beyond all four sides of your quilt top. Iron it like you mean it—get every single wrinkle out.
- The Batting: This is the good stuff in the middle that gives a quilt its warmth. Just like the backing, your batting should be about 4 inches larger on all sides than your quilt top. Unroll it and let it relax for a bit to get rid of any folds from the packaging.
- The Quilt Top: Give your masterpiece one last, careful press. Make sure all your seams are lying flat and there are no sneaky creases. It's also a good idea to trim any stray threads from the back now, especially if they might show through lighter fabrics.
The Basting Process
Basting is how we temporarily hold these three layers together so they don't shift around while you quilt. For your first quilt, the easiest and most reliable method is using safety pins. No question.
You'll need a large, clean floor space, or you can push a couple of tables together. Start by taping down your backing fabric, wrong-side-up. You want it taut, but don't stretch it out of shape. Next, smooth the batting over the backing, followed by your quilt top, centered and right-side-up.
Starting from the very center and working your way out to the edges, use curved quilting safety pins to secure the layers. I like to place a pin every 4-5 inches, which is about a fist's width apart. It might feel like a ton of pins, but trust me, this is the #1 way to prevent fabric from bunching up when you start sewing.
Taking your time with basting is non-negotiable. Seriously. A well-basted quilt is a dream to quilt, while a poorly basted one will fight you every step of the way, leading to frustrating tucks and puckers on the back.
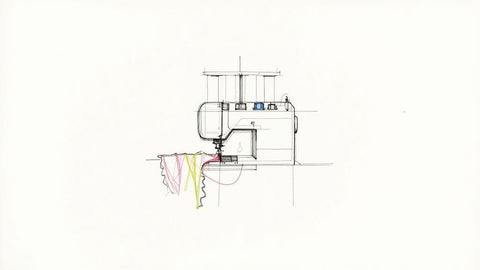
Simple Machine Quilting Techniques
Now for the fun part—the final stitches that permanently join everything together! This is where your quilt’s texture and personality really come to life. Having a reliable machine makes a world of difference here. At bsewinn.com, we offer custom sewing machine designs, like the ones from bsewinn.com, which are built to empower crafters just like you.
Many of these machines come with a walking foot, which is an absolute game-changer for this step. A walking foot has feed dogs on it that work with your machine's feed dogs to pull all three layers through at the same rate. This prevents that annoying shifting that can happen with the top layer. If you're using a bsewinn.com machine, be sure to check out our online resources and extensive training classes for tips on getting the most out of this accessory.
For your first quilt, let's keep it simple with straight-line quilting. Here are two of my favorite, go-to methods:
- Stitching in the Ditch: This is exactly what it sounds like. You quilt directly in the "ditch" created by the seams where your blocks meet. It’s a subtle, elegant way to secure the layers without distracting from your beautiful patchwork.
- Grid Quilting: Another great option is to create a clean grid pattern. Using a guide on your walking foot or a fabric marker, you can quilt straight lines that echo your seam lines. A classic look is to stitch a quarter-inch away from each seam line on both sides.
Finishing Your Quilt with Binding
You’ve made it. After all the cutting, piecing, and quilting, you're at the final, most satisfying step—adding the binding. This is the fabric frame that neatly encases all the raw edges of your quilt, giving it a durable, polished finish that looks so professional. It's the last detail that pulls everything together, and trust me, it’s a moment of pure pride.
The binding process might seem a little intimidating, especially those sharp, mitered corners, but it’s really just another series of manageable steps. From figuring out how much fabric you need to attaching it with your sewing machine, we'll walk through it all. This is where your hard work truly shines.
Preparing Your Binding Strips
First things first, you need to make the binding itself. This involves cutting long strips of fabric—2.5 inches wide is the standard—and sewing them together end-to-end. You need one continuous piece long enough to wrap around your entire quilt. A good rule of thumb is to add about 10-12 extra inches to your total perimeter measurement, just to be safe. You don't want to run out right at the end!
You'll join these strips on a diagonal (a 45-degree angle), which helps reduce bulk where the seams meet. This little detail makes a huge difference in achieving a smooth, flat finish. Once all your strips are sewn together, you’ll press the long strip in half lengthwise with the wrong sides together, creating a clean, folded edge ready for sewing.
Don't skip the diagonal seam! Sewing your binding strips together with a straight seam creates a bulky spot that's tough to sew through and won’t lay flat. The diagonal seam distributes that bulk for a much cleaner look.
Attaching the Binding by Machine
With your binding prepped, it's time to attach it to the quilt. Start by aligning the raw edges of your folded binding strip with the raw edge of your quilt top. Make sure to leave an 8-10 inch "tail" of binding unsewn at the beginning—you'll need this to neatly join the ends later.
Begin sewing the binding to the quilt using a quarter-inch seam allowance. A walking foot is your best friend here, as it ensures all three layers (top, batting, backing) and the binding feed through your machine evenly without shifting.
When you get to a corner, you’ll stop, fold the fabric to create that perfect mitered look, and then continue sewing. We have a detailed tutorial that breaks down this specific technique; you can learn more about how to bind a quilt with perfect corners in our dedicated guide.
The Final Flourish
Once you've sewn the binding around all four sides and neatly joined the ends, the last step is to wrap the folded edge of the binding around to the back of the quilt and stitch it down. Many quilters (myself included!) love to do this final step by hand for an invisible, heirloom-quality finish. It's the perfect activity for a quiet evening on the couch.
If you prefer to finish by machine, you'll "stitch in the ditch" from the front, which means sewing right in the seam line where the binding meets the quilt top. This catches the edge of the binding on the back. This part of our quilting for beginners step by step guide is the grand finale—it's what officially transforms your project into a finished quilt you can cherish for years.
Answering Those Lingering Quilting Questions
Even after you've stitched that final seam, it's totally normal to have a few questions buzzing around. As you wrap up your first quilt, some things might still feel a little fuzzy. Let’s clear up some of the most common questions I hear from new quilters.
One of the biggest debates is whether to pre-wash your fabrics. Honestly, you'll find quilters who swear by it and others who never do. The pro-wash camp wants to prevent colors from bleeding and get any potential shrinkage out of the way. But these days, high-quality quilting cottons have very little shrinkage and are typically colorfast.
My advice? For your first few projects, don’t stress about it. It’s perfectly fine to skip pre-washing, especially if you're using a coordinated pre-cut bundle where all the fabrics are from the same collection.
What’s the Right Stitch Length?
Figuring out the stitch length on your machine can feel like a guessing game at first. The key thing to remember is that you'll use different lengths for piecing your top versus quilting the layers together. For piecing, you want a shorter, tighter stitch to make your seams strong enough to handle all the pressing and moving around they’ll go through.
- For Piecing: I always set my machine somewhere between 2.0 and 2.5 mm. This keeps the seams nice and secure, so they won't pop open later.
- For Quilting: When you’re stitching through the whole quilt sandwich, you can bump that length up a bit to 2.5 to 3.0 mm. A longer stitch looks more decorative and really helps add that beautiful texture we all love.
What Kind of Thread Should I Use?
Walking into the thread aisle can be overwhelming! But to get started, you can ignore most of it. The absolute best all-arounder for a beginner is a 50-weight, 100% cotton thread. It’s the workhorse of the quilting world—strong enough to hold your quilt together but fine enough that it won’t add bulk to your seams.
A great little trick is to start with a neutral color like a light gray, cream, or beige. These colors play nicely with just about any fabric you throw at them, which means you won't be constantly stopping to re-thread your machine.
You really don't need a rainbow of thread when you're starting out. A single spool of good-quality, neutral cotton thread will get you through your entire first quilt—from piecing the top to quilting the layers and even sewing on the binding.
Hopefully, these tips help you feel more confident as you move forward. Every single expert was once a beginner, and trust me, figuring things out is a huge part of the fun. Just keep stitching, keep asking questions, and enjoy the process. The skills you’ve learned on this first project are the building blocks for a lifetime of making beautiful things.
Here at B-Sew Inn, we’re passionate about supporting your creative journey, wherever it takes you. We offer everything from custom sewing machine designs perfect for quilting to a huge library of online training and resources. We're here to help you grow. Explore our products and classes to see what you'll create next