

A good fabric ruler is one of those non-negotiable tools that can make the difference between a project you love and one that makes you want to pull your hair out. It’s the secret weapon for getting those flawless, professional-looking results every single time. Honestly, a standard desk ruler just can't compete, and this guide will show you why choosing the right one is a game-changer for any sewing machine design you want to create.
Why a Specialized Fabric Ruler Is Your Most Important Tool
If you've ever tried to cut a straight line in fabric with just a pair of scissors and a regular office ruler, you know the struggle is real. Fabric is slippery! It stretches, it shifts, it frays—it basically has a mind of its own. What should be a simple cut quickly turns into a wobbly, frustrating mess.
This is where a specialized fabric ruler, designed to be buddies with a rotary cutter and self-healing mat, completely changes the game.
Think of your fabric ruler as the blueprint for whatever you're making. An architect wouldn't eyeball the measurements for a building, and you shouldn't either. Precise cuts are the foundation of good sewing. Without them, your seam allowances get wonky, quilt blocks won't line up, and garment pieces just won't fit together the way they're supposed to.
The Foundation of Accuracy and Safety
When you get right down to it, a quality fabric ruler gives you two huge advantages:
- Precision: These rulers are usually made from clear acrylic and covered in detailed grid markings. That transparency is key—it lets you see the fabric right underneath, making it a breeze to line up your cuts with the grainline or a specific print. Every piece comes out exactly the size you intended.
- Safety: A proper fabric ruler is much thicker and heavier than your average ruler. That extra heft creates a safe, sturdy edge for your rotary cutter to glide against, keeping the blade from jumping over and nicking your fingers. That’s a common (and scary!) problem with flimsy, thin rulers.
At bsewinn.com, we are committed to empowering crafters to bring their visions to life. From our custom sewing machine designs to our supportive online classes, everything we do is about building your skills from the ground up. And it all starts with that first critical step: making a perfect cut.
More Than Just a Measuring Stick
A specialized fabric ruler is so much more than a way to measure. It's a multi-tool. You'll use it to square up your fabric, trim half-square triangles using the built-in angle lines, and measure perfect bias strips with total confidence.
It’s one part of a three-piece system, working together with a self-healing mat and a rotary cutter. This trio makes your workflow not only way faster but also incredibly more accurate than cutting with scissors.
For anyone just starting out, getting this core toolkit right is essential. To see what else you'll need, check out our detailed guide on the top sewing tools for beginners. Committing to precision from the start is what lets you confidently tackle new projects and bring even the most complex designs to life.
Exploring the Different Types of Fabric Rulers
Walking into the notions aisle of a fabric store can feel a little overwhelming, right? So many colors, shapes, and sizes! When it comes to the world of the ruler for fabric, that variety isn’t just for show. Each type has a very specific job, designed to make a particular cutting task easier, faster, and way more accurate.
Think of it like a mechanic’s toolbox. Sure, one adjustable wrench can handle a few basic jobs, but you’d never try to build an engine with it. Having a versatile collection of fabric rulers empowers you to tackle any project with confidence, from simple straight cuts to complex curves.
The Workhorse: Rectangular Quilting Rulers
If you only buy one ruler to start, this is the one. Rectangular quilting rulers are the undisputed champions of the sewing room because they’re just so darn versatile. They’re perfect for cutting long, straight strips of fabric right off the bolt and for “squaring up” your fabric—which is just a fancy way of saying you’re making sure your starting edges are a perfect 90-degree angle.
The most common size, and the one I always recommend, is the 6" x 24" ruler. Its length is absolutely ideal for cutting across the entire width of folded fabric, which is a massive time-saver. You’ll also find smaller versions, like a 3" x 12", that give you a bit more control for smaller pieces.
These rulers are a cornerstone of the craft, and the market shows it. The global quilting ruler market was valued at USD 150 million and is projected to climb to USD 250 million by 2033. It’s amazing to see how these essential tools are supporting a growing community of crafters. You can actually explore more data on the quilting ruler market trends and see how the community is expanding.
Essential Square Rulers
The minute you dive into quilting and patchwork, you’ll find that square rulers quickly become your best friend. Their main job is to help you trim down finished quilt blocks—like half-square triangles or log cabin blocks—to a precise, uniform size. This step is non-negotiable if you want all your blocks to fit together perfectly when it’s time to assemble your quilt top.
Square rulers come in all sorts of sizes, but a few have earned a permanent spot on my cutting table:
- 12.5" x 12.5" Square: A fantastic all-purpose size for larger, common quilt blocks.
- 6.5" x 6.5" Square: Perfect for smaller, more detailed block work.
- 4.5" x 4.5" Square: Ideal for trimming the tiny little units within a block before they’re pieced together.
Having a few different sizes on hand keeps you from using a big, clumsy ruler for a small, delicate job. You’ll get much better accuracy this way.
To make sense of all the options, here’s a quick breakdown of the most common rulers you'll encounter and what they're best for.
Quick Guide to Common Fabric Rulers
| Ruler Type | Primary Use | Best For Projects Like... | Key Feature |
|---|---|---|---|
| Rectangular/Quilting | Cutting long straight lines, strips, and squaring up fabric. | Quilts, bag straps, borders, cutting fabric from the bolt. | Long length (6" x 24" is standard) for cutting across fabric widths. |
| Square | Trimming finished quilt blocks to a precise, uniform size. | Half-square triangles, log cabin blocks, any patchwork. | Perfect 90-degree angles and markings for easy centering. |
| French Curve | Drawing and cutting smooth, consistent curves. | Garment sewing (armholes, necklines, hip lines), pattern drafting. | Gradual, elegant curve that mimics natural body lines. |
| Triangle | Cutting precise angles and geometric shapes. | Complex quilt patterns, equilateral triangles, flying geese units. | Pre-marked angles (60°, 45°, 30°) take the guesswork out of geometry. |
This table should give you a good starting point for deciding which tool you need for the job. While a rectangular ruler gets you far, adding specialty rulers really opens up your creative possibilities.
Specialty Rulers for Curves and Angles
Once you venture beyond basic rectangles and squares, you'll find a fascinating world of specialty rulers, each one designed to solve a unique cutting puzzle. These are the tools that let you move from simple patchwork to more advanced garment sewing and intricate quilt designs, like the ones you might find in our bsewinn.com custom patterns.
This is where you really see how the right ruler brings precision and a professional touch to every project you make.
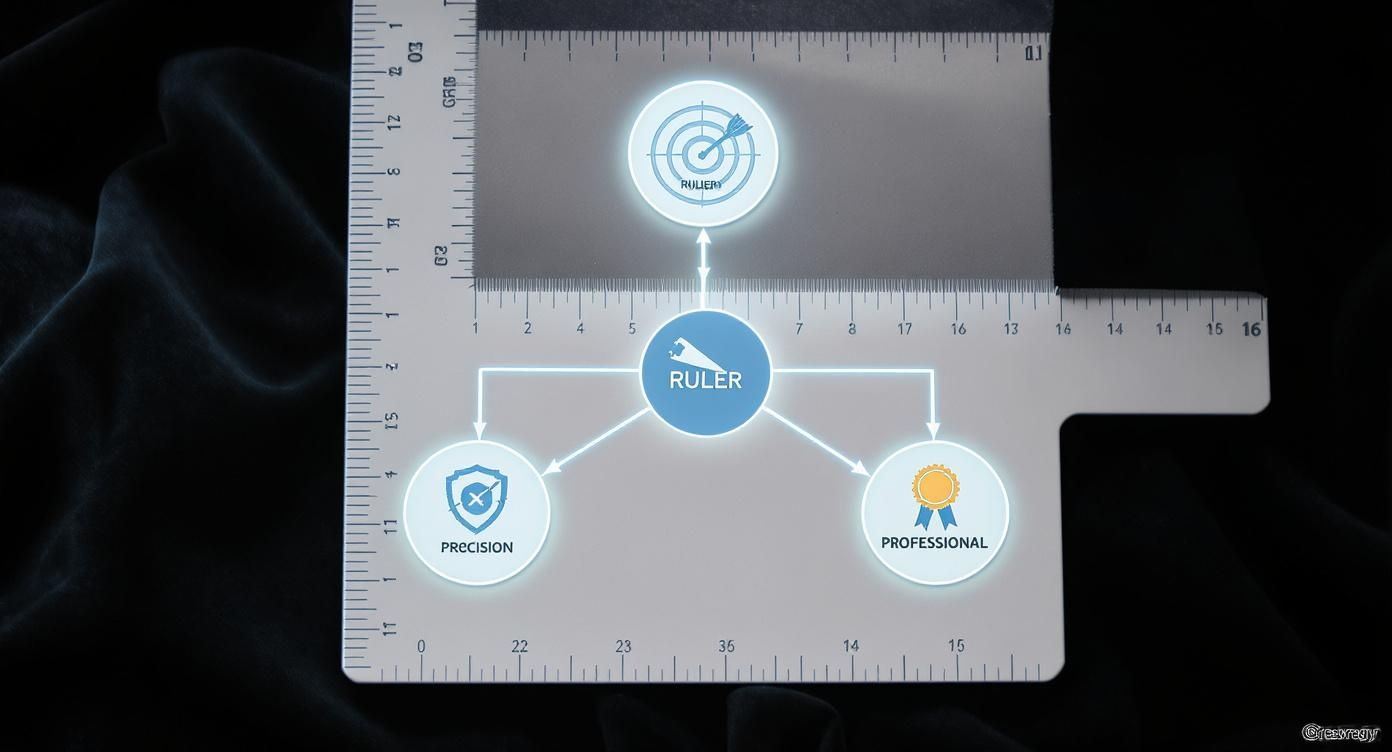
This image sums it up perfectly: a good ruler isn't just a measuring stick; it's a core tool for getting high-quality, safe, and accurate results every single time.
Here are a few specialty rulers you’ll run into:
- French Curves: With their distinct comma-like shape, these are a garment sewer’s secret weapon. They’re used for drawing and cutting those smooth, consistent curves for armholes, necklines, and hip lines.
- Triangular Rulers: Absolutely essential for quilters, these come in different types (like equilateral or half-square triangles) and make cutting angled pieces for complex geometric patterns so much simpler.
- Fussy Cut Rulers: These are usually small, clear squares or windows with precise markings. They let you perfectly center a specific motif on your fabric before you cut, making sure that cute little fox or flower ends up right where you want it.
By understanding the role of each type of ruler for fabric, you can start building a collection that truly supports your creative vision. A great approach is to start with a solid rectangular ruler and then add squares and specialty shapes as your skills and project ambitions grow.
What Makes a Fabric Ruler Great?
When you’re picking out a ruler for your fabric projects, it’s easy to get caught up in just the size and shape. But the real difference between a tool you can trust and a frustrating piece of plastic is all in the details. Knowing what to look for will help you find a ruler that gives you accurate, safe cuts for years.

The first thing you’ll probably notice about a good ruler is that it's made from a clear, sturdy acrylic. There’s a good reason that’s the industry standard! That transparency is a game-changer because it lets you see the fabric underneath, making it a breeze to line up your cuts with a pattern, grainline, or a specific design on the fabric. It takes all the guesswork out of the equation.
Crystal Clear Markings That Don't Quit
Next, get a close look at the grid lines. The absolute best rulers have laser-etched markings. This means the lines are burned into the acrylic, not just printed on top. Why does that matter? Surface-level printing can easily wear off with regular use and cleaning, which can lead to bad measurements and wasted fabric. Laser-etching ensures your grid stays sharp and easy to read, basically forever.
A truly versatile ruler will also have markings in both inches and centimeters. This is incredibly handy, especially if you use patterns from different designers or countries. You'll also want to look for fine lines that mark smaller increments, like 1/8" or 1/16", because that level of precision is what makes all the difference in accurate piecing.
Think of the markings on your ruler as the silent instructor guiding your every cut. Faded, inaccurate lines can mislead you, but sharp, permanent ones build a foundation of trust between you and your tools. This aligns with our commitment at bsewinn.com to empower crafters through extensive resources and training that build lasting skills.
Why Stability and Grip Are So Important
One of the most critical safety features of a fabric ruler is its ability to stay put while you cut. That’s where non-slip grips come in. They’re usually small, clear, textured dots or a special coating on the bottom of the ruler that creates friction against the fabric.
I like to think of these grips like the treads on a tire—they grab the fabric and stop the ruler from shifting or sliding as you press down with your rotary cutter. This stability is what keeps your blade on track, protecting both your fabric and your fingers from a dangerous slip. Some rulers come with grips built-in, while others can be added on with little stick-on dots.
The thickness of the ruler itself is also a big deal for safety. A good ruler for fabric should be at least 1/8 inch (about 3mm) thick. This gives you a solid, high-profile edge for your rotary cutter to press against, making it almost impossible for the blade to jump over the top. A flimsy, thin ruler just can't give you that kind of protection.
Angle Lines for Total Creative Freedom
Beyond just cutting straight lines, a great quilting ruler is secretly a geometry tool. Look for rulers that have clearly marked lines for the most common angles, like 30°, 45°, and 60°. These angle guides are a quilter's best friend. They eliminate the guesswork when you’re cutting shapes for more complex designs like half-square triangles, chevrons, and diamonds.
Having those angles already marked saves you time and means you don't have to pull out a separate protractor. You can cut intricate pieces quickly and confidently, which is a huge help when you're tackling creative patterns. Understanding these features is a huge part of setting up your sewing space for success. For a complete rundown of the essentials, check out our guide on quilting supplies for beginners.
Mastering the Ruler, Mat, and Cutter System
A high-quality ruler for fabric is a game-changer, but it rarely works alone. You should really think of your ruler, rotary cutter, and self-healing mat as a perfectly matched team. When you get them working together as a single system, you unlock a level of speed and precision that’s just impossible otherwise. This trio is the foundation of modern quilting and sewing, plain and simple.
It's amazing to think that the global fabrics market recently hit a value of nearly USD 108.67 billion, and that growth is fueled by people like us—crafters and small businesses who all depend on getting things right. That huge demand just highlights how critical it is to have tools that deliver clean, accurate cuts every single time. It makes this little system of ours pretty essential.
Setting Up for a Perfect Cut
Before you even think about making a slice, your setup is everything. The very first step is to get your fabric lined up perfectly on the mat. Use those grid lines to make sure it’s dead straight. This is how you establish your grainline—the fabric’s lengthwise and crosswise threads—which controls how your finished piece will hang and behave.
With your fabric in place, lay your ruler on top. Line up one of the ruler’s horizontal lines perfectly with the fabric's fold or a visible thread. This is your guarantee that every cut will be square and on the money.
Applying Pressure and Making the Cut
Okay, now it’s time to get a firm grip. Spread your non-cutting hand across the ruler, applying steady, even pressure. Make sure your fingertips are safely tucked away from the edge! It’s this pressure that keeps the ruler from slipping mid-cut, which is the number one reason for wonky lines.
When you're ready, hold the rotary cutter with a confident grip, kind of like a pizza cutter. Press the blade against the ruler’s edge, then push the cutter away from your body in one smooth, continuous motion. The golden rule: never, ever cut towards yourself.
Think of it like this: your ruler is the train track, and the rotary cutter is the train. If the track moves, the train derails. Firm pressure keeps that track locked in place for a perfectly straight journey.
This technique is absolutely fundamental to getting clean results. To really sharpen your skills, check out our deep dive on the benefits of rotary cutting and see how much it can speed up your workflow.
Safety First, Always
A rotary cutter demands your full attention. Those blades are unbelievably sharp, so building safe habits isn't optional—it's a must.
- Always Close the Blade: Make it a reflex. The second you finish a cut, retract the blade guard. Never set the cutter down with an exposed blade.
- Cut Away From Your Body: This is the big one. If the cutter slips, you want it moving away from you, not toward you.
- Keep Fingers Clear: Position your holding hand so your fingers are several inches away from the cutting edge. No exceptions.
- Use a Sharp Blade: A dull blade forces you to use more pressure, which dramatically increases the risk of it slipping or skipping across the fabric. Change your blade regularly.
Troubleshooting Common Cutting Issues
Even with the best tools and intentions, things can go sideways. Here’s how to fix the most common problems:
- Wobbly or Curved Lines: This is almost always the ruler shifting. Put more pressure on it with your holding hand, and make sure that pressure is distributed evenly from end to end.
- Incomplete Cuts or "Skips": If the blade doesn't slice all the way through, it’s a tell-tale sign your blade is dull. It could also mean you aren't applying enough consistent pressure with the cutter itself. Try a fresh blade first; that usually solves it.
- Fabric Bunching Up: This tends to happen when you're cutting through multiple layers. Before you place the ruler down, make sure your fabric is perfectly flat and smooth. If you're cutting four or more layers, you'll likely need to apply a bit more downward pressure.
Getting the hang of this system takes a little bit of practice, but I promise it's a skill that will pay you back in every single project you make. At bsewinn.com, we champion these foundational skills, offering extensive online classes and resources to help you build the confidence to create with absolute precision.
Matching the Right Ruler to Your Sewing Project
This is where the rubber meets the road—or in our case, where the ruler meets the fabric. Knowing all the features of a ruler is great, but connecting those features to what you’re actually making at your sewing table is where the magic happens. A great ruler for fabric isn’t just another tool; it’s a specific solution to a creative problem.
When you choose the right one for the job, you’re setting yourself up for a smoother, more accurate, and way more enjoyable process. And it's not just us crafters who value precision; the global ruler market, which includes tools for fabric, was valued at a whopping USD 25.2 billion and is projected to hit USD 72.6 billion by 2031. That growth shows just how much people are investing in the right tools for the job. You can discover more insights about the growing ruler market here.
Rulers for the Dedicated Quilter
If you're diving into one of our intricate bsewinn.com custom sewing machine designs, your ruler is pretty much the first step to success. Quilting is a game of precision, plain and simple. Even a tiny 1/8-inch error can throw off an entire block, leading to that frustrating moment when your points just don't match.
For quilters, a few rulers are absolutely non-negotiable:
- A 6" x 24" rectangular ruler: This is your workhorse. It’s what you’ll grab for cutting long strips of fabric for sashing, borders, and binding. Its length is perfect for cutting across the full width of fabric right off the bolt.
- A 12.5" x 12.5" square ruler: You'll need this for "squaring up" or trimming your finished 12-inch quilt blocks. It’s the key to getting them all to a perfect, uniform size before piecing them together.
- A smaller 6.5" x 6.5" square ruler: This one is a lifesaver for trimming up smaller units like half-square triangles or flying geese before they become part of a larger block.
By starting with these core rulers, you create a solid foundation for accuracy. Your points will match, your blocks will align, and your finished quilt top will lay beautifully flat—all because you chose the right tool for each step.
Essential Tools for Garment Sewing
Making clothes presents a completely different set of challenges. Instead of perfect straight lines and sharp angles, you’re working with the natural curves of the human body. This is where a straight quilting ruler, on its own, just won't cut it.
A garment sewer's toolkit really should include:
- A long straight ruler (18" or 24"): This is still essential for cutting out those large pattern pieces like pant legs, skirt panels, and long coats. It helps you make sure your grainline is perfectly straight, which is critical for how the garment hangs.
- A French curve: This oddly shaped ruler is the secret weapon for professional-looking necklines, armholes, and hip curves. It lets you draw and cut smooth, graceful lines that a straight ruler simply can't replicate. For example, when creating a custom-fit blouse from a bsewinn.com design, the French curve is indispensable for perfecting the armscye.
Perfect Rulers for Bag Makers
Bag making often means wrestling with thicker materials like canvas, vinyl, or multiple layers of interfacing. These materials demand stability and control, so your ruler needs to be up to the task.
For bag makers, a sturdy, medium-sized rectangular ruler, like a 6" x 12" or an 8.5" x 12", is incredibly useful. It gives you enough surface area to hold down bulky layers securely, but it's still nimble enough for cutting smaller pieces like pockets, flaps, and straps. The clear grid is also a huge help for ensuring all your rectangular panels are perfectly square—a must for a well-structured bag that doesn't look wonky.
By understanding how specific rulers solve these project-specific puzzles, you can pick your next tool with confidence. At bsewinn.com, we’re all about empowering you with custom designs and extensive resources, helping you build a toolkit that supports your creative journey from start to finish.
Taking Care of Your Fabric Rulers
When you find a great ruler for fabric, you're really making an investment in your craft. Think of it this way: you wouldn't leave a nice camera out in the rain, and your favorite ruler deserves the same kind of thought. With just a little care, it can give you crisp, accurate cuts for years and years.
It all boils down to two simple habits: keeping it clean and storing it smart. Get these right, and your ruler will be a reliable partner on countless projects to come.
Keeping Your Rulers Clean and Clear
After a few projects, it's totally normal for your acrylic rulers to pick up tiny bits of lint, dust, and smudges. This gunk can build up and make the measurement lines tricky to see, which is a recipe for an off-kilter cut. Cleaning them is a breeze, but you have to do it right.
Stay away from harsh chemicals like alcohol or ammonia-based sprays. They can actually damage the acrylic, causing the grid lines to fade or rub off completely over time. A gentle approach is all you need:
- Grab a soft, lint-free microfiber cloth.
- Lightly dampen the cloth with plain water. If you’ve got a stubborn spot, a tiny drop of mild dish soap will do the trick.
- Gently wipe down the ruler, paying extra attention to the edges where lint loves to hide.
- Use a separate dry microfiber cloth to dry it right away. This prevents any annoying water spots.
Smart Storage to Prevent Warping
Honestly, how you store your ruler is even more important than how you clean it. Acrylic can bend and warp if it gets too hot or isn't stored properly. Just like parking a car, you wouldn’t leave it sitting in the blazing sun all day.
Storing a ruler flat or hanging it vertically is the absolute best way to keep it in shape. A warped ruler is a quilter's nightmare—it can develop a subtle curve that makes it impossible to cut a truly straight line, defeating its whole purpose.
Never, ever leave your rulers lying on a lumpy surface or propped up at an angle. Gravity will eventually win, and you’ll end up with a bowed tool. Also, keep them far away from direct sunlight or heat sources like radiators, which are notorious for causing warps. The best storage spots are simple:
- Hang them up: A ruler rack with slots or a pegboard with hooks is perfect. This keeps them straight, out of the way, and easy to grab.
- Lay them flat: A shallow drawer or a dedicated flat container works great. Just make sure nothing heavy gets piled on top of them.
A Few Common Questions About Fabric Rulers
As you start getting the hang of your tools, you'll find a few questions always seem to pop up. I've been there! Think of this section as your personal cheat sheet for using your ruler for fabric with the kind of confidence that leads to dead-on precision. Nailing these fundamentals is a huge step toward making things you're truly proud of.
What Are the First Three Rulers a Beginner Should Buy?
When you're just starting, the goal is to build a small, mighty toolkit. You don't need a whole wall of rulers, just the right ones. I always recommend this essential trio because it'll handle the vast majority of cutting tasks you'll encounter in both quilting and garment making.
- A 6" x 24" Rectangular Ruler: This is your absolute workhorse. It’s what you'll grab for cutting long, straight strips right off the bolt and for squaring up big pieces of fabric before you even start a project.
- A 12.5" x 12.5" Square Ruler: This one is a game-changer for quilters. It's the perfect size for trimming most standard quilt blocks, making sure every single piece is uniform for perfect piecing.
- A Small 3" x 12" Rectangular Ruler: When things get detailed, this smaller ruler is your best friend. It gives you much better control for cutting smaller pieces or marking short, precise lines.
This simple combo gives you a rock-solid foundation. With these three, you can confidently take on a huge range of patterns, including the custom sewing machine designs and tutorials we share over at bsewinn.com. Our online classes often focus on helping you become an expert with these core tools.
Can I Use a Regular Office Ruler for Cutting Fabric?
I get this question all the time, and my answer is always a firm—but friendly—no. It really boils down to two critical things: your safety and your accuracy. A flimsy office ruler is way too thin and light to safely guide a rotary cutter. That blade can easily jump right over its low edge, which is a serious injury risk.
A proper acrylic fabric ruler is intentionally thick and heavy. It creates a high, stable wall that keeps your rotary blade exactly where it’s supposed to be. It’s a tool designed for the job, not a risky substitute.
Beyond safety, a standard ruler just doesn't have the features that make a sewing ruler so effective. You won't find any non-slip grips to stop it from shifting, and it's missing the detailed 1/8-inch grid markings and handy angle lines that are absolutely essential for getting those crisp, professional-looking results we’re all after.
How Do I Read the Angle Lines on My Quilting Ruler?
Ah, those diagonal lines! They're your secret weapon for creating all kinds of beautiful geometric designs. Most quilting rulers will have lines for 30°, 45°, and 60° angles marked right on them, and these are the bread and butter of quilting.
Using them is pretty straightforward. First, line up a straight edge of your fabric perfectly with one of the horizontal lines on your ruler. Then, just pivot the ruler until the angle line you want—let's say the 45° line—lines up exactly with that same straight fabric edge. Once you've got it perfect, press down firmly and slice along the ruler's side. That simple move is all it takes to cut flawless half-square triangles, chevrons, and diamonds.
Ready to find the perfect tools to bring your creative vision to life? At bsewinn.com, we offer a curated selection of high-quality rulers, cutters, and sewing machines, backed by expert training and a supportive community. Explore our extensive resources and empower your crafting journey today. Find everything you need at https://www.bsewinn.com.

