

Ever wondered how store-bought t-shirts get that perfect, stretchy hem? The secret is the coverstitch, a beautiful finish that gives garments incredible durability and flexibility. While many sewers think they need a separate, specialized machine for it, your combination serger might already have this powerful feature hiding in plain sight. This guide will show you exactly how to use it, empowering you to create stunning, professional-quality garments you can replicate at home.
Give Your Projects a Professional Edge with a Serger Coverstitch
The coverstitch is truly the hallmark of a professionally made knit garment. Just take a look at the hem of any t-shirt, sweatshirt, or pair of leggings you own. You'll almost certainly see two or three perfectly parallel lines of stitching on the outside, and on the inside, a web of looper threads covering the raw edge. This stitch is specifically designed to stretch with the fabric, which means no more popped threads when you move.
Unlike a standard sewing machine's zigzag or stretch stitch—which can sometimes look a little homemade—the coverstitch provides a clean, flat, and exceptionally durable finish. Here are a few tangible examples of how you can use it:
- Hemming a T-Shirt: This is the classic application! It creates a flexible, sturdy hem that's perfect for t-shirts, dresses, and all kinds of activewear.
- Topstitching a Neckline: Use it to add decorative and functional stitching to necklines and seams that need to stretch. A triple coverstitch on a sweatshirt shoulder seam adds an authentic, ready-to-wear look.
- Attaching a Binding: Perfect for finishing raw edges on necklines and armholes with a clean, enclosed look that screams quality.
- Creating Flat Seams on Leggings: You can even create strong, flat seams for athletic apparel where comfort against the skin is absolutely key.
The Power of a Combo Machine
For a long time, the idea of a coverstitch felt intimidating, something reserved for industrial machines in a factory setting. But as home sewists have gotten more ambitious, manufacturers have responded. Now, many home sergers have this capability built right in, making it more accessible than ever before. Want to learn more about the basics of these incredible machines? Check out our comprehensive guide on what a serger is.
A coverstitch isn't just a different type of stitch; it’s a totally different way of thinking about how you construct a garment. It lets you build strength and elasticity right into your hems and seams, mimicking the quality you see in high-end activewear and ready-to-wear clothing.
Is a Coverstitch the Same as an Overlock?
This is probably one of the most common points of confusion for people new to serging. While both stitches can be made on the same machine, they do very different jobs.
A standard serger overlock stitch uses blades to trim the fabric edge as it sews, wrapping the raw edge in thread to prevent fraying. It's almost always used for finishing seam allowances inside a garment.
A coverstitch, on the other hand, is used for hemming and topstitching. It's typically done away from the fabric's edge, and most importantly, it does not use the blade.
The first combo overlock and coverstitch machines started showing up in the late 20th century. By 2020, an estimated 30% of home sergers sold in North America and Europe included this dual functionality. That shift alone shows just how valuable this feature has become for those of us sewing at home.
To make it even clearer, let's break down the key differences.
Coverstitch Vs. Serger Overlock: A Quick Comparison
This table highlights the primary differences and best uses for a coverstitch versus a standard serger overlock stitch, helping you choose the right finish for your project.
| Feature | Coverstitch | Serger Overlock Stitch |
|---|---|---|
| Primary Use | Hemming, topstitching, decorative finishes | Seam finishing, construction |
| Blade Usage | Blade is disengaged (no cutting) | Blade is engaged (trims fabric) |
| Stitch Location | Usually on the surface of the fabric, not on the edge | Along the raw edge of the fabric |
| Appearance | 2-3 parallel straight stitches on top, looper chain on back | Interlocking thread loops that wrap the fabric edge |
| Stretch | Excellent stretch and recovery | Good stretch, but primarily for seam integrity |
| Best For | Knit garments, activewear, stretch fabrics | Wovens and knits, finishing internal seams |
Ultimately, one stitch isn't "better" than the other; they're simply different tools for different tasks.
At bsewinn.com, we are committed to empowering crafters like you. Our custom sewing machine designs are backed by the support you need to succeed, including online classes, training, and extensive resources. We want to help you master techniques like the coverstitch, allowing you to replicate professional designs and create garments you’re truly proud of.
Setting Up Your Serger for Coverstitching
Switching your serger from its everyday overlocking job to the more specialized coverstitch mode can feel like a puzzle at first. But trust me, once you understand the basic changes, you'll be converting your machine back and forth like a pro. Think of it less like a total machine overhaul and more like shifting gears for a different kind of terrain.
The whole point is to change the machine's function from cutting and wrapping an edge to creating a flat, stretchy hem on top of the fabric. It’s a pretty fundamental shift, but it’s what unlocks a whole new level of professional-looking finishes for your knit garments.
This diagram lays it all out, showing the journey from a raw piece of fabric to a beautifully finished garment, all thanks to the coverstitch function.
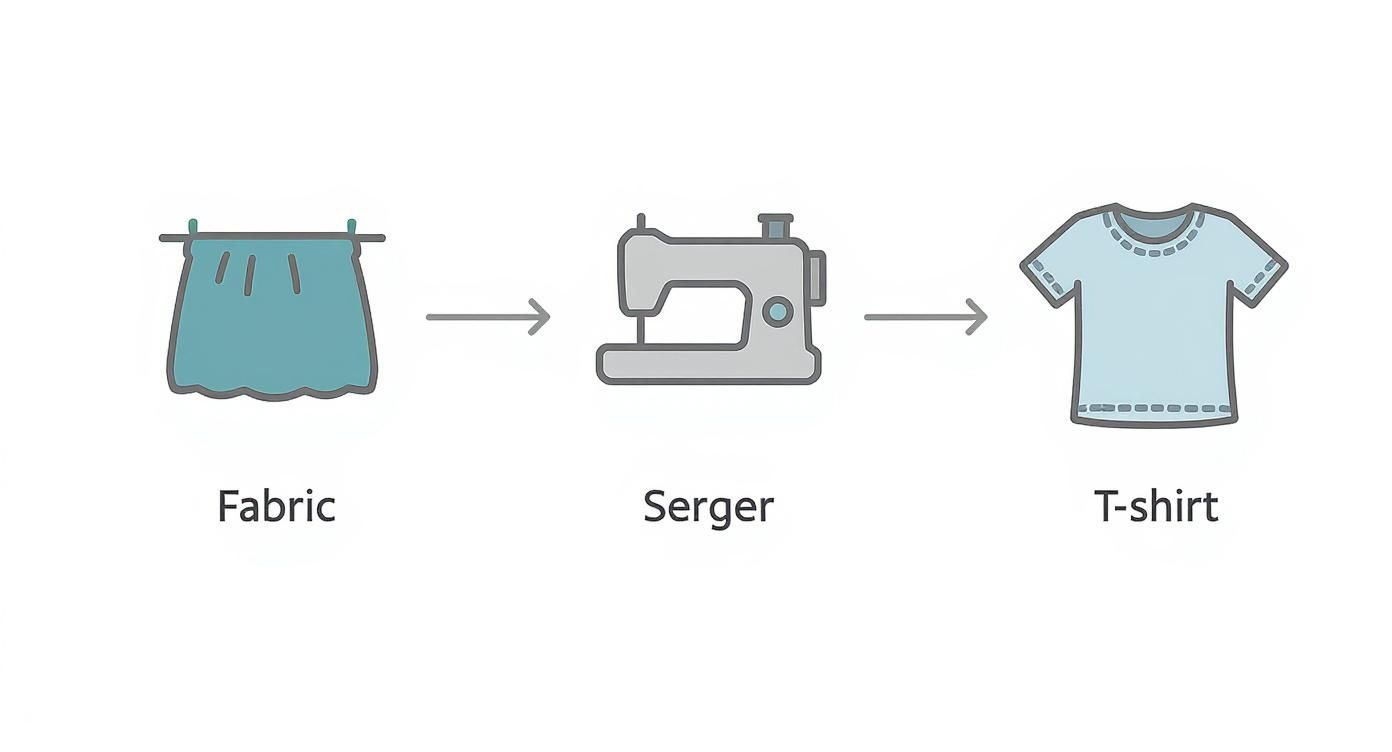
As you can see, a combination serger is the powerhouse that turns a simple cut of knit fabric into a store-quality tee. That coverstitched hem is the final, crucial touch that makes all the difference.
Disengage the Blade and Upper Looper
First things first—and this is non-negotiable—you have to get that cutting blade out of the way. A coverstitch sews on the surface; it doesn't trim the edge. On most sergers, this is as simple as flipping a lever or pushing a button to retract the upper knife. If you're not sure where it is, your machine's manual will point you right to it.
With the knife safely disengaged, your next step is to sideline the upper looper. This is the part responsible for creating the thread over the top edge of the fabric in an overlock stitch. Since a coverstitch doesn't wrap an edge, this looper has nothing to do. Again, this is usually a simple mechanical switch. Taking care of this is what really begins the conversion to a coverstitch on a serger.
Needle Selection and Placement
Now that the overlocking parts are out of the picture, it's time to focus on the needles. Getting this right is absolutely critical for avoiding those dreaded skipped stitches and getting a clean, even finish.
- Needle Type: A lot of combo sergers are picky and need a specific type of needle for coverstitching, like the ELx705 needles. They're designed with a special groove and a slightly rounded point that plays nicely with knit fabrics and the high speeds of a serger.
- Needle Placement: You won't be using the same needle slots as you do for overlocking. Your machine will have a dedicated set of positions for coverstitching, usually three slots. You can use two needles for a narrow or wide two-thread coverstitch, or go for all three to create that cool triple-stitch look.
I can't stress this enough: always check your manual for the right needle type and setup. Using the wrong needle is probably the #1 reason people get frustrated with their coverstitch results.
Threading the Chain Looper
Okay, deep breath. Threading can feel like the most intimidating part of this whole process, but it doesn't have to be. For coverstitching, there's one new player in the game: the chain looper. This is a totally separate looper that's only used for coverstitching and chainstitching. It’s the part that magically creates that signature lattice of thread on the underside of your hem.
The chain looper is the heart of the coverstitch. Honestly, once you get the hang of threading it, you're 90% of the way there. After a few tries, it’ll become muscle memory.
Your machine will have a completely different thread path just for this looper. Many newer machines have awesome features like air-threading or color-coded diagrams printed right on the machine to make your life easier. If threading in general still gives you pause, our guide on how to thread a serger is a great place to build up your confidence.
Once the chain looper is threaded, you just thread your chosen needles like you normally would.
Final Checks and Essential Accessories
Before you put your pedal to the metal, just take a second for a few final checks. Some sergers require you to install an accessory or two to get the coverstitch to form correctly.
You might need to pop on:
- A specialized presser foot made for coverstitching. These often have clearer markings that help you guide your fabric perfectly.
- A conversion plate or small table that covers up the stitch fingers that are used for overlocking.
Once those are in place, your machine is officially ready to go. By taking a few minutes to walk through these steps, you're setting your serger up for success, ensuring it can produce a strong, flexible, and beautifully professional coverstitch every single time.
Nailing Your Stitch and Tension Settings
Okay, you've got your serger converted and threaded for a coverstitch. Now for the fun part—the part where art meets mechanics. This is where you'll fine-tune the settings to match your specific fabric, turning a basic stitch into something that looks truly store-bought. Think of it as a little dance between you and your machine; learning its quirks with tension and feed adjustments is how you lead.
The whole point is to get a beautifully balanced stitch that lies perfectly flat. For a coverstitch on a serger, that perfect balance is a delicate negotiation between the needle threads on top and the single chain looper thread underneath.
Finding that Perfect Tension Balance
First rule: forget guesswork. The only way to really master tension is to read a test swatch. Seriously, always grab a scrap of your project fabric and test your settings before you go anywhere near your actual garment. Sew a few inches and then play detective.
- Are the needle threads too tight? You'll see "tunneling," which looks like a little ridge of fabric getting pulled up between the stitch lines. This is hands-down the most common headache.
- Is the chain looper thread too tight? The top might look fine, but the needle threads will be yanked to the underside, looking more like tiny dots than clean dashes.
- Is the looper thread too loose? You'll have floppy, loosey-goosey loops on the back that are just begging to get snagged on something.
Your machine's manual will give you a starting point, usually somewhere around a 4 for each tension dial. Start there, but be ready to experiment. To fix that annoying tunneling, try lowering the needle tension dials one click at a time (from 4 down to 3, for instance). More often than not, that's all it takes.
I like to think of tension as a conversation. Your fabric is telling you exactly what it needs. A sturdy, stable knit can handle higher tension, but a slinky, lightweight jersey will demand a much gentler touch to keep from getting stretched all out of whack.
Your Secret Weapons: Stitch Length and Differential Feed
Tension gets all the attention, but two other settings have a huge say in your final stitch: stitch length and differential feed. These are your go-to tools for taming your fabric and getting that perfect finish.
Stitch Length is just what it sounds like—the distance between each stitch. I've found that a slightly longer stitch length, usually between 3.0 and 4.0, gives hems a more professional, ready-to-wear vibe. It helps the seam stretch more easily and can even help reduce tunneling on certain fabrics.
Differential Feed is the magic bullet for stopping wavy, stretched-out hems on knits. This setting controls two sets of feed dogs that can move at different speeds.
- N or 1 means both sets of feed dogs are moving at the same pace.
- A setting greater than 1 eases the fabric in, gathering it just a tiny bit as it sews.
- A setting less than 1 does the opposite, stretching the fabric slightly.
For most knit hems, bumping the differential feed just a bit above 1 (say, to 1.2 or 1.5) works wonders. It counteracts the fabric's natural tendency to stretch under the presser foot and gives you a beautifully flat hem.
Real-World Fabric Scenarios
There's no such thing as one-size-fits-all settings. The right combo is all about your fabric's weight, stretch, and personality. Let's look at how you might approach two common knits.
| Fabric Type | Needle Tension | Looper Tension | Stitch Length | Differential Feed | Notes |
|---|---|---|---|---|---|
| Stable Cotton Jersey | 3 - 4 | 3 - 4 | 3.5 mm | 1.2 | This fabric is pretty forgiving, so it's less prone to stretching. You usually only need minor tweaks from the default. |
| Slippery Modal Knit | 2 - 3 | 3 - 4 | 4.0 mm | 1.5 | A drapey knit like this needs lower needle tension to prevent tunneling and a higher differential feed to keep it from getting wavy. |
See how the more delicate fabric needs a lighter touch across the board? Getting the right stitch also comes down to the right thread, so don't be afraid to experiment there, too. A great place to start is the Sergin General Thread collection, which has tons of options designed for sergers.
At bsewinn.com, we know that this kind of hands-on learning is what really builds sewing confidence. It's why our custom sewing machine designs are backed by a library of online classes and training resources. We want to help you master these techniques so you can tackle any material and get flawless results, every single time.
Putting Your Coverstitch Skills Into Practice
Okay, your serger is dialed in and you've run a few test swatches. Now for the fun part: moving on to actual projects. All the theory in the world doesn't compare to the satisfaction of making a beautiful garment that looks like it came right off the rack. This is where you bring it all together.
At bsewinn.com, we're huge believers in learning by doing. Our custom sewing machine designs are backed up by a whole library of online classes and resources—all created to build your confidence through hands-on practice. Let’s walk through a few projects that will make you a pro with that coverstitch function on your serger.
Hemming the Classic Knit T-Shirt
This is the bread-and-butter task for a coverstitch, and getting it right is so rewarding. A clean, stretchy hem is what separates a homemade-looking t-shirt from a professional one.
First things first, prep your hem. Fold it up to the depth you want—for most t-shirts, somewhere between 3/4 inch and 1 1/4 inches is perfect—and give it a good press with your iron. I always use a seam gauge here to make sure my hem is perfectly even all the way around. It's a small step that makes a huge difference.
Now, head over to your serger. Place your t-shirt under the presser foot with the right side facing up. You're aiming to stitch perfectly parallel to that folded edge, with your needles hitting about 1/8 inch from the raw edge on the inside of the garment. This simple placement trick is what wraps the raw edge neatly in the looper threads, stopping it from curling or fraying later. Just guide the fabric gently and sew at a steady pace, letting the machine do the work.
Leveling Up Your Activewear
Activewear is a whole different ballgame. It needs serious stretch and durability, which is exactly where a coverstitch shines. Think about attaching elastic to waistbands or leg openings on a pair of leggings.
To get that professional finish on a legging waistband, start by serging the short ends of your elastic together to make a circle. Next, divide both the elastic loop and the legging's waist opening into four equal sections. Mark them with pins or clips.
This little trick of aligning the quarter marks is the secret to getting evenly distributed elastic. It prevents any awkward bunching or tight spots and gives you a comfortable, secure fit that actually moves with you.
With the elastic pinned to the wrong side of the fabric along the waistline, you'll use your coverstitch to lock it in place. You'll be sewing from the right side, stitching through both the legging fabric and the elastic underneath. This creates a strong, flat seam that won’t pop when stretched—a must-have for any workout gear. If you're new to these kinds of fabrics, our guide on how to sew stretch fabrics has even more great tips.
Using Coverstitch as a Decorative Topstitch
Don't box your coverstitch into just being functional! It can be a stunning design element, too. A triple coverstitch, in particular, adds that authentic, ready-to-wear look to necklines, shoulder seams, or even as a cool detail on panels.
Imagine adding a triple coverstitch to the shoulder seams of a sweatshirt. Once you've constructed the seam with your standard overlock stitch, press the seam allowance toward the back. Then, flip it over to the right side and topstitch right over that seam line with your coverstitch. It not only makes the seam stronger and helps it lie flat, but it also adds a sporty, professional touch.
You can really have fun with this by using a contrasting thread color in your needles. This turns the stitching into a standout feature and is a fantastic way to elevate a basic pattern into something truly unique. When you start exploring both the utility and the decorative side of your serger's coverstitch, you open up a whole new world of creative finishing.
Troubleshooting Common Coverstitch Problems
Even the most seasoned sewist runs into a stubborn stitch now and then. It’s just part of the process! When you’re working with a coverstitch on a serger, a few common hiccups can appear, but the great news is they are almost always a simple fix. Think of this as your go-to guide for figuring out those frustrations so you can get back to what you love—sewing.
We'll tackle everything from those maddening skipped stitches to the dreaded fabric "tunneling," making sure your projects always look polished and professional.
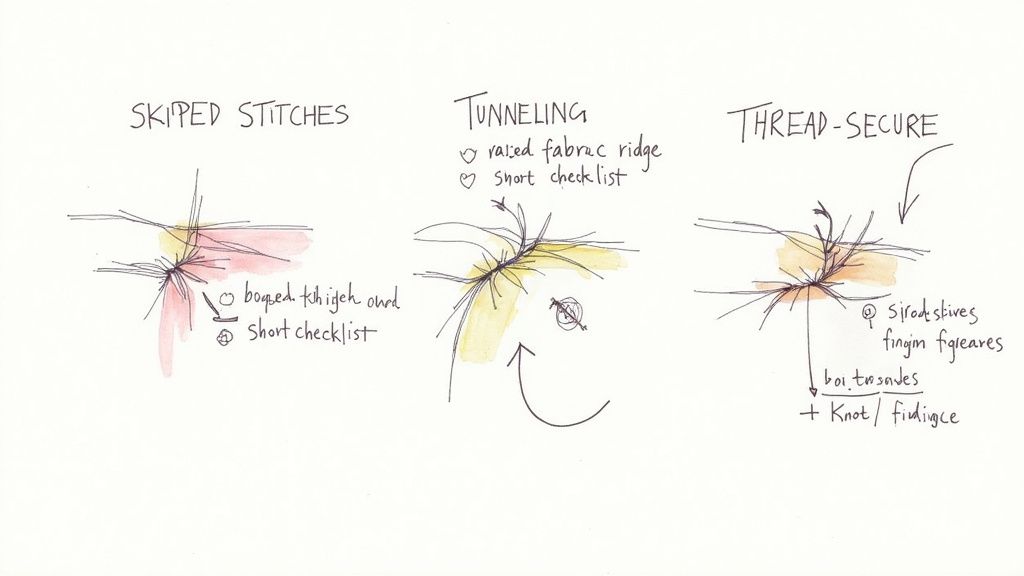
Conquering Skipped Stitches
Skipped stitches are, without a doubt, the number one complaint I hear about coverstitching. One minute your seam is perfect, and the next, you've got annoying gaps in your stitch line. Nine times out of ten, this comes down to a needle issue.
Before you even think about touching those tension dials, run through this quick mental checklist:
- Is the needle fresh? Seriously, a dull or slightly bent needle is the biggest culprit. Needles are cheap; don't be afraid to change them often, especially before starting a new project.
- Is it the right type? Many combo sergers are picky and need specific needles, like the ELx705, for coverstitching. These are designed to handle the machine's high speed and unique stitch formation.
- Is it inserted correctly? Double-check that your needles are pushed all the way up into the clamp and facing the right direction. A needle that’s even a millimeter too low just won’t form a proper stitch.
I’d bet that 90% of skipped stitch problems are solved by addressing one of these three things. Making it a habit to start every coverstitch project with fresh, correct needles is the best preventative medicine you can have.
Flattening Out Fabric Tunneling
You know that annoying little ridge of fabric that gets pulled up between the rows of stitching? That's tunneling. It loves to show up on lightweight and stretchy knits. This happens when your needle threads are too tight and are literally yanking the fabric upwards.
Tunneling is your fabric’s way of saying, "Loosen up!" It’s a direct signal that the tension balance is off. The fix is usually a simple adjustment that restores harmony between the threads.
To get rid of that pesky tunnel, try these solutions in order:
- Lower the Needle Tension: This is your first and most effective fix. Start reducing the tension on your needle threads, one dial at a time, until you see the fabric lie flat.
- Adjust the Differential Feed: Sometimes, gently stretching the fabric as it feeds through the machine can help. Try a differential feed setting just a hair below 1.0.
- Widen the Stitch: If your machine has the option, using a wider two-needle coverstitch (with the two outermost needles) can spread the tension over a larger area, reducing that pull.
- Use a Stabilizer: For really fine or slippery fabrics, a strip of wash-away or iron-away stabilizer under your hem gives the stitch a solid foundation to form on, preventing tunneling altogether.
Securing Your Seams for Good
One of the quirks of a coverstitch is that it can unravel if you just stitch right off the end of the fabric. You need a reliable way to lock those threads in place so your beautiful work doesn’t come undone in the laundry.
The most foolproof method is to sew right over your starting point. When you’ve stitched all the way around your hem and are about one inch away from where you began, stop with the needles in the down position. Lift your presser foot, tug the fabric and threads gently toward you to create a little slack, then slide the start of your hem under the presser foot.
Lower the foot and stitch directly over your first few stitches for about an inch. That overlap locks everything securely. To finish, raise the needles to their highest point, lift the presser foot, and use a pointed tool (like a seam ripper or stiletto) to sweep the needle threads forward under the foot. Pull your project to the back, and the threads will release, leaving a neat chain for you to snip.
At bsewinn.com, our commitment is to empower you through every step of your creative journey. Our custom sewing machine designs are supported by extensive online classes and training resources, helping you master techniques and troubleshoot with confidence.
Your Top Questions About Serger Coverstitching
Diving into the world of combo sergers can feel like learning a new language. But as you get the hang of it, you'll see just how incredible having a coverstitch on a serger really is. Let's walk through some of the questions I hear all the time from people just starting out.
Can Every Serger Do a Coverstitch?
This is the big one, and it's a super important distinction: no, not all sergers can perform a coverstitch. That beautiful, professional-looking hem is a special feature found only on "combo" or "combination" serger machines. These are specifically built to switch between overlocking and coverstitching.
Your standard 3 or 4-thread serger is a specialist—its job is to trim and wrap the edge of a seam, and it does it beautifully. A combo machine, on the other hand, comes equipped with an extra looper (the chain looper) and different needle setups just for creating that coverstitch. When you're machine shopping, a key tell is the thread count; models advertised as 5-thread or 8-thread are strong indicators that they have this powerful dual functionality.
Combo Machine vs. a Dedicated Coverstitch Machine
So, should you get a combo machine or a dedicated coverstitch? A combo machine is a brilliant space-saver and definitely easier on the wallet since you're getting two functions in one machine. The trade-off is the conversion process. You’ll need to re-thread and tweak the settings every time you switch from finishing a seam to hemming a t-shirt.
A dedicated coverstitch machine is always threaded and ready to go for hemming and topstitching. If you find yourself constantly switching between those two tasks, a dedicated machine will make your workflow much smoother and faster.
A lot of sewers I know, myself included, find that dedicated machines often have more "harp space"—that's the open area to the right of the needles. That extra room makes a huge difference when you're trying to maneuver a whole garment, especially when topstitching something in the round like a neckline. Ultimately, the best choice boils down to your personal workflow, budget, and how much space you have in your sewing room.
Why Are My Stitches Tunneling?
Ah, tunneling. It's probably the most common headache when you're learning to coverstitch. You know that little ridge of fabric that pops up between your needle threads? That’s tunneling, and it’s almost always caused by the needle threads being too tight.
Your first line of defense is simple: lower the tension on both of your needle threads. Just dial them down a bit and see what happens. If the tunneling improves but doesn't disappear, try nudging the looper thread tension up just a hair to help pull the stitches flat from underneath.
Another trick I lean on heavily is the differential feed. Sometimes, stretching the fabric just a tiny bit as it feeds through the machine (by setting the differential feed just below 1.0) can encourage those stitches to lay perfectly flat. And for really tricky fabrics like slinky knits, a strip of water-soluble or iron-away stabilizer under the hem can be a lifesaver. It gives the fabric the support it needs to prevent tunneling from ever starting.
Getting a feel for these settings is a huge part of the journey. At bsewinn.com, we want to help you get there. Our goal is to arm you with not just the right machines, but the know-how to use them like a pro. Check out our online classes and training resources designed to help you nail any technique and get those beautiful results you're after.
At B-Sew Inn, we’re passionate about supporting every part of your sewing journey. From an incredible selection of sewing machines and accessories to education that builds real confidence, we have everything you need to bring your creative vision to life.

