

Before you even think about threading a needle, let's talk about tools. Honestly, getting your kit together is the most important first step. If you dive in without the right gear, you're setting yourself up for a frustrating time. But with a few key items on hand, your journey into learning basic hand sewing stitches will be so much smoother and way more fun. This is the foundation you'll build all your future projects on, whether you're working by hand or on one of B-Sew Inn's custom sewing machines.
Building Your Essential Hand Sewing Toolkit
Every craft I've ever tried starts with good prep, and sewing is absolutely no different. Using the right tools doesn't just make the process easier; it genuinely makes your work look better. Think about it: you wouldn't try to cut delicate silk with a pair of clunky kitchen scissors, right? They'd snag the fabric and ruin it in a second. That same idea applies to every single thing in your sewing kit.
Here at bsewinn.com, we are committed to empowering crafters through our custom sewing machine designs. Our extensive resources, online classes, and training are here to guide you, and that support begins with helping you assemble a reliable set of tools right at your fingertips.
What You Really Need in Your Hand Sewing Kit
You can go wild and buy every gadget out there, but you really only need a few workhorses to get started. These are the non-negotiables you'll reach for again and again.
- Sharp Fabric Shears: This is a big one. Invest in a good pair of scissors and only use them for fabric. Seriously. This keeps them sharp for clean, precise cuts that won't fray your material.
- A Variety of Needles: Different fabrics and threads need different needles. You don't need a million of them, but a good starter pack with various sizes will cover you for everything from light chiffon to tough denim.
- Quality Thread: To start, just grab some black, white, and grey thread in both cotton and polyester. Cotton is lovely for natural fabrics, while polyester gives you extra strength and a bit of stretch.
- A Protective Thimble: Pushing a needle through thick fabric can really do a number on your fingers. A thimble might seem old-fashioned, but it's a simple little tool that saves you from sore, poked fingertips.
It's pretty amazing how popular hand sewing remains. The global market for these supplies was valued at over $1.2 billion in 2023, with millions of hobbyists and pros keeping the craft alive. A huge part of that is people just like you, learning these foundational skills.
To make things even easier, we've put together a list of our absolute favorite items. For a complete rundown, check out our guide on the top sewing tools for beginners. It's got everything you need to feel ready to tackle any project that comes your way.
Mastering Foundational Sewing Stitches
Alright, you've got your toolkit sorted. Now for the fun part—actually putting needle to thread. This is where you start building real skills, getting hands-on with the foundational stitches that are the backbone of all sewing. Think of these as the primary colors on your sewing palette; once you've got them down, you can mix and match to create anything you can imagine, from hand-finished details to entire projects built with your custom sewing machine.
This isn't just about making loops with thread; it's about connecting with a timeless craft. Hand sewing has been a core part of human life for at least 20,000 years, when our ancestors first used bone needles to stitch animal hides together. It's wild to think that the most common stitches we use today have barely changed over millennia—a true testament to how effective they are. If you're a history nerd like me, you can read more about the fascinating history of sewing stitches and their role across different cultures.
For now, we're going to focus on the big three: the Running Stitch, the Backstitch, and the Slip Stitch. I'm a firm believer that knowing why you're doing something is just as important as knowing how. That's the philosophy we build our resources and online classes on here at bsewinn.com—giving you the deeper knowledge to tackle any project with confidence.
But before we dive in, let's just appreciate the elegant simplicity of our tools.
It really comes down to these three things: sharp scissors for clean cuts, quality thread for strength, and the right needle for your fabric. That’s it.
For a quick overview of the stitches we're about to cover, I've put together a handy little table. It's a great cheat sheet to keep nearby as you're starting out.
Quick Guide to Foundational Hand Stitches
| Stitch Name | Primary Use | Appearance | Strength |
|---|---|---|---|
| Running Stitch | Basting, gathering, temporary seams | Dashed line: - - - - | Low |
| Backstitch | Strong, permanent seams | Solid, continuous line | High |
| Slip Stitch | Invisible hemming, closing openings | Nearly invisible dots | Medium |
This table gives you a bird's-eye view, but now let's get into the nitty-gritty of how and when to use each one.
The Simple and Speedy Running Stitch
If you've ever sewn anything by hand, you've probably done a running stitch. It's the first one most people learn, and for good reason—it’s the fastest and easiest of all the basic hand sewing stitches. It looks like a simple dashed line, created by weaving your needle in and out of the fabric.
Its main advantage is speed, not strength. This is your go-to for things that don't need to be super secure. Think basting two pieces of fabric together before taking them to the machine, or creating the loose stitches you'll pull to gather fabric for ruffles or a skirt waistband.
To do it, just push your needle down through the fabric, then bring it back up a short distance away. Pro tip: you can "load" several stitches onto your needle at once before pulling the thread all the way through. It makes the process even faster.
The Strong and Reliable Backstitch
When you need a seam that’s not going anywhere, the backstitch is your best friend. This is hands-down one of the strongest hand stitches you can make, and it looks a lot like a line of machine sewing from the right side. That sturdiness comes from the way each stitch slightly overlaps the one before it, locking the thread in place.
This is the stitch for structural work. I use it for repairing a ripped seam on a pair of jeans, sewing a button on a coat that takes a lot of stress, or reattaching a strap on a well-loved tote bag. If you're constructing an entire garment by hand, this will be your workhorse for the main seams.
To make a backstitch, you bring the needle up through the fabric, take a small stitch backward from where you came up, and then push the needle forward underground, bringing it up a full stitch length ahead. It's a "one step back, two steps forward" kind of motion that creates that incredibly strong, continuous line.
The Invisible and Polished Slip Stitch
For a finish that looks truly professional, you need to master the slip stitch. Sometimes called a ladder stitch, it's designed to be almost completely invisible from the outside of your project. This makes it perfect for hemming and closing up linings without any obvious stitches showing.
Reach for the slip stitch whenever you want your handiwork to look clean and seamless. It's my go-to for hemming trousers, skirts, and dress sleeves. It’s also brilliant for closing the final opening on a stuffed pillow or a soft toy, where it creates a seam that just disappears right into the fabric.
The trick to a good slip stitch is picking up just one or two threads from the main garment fabric with your needle, then sliding the needle through the folded edge of the hem. Keeping your stitches small and consistent is key to making them vanish. This bit of extra care is what elevates your project from looking "homemade" to beautifully "handmade."
Once you've gotten the hang of the basic, foundational stitches, you can really start having some fun. This is where you move beyond just mending and hemming and start adding stitches that are both strong and pretty. Learning just a few more opens up a whole new world of projects, from finishing edges with a beautiful, handcrafted look to adding personalized embroidery.
At bsewinn.com, we're all about giving you a full toolbox of skills. Our online resources and classes are here to guide you as you add techniques, just like these, to your sewing arsenal.
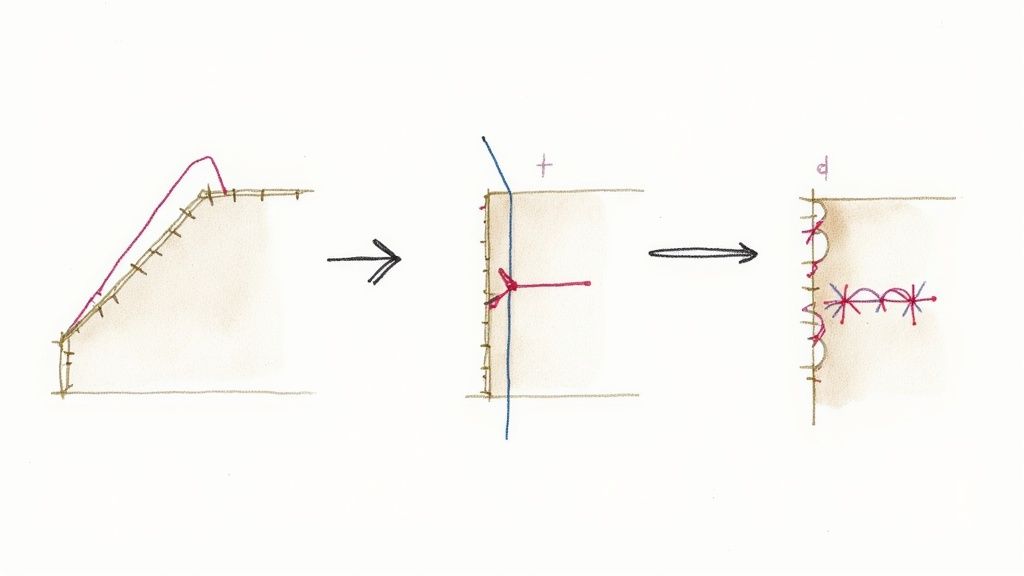
The Blanket Stitch: Functional and Decorative
The Blanket Stitch is one of those fantastic, multi-purpose stitches that creates a clean, looped finish right along the border of your fabric. It's an absolute lifesaver for preventing fraying on materials like felt or fleece and adds such a charming, handmade touch.
Honestly, you'll find yourself reaching for this stitch all the time. It’s perfect for the edges of a cozy fleece blanket, stitching together felt ornaments for the holidays, or creating appliqué where you want the edges to really pop. You can even play with the spacing to create different looks, making it incredibly versatile.
So how do you do it? You'll bring your needle up from the back, just inside the fabric's edge. Push the needle through from front to back a short distance away, but—and here's the trick—before pulling the thread tight, loop it under the point of your needle. That simple move creates the classic "L" shape that makes this stitch so recognizable.
The Whipstitch: Sturdy and Practical
When you need to join two finished edges together and you need that join to be secure, the Whipstitch is your best friend. It’s a simple, strong stitch where you pass the needle over the seam from one side to the other. This creates a series of small, diagonal stitches that "whip" around the fabric's edge.
Its main job is closing seams that need to be durable and tight. Think about that final seam on a stuffed animal or a throw pillow—the whipstitch holds it all together neatly and can stand up to a lot of handling. It’s also my go-to for joining pieces in hand-pieced quilts or even some leatherwork where the seam itself is part of the structure.
The real key to a great-looking whipstitch is consistency. If you keep your stitches evenly spaced and at the same angle, you'll get a seam that's not only strong but also looks tidy and professional. For a nearly invisible finish, use a thread that's a perfect match for your fabric.
The Chain Stitch: Beautiful and Expressive
Now we're moving into more decorative territory. The Chain Stitch creates a gorgeous, textured line that looks just like a series of tiny interconnected loops—a literal chain. It’s one of the most fundamental embroidery stitches and a much bolder alternative to a simple backstitch for outlines or lettering. It also has a rich history, connecting us modern makers to centuries of needlework tradition.
You can see just how important these stitches were by looking at historical examples. For instance, the Victoria and Albert Museum in London has a collection of over 700 needlework samplers, with some dating all the way back to the 1400s! These were literally used to teach essential techniques to young girls.
The Chain Stitch is perfect for adding a personal touch to almost anything. You could embroider a monogram on a tea towel, create decorative borders on a tote bag, or fill in small shapes with a pop of color and texture. Because it creates a much thicker line than other stitches, it really stands out. If you're looking for more ideas, check out our guide on top tips for beautiful decorative stitches.
To form the stitch, you make a small loop with your thread on the fabric's surface. Then, bring your needle up through the center of that loop to anchor it, which immediately starts the next loop in your chain. It’s a rhythmic, really satisfying motion once you find your groove.
How to Fix Common Hand Sewing Problems
https://www.youtube.com/embed/3CMp1GK9zdA
Even after years of sewing, I still run into frustrating little problems. It just happens. But learning how to troubleshoot the common hiccups with basic hand sewing stitches is a skill that saves so much time and frustration, turning what feels like a disaster into a minor speedbump.
Instead of getting discouraged, I've learned to see these moments as chances to really dial in my technique. Let's walk through some of the biggest culprits.
One of the biggest headaches, especially when you're in the zone with a beautiful seam, is tangled thread. Ugh. This almost always happens for one of two reasons: the thread is just too long, or it has a natural twist that’s fighting you.
There's a simple, old-school trick for this: run your thread through a little cake of beeswax before you start. It coats the fibers just enough to make them glide smoothly instead of grabbing onto each other. It’s a game-changer.
Another classic issue is puckered fabric. You know the look—your seam is all gathered and bumpy instead of lying perfectly flat. That's usually a dead giveaway that your stitch tension is way too tight.
Solving Puckers and Uneven Stitches
Puckering pulls the whole fabric out of shape and can completely ruin the drape of a garment you've worked so hard on. The fix is usually simpler than you’d think and is all about adjusting your technique, not ripping out the whole seam.
- Ease up on your tension. I mean this literally. Consciously relax your grip on the needle and thread. Your stitches need to be snug enough to hold the fabric securely, but not so tight that they cause that dreaded bunching.
- Keep your fabric under control. Use your non-dominant hand to gently hold the fabric taut as you sew. This stops it from shifting around and helps you create much more consistent, evenly spaced stitches. Just keep it flat—don’t stretch it.
- Check your stitch length. Stitches that are too small for your fabric, especially on lightweight materials like silk or voile, can also cause puckering. Try making your stitches just a little bit longer and see if that helps the seam lay flat.
Your goal is to let the thread sit comfortably within the fabric, not to strangle it. Finding that sweet spot with tension is all about practice and feel. It’s one of those key skills that elevates your handiwork from just functional to truly beautiful.
Correcting Mistakes Without Starting Over
So what happens when you make a mistake? A crooked stitch, a wrong turn in your seam line—we've all been there. Your first instinct might be to grab the seam ripper and undo everything, but that's not always necessary. For just one misplaced stitch, you can often fix it with a little finesse.
Just use the very tip of your needle to carefully pick out that single errant stitch. If you catch it right away, you can usually lift the thread right out without leaving a noticeable hole.
Then, you just make the correct stitch in its place and carry on. This tiny correction saves you the whole hassle of re-threading your needle and starting the seam all over again. Once you get the hang of these simple fixes, you'll find your hand sewing sessions become so much more enjoyable and productive.
Simple Projects to Practice Your Stitches
The fastest way to get comfortable with these basic hand sewing stitches is to actually make something. I can't stress this enough. While stitching on scrap fabric is okay for a bit, you build real muscle memory when you have a tangible goal. A rewarding, low-pressure project is so much more effective for learning. These projects serve as tangible examples that you can replicate, building skills that translate perfectly to more complex machine sewing designs.
Here are a few simple ideas I love that are designed to help you master specific stitches in a fun, practical way.
From Stitches to Finished Pieces
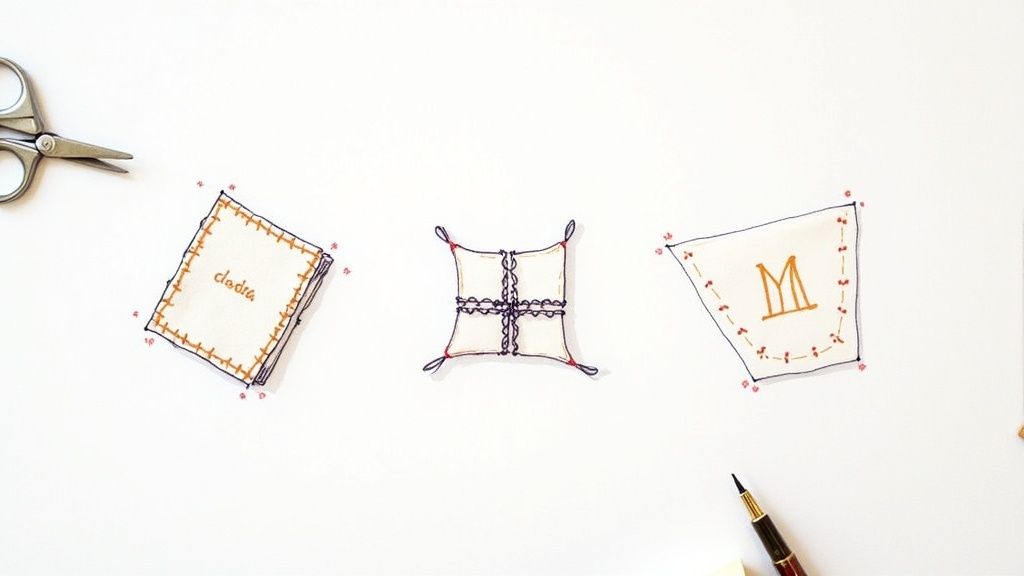
Making the jump from a practice swatch to a finished piece is where the magic happens. It solidifies your skills and gives you a huge confidence boost. Each of these little projects focuses on a different stitch, giving you a clear goal and something beautiful to show for it at the end.
- Felt Needle Book: Grab two small pieces of felt and use the blanket stitch to create a clean, decorative edge all the way around. It's the perfect way to practice keeping your stitch spacing consistent while making a tool you’ll actually use for years.
- Lavender Sachet: For this one, you’ll sew a small pouch using the incredibly strong backstitch for the main seams. This is a great test of its durability—you need to make sure those tiny lavender buds stay securely inside! You'll quickly see why it's a go-to for strong seams.
- Embroidered Napkin: Personalize a plain cloth napkin with the chain stitch. This stitch is fantastic for adding monograms or simple line art. It’s a wonderful way to see how a decorative stitch can completely transform an everyday item.
Scoring these small wins is what builds the confidence you need for bigger things, like learning how to hem pants with a nearly invisible slip stitch.
Here at bsewinn.com, we believe that the best way to learn is by doing. Our online classes and resources are all designed to guide you through these kinds of projects, helping you turn that foundational knowledge into beautiful, finished pieces you'll be proud of.
Common Questions About Hand Sewing
As you start your journey into hand sewing, you're bound to have questions pop up. It's totally normal! Think of this as a quick chat with an experienced sewing friend, here to clear up those little things so you can stitch with more confidence. Let's dig into some of the most common questions I hear from new crafters.
One of the first puzzles is always, "How long should my thread be?" A great rule of thumb is to measure a piece from your fingertips to your elbow. This usually lands somewhere between 18 and 24 inches. It's the sweet spot—long enough to get a good bit of sewing done, but short enough that you won't be fighting a tangled mess every few stitches.
Another big one is how to tie a knot that actually stays put and doesn't just pull right through the fabric. For this, the quilter's knot is a game-changer. Just lay the thread's tail across your index finger, place the needle on top of it, and wrap the thread around the needle three times. Then, pinch those wraps with your thumb and forefinger and pull the needle all the way through. You'll get a perfect little knot at the end.
Getting Your Stitches Just Right
We all dream of those perfect, evenly spaced stitches you see in magazines. If yours are looking a little... creative, don't worry. It really just comes down to practice and getting a feel for your fabric tension.
- Practice with a Guide: Grab a scrap of fabric and use a disappearing ink pen or chalk to draw a perfectly straight line. Your only job is to practice stitching right on top of that line. It’s amazing how quickly this trains your hand-eye coordination.
- Keep a Gentle Tension: Use your non-dominant hand (the one not holding the needle) to keep the fabric smooth and taut, but not stretched out of shape. This creates a stable surface that makes it so much easier to guide your needle and control the stitch length.
Look, every single stitch you make is progress. The goal isn't perfection on day one; it's about building that muscle memory. Before you know it, making those lovely, even stitches will feel completely natural.
Nailing these little details is what really takes your sewing from "homemade" to "handmade." When you build a solid foundation of skills, you're setting yourself up to create beautiful things that will last for years to come.
At B-Sew Inn, we're here to cheer you on at every step. From custom sewing machine designs to a huge library of resources and online classes, we've got what you need to grow your skills. Discover how B-Sew Inn can empower your crafting today.

