

Welcome to the world of sewing machine feet! If you've ever felt like you're fighting with your fabric or just not getting that crisp, professional finish, these little attachments are about to become your best friends. Think of them like a chef's knife set; you wouldn't use a cleaver for delicate paring, and the same idea applies here. This sewing machine feet guide is your map to navigating all these amazing tools and creating beautiful projects.
Your Guide to Sewing Machine Feet
At their core, sewing machine feet are the small, interchangeable parts that clip onto the presser bar of your machine. Their most basic job is to hold your fabric down and guide it smoothly under the needle. But that's just the beginning. The real magic is in their specialized designs—each one is engineered to make a specific, often tricky, task feel almost effortless.
Here at bsewinn.com, we are committed to empowering crafters just like you. We know that mastering your craft comes from understanding your tools, and getting comfortable with the right presser foot is a game-changer. It’s what turns a project from looking "homemade" to beautifully "handmade." This guide is designed to build your skills and confidence, showing you how to create stunning designs with the support of our custom patterns, bsewinn.com online classes, and extensive resources.
From Basic Tools to a Crafter's Arsenal
It’s incredible to see how many different presser feet are out there today. Their story really mirrors the evolution of the sewing machine itself. Back in the 1930s, Singer offered around 20 different feet, which was a big deal then. Fast forward to now, and there are over 150 distinct types available! It's a massive market, valued at over $1.2 billion in 2022, which just goes to show how essential these accessories are for modern sewers.
What You Will Learn in This Guide
I've structured this guide to feel like one of our bsewinn.com online classes—we'll start with the basics and work our way up to more advanced techniques. Here’s a quick look at what we'll cover:
- Meet the Essentials: We’ll get to know the workhorse feet that probably came with your machine.
- Expand Your Skills: Discover specialty feet that unlock creative possibilities, from perfect zippers to delicate rolled hems.
- Practical How-Tos: Learn how to identify, choose, and snap on the right foot for any project you can dream up.
- Care and Troubleshooting: A little maintenance goes a long way. I'll share simple tips to keep your feet in top shape.
By the time you finish this guide, you won't just see a jumble of metal parts. You'll see a toolkit brimming with potential, where every single foot is a new skill waiting to be learned.
Before we jump in, it helps to be comfortable with the basic functions of your machine. If you need a quick refresher, our guide on sewing machine basics for beginners is a great place to start. A solid foundation makes it so much easier to see how these feet work with your machine to create those amazing results.
Meet Your Machine's Most Essential Feet
When you unbox a new sewing machine, the handful of presser feet that come with it are your starting lineup. Think of them like a chef's core set of knives—each one is a workhorse you'll reach for again and again. Getting comfortable with these essentials is a huge part of the creative process, and it's something we really focus on in our bsewinn.com online classes. Why? Because they build a rock-solid foundation for every single project you'll ever tackle.
So, let's get you properly introduced to these must-have feet. We'll walk through what they look like, what they're called, and what they do best, so you can grab the right tool for the job with total confidence.
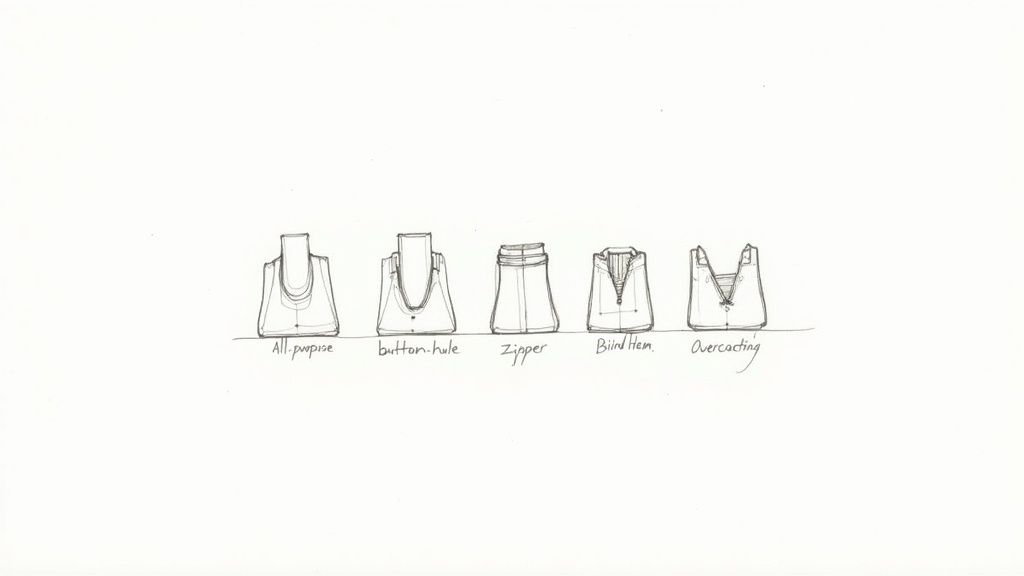
Before we dive deep, here's a quick cheat sheet for the feet we're about to cover. Think of it as your at-a-glance guide for common sewing tasks.
Essential Presser Feet and Their Primary Uses
| Presser Foot Name | Primary Function | Best For Projects Like... |
|---|---|---|
| All-Purpose Foot | General sewing with straight and zigzag stitches. | Seams on cotton dresses, piecing quilt blocks, simple mending. |
| Zipper Foot | Stitching very close to a raised edge. | Installing zippers in skirts, pillows, and bags. |
| Buttonhole Foot | Creating perfectly sized, consistent buttonholes automatically. | Shirts, blouses, dresses, and jacket closures. |
| Blind Hem Foot | Creating an invisible hem from the right side of the fabric. | Finishing the hems on trousers, skirts, and curtains. |
| Overcasting Foot | Finishing raw fabric edges to prevent fraying. | Seam finishes on woven fabrics like linen, tweed, or denim. |
This table is a great starting point, but let's get into the nitty-gritty of what makes each foot so special.
The All-Purpose Foot (or Zigzag Foot)
This is the MVP of your collection. The All-Purpose Foot, which you'll also hear called the Zigzag Foot, is the one that probably lives on your machine right now. Its design is brilliant in its simplicity: a wide, flat sole with a broad slot for the needle gives it the versatility to handle both straight stitches and wide zigzag stitches.
It's your jack-of-all-trades, perfect for straightforward seams, basic mending, and simple topstitching. When you're making something like a classic cotton tote bag, this is the foot you’ll likely use for 90% of the construction.
The Zipper Foot
Putting in a zipper can feel like a major hurdle for new sewists, but the Zipper Foot turns it into a totally manageable task. The secret is its super-narrow design. It acts like a precision guide, letting you stitch right up against the raised "cliff" of the zipper teeth without ever accidentally sewing over them.
Most zipper feet can be snapped onto either the left or the right side of the needle. That flexibility is key, because it lets you get incredibly close to both sides of the zipper coil, giving you a clean, professional finish every time. On a project like a custom throw pillow cover from a bsewinn.com design, this foot makes sure your zipper is perfectly hidden and works smoothly.
The Zipper Foot is a perfect example of a specialized tool transforming a challenging task into a manageable one. It's all about having the right tool to guide your needle exactly where it needs to go.
The Buttonhole Foot
Trying to create perfectly matched buttonholes by hand is a true test of patience. The Buttonhole Foot, thankfully, is here to save the day by automating the whole process. Most modern versions are long, rectangular feet with a little sliding compartment where you pop in your button. The foot uses the button itself to measure the exact size needed.
Once it's clipped onto your machine, you just press the pedal and let it do its thing. The machine stitches all four sides of the buttonhole with total precision. It's an absolute game-changer for making clothes, like when you're adding the finishing touches to a crisp linen shirt from one of our tutorials. This foot guarantees every single buttonhole will be identical. No guesswork needed.
The Blind Hem Foot
That invisible hem you see on high-quality trousers and skirts? That's the work of a Blind Hem Foot. This clever foot is engineered with a central guide or blade that runs right along the folded edge of your fabric. As you sew, the guide ensures your stitches catch just a tiny, almost invisible thread of the fabric on the front side.
It's the secret weapon for creating professional-looking hems without any visible stitching from the outside. It takes a little practice to get the hang of it, but mastering this foot with a bit of help from our bsewinn.com training resources will seriously elevate the finish of your garments. A lot of sewists also love this foot for perfect edge stitching!
The Overcasting Foot
Nothing says "homemade" faster than fraying seams on the inside of a garment. The Overcasting Foot (sometimes called an Overedge Foot) is designed to give your raw fabric edges a clean, tidy finish that stops them from unraveling. It works by mimicking the stitch of a serger, wrapping thread around the edge of the fabric.
This foot is a lifesaver when you're working with fabrics that love to fray, like linen, tweed, or some rayons. For instance, when you're sewing an unlined jacket from a bsewinn.com pattern, using the Overcasting Foot on all the internal seams ensures the garment will last for years and look just as good on the inside as it does on the outside. It’s all about creating a durable, professional finish.
Expand Your Skills with Specialty Presser Feet
Once you've got the hang of the basic presser feet, a whole new world of sewing opens up. This is where the fun really begins with specialty feet. Think of them as upgrading your toolkit from a simple set of screwdrivers to specialized power tools—each designed to do one specific job, and do it perfectly.
At bsewinn.com, we see these feet as your ticket to bigger and better projects. They give you the confidence to tackle techniques you might have thought were way out of your league. Our custom designs and online classes are all about empowering you, showing not just what these feet do, but how to use them to bring your most creative ideas to life.
Let's dive into a few of these game-changing accessories.
The Walking Foot for Quilting and Bulky Fabrics
The Walking Foot is, without a doubt, one of the most incredible specialty feet you can own, especially if you're a quilter. I’ll admit, it looks a bit like a clunky, mechanical bug, but its design is pure genius. A standard foot just glides (or sometimes drags) over the fabric, but a walking foot has its own set of feed dogs on top.
This means it actively grabs and pulls the top layer of fabric forward, perfectly in sync with your machine’s own feed dogs pulling from the bottom. The result? Your quilt sandwich—the top, batting, and backing—moves together as a single, unified piece. It’s the ultimate solution for preventing that dreaded shifting, puckering, and fabric "creep" that can turn a beautiful quilt top into a frustrating mess.
- How It Works: By feeding the top and bottom layers at the same time, it guarantees even stitches across thick or slippery materials.
- Best For: Machine quilting, matching plaids or stripes, and sewing tricky fabrics like velvet, vinyl, or knits.
- Tangible Example: Imagine finishing a beautiful patchwork quilt from one of our bsewinn.com custom designs. The Walking Foot is what ensures all your points meet perfectly and your quilt lies beautifully flat. For a deep dive into this amazing tool, check out our guide on how to use a walking foot.
The Darning Foot for Free-Motion Creativity
Have you ever wanted to "draw" with your sewing machine? If so, you need a Darning Foot, which you'll also hear called a Free-Motion Foot. This little foot is completely different from the others. It doesn't clamp the fabric down; instead, it sort of hops or hovers just above the surface.
To use it, you'll drop your machine’s feed dogs so they no longer grip the fabric from below. Now, you are in full control. You guide the fabric with your hands, moving it in any direction to create gorgeous stippling on a quilt, delicate thread painting, or even mend a hole in jeans with a cool, decorative patch.
The Darning Foot completely changes the dynamic between you and your machine. You're taking control away from the machine's automated feed system and putting it right back into your own hands. Your needle basically becomes a pen for creating fabric art.
The Gathering Foot for Effortless Ruffles
Making perfectly even ruffles by hand is, let's be honest, a pain. You have to sew long basting stitches, then painstakingly pull the threads to create the gathers. The Gathering Foot does all of that work for you, automatically.
This clever little foot has an uneven sole that gently lifts the fabric just before it goes under the needle, creating soft, consistent gathers as you sew. It's a massive time-saver for anyone who loves adding ruffles to skirts, a decorative flourish to pillows, or a gathered cuff to a sleeve. Pro tip: you can often adjust how much it gathers by changing your stitch length—a longer stitch usually makes for fuller ruffles.
The Rolled Hem Foot for Delicate Finishes
For finishing the edges of lightweight fabrics like chiffon, silk, or organza, the Rolled Hem Foot is an absolute lifesaver. A normal double-fold hem is often too bulky and nearly impossible to sew neatly on these fine materials. This foot handles it beautifully.
It has a unique little spiral guide at the front. As you feed the raw edge of your fabric into this guide, it magically folds the material over twice into a tiny, perfect scroll. The machine then stitches this minuscule hem down, creating a professional and durable finish that’s just a few millimeters wide. It’s the secret behind those beautiful, airy edges you see on high-end scarves and formalwear. Many of the bespoke garment designs in the bsewinn.com gallery rely on this foot for that final touch of elegance.
How to Choose and Attach the Right Presser Foot
Picking out the right presser foot can feel a little overwhelming at first, but it boils down to two simple things: what kind of machine you have and what you’re trying to sew. Getting this right is one of those foundational skills that makes everything else so much easier, and it’s a big part of what we at bsewinn.com want to help you with as you grow your confidence.
Before you even think about the project, you have to know how the foot will connect to your machine. That’s where a little term called shank height comes into play. Just think of the shank as the ankle connecting the presser foot holder to the main presser bar of your machine.
Identifying Your Machine's Shank Height
Most home sewing machines have one of three main shank heights. This is simply the distance from the bottom of the foot to the center of the thumbscrew that holds it in place.
- Low Shank: This is what you'll find on the vast majority of modern home sewing machines. A quick measure will show it's about 1/2 inch from the screw to the bottom of the foot.
- High Shank: You'll usually see these on heavy-duty industrial machines or some of the bigger, fancier embroidery and quilting models. They measure about 1 inch from the screw to the bottom.
- Slant Shank: This one is a bit of a vintage classic, unique to many older Singer machines. True to its name, the shank itself is angled instead of sitting perfectly straight.
Figuring out your shank height is step one. Grab a ruler and take a quick measurement—it's usually all you need to do to solve the mystery.
Snap-On vs. Screw-On Feet Explained
The next part of the puzzle is how the feet physically attach. Most machines today use a wonderfully convenient snap-on system. The presser foot is a small plate that just "snaps" onto an adapter (the ankle), which stays screwed onto the shank. This makes swapping between feet a total breeze.
On the other hand, screw-on feet are all one piece—the foot and its attachment arm are integrated. To change one, you have to get out the little screwdriver and completely unscrew the whole unit from the presser bar. A lot of specialty feet, like the popular Walking Foot, are screw-on because they need that extra-secure connection to do their job properly.
Don't worry if you have a low-shank machine but fall in love with a specialty foot designed for a different system. You can often grab an accessory adapter to make it a perfect fit.
The diagram below shows how different feet, like a Walking Foot or a Darning Foot, are essential for specific techniques you'll use as you move through a project.
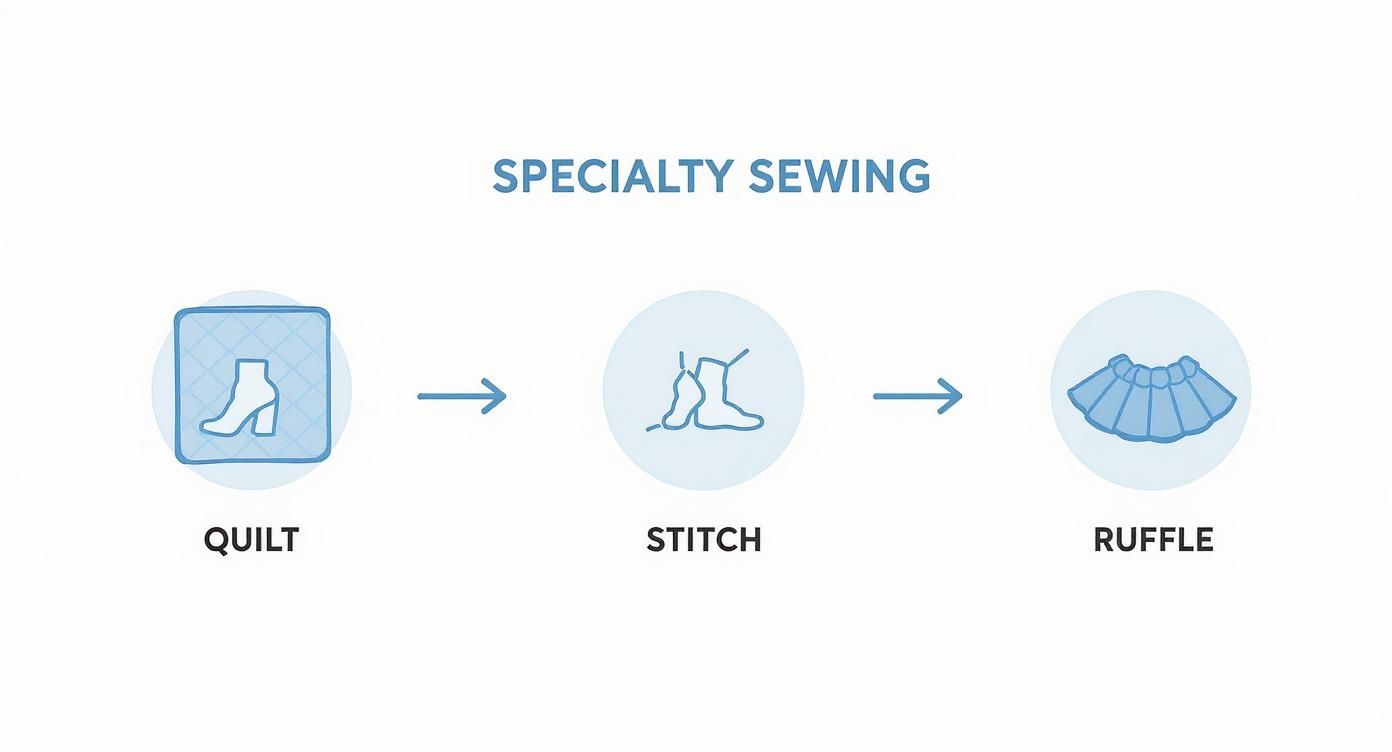
As you can see, getting the best results often means swapping to a specialized foot designed for that exact task.
A Step-by-Step Guide to Changing a Presser Foot
Changing a foot is a quick little job that you'll get the hang of in no time. Just follow these steps to make sure you're doing it safely.
- Turn Off the Machine: This is the golden rule. Always, always power down your machine before you change a foot or a needle. You don't want any accidental stitches!
- Raise the Needle: Twist the handwheel toward you to bring the needle all the way up. This gets it safely out of your way.
- Lift the Presser Foot Lever: Push the presser foot lever up as high as it will go. This gives you plenty of room to work.
-
Remove the Old Foot:
- For snap-on feet, there’s usually a little button or lever on the back of the ankle. Press it, and the foot will pop right off.
- For screw-on feet, use the small screwdriver that came with your machine to loosen the thumbscrew until you can slide the foot out.
-
Attach the New Foot:
- For snap-on feet, line up the new foot under the ankle and slowly lower the presser foot lever. It should click right into place.
- For screw-on feet, guide the new foot into position, then tighten the thumbscrew until it’s snug but not overly tight.
Before you start sewing again, give the new foot a gentle little tug to make sure it's on there securely. A loose foot can cause all sorts of headaches like broken needles and messed-up fabric, so this tiny final check is well worth it
Caring for and Troubleshooting Your Presser Feet
I like to think of presser feet as the tires on a car. They need to be in good shape and kept clean to properly grip the "road"—your fabric—and guide you where you want to go. A little bit of care goes a long way and can save you a world of frustration later on.
We're big believers here at bsewinn.com that truly empowering sewists means helping with the whole journey, not just the fun parts. That includes knowing how to look after your gear. Our extensive resources are all about helping you fix problems fast so you can get back to what you love: creating.
Simple Cleaning for Peak Performance
Your presser feet are right there in the middle of the action, so it's no surprise they attract lint, dust, and tiny threads. Let that build up, and it can actually get packed in, preventing the foot from sitting flat on the fabric and messing with your stitch quality.
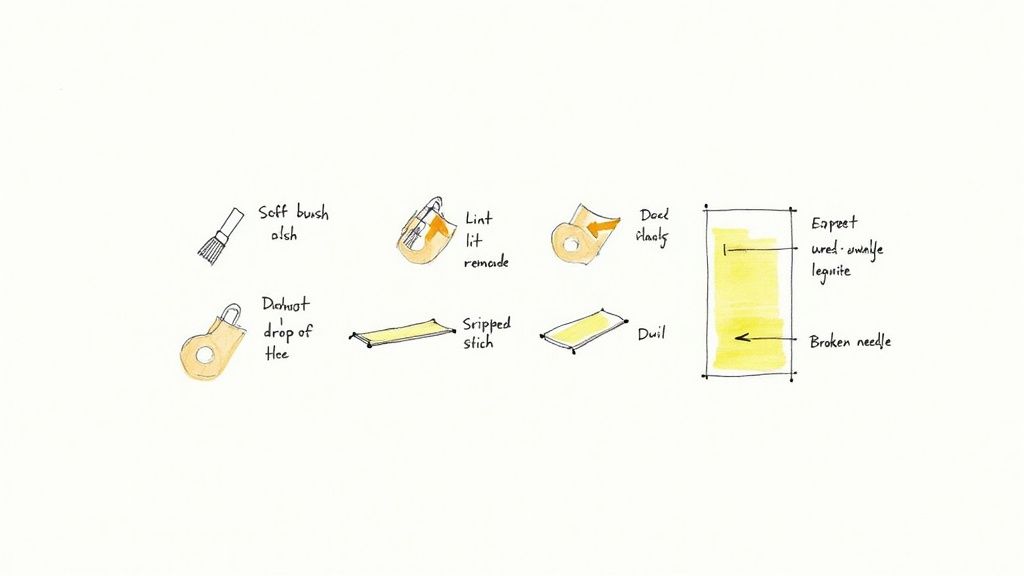
A quick cleaning routine is all it takes:
- Get the Foot Off: First things first, turn off your machine and remove the presser foot.
- Brush Away the Gunk: Grab that small, stiff brush that came with your machine and give the foot a good scrub. Get into all the little crevices and clear out any lint.
- Wipe It Down: For anything a little more stubborn, a soft, dry cloth usually does the trick. I'd steer clear of harsh chemicals, as they can damage the coating on the foot.
Making this a part of your regular machine maintenance will keep your feet gliding smoothly and your stitches looking perfect.
Solving Common Sewing Problems
When your stitches start skipping or the fabric is puckering, it’s easy to immediately blame the needle or the machine's tension. But more often than you'd think, the presser foot is the real culprit. Figuring out the root cause is a skill we focus on in our bsewinn.com online classes because it builds so much sewing confidence.
The presser foot is the direct point of contact between your machine and your project. If it’s the wrong one, attached incorrectly, or dirty, nothing else is going to work right. When things go wrong, always check your foot first.
It's frustrating when things aren't working, but don't give up! Most issues are surprisingly simple fixes once you know what to look for.
Here’s a little cheat sheet to help you diagnose and solve some of the most common presser foot problems.
Common Presser Foot Problems and Solutions
| Problem | Possible Presser Foot Cause | Solution |
|---|---|---|
| Skipped Stitches | The foot isn't holding the fabric down firmly enough against the feed dogs. This allows the fabric to bounce or "flag" up and down with the needle. | Double-check that the foot is snapped on securely. If you're using a specialty foot (like a darning or free-motion foot), make sure you're using the right technique for it. |
| Fabric Puckering | There's too much pressure from the foot, which is stretching the fabric as you sew. This is a classic problem with knits and delicate materials. | Use the right foot for the job! A Walking Foot is a game-changer for knits, and a Non-Stick Foot works wonders on vinyl or leather. Some machines also let you adjust the presser foot pressure—lighten it up for delicate fabrics. |
| Breaking Needles | The needle is physically hitting the metal of the presser foot. This almost always happens when the foot and the stitch type don't match (e.g., using a straight stitch foot with a wide zigzag stitch). | Stop and check that the stitch you've selected is compatible with the foot you have on. Make sure the foot is aligned perfectly and snapped on all the way. |
A quick check of this table can often save you a ton of time and get you back to sewing with smooth, even stitches. It's all about matching the right tool to the task at hand
Answering Your Top Questions About Sewing Machine Feet
Once you start exploring the world of presser feet, a few questions always seem to pop up. Honestly, getting these sorted out is a huge step toward feeling more confident and creative at your machine. Think of this as the final piece of the puzzle, where we clear up those common head-scratchers once and for all.
Here at bsewinn.com, we believe that understanding your tools is what turns a hobby into a passion. We're committed to empowering you on your creative journey, and every guide, class, and resource we create is designed to be right there with you as you learn and grow.
Are Sewing Machine Feet Universal?
This is the big one, and the short answer is a helpful "mostly, but not always." It’s not quite as simple as a yes or no.
Many modern machines from different brands use what’s called a low-shank system. This has created a lot of cross-compatibility, especially for generic snap-on feet you might find online or in a fabric store. Chances are, a "universal" foot will click right onto your machine.
But—and this is a big but—it’s not a 100% guarantee. Some brands are loyal to their own unique attachment systems, or they build machines with a high-shank or slant-shank design that demands specific feet. The absolute best thing you can do? Grab your sewing machine's manual and check the shank type before you buy anything. A quick two-minute check saves a ton of frustration and ensures a perfect, wobble-free fit.
How Do I Know Which Foot to Use?
This feels overwhelming at first, but it gets easier with practice. The trick is to stop thinking about the feet and start thinking about the task. Ask yourself: What am I trying to do right now?
- Tangible Example: Sewing a zipper into that cute pouch from a bsewinn.com design? You need a Zipper Foot.
- Tangible Example: Making crisp, perfect buttonholes for a new blouse pattern? Time for the Buttonhole Foot.
- Tangible Example: Trying to quilt through that fluffy, thick quilt sandwich? A Walking Foot is your absolute best friend here to stop the layers from shifting.
Most of the time, your sewing pattern will tell you exactly which foot to use. When it doesn't, just let the technique guide you. And for just about any standard seam, the good old All-Purpose (Zigzag) Foot is your trusty starting point.
It really boils down to this: Match the foot's special power to your sewing task. That's it. This simple mindset turns a confusing choice into a logical one that will quickly become second nature.
Can I Use a Metal Foot on Delicate Fabric?
You can, but you might not want to. While a standard metal foot works for a lot of things, it can be a little grabby on certain fabrics. Materials like silk, vinyl, leather, or slinky knits can stick to the metal, causing those dreaded puckered seams or stretched-out stitches.
This is where a Non-Stick (Teflon) Foot or a Roller Foot really shines. They’re designed to glide right over those tricky surfaces without a fight, making sure your fabric feeds through smoothly. As with anything new, always run a quick test on a scrap of your fabric first. It’s the best way to see how the foot and fabric will get along before you commit to the real deal.
What Is the Difference Between an Open Toe and a Closed Toe Foot?
This one is all about visibility. Think of it like the difference between wearing sunglasses and not.
An Open-Toe Foot has a big cutout right in the front, giving you a crystal-clear, unobstructed view of the needle hitting the fabric. This is exactly what you want for jobs where you need to be super precise—think appliqué, decorative stitching, or following a tricky pattern line.
On the other hand, a Closed-Toe Foot has a solid bar across the front. This design gives the foot a little more stability, which is great for general sewing and utility stitches where you don't need to see every single detail up close. Both have their place in your toolkit; it just depends on whether your project calls for maximum stability or a perfect line of sight.
Feeling ready to add a few new tricks to your sewing repertoire? At B-Sew Inn, we are dedicated to empowering crafters with a huge selection of sewing machines, specialty presser feet, and all the accessories you need to bring your projects to life. Explore our collection, find the perfect tools, and get the support you need through our classes and resources to take your sewing to the next level. Visit us at https://www.bsewinn.com today

