So, you’ve decided to start sewing! Welcome. At first glance, a sewing machine can look a little intimidating with all its knobs and dials, but I promise it’s about to become your favorite creative partner. We're going to break it all down into simple, easy-to-follow steps. This is your starting point for sewing machine basics for beginners, and you'll be creating tangible, beautiful designs with confidence in no time.
Your Journey into Sewing Starts Here
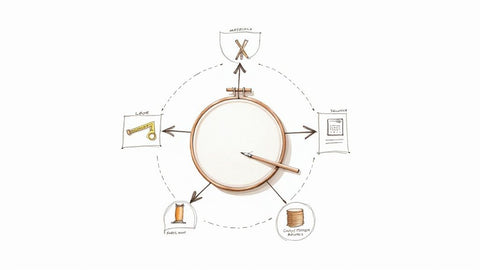
Think of this guide as your friendly roadmap. Every amazing project, from a simple tote bag to a dream quilt, starts with getting comfortable with your machine. We'll walk through the essential parts, get you set up properly, and nail the threading process so it becomes second nature. Before you know it, you'll be sewing your first line of perfect, even stitches, ready to create something wonderful.
Here at bsewinn.com, we're not just about selling machines; we're about empowering your entire creative journey. Our goal is to give you a solid foundation, which is why we provide comprehensive "how-to" guides and tangible examples using our unique custom sewing machine designs. We’re truly invested in your success, offering the support you need to replicate inspiring projects every step of the way.
I’ve always found that real success in sewing comes from mastering the fundamentals. Once you really understand how your machine works, it feels like a creative superpower is unlocked.
To make sure you never feel like you're going it alone, we’ve put together a whole support system to empower crafters just like you. Our ecosystem includes:
- Custom Sewing Machine Designs: We’ve designed these with beginners in mind, making the whole learning process feel more natural and intuitive as you create.
- Online Classes and Training: These are step-by-step video tutorials that guide you through every little technique, from threading to finishing a complete project.
- Extensive Resources: You'll get access to a full library of guides and patterns to spark ideas and help you replicate designs you love.
Let’s get started. It's time to turn that pile of fabric and thread into something amazing.
Getting to Know Your Sewing Machine
I know that first glance at a new sewing machine can feel a little intimidating. All those knobs, dials, and mysterious little parts! But trust me, it's not nearly as complicated as it looks. The best way to start is to think of your machine as a new friend you're getting to know—each part has a name and a job, and soon you'll know exactly what to do.
This isn't about memorizing a textbook diagram. It's about building a hands-on understanding of how your machine works to create the perfect, even stitches that form the foundation of any sewing design.
The Main Players: How the Thread Travels
Every stitch you make starts its journey on the spool pin, which is just a simple peg that holds your spool of thread. Easy enough, right? From there, the thread weaves through a specific path, and one of the first important stops is the tension dial.
This little knob is a game-changer and absolutely vital for sewing machine basics for beginners. It controls how tight or loose the top thread is. Getting the tension just right is what gives you those beautiful, balanced stitches that look the same on both sides of your fabric. It’s one of the first things you'll learn to adjust, and it makes all the difference in the final look of your design.
Next up is the take-up lever, that little arm that bounces up and down as you sew. It looks like it's just dancing along, but it has a crucial job: it pulls thread from the spool and helps feed it down to the needle, making sure everything flows smoothly and consistently. It’s a key part of the rhythm of the machine.
Interestingly, sewing is seeing a huge comeback, especially with younger generations. It’s no longer just a niche hobby. Many new sewers in North America and Europe are jumping in with mid-range machines, often in the $200–$600 price range. These models are fantastic because they're reliable workhorses but also come with features you’ll grow into. If you're curious, you can dig into more research on these sewing machine market trends.
This handy infographic breaks down where all the key parts are located.
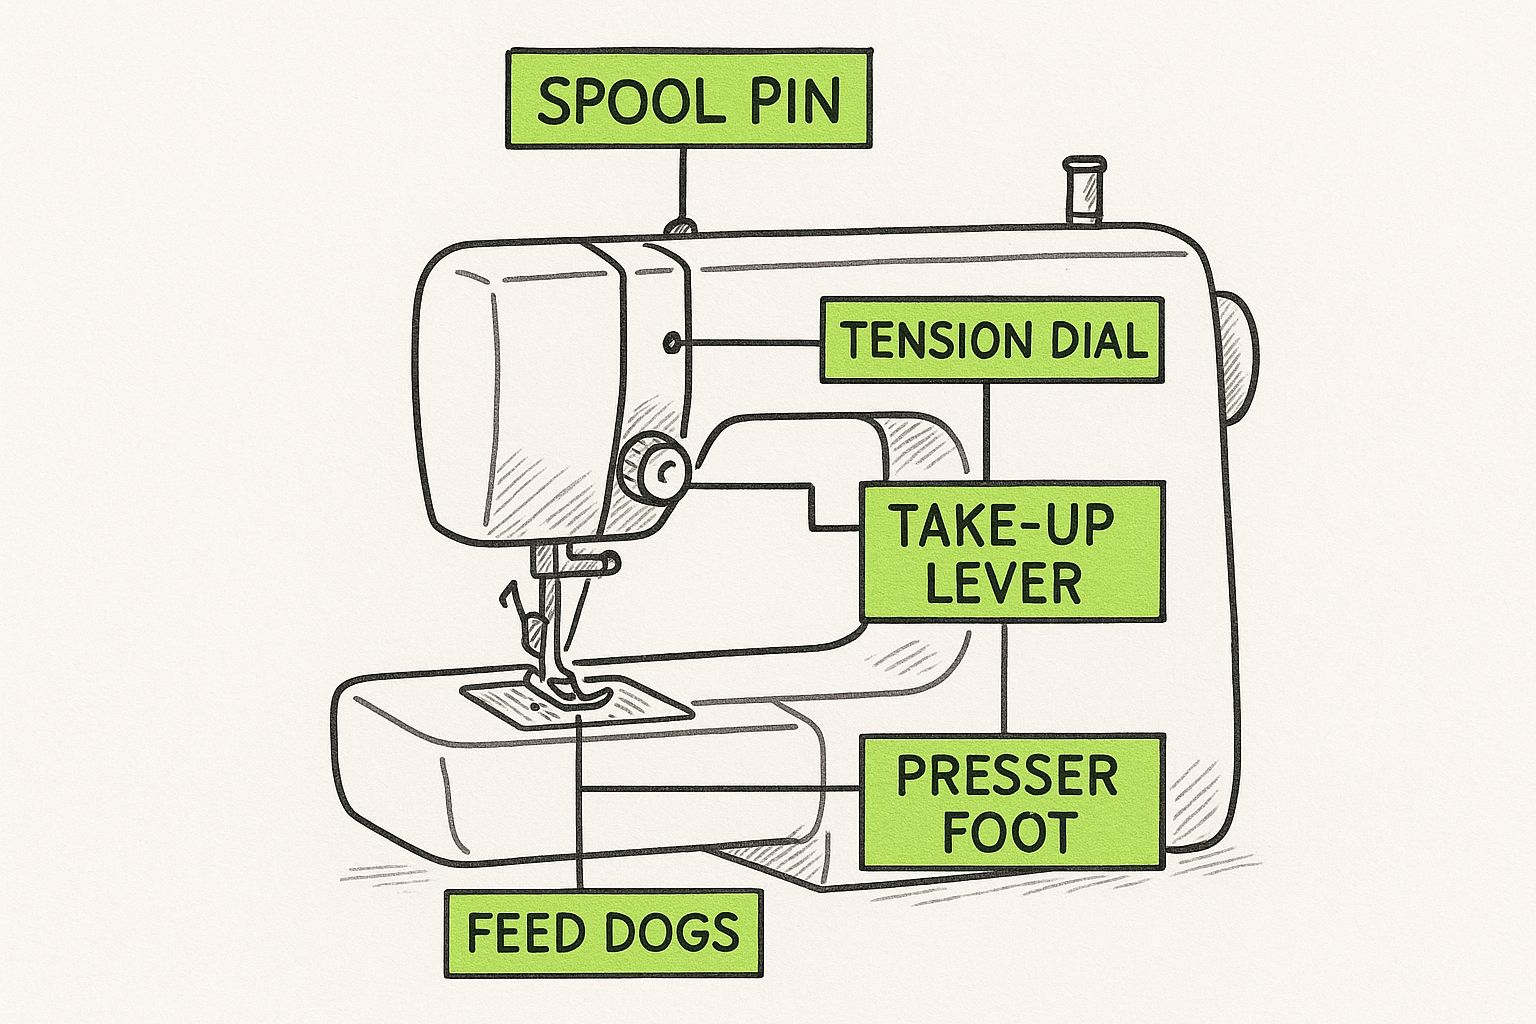
As you can see, everything is designed to work together logically, moving the thread and fabric in a perfectly coordinated dance.
Where the Stitching Happens: The Needle Area
Once your machine is all threaded up, the real action happens down by the needle.
- The presser foot is the little metal piece that holds your fabric down flat against the machine. Think of it as a steady hand keeping your material from slipping and sliding.
- Right underneath it are the feed dogs, which are tiny metal teeth that pop up and grip the bottom of your fabric, pulling it forward with each stitch. They are the secret to evenly spaced stitches!
And we can't forget the other half of the stitch-making team: the bobbin. This is a tiny spool of thread that lives in a compartment right under the needle, providing the thread for the bottom of the stitch.
A few other key parts you’ll use all the time:
- The handwheel on the side lets you manually lower and raise the needle one stitch at a time—perfect for hitting a precise spot.
- The stitch selector is the fun part! This dial or screen lets you choose whether you want a straight stitch, a zigzag, or something more decorative for your design.
To make things even clearer, here’s a quick-reference table that breaks down the most important components you'll be working with.
Key Sewing Machine Parts and Their Functions
| Part Name | What It Does | Why It's Important for Beginners |
|---|---|---|
| Spool Pin | Holds the spool of upper thread. | The starting point for threading your machine. Simple but essential! |
| Tension Dial | Controls the tightness of the top thread. | Key to creating balanced, professional-looking stitches instead of messy loops. |
| Take-Up Lever | Pulls thread from the spool to feed the needle. | Ensures a consistent flow of thread for even stitching. |
| Presser Foot | Holds the fabric firmly in place while sewing. | Prevents fabric from shifting, allowing for straight and accurate seams. |
| Feed Dogs | Metal teeth that move the fabric forward. | They set the stitch length and make sure every stitch is perfectly spaced. |
| Bobbin | A small spool that holds the bottom thread. | Forms the other half of the stitch, locking it in place with the top thread. |
| Handwheel | Manually turns to raise or lower the needle. | Great for precise needle placement, especially when starting or turning corners. |
| Stitch Selector | Allows you to choose different stitch types. | Lets you switch from basic straight stitches to zigzag and decorative options. |
Getting comfortable with these parts will really boost your confidence.
Once you understand how these pieces work together, you stop guessing what's wrong and start knowing how to fix it. It turns troubleshooting from a frustrating mystery into a simple, logical puzzle.
Here at bsewinn.com, we build our custom machines and online training around this very idea—empowering you to feel confident and in control from your very first stitch.
Getting Your Machine Ready for Success
A great sewing project doesn't start when your presser foot comes down—it begins with a good, solid setup. Taking a few minutes to get things right from the get-go means your machine will work with you, not against you, and you'll sidestep some of the most common headaches new sewers face.
I always think of sewing as a partnership between three key players: the needle, the thread, and the fabric. If these three aren't getting along, you're going to see problems like skipped stitches or snapping thread. So, your very first job is to pick the right needle for the fabric you're using.
For example, a universal needle is a great workhorse for basic cottons, but you'll need to swap it out for a tough denim needle when tackling heavier stuff. When you install it, always make sure the flat side of the needle shank faces the back of the machine. Push it all the way up until it won't go any further, then tighten the screw. Getting this simple step right is a cornerstone of sewing machine basics for beginners.
The Bobbin: Winding and Inserting It Correctly
Next up is the bobbin, that little spool that handles the bottom half of your stitch. A tight, evenly wound bobbin is non-negotiable for a good-looking stitch. Most machines have little diagrams right on top to show you the thread path for winding. You're aiming for a bobbin that looks neat and feels firm, not one that's loose or tangled.
Once it's wound, you have to pop it in. How you do this depends on your machine's style:
- Top-loading bobbins: These are the easiest and most common for beginners. You just drop the bobbin into its little compartment near the needle plate and leave a tail of thread hanging out.
- Front-loading bobbins: These have a separate metal case. You'll place the bobbin inside the case, pull the thread through a tiny slit to create tension, and then insert the whole case into the machine from the front.
A poorly wound or incorrectly inserted bobbin is the secret villain behind so many sewing frustrations. Trust me, taking a moment to get this right will save you a world of trouble down the road.
Lastly, turn your stitch selection dial (or use the screen) to a basic straight stitch. A stitch length of about 2.5 mm is a fantastic all-purpose setting that works for most medium-weight fabrics. With your needle, bobbin, and stitch selected, your machine is prepped and ready for a smooth ride. Getting your settings just right—including the tension—is key, and you can dive deeper into that by reading our full guide on tension adjustment on sewing machine to really perfect your stitches.
Mastering the Art of Threading Your Machine
At first glance, threading a sewing machine can look like a confusing maze of hooks, guides, and levers. But I promise you, it's a simple, logical path that you'll have down to muscle memory in no time. Think of it as connecting the dots—most machines even have little numbers printed right on them to guide you. Nailing this is one of the most important first steps you'll take before creating your first design.
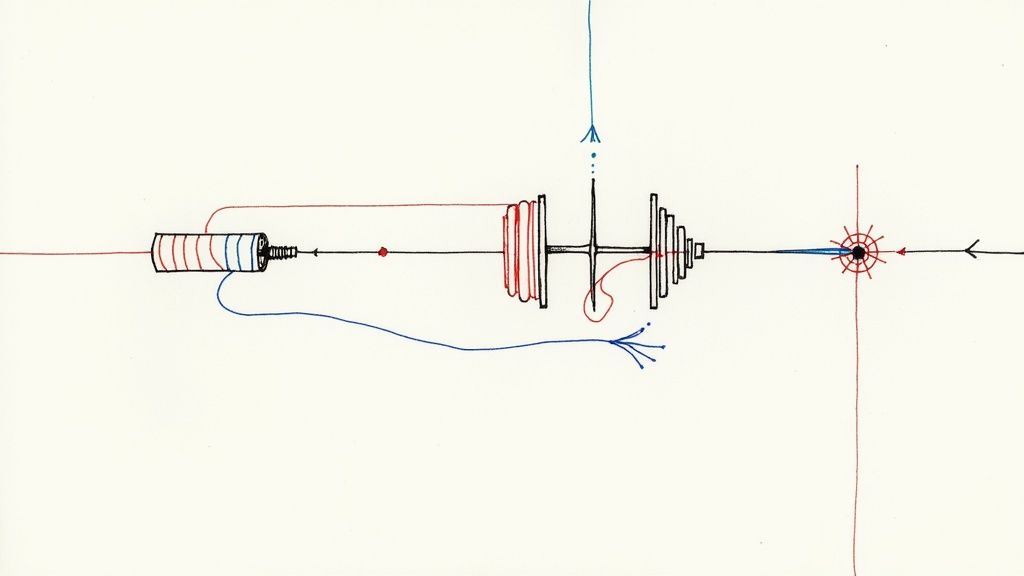
The journey always begins at the spool pin. From there, you'll work your way through the upper thread path. Here's a critical tip I tell every new sewer: always thread your machine with the presser foot UP. When you lift the foot, it opens up the tension discs, which allows the thread to settle in properly. If the foot is down, those discs are clamped shut, and your thread won't be tensioned correctly, leading to a tangled, bird's-nest-like mess on the bottom of your fabric.
After the tension discs, the thread travels up through the take-up lever (that's the part that bobs up and down as you sew) before making its final journey down to the needle.
Foolproof Threading and Final Steps
So many modern machines now come with an automatic needle threader, which is a tiny hook that swoops in and pulls the thread right through the eye of the needle for you. This little feature has been an absolute game-changer for crafters, making sewing so much more approachable.
In fact, user-friendly features like automatic threaders are a big reason why so many people are picking up sewing. It's lowered the barrier to entry, which is fantastic for the growing DIY community and the push toward mending and sustainability. You can actually see this trend reflected in the sewing machine market on factmr.com.
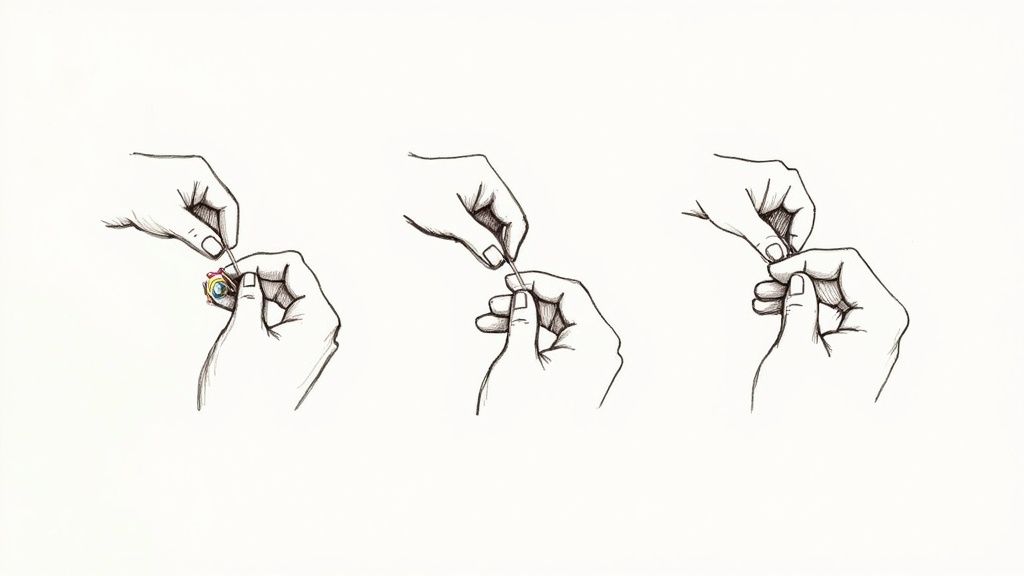
Okay, once the top thread is through the needle, you have just one final step: bringing up the bobbin thread. Hold the top thread loosely with one hand and turn the handwheel toward you for one full rotation. You'll see the top thread dip down, catch the bobbin thread, and pull up a little loop. Use your fingers or a pair of small scissors to pull that loop all the way through.
Getting the bobbin ready is just as important as the top thread. A perfectly wound bobbin is the secret to a flawless stitch, and mastering this step will save you from so many common issues.
Now, with both threads pulled to the back and tucked under the presser foot, you are officially ready to sew! For a detailed walkthrough, check out our guide on how to wind a bobbin. This foundation sets you up for success on every project you create with your custom bsewinn.com machine and our supportive online classes.
Sewing Your First Stitches and a Simple Project
This is the moment of truth! Your machine is all threaded up and raring to go. It's time to actually sew. Grab a piece of scrap fabric—a simple cotton is perfect for this—because the goal here is just to get a feel for the machine's rhythm and build up a little confidence.
Go ahead and place your fabric under the presser foot, then lower it. Now, gently press the foot pedal. Your only job right now is to guide the fabric with your hands, keeping it moving in a straight line. The key thing to remember is that you are guiding, not pushing or pulling. The machine has little "feed dogs" underneath that do all the work of moving the fabric for you.
Practice Makes Perfect
Here's a great little trick for building muscle memory without using up all your thread: practice on a piece of paper. Seriously! Draw some straight lines, some curves, and even a few sharp corners. Then, with the machine unthreaded, "sew" right on top of your lines. This is a fantastic way to get the hang of speed control and learn how to pivot smoothly at corners. Once that feels natural, switch back to your fabric.
The single most important technique you'll learn today is backstitching. You'll do this at the beginning and end of every single seam. Just sew forward two or three stitches, press the reverse lever to sew backward over them, and then continue forward. This simple step locks your stitches in place so they don't unravel.
Your First Tangible Creation: A Stylish Cloth Napkin
Ready to make something you can actually use? At bsewinn.com, we love empowering crafters with custom designs and tangible projects that are perfect for getting started. A stylish cloth napkin is a fantastic first project. It’s all straight lines, which means you get to practice every one of the sewing machine basics for beginners you just learned. We believe the best "how-to" guides are ones that end with a finished item you can be proud of.
Think of this project as more than just practice; it's tangible proof that you can create something both beautiful and useful from day one. This whole hands-on, DIY approach is a huge reason why the sewing machine market is growing like crazy, with projections to hit $7.9 billion by 2025. You can dig into the numbers yourself in the full sewing machine market report.
We’ve got plenty of online resources, including our free sewing lessons, to help you turn that piece of fabric into a finished item you can replicate and customize.
Keeping Your Sewing Machine Happy and Healthy
Think of your sewing machine as your creative partner. And just like any good partnership, a little TLC goes a long way. Spending a few minutes on basic maintenance is the secret weapon to keeping your sewing sessions fun and frustration-free. Honestly, these simple habits are a core part of learning sewing machine basics for beginners.
So, what's the biggest troublemaker for a sewing machine? You might be surprised. It's usually tiny bits of lint and dust that get packed in around the moving parts. Get in the habit of using a small brush to gently clear out the bobbin area and around those little metal teeth called feed dogs. This one simple step can prevent a world of hurt, like thread jams and wonky stitches.
The Golden Rule of Sewing Maintenance
If you take away just one tip, make it this one: change your needle often. I can't stress this enough! A dull or slightly bent needle is the number one enemy of a beautiful seam. It can cause skipped stitches, snag your fabric, and make your lines look messy. A fresh needle for every new project is probably the cheapest "insurance" you can buy for professional-looking results.
Simple maintenance isn't a chore; it's an investment in your creativity. A clean, well-cared-for machine will always be ready when inspiration strikes.
Finally, a couple of last things. Some machines like a drop of oil now and then to keep things running smoothly—peek at your manual to see if yours is one of them. And when you're done for the day, pop a cover over it to keep that pesky dust out. Taking care of these little things ensures your machine is always ready to roll when you are.
Uh Oh, My Machine Is Doing Something Weird!
Look, no matter how carefully you follow the steps, your sewing machine is going to act up at some point. It happens to everyone. It's just a normal part of the learning curve, so don't panic! Here are a couple of the most common hiccups new sewers run into and how to fix them in a flash.
Why Is My Thread Bunching Up Underneath the Fabric?
Ah, the dreaded "bird's nest." We've all been there. You're sewing along happily, only to flip your project over and find a tangled mess of thread underneath. It’s frustrating, but the fix is almost always surprisingly simple.
This happens because of a problem with the top thread, not the bobbin. Most likely, you threaded the machine with the presser foot down. When the foot is down, the tension discs are clamped shut, and the thread can't settle in properly. Just lift the presser foot, pull out the top thread completely, and re-thread it from the start. That usually does the trick!
Which Sewing Machine Needle Should I Use?
Think of your needle as the most important (and cheapest!) tool for a successful project. Always, always match your needle to your fabric. It makes a huge difference.
If you’re just starting out with basic cottons, a Universal needle in a size 80/12 will be your best friend. But if you move on to something floaty and delicate like chiffon, you'll want to switch to a smaller 70/10 to avoid snagging it. For heavy-duty fabrics like denim, you need a tough needle that won't break, so grab a Denim needle in a size 100/16.
Ready to keep that creative momentum going? At B-Sew Inn, we’re all about helping you move past the basics and start making things you truly love. We offer everything from custom machine designs and "how-to" project guides to a huge library of online training and a friendly community to cheer you on.
Come see what you can create with us. Explore everything we offer at our official B-Sew Inn website.