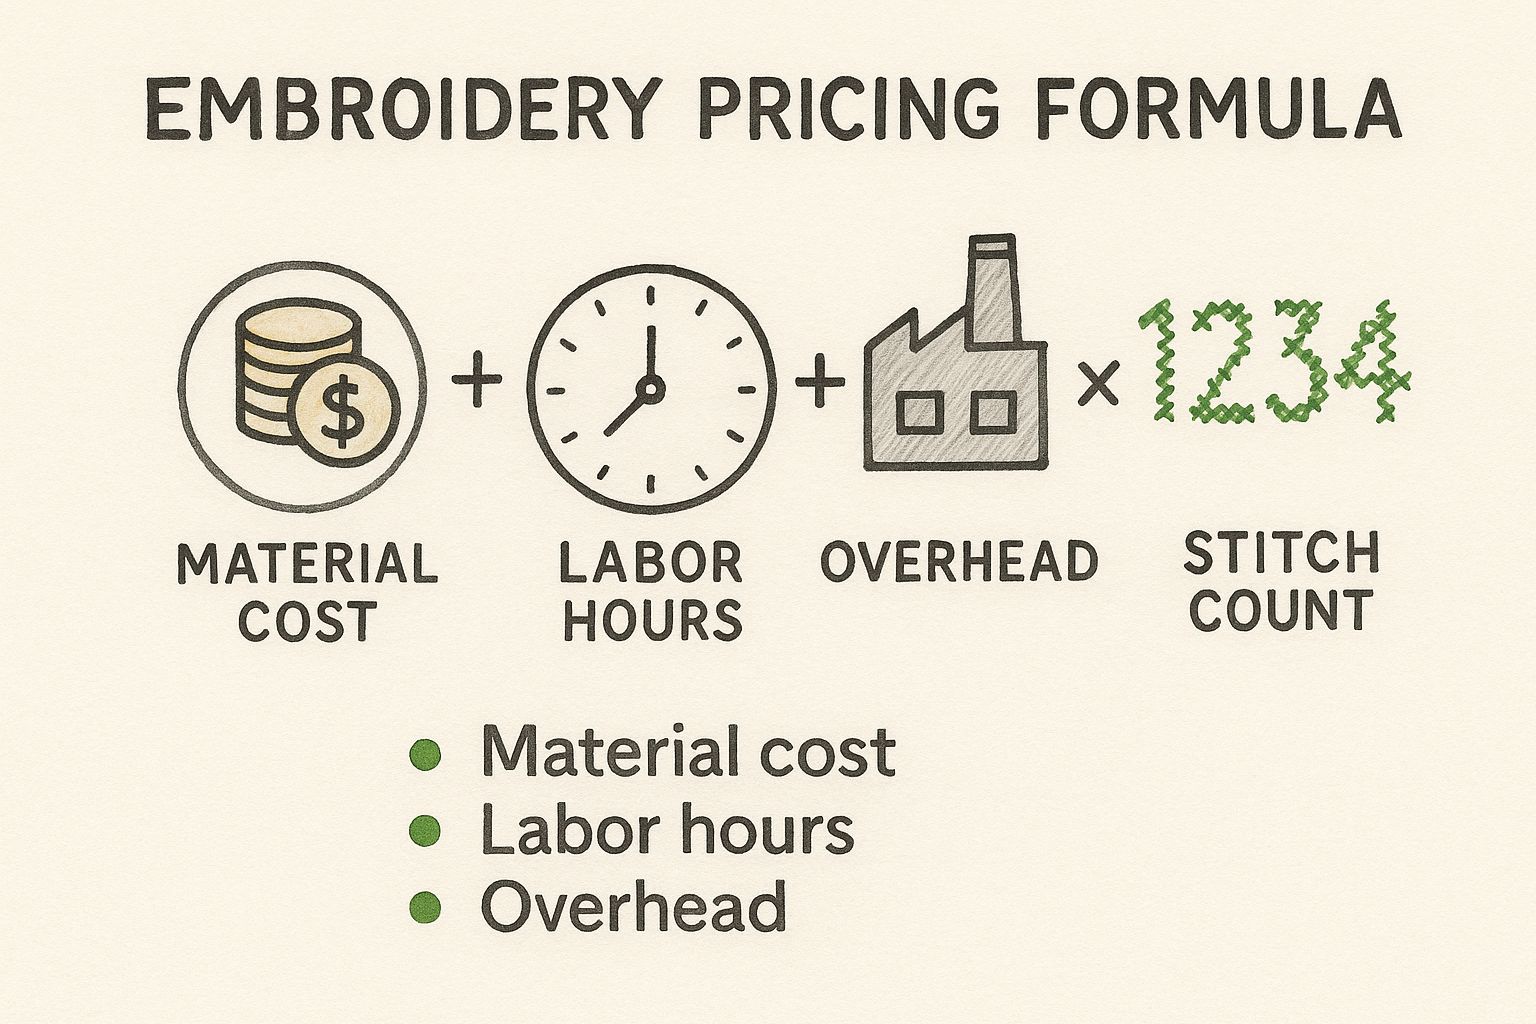
Getting your embroidery pricing right is what separates a fun hobby from a profitable business. It all comes down to a surprisingly simple formula: (Material Costs + Labor + Overhead) + Profit Margin = Final Price.
Once you nail this calculation, you can stop guessing and start earning with confidence. Every stitch will actually contribute to your bottom line, ensuring you cover all your expenses and—most importantly—pay yourself a fair wage for your incredible skills. At B-Sew Inn, we're committed to empowering crafters by providing not just the tools, but also the business know-how through extensive resources, online classes, and training.
The Foundation of Smart Embroidery Pricing
Figuring out how to price your work isn't about pulling numbers out of thin air. It’s about building a solid, repeatable system that accounts for every penny spent and every minute you've worked. The goal is to make sure your passion pays the bills.
Success really hinges on balancing four critical things: the cost of your materials, the value of your time, all those sneaky operational costs (overhead), and, of course, the profit you need to grow your business. This method turns your pricing into a smart business decision instead of a reaction to what competitors are doing. You’ll be building your prices on your actual business data, which is the only way to stay stable and successful long-term.
Key Components of Your Pricing Formula
To put together an accurate quote, you have to break down your expenses. Every embroidery shop, whether it's a side hustle in a spare room or a full-blown commercial operation, needs to track these core elements:
- Material Costs: This is everything that physically goes into the project. Think thread, stabilizer, backing, and the garment itself if you’re the one supplying it.
- Labor Costs: This is what your time is worth. It’s not just the time the machine is running! It's the whole process—from setting up the design and hooping the item to finishing touches like trimming threads and packaging.
- Overhead Costs: These are the indirect, "cost of doing business" expenses. We're talking electricity, machine maintenance, software subscriptions, maybe even rent for your workspace.
- Profit Margin: This is the crucial bit you add on top of your costs. It’s what ensures your business isn't just surviving, but actually thriving and growing.
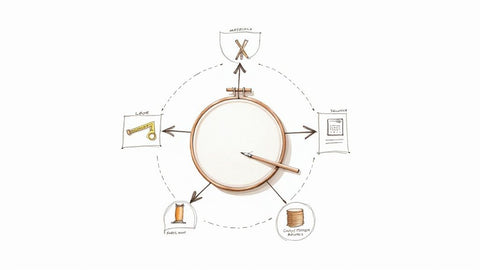
This simplified diagram gives you a great visual of how these elements all connect to build a complete price.
As you can see, a solid pricing model is a balanced equation. Each part needs to be given the right amount of attention. To explore some different approaches, this guide on membership pricing strategy has some interesting ideas you might find useful.
Getting these foundational elements right is the first big step we cover in our guide on how to start an embroidery business. Here at B-Sew Inn, we’re all about empowering crafters with the right tools and the right knowledge to build a successful business from the ground up, supported by our extensive resources and training.
To give you a quick cheat sheet, here’s a table breaking down these core components.
Core Embroidery Pricing Components at a Glance
| Pricing Factor | Description | Example Metric |
|---|---|---|
| Material Costs | All physical supplies used for a specific job. | Cost per cone of thread, price per yard of stabilizer. |
| Labor Costs | The value of your time spent on the entire project. | An hourly rate for your time and expertise. |
| Overhead Costs | Indirect expenses required to run your business. | Monthly software subscription fees, annual machine service. |
| Profit Margin | The percentage added to your total costs. | A 20-50% markup on the total cost of the job. |
Think of this table as your starting point. Keep these four pillars in mind, and you'll be well on your way to creating a pricing structure that’s both fair to your customers and profitable for you.
Figuring Out Your True Project Costs
If you want to price your embroidery with confidence, you first have to become an expert on your own expenses. This is the bedrock of profitable pricing. It all starts with a deep dive into every single cost that goes into a finished piece—and I mean everything, not just the obvious stuff.
You have to look past the thread and stabilizer to uncover all those sneaky costs that can quietly eat away at your profits. Think about machine maintenance, software subscriptions, and even the electricity your equipment is pulling. Honestly, tracking these expenses is non-negotiable if you're serious about building a sustainable business.
Uncovering Your Direct and Indirect Costs
The first thing I tell everyone is to separate their costs into two main buckets: direct costs and indirect costs (often called overhead). Direct costs are the tangible supplies you use up for a specific job. Indirect costs are all the things you have to pay for just to keep the lights on, whether you have a single order or a hundred.
Let's get specific:
- Direct Costs: This is your thread, stabilizer, needles, bobbins, and the garment itself if you're providing it. These are the easy ones to track on a per-job basis.
- Indirect Costs (Overhead): This category is way broader and often overlooked. It covers your design software subscription, electricity, machine depreciation, replacement parts, and even your marketing budget.
A great way to manage your overhead is to add it all up for the month or year, then break it down into an hourly rate. You can then build that hourly overhead rate into every project quote you send out. This makes sure every job is pulling its weight and covering its share of the operational expenses.
One of the biggest mistakes I see new business owners make is underestimating their overhead. A $20 monthly software fee or a $150 annual machine tune-up might seem small, but those costs add up over hundreds of jobs. That can easily be the difference between making money and losing it.
The Impact of Your Embroidery Machinery
The kind of embroidery machine you're running will absolutely influence your costs and how you price your work. A crafter using a single-head machine for one-off custom pieces has a completely different cost structure than a shop running a big multi-head machine for bulk orders.
It’s a game of scale. Multi-head machines can slash operational costs by 25-40% compared to single-head models, which is a massive advantage when you're trying to price large orders competitively. The initial investment is obviously much higher, but that efficiency is the key to scaling up. You can read more about how machinery affects the industry's bottom line.
This is exactly where B-Sew Inn's commitment to empowering crafters makes a difference. We don't just sell you a box; we help you find the right machine for your actual business goals and give you the training to operate it efficiently.
Whether you're mastering a single-needle design or scaling up with multi-needle equipment, our online classes and support system help you understand your machine's true operational cost. That knowledge is the secret sauce for anyone learning how to price embroidery effectively. When you truly understand your equipment's capabilities and costs, you can price your services for real profit and long-term growth.
Pricing Beyond Just the Stitch Count
If you're only using stitch count to price your embroidery, you're almost certainly leaving money on the table. It’s a great starting point, but it's just that—a start. Think about it: an 8,000-stitch text design in one color is a completely different beast than an intricate 8,000-stitch logo with dense fills, multiple colors, and fine details. The second one just plain requires more time, more materials, and frankly, more of your skill.
When you rely on a flat rate per thousand stitches, you're ignoring all the real work that goes into a complex project. To price your work accurately and stay profitable, you have to learn how to layer in adjustments for the design's complexity and the unique demands of each job. This is the shift from just counting stitches to creating a pricing strategy that actually values your craft.
Factors That Add Complexity and Cost
So, what makes one job harder than another, even if the stitch count is the same? Several things can crank up the time and resources you need. Getting a handle on these is crucial for figuring out how to price embroidery the right way. Your stitch count is the base price; these factors are the multipliers you add on top.
Here’s what I always look for when quoting a project:
- Number of Color Changes: Every time the thread color changes, the machine stops. That stoppage adds up. A design with ten colors will take way longer to run than a single-color version, even if they have the exact same number of stitches.
- Trim Points and Jumps: Designs with lots of separate parts—like individual letters or scattered elements—force the machine to "jump," trim the thread, and move to a new spot. All that stopping and starting really slows down production.
- Fabric Type and Hooping Difficulty: Let’s be real, embroidering on a nice, stable piece of cotton twill is a breeze. But a stretchy polo? A slippery performance jacket? A thick, structured canvas bag? Each one brings its own challenges, demanding more time, different needles, and specific hooping tricks.
- Stabilizer Requirements: Different fabrics need different support. A thin knit might need a cut-away stabilizer plus a water-soluble topping just to look good. That adds to your material costs. Knowing what backing to use is a skill, and it should be factored into your price. For a deep dive, our guide on choosing the best stabilizer for embroidery is a fantastic resource.
Think of it like this: a simple logo is a straight highway drive, while a complex design is like navigating city traffic with lots of stops and turns. Both might cover the same distance (stitch count), but the time and effort involved are worlds apart. Your pricing needs to reflect that reality.
A Real-World Pricing Comparison
Let's break this down with a couple of tangible examples that crafters like you can replicate in your own pricing. Imagine two different jobs come in, both with a design that's around 9,000 stitches.
Project 1: A Standard Left-Chest Logo
- Design: A simple two-color company name on a standard polo shirt.
- Complexity: Low. There's only one color change and very few trims. The fabric is easy to work with and hoop.
- Pricing Approach: For this, you can stick pretty close to your base rate per thousand stitches. Add your usual labor and material costs, and you’ll have a fair and profitable price.
Project 2: A Complex Jacket Back Design
- Design: A detailed crest with seven colors, small text, and dense satin stitching, all on a thick, lined jacket.
- Complexity: High. We're talking six color changes, tons of trims for the lettering, and the headache of hooping a bulky, multi-layered item.
- Pricing Approach: This is where you absolutely must add complexity fees. You could tack on $1.00 - $2.00 for each extra color change after the first two. I'd also add a special handling fee—maybe $3.00 - $5.00 per jacket—to cover the extra time and care needed to wrestle with that difficult item.
This is the kind of know-how we live and breathe at B-Sew Inn. We don't just teach you to make beautiful things; we give you the technical insights and extensive resources to understand what affects your bottom line. When you can spot and price for complexity, you're building a business that’s not just a hobby, but a sustainable success.
Valuing Your Time and Digitizing Skills
So far, we've talked about the tangible costs—your materials, your overhead. But let's be honest, the most valuable asset in your embroidery business is you. Your expertise, your eye for detail, your skill. Every moment you spend on a project, from opening the design file to that final quality check, is what turns a plain old t-shirt into something special.
If you want to build a business that lasts, you have to get comfortable charging for this "human element." It's often the most overlooked part of the pricing puzzle.
Calculating Your Hands-On Hourly Rate
First things first, you need a fair hourly rate for your own labor. This isn't for the time the machine is humming along on its own; this is for every minute you are actively working on an order. Think about all the little things that add up:
- Prep Work: Unboxing and sorting dozens of shirts, carefully hooping each one just right.
- Machine Tending: Babysitting the machine, listening for thread breaks, re-threading needles on the fly, and making sure everything looks perfect.
- Finishing Touches: This is the tedious part! Trimming all those jump stitches, tearing away stabilizer, steaming, folding, and packing it all up beautifully.
These tasks are your time and your effort. If you decide $20 per hour feels right for your skill level and local market, then you need to track that time. A job that takes you 30 minutes of hands-on work? That’s a $10 labor charge you should add to the quote, completely separate from your stitch count costs.
The Critical Role of Digitizing Fees
Now let's talk about digitizing. This is a huge one. Turning a customer's flat image into a stitch file that your machine can actually read is a true skill. It’s not just clicking a button; it’s an art form that requires technical know-how to make a design sew out smoothly without looking like a mess. You absolutely must charge for this.
If you want to dive deeper into what this process really involves, we've got a whole guide on how to digitize embroidery designs.
When it comes to billing for digitizing, you really have two main paths you can take.
Client Scenario: Imagine a local bakery comes to you with their logo—a super detailed, multi-colored cupcake. It's got delicate shading and tiny text, and they want it on aprons. This isn't a simple job. That kind of logo needs a ton of manual work to create the right stitch paths and adjustments to keep the apron fabric from puckering.
In a situation like that, billing hourly for your digitizing time is the smartest move. A flat fee could leave you seriously underpaid for the hours of meticulous work that design will take.
On the other hand, if a client just needs a simple, one-color text logo, a one-time flat setup fee of $25-$50 usually makes more sense. It's straightforward for them to understand and fair for the amount of work involved. The trick is learning to look at a design and know which pricing model will compensate you fairly for your time and expertise.
Alright, you've tallied up all your costs. Now comes the fun part: getting paid for your skill and effort. This is where you add your profit margin.
Thinking about profit isn't greedy—it's what keeps the lights on and lets you invest back into your craft. Without it, you’re just covering expenses, essentially working for free. Profit is the fuel that buys new equipment, lets you experiment with cool new designs, and turns your passion into a business that actually grows.
What Should Your Profit Markup Be?
So, what’s the magic number? While there’s no one-size-fits-all answer, most custom apparel businesses aim for a profit margin between 20% to 50% on top of their total costs.
Where you land in that range really depends on your market, the quality of your work, and what you want to achieve with your business. A solid grasp of understanding profit margins is non-negotiable here. For instance, if a job costs you $10 in materials, labor, and overhead, a 40% profit margin means you'd add $4, bringing the final price to $14.
When you're figuring out your own margin, think about:
- Your Experience: Are you known for top-tier, flawless embroidery? Your reputation allows you to command a higher margin. Don't be shy about it.
- Your Market: If you're in a crowded market with lots of competition, you might need to start closer to 20-30%. But if you offer something unique or specialized, 40-50% is perfectly reasonable.
- Your Goals: Eyeing a new multi-needle machine? A healthier margin will get you there much faster. Price with your goals in mind.
How to Create Quotes That Actually Win Jobs
Your quote is more than just a number; it’s often a client’s first real taste of your professionalism. A confusing or vague quote sends the wrong message, but a clear, detailed one builds immediate trust. It shows you know what you're doing and you value their business.
A killer quote doesn't just list a price—it communicates your value and sets crystal-clear expectations from the get-go. It's your single best tool for avoiding that awful "I thought that was included!" conversation later.
Transparency is everything. Don't just give a single lump-sum price. Break it down so the client sees exactly where their money is going. This simple step can make a huge difference in how they perceive the value you're offering.
Here’s what I make sure to include in every single quote I send out:
- Embroidery Cost: The main charge, based on things like stitch count and design complexity.
- Digitizing Fee: Be upfront about this. Is it a one-time setup fee? An hourly charge for custom artwork? Spell it out.
- Garment Cost: If you're providing the apparel, list the price per item clearly.
- Tiered Pricing: For bigger jobs, show them the savings. Break down the price per piece for different quantities (e.g., 1-12, 13-48, 49+).
- The Bottom Line: A clear total price and a realistic timeframe for when they can expect their order.
At B-Sew Inn, we’re huge advocates for this business-first mindset. Our training and resources are built to help crafters succeed not just with a needle and thread, but with the business side of things, too. When you master the art of the quote, you're not just a stitcher; you're an expert building a foundation for a successful, long-lasting business.
Frequently Asked Embroidery Pricing Questions
Even after you've got a solid pricing formula down, some jobs just make you pause and think. Knowing how to price confidently means being ready for those oddball requests and common scenarios that always seem to pop up. Let's tackle some of the questions I hear most often from fellow crafters.
Think of this as your quick-reference guide. It’s here to help you handle those tricky, real-world pricing decisions with a professional touch, making sure every project stays profitable.
How Much Should I Charge for a Standard Logo?
This is, without a doubt, the number one question. For a typical left-chest logo on a polo or the front of a hat—designs that usually fall between 4,000 and 8,000 stitches—a good starting point for smaller orders is anywhere from $8 to $15 per item. That range should comfortably cover your setup, materials, labor, and leave you with a healthy profit.
But remember, that's just a baseline. You always want to run the numbers through your own pricing formula to get a final price that truly reflects your costs. For larger orders, that per-item price will naturally come down as you factor in a bulk discount.
Should I Have a Minimum Order Requirement?
Yes, absolutely. Putting a minimum order charge in place isn't just a smart move; it's a necessary one for a healthy business. It ensures you get paid for the fixed time and effort that goes into setting up every single job, no matter how small. Without it, you’ll find yourself losing money on those little one-off projects.
A minimum charge is your best defense for profitability. For single-item requests, I'd suggest a dedicated "one-off" fee, something like $25 plus the embroidery cost. This makes the machine setup and your hands-on time truly worthwhile.
This policy makes it clear to customers that your setup process has real value, and it guarantees every project contributes to your bottom line.
How Do I Price Jobs with Specialty Materials or Fabrics?
Not all threads are created equal, and some fabrics can be a real pain to work with. Your pricing needs to reflect that extra cost and effort. You should always add a surcharge for jobs that require fussy materials or tricky garments.
Here’s how I handle it:
- Specialty Threads: When a customer wants something like metallic or 3D puff threads, I'll bump up the final embroidery price by 15% to 30%. These threads don't just cost more; they often force you to run the machine slower, which eats into your production time.
- Difficult Fabrics: For those challenging items—think thick Carhartt-style jackets, slippery silks, or bulky tote bags—a flat handling fee is the way to go. Adding a $1 to $3 surcharge per item is perfectly reasonable to make up for the extra labor and care it takes to hoop and sew them just right.
At B-Sew Inn, we believe real success comes from mixing creative passion with smart business sense. Our goal is to empower you at every step, with everything from custom sewing machine designs to hands-on online training. We’re here to give you the tools and support you need to turn your craft into a thriving venture.
Explore our full range of machines, supplies, and educational materials at https://www.bsewinn.com to take your work to the next level.