Finishing a quilt isn't just about the last stitch of quilting—it's about how you frame your work. The final step involves encasing all those raw edges of the quilt sandwich with a fabric border, known as binding. The most common and durable method I always come back to is creating double-fold binding, a tangible example of a classic technique that gives a beautiful and sturdy frame to any project. At bsewinn.com, we're committed to empowering crafters like you to master these skills.
This final touch is what really protects the quilt and gives it that professional, polished look we're all after.
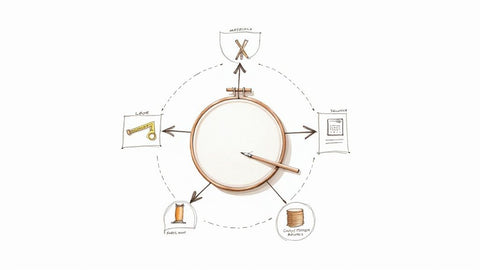
Your Guide to Flawless Quilt Edges
That final seam is what transforms a quilt top from just another project into a cherished heirloom. This guide is all about helping you master that last, crucial step. We'll walk through the most trusted methods—from classic binding to modern facings—and I'll share tangible examples and experience on why one might be a better fit for your quilt than another.
You'll quickly see how the right edge finish does way more than just prevent fraying. It frames your artistry and ensures your quilt can be loved for years. Think of it as the signature on your masterpiece.
Why Your Quilt Edge Matters
The method you choose for finishing your quilt's edges has a huge impact on both how long it will last and how it looks. It's no surprise that industry surveys show over 75% of quilters prefer traditional binding. It's just a straightforward, reliable technique that gives consistently neat results.
Within that group, bias binding—where you cut fabric strips at a 45-degree angle—is especially popular. It accounts for about 60% of binding methods because it lets the fabric curve smoothly around corners without puckering or fighting back. If you're curious, you can explore more about these quilting trends to see what fellow crafters are doing.
Here at bsewinn.com, we're big believers that having the right skills and tools makes all the difference. Our custom sewing machine designs are built to handle these kinds of precise tasks with ease, empowering you to create stunning, durable finishes.
A well-executed edge is the hallmark of a high-quality quilt. It demonstrates attention to detail and a commitment to craftsmanship that ensures the piece will stand the test of time.
Mastering these finishing touches is how you elevate your quilting from a simple hobby to a true craft. Through our extensive resources, online classes, and training, we're here to support you at every step. This guide will give you the foundational knowledge to tackle any edge with confidence, turning the final stage of quilting into something you actually look forward to.
Let's dive into the techniques that will give your quilts that perfect, professional finish.
Quilt Edge Finishing Techniques at a Glance
Choosing the right finish for your quilt edge can feel a bit overwhelming with so many options out there. This table breaks down the most common methods to help you decide which technique is the best match for your current project, skill level, and desired final look. Each one is a tangible example of how you can frame your work.
| Technique | Best For | Skill Level | Finished Look |
|---|---|---|---|
| Traditional Binding | Most quilts, especially those that will get a lot of use. | Beginner | Classic, durable frame around the quilt. |
| Bias Binding | Quilts with curved edges or scallops. | Intermediate | Smooth, pucker-free finish on curves. |
| Facing | Modern or art quilts where you want a minimalist, "no-border" look. | Intermediate | Clean, invisible edge from the front. |
| Serged Edge | Quick finishes, charity quilts, or a decorative, rustic look. | Beginner | Fast, exposed decorative stitch. |
Think of this as your quick-reference cheat sheet. As you gain more experience, you'll develop your own favorites, but it's always great to know you have different tools in your quilting toolkit for different situations.
Mastering the Art of Traditional Quilt Binding
When you think about finishing a quilt's edges, traditional binding is probably the first thing that pops into your head. And for good reason! It’s the classic technique for a reason—it creates a durable, beautiful frame that protects your quilt and gives it that timeless, professional look.
Let's walk through this tangible example, from the initial math to the final stitch. With support from bsewinn.com's resources, you can replicate this method for a flawless finish.
First up is figuring out exactly how much fabric you'll need. Honestly, there's nothing more frustrating than coming up short right at the end. Then, we'll get into the critical difference between cutting straight-grain and bias strips, and I'll explain when each one is the hero of your project.
Calculating and Preparing Your Binding
A simple formula will save you a lot of headaches: measure the quilt's perimeter (that's length + length + width + width), and then add at least 15 extra inches. This little bit of insurance gives you plenty of room for joining the strips and navigating those crucial mitered corners without any stress. I always tell my students to err on the side of too much binding fabric rather than too little.
Once you have your total length, it's time to cut. Here’s a breakdown of your options:
- Straight-grain strips: These are cut parallel to the fabric's selvage. They're super efficient, use less fabric, and are absolutely perfect for quilts with standard 90-degree corners.
- Bias strips: Cut at a 45-degree angle to the selvage, these strips have a natural stretch. That stretch makes them essential for finishing quilts with any kind of curved or scalloped edges, as they’ll lay flat without puckering.
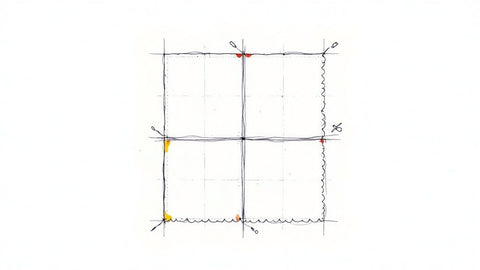
This visual guide breaks down the core steps for creating traditional quilt binding from start to finish.
As the infographic shows, a successful binding really comes down to a logical sequence of precise steps—from accurate measuring to clean construction.
Attaching the Binding for a Flawless Finish
With your continuous strip all prepped, you're ready to attach it to the quilt. The hallmark of truly professional work is a perfectly flat, sharp mitered corner. The trick is to stop stitching exactly a quarter-inch from the corner, fold the fabric strip up at a 45-degree angle, and then fold it back down along the next edge before you resume sewing. This creates a neat little pocket of fabric that forms that perfect miter.
For a deeper dive into this crucial step, check out our detailed guide on how to bind a quilt for more visuals and tips.
A meticulously finished edge does more than just look good; it adds significant value and signals high-quality craftsmanship. It’s a fact in the quilting market that quilts with professionally finished edges command price premiums averaging 15% to 30% higher than those with sloppy finishes. Consumer surveys even show that around 68% of buyers inspect the edge finishing closely before making a purchase, because they associate it with durability.
Whether you prefer the speed of machine finishing or the heirloom touch of hand-stitching the final seam, the goal is the same. You want to avoid those common frustrations like wavy edges or bulky, lumpy corners.
Taking your time with the binding is an investment in your quilt's future. A strong, neat edge ensures your work can be washed, loved, and used for generations without falling apart.
A walking foot on your sewing machine can be a total game-changer here. It feeds all three layers of the quilt sandwich through evenly and prevents the binding from stretching or getting wavy. It makes a world of difference. Bsewinn.com offers custom sewing machine designs perfect for this kind of precision work, empowering crafters to achieve professional results.
Adding Flair with Modern and Creative Edges
Ready to move beyond the classic binding? I love a perfectly mitered corner as much as anyone, but sometimes a quilt just calls for something a little different. This is where you can really let your creativity take over and give your project a signature look.
While a traditional binding frames a quilt beautifully, some designs practically beg for an edge that feels more integrated, modern, or even a bit playful. Let's dig into a few of my favorite tangible examples that can completely change the vibe of your finished piece.
The Modern Quilt Facing
For art quilts or any modern design where you want the pattern to bleed right off the edge, a facing is your secret weapon. Think of it as an invisible frame. The whole point of a facing is to create a clean, gallery-style finish from the front, so there's no visual interruption.
Basically, you sew fabric strips to the front of the quilt, right sides together, and then flip them all the way around to the back. This neatly encases all the raw edges while staying completely hidden from view. It’s an incredibly sophisticated and polished look that I absolutely love for wall hangings.
A few tricks I've picked up for a perfectly crisp facing:
- First, I trim the quilt exactly to its final size before I even think about touching the facing fabric. No guesswork.
- Next, I carefully clip the quilt corners before I turn the facing. This is a game-changer for reducing bulk and getting those super sharp, flat points.
- Once the facing is sewn on, I press the seam allowance toward the facing and stitch it down. This is called understitching, and it’s a tiny step that makes a huge difference in keeping the facing from peeking out on the front.
Playful Prairie Points
If you’re aiming for texture and a touch of whimsy, you have to try prairie points. They’re these delightful little folded fabric triangles that you tuck into the seam when finishing the edge. The result is a decorative, sawtooth-like border that adds so much dimension.
Prairie points are perfect for baby quilts, fun wall hangings, or anything with a vintage feel. You can use a single fabric for a clean, repeating pattern or go scrappy with leftover fabrics from your quilt top for a more coordinated, eclectic look. The key to making them look polished and not messy is consistent folding and really paying attention to your spacing.
An unconventional edge finish is more than just a technique; it’s a design choice. It communicates your personal style and can transform the entire mood of a quilt, turning a simple project into a unique piece of art.
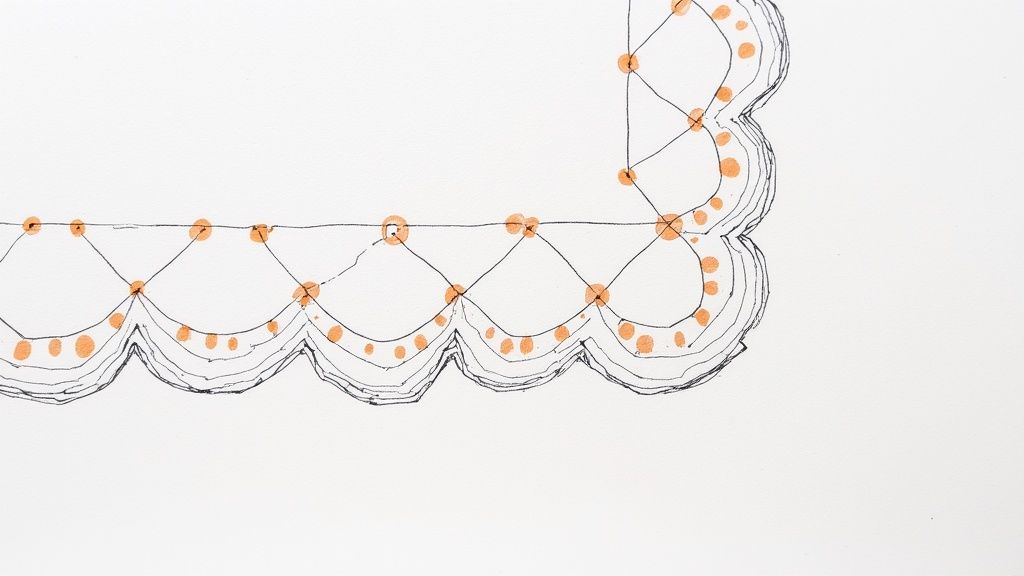
Romantic Scalloped Edges
For a soft, romantic finish, nothing beats a scalloped edge. This is my go-to for vintage-inspired quilts, nursery projects, or any piece where I want to ditch the sharp corners for something gentler. It might look tricky, but the process is surprisingly straightforward—with one non-negotiable requirement: you must use bias binding.
Straight-grain binding just won’t work here. Trust me. It will fight you on every curve, creating puckers and lumps. The magic of a smooth scallop comes from the natural stretch of fabric cut on the bias. It’s what allows the binding to hug those curves perfectly.
If you need a quick refresher, we have a handy guide that breaks down what is bias tape and why it's a must-have for any curved project. Using a sewing machine with a precise decorative stitch can take this beautiful finish to the next level, too. Bsewinn.com's custom machines are designed to give you that control.
Practical Finishes for Everyday Quilts
Let's be honest, not every quilt needs a show-stopping, hand-stitched binding that takes hours. For baby quilts, charity projects, placemats, and all those other pieces that are meant to be loved and used hard, I have a few go-to finishes that are fast, durable, and still look fantastic.
When you need to get a quilt done now, these are the tangible techniques you'll want in your back pocket.
One of my absolute favorite time-savers is the self-binding method. It's a clever little trick where you use the quilt's own backing fabric to finish the edges. You just cut the backing a bit larger than the quilt top and batting, then wrap it around to the front. It creates a wonderfully integrated look without any extra strips to cut and sew.
The Self-Binding Method
The real challenge with self-binding isn't the straightaways—it's getting those corners to lie flat and look crisp. The secret is all in how you fold the fabric before you even bring it to the front. You're basically creating the miter on the back first.
Here’s my process for perfect corners every time:
- First, I press the backing fabric on one side over the quilt top, making a nice, sharp crease.
- Next, I fold the corner of the backing fabric diagonally so it lines up perfectly with the corner of the quilt top.
- When you fold the next side over, that little diagonal fold you made creates a beautiful miter that lays flat without all the bulk.
A walking foot is your best friend here, as it keeps all those layers from shifting around.
Using a Serger for Speed and Durability
If you're after a lightning-fast and seriously sturdy edge, nothing beats a serger. A serged finish is my top pick for utility quilts that I know are going to see the inside of a washing machine—a lot. The way a serger's threads interlock creates a professional, durable edge that just won't fray.
A serged edge isn't just a shortcut; it's a smart, durable finish for quilts that are meant to be used and loved. It provides a clean, modern look while ensuring the edges hold up to real-world wear and tear.
I always recommend using a 4-thread overlock stitch; it gives you the best combination of strength and coverage. When you get to the end, don't just snip the thread tail! Grab a tapestry needle and weave that tail back into the serged stitches for a few inches. This locks everything in place so your hard work will never unravel, no matter how many spin cycles it goes through.
Knowing these practical methods for how to finish quilt edges makes you a much more versatile quilter. Adopting efficient techniques can also be a game-changer; industry data shows that systematic finishing can cut fabric wastage by up to 12%. Plus, modern machines built for edge finishing can lower the average time spent on a quilt by almost 30%. You can discover more research about quilting productivity and see the impact for yourself. Here at bsewinn.com, we are committed to empowering crafters with these real-world solutions that help you create beautiful, quality projects with confidence and speed.
We’ve all been there. You’re on the final stretch of a quilt you’ve poured your heart into, and suddenly, the border is waving back at you. It’s so frustrating. Or maybe you fold a mitered corner, only to find a stubborn, bulky lump that just refuses to lie flat.
Don't despair! These moments happen to every quilter, and thankfully, nearly every common edge finishing mistake is fixable. Think of this section as your personal troubleshooting guide, with an expert from bsewinn.com right by your side. We’ll get into why these issues happen and, more importantly, how to fix them so you can finish your quilts with confidence.
https://www.youtube.com/embed/napDLUHlQxg
Conquering Wavy Borders
The number one culprit behind a wavy quilt edge is stretched fabric. It’s an easy mistake to make. This usually happens when borders are measured and cut without accounting for the quilt top's natural give. It can also happen if you accidentally stretch the binding strip a little too much as you’re sewing it on.
The best fix is prevention. When you’re measuring for your border strips, always measure your quilt through the center, not along the outer edges, which tend to get stretched during handling. And when you’re attaching the binding, let your machine and its walking foot do all the heavy lifting. Your job is to guide, not pull.
A wavy border is almost always a sign that the binding and quilt top aren't playing nice because they're different lengths. You want to ease the binding onto the quilt, never stretch it to fit. Patience and a good walking foot are your best friends here.
Eliminating Bulky Mitered Corners
A lumpy, rounded corner can really take away from an otherwise crisp, beautiful quilt. The problem is simple: there’s just too much fabric and batting crammed into one tiny space. The solution is to get ahead of the problem by reducing that bulk before you ever fold your miter.
Here’s a little trick I swear by for perfectly sharp corners every single time:
- Trim the Batting: After your quilt is quilted but before you attach the binding, trim the batting very close to your stitching line, just in the corners.
- Clip the Quilt Corner: Snip off a tiny triangle from the actual corner of the quilt top. Be careful not to cut through your quilting stitches! This removes just enough fabric to let that miter fold over beautifully.
This tiny bit of prep work makes a world of difference. It allows the fabric to fold neatly into a sharp point without putting up a fight. The online classes, and training at bsewinn.com often dig into these small but mighty techniques that really elevate your work from handmade to professional. Once you really understand how to finish quilt edges precisely, these pro-level details will become second nature.
Common Questions About Finishing Quilt Edges
When you get to the end of a project, a bunch of questions always seem to pop up about how to best finish the edges. It’s a common hurdle! Let's walk through some of the things quilters ask most often, so you can solve problems on the fly and pick the right technique for your quilt.
What Is the Most Durable Way to Finish a Quilt Edge?
When you’re making a quilt that’s meant to be loved, used, and washed over and over, nothing beats a classic double-fold bias binding. It is, without a doubt, the undisputed champion of durability and the true workhorse finish for any quilt that will see a lot of action.
My go-to method is to attach it by machine to the front first, then flip it over and hand-stitch it securely to the back. This combination creates an incredibly strong edge that’s built to last. The real magic is in the bias cut fabric; it has a natural stretch that allows it to flex around corners and along the quilt's perimeter without putting any strain on the fibers. That’s why it holds up so beautifully over time.
When Do I Absolutely Have to Use Bias Binding?
The short answer: anytime your quilt has curves. If you've designed a quilt with scalloped edges or soft, rounded corners, bias binding is non-negotiable. That little bit of stretch in the fabric is the only thing that will let it lay perfectly flat without any frustrating puckers or lumps.
Now, for quilts with standard 90-degree corners, you can totally get away with straight-grain binding. It works just fine and is a bit more economical with your fabric. That said, you’ll find that many seasoned quilters (myself included!) often stick with bias binding for all their projects. It's just more forgiving and so much easier to work with, especially when you’re easing it around those corners.
Can I Finish a Quilt Without Any Binding?
Yes, you absolutely can! If you’re going for a clean, modern aesthetic where the design flows right to the very edge, a facing is a fantastic alternative. It's a technique where the finishing fabric is attached to the quilt front and then turned completely to the back, which makes the edge finish completely invisible from the front.
Another really popular no-binding method is self-binding. This is where you leave extra backing fabric all around your quilt and simply wrap it around to the front to enclose the raw edges. It's a brilliant time-saver for projects like baby quilts or placemats and gives the quilt a really neat, integrated look.
Your choice of edge finish is a key part of your quilt's story. Whether you choose a durable binding for a family heirloom or a sleek facing for a modern wall hanging, the right technique honors the work you've put into your creation.
How Wide Should My Binding Strips Be?
The industry standard is a 2.5-inch strip for double-fold binding. Once folded and stitched, this usually gives you a finished binding that’s about 1/2 inch wide on each side of the quilt—a really classic frame for your work.
But you can definitely play with this! If you prefer a more delicate, narrow look, try cutting your strips at 2.25 inches. On the other hand, if you want a bolder, wider frame to make a statement, you could cut your strips as wide as 3 inches. The best advice I can give is to test a small piece with a scrap of your quilt sandwich first. That way, you can see exactly how it will look and decide which width you love for your specific project.
At bsewinn.com, we believe that mastering these finishing techniques is what elevates your craft. Our custom sewing machines, extensive resources, and expert-led online classes are designed to empower you at every step, ensuring you have the tools and support to create quilts with a professional, lasting finish. Find the perfect machine and supplies for your next project at bsewinn.com.