Have you ever looked at a beautifully made garment and wondered how the maker achieved those perfectly smooth, curved edges on the neckline or armholes? The secret weapon is often bias tape. It’s a simple strip of fabric, but with a clever twist: it's cut at a 45-degree angle to the fabric's grain.
Unlocking Professional Finishes with Bias Tape
Think of it like this: a regular strip of fabric cut along the grain is stiff and rigid, with almost no give. But slicing it on the “bias”—that 45-degree angle—magically unlocks its natural stretch and flexibility. This simple change turns a basic fabric strip into the perfect tool for finishing any curved edge you can think of, from clothing to quilts.
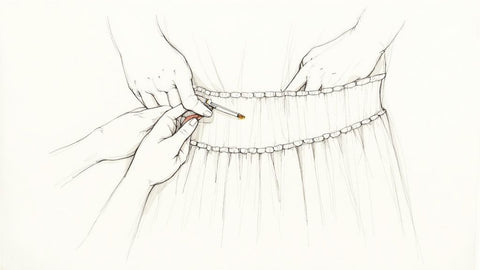
Bias tape neatly wraps around raw fabric edges, stopping them from fraying and giving them a clean, durable finish. It’s what takes a project from looking homemade to looking truly handmade and professional.
Here at bsewinn.com, we believe that mastering foundational skills is what gives you real creative freedom. This guide is designed to be a comprehensive resource, showing you exactly how to use bias tape to create stunning designs you can replicate at home. Getting the hang of this technique is one of those fundamental steps that really levels up your sewing game. It's one of the essential sewing notions that belongs in every sewist's toolkit.
Why Is It So Important in Sewing?
The real magic of bias tape is in its versatility. It’s not just a decorative trim; it’s a problem-solver that adds durability and a high-quality finish where you need it most.
- Cleanly Finishes Curved Edges: It’s the number one choice for necklines, armholes, and scalloped edges where a straight-grain strip would just pucker and refuse to cooperate.
- Adds Structural Support: You can use it as a facing to stabilize an edge without adding any noticeable bulk.
- Offers Creative Possibilities: Get creative! Use it to make casings for drawstrings, spaghetti straps, or even as a pop of contrasting color to make a design feature stand out.
When you learn to work with the fabric's natural stretch, you're not just finishing a seam—you're shaping the garment with precision. This is the kind of skill that really separates a basic project from a handmade treasure.
Our whole mission is to empower you with the skills and tools to bring your creative ideas to life. Whether it’s through our custom sewing machine designs or our extensive online classes and training, we’re here to support you. Mastering a simple tool like bias tape is a perfect example of how small skills can make a huge impact on your final piece, turning a good project into a great one.
Understanding Fabric Grain and the Bias Cut
To really get why bias tape is such a little miracle worker, we first have to talk about how woven fabric is put together. Picture a simple piece of cotton. It's built on a grid. You've got threads running lengthwise (the warp) and threads running crosswise (the weft). If you try to pull the fabric along these straight threads, you'll notice there's almost no stretch. It's stable, but pretty rigid.
That grid is great for strength, but it's not so great for curves. The secret to getting that beautiful, smooth finish on a curved edge lies in ignoring the grid completely.
The Power of the Bias
The bias is that diagonal line running at a perfect 45-degree angle to the warp and weft. When you cut fabric along this line, something almost magical happens. All that stiffness vanishes, and the fabric suddenly has a surprising amount of stretch and drape. It’s like turning a stiff piece of cardboard into a slinky; it can now bend and move in ways it couldn't before.
This newfound flexibility is the entire reason bias tape exists. By cutting the fabric strips on the bias, we unlock that natural elasticity. This allows the tape to gracefully follow any curve you throw at it—think necklines, armholes, or quilt edges—without any awkward puckering or bunching. As a bonus, cutting on the bias also helps minimize fraying, which is a huge help in creating durable finishes.
This stretch is precisely what makes bias tape the go-to for finishing curved edges. A strip cut on the straight grain would just fight you the whole way, but a bias-cut strip lays down flat and smooth for a clean, professional finish every time.
Getting a handle on this one concept is a total game-changer. It’s what separates a project that looks "homemade" from one that is beautifully handmade. Here at bsewinn.com, our goal is to give you that confidence. We don't just offer custom sewing machine designs; we provide the foundational knowledge you need to master techniques just like this one. Our online classes, training, and extensive resources are all about helping you bring your creative vision to life with a polished, professional touch you can be proud of.
Choosing the Right Type of Bias Tape
If you're new to bias tape, you might be surprised to find a few different kinds at the fabric store. Picking the right one isn't just a minor detail—it's key to getting that clean, professional finish we're all after. Using the wrong type can leave you with a bulky or flimsy edge, so let's break down the main styles you'll run into.
The two you'll see most often are single fold and double fold bias tape. They might look similar at first glance, but they're designed for completely different jobs. You definitely don't want to mix them up!
Single Fold vs. Double Fold
Single fold bias tape is pretty straightforward: both raw edges of the fabric strip are simply folded in once to meet right at the center. Think of it as your go-to for finishing an edge that’s going to be hidden on the inside of your project, like the facing on a neckline or an armhole. You'll stitch one side down, flip the tape to the inside of the garment, and stitch it again. The result is a neat, clean finish that isn't visible from the outside.
Double fold bias tape, on the other hand, takes it one step further. It actually starts out as single fold tape, but then it's folded in half again along the center. This creates a tidy "V" shape that's perfect for encasing a raw edge completely. This is what you want for any visible edge that needs to look good from both sides—think the hem of a sleeve, the border on a set of placemats, or the binding around a quilt. It gives you a durable, and often decorative, finish.
Comparing Common Bias Tape Styles
This quick reference guide will help you select the ideal bias tape for your specific sewing needs and desired finish.
| Bias Tape Type | Key Feature | Best For | Final Appearance |
|---|---|---|---|
| Single Fold | Edges are folded once to meet at the center. | Finishing raw edges that will be hidden, like facings or internal seams. | Creates a clean edge on the inside of a garment; not visible from the outside. |
| Double Fold | Single fold tape that is then folded in half again. | Binding and finishing visible raw edges, like quilts, hems, and blankets. | Encases the raw edge completely, providing a decorative and durable finish on both sides. |
Hopefully, seeing them side-by-side makes it clear which one to grab for your next project. It really comes down to whether the edge will be seen or not.
This infographic breaks it down visually, showing exactly how each type is constructed and where it shines.
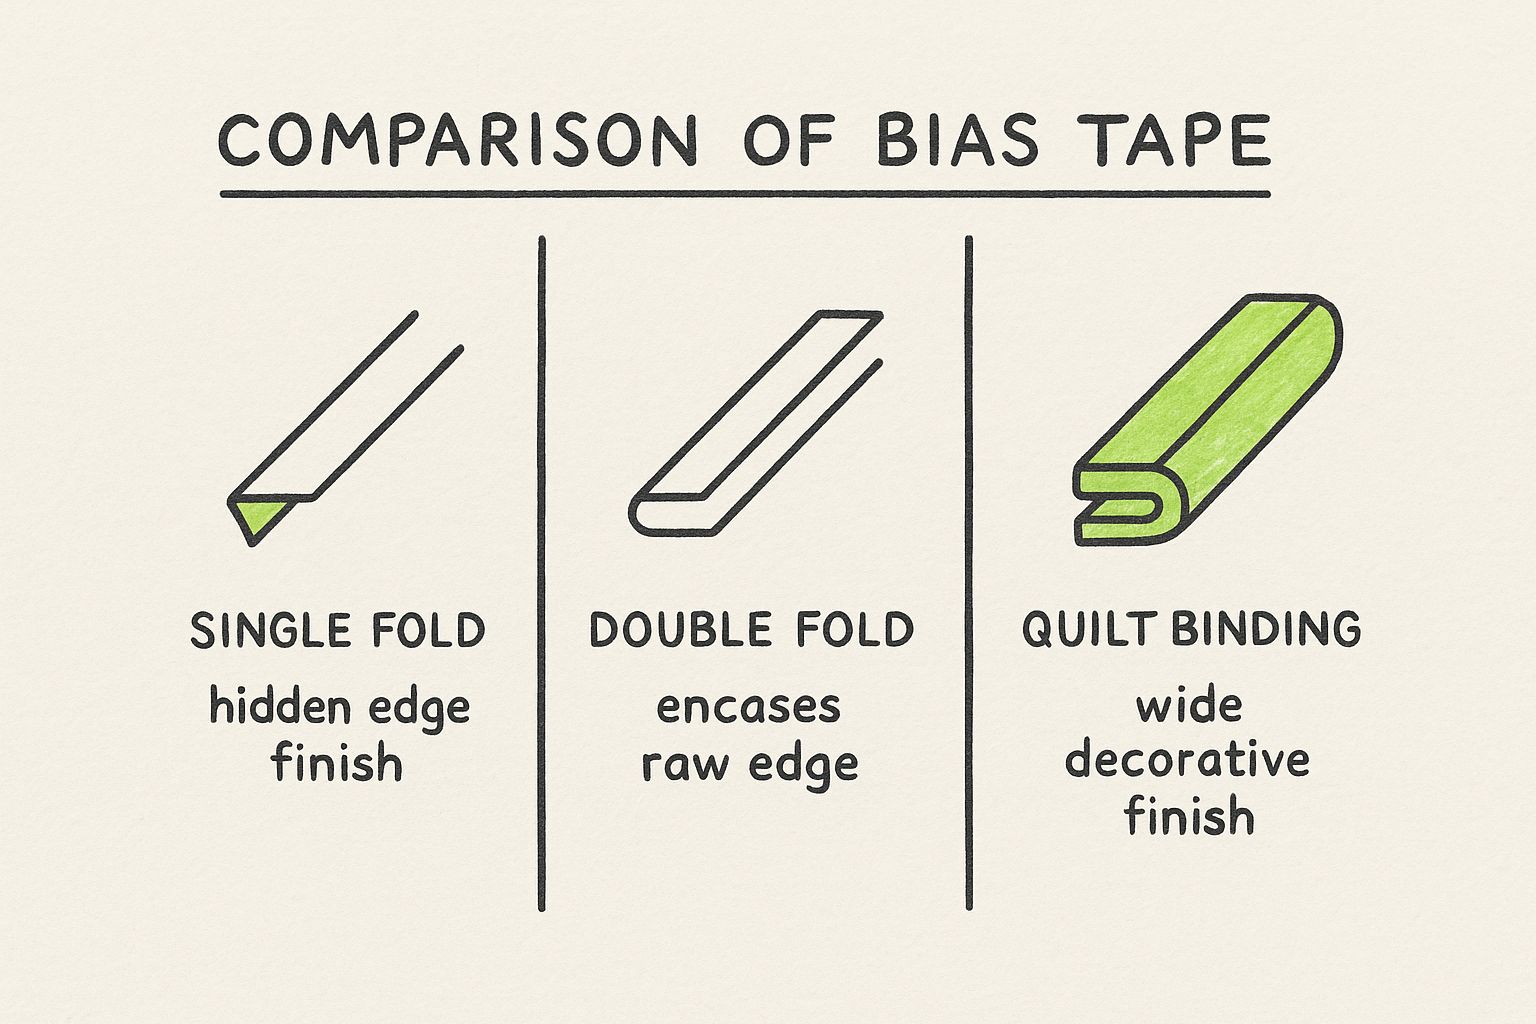
Sometimes a picture is worth a thousand words, right? Having a clear visual of the folds makes it so much easier to remember which is which.
And if you want to make applying bias tape practically foolproof, tools like an adjustable bias binder foot are a total game-changer. It guides the tape perfectly as you stitch, giving you flawless results every time. Here at bsewinn.com, we're all about empowering crafters by providing the custom sewing machine designs and support needed to master techniques just like this one.
Where You'll Actually Use Bias Tape
Okay, so we’ve talked about what bias tape is and the different kinds you can find. Now for the fun part: where can you actually put this stuff to work? This is where our how-to guide gets tangible, showcasing examples you can replicate. Bias tape is so much more than just a neat way to finish an edge. It’s a secret weapon that adds durability, comfort, and that polished, professional look to almost any project you can dream up.
Its real magic is in its flexibility. That stretchiness is exactly why it’s the go-to for creating flawless necklines on blouses and clean, comfy armholes on sleeveless tops. It gracefully bends with the fabric’s curve, preventing the awful puckering you’d get with a straight-grain strip. Honestly, this small detail is one of the hallmarks of a well-made garment.
From Your Wardrobe to Your Home
The applications for bias tape go way beyond just clothing. Ever admired the classic, sturdy edge on a handmade quilt? That’s almost always double-fold bias tape doing its thing. It neatly wraps around all the raw edges of the quilt top, batting, and backing, creating a beautiful and tough-as-nails frame. If you want to see exactly how it’s done, check out our guide on how to bind a quilt right here on the blog.
Looking for a few more tangible examples you can create?
- Durable Straps and Ties: Use it to create sturdy straps for a tote bag or delicate little ties for an apron or wrap dress.
- Decorative Accents: A pop of contrasting bias tape can create a stunning visual detail along a pocket edge or a hemline.
- Playmat Casings: It forms the perfect, durable channel for a drawstring on projects like a child's toy mat that doubles as a storage bag.
Bias tape isn't just for hiding messy edges; it's a core design element that adds both strength and style. When you get the hang of its different uses, you can create projects that aren't just pretty, but are built to last.
This incredible versatility is why it’s been a sewing room staple for ages. The basic concept is time-tested, ensuring that the skills you learn today will serve you for years to come.
Here at bsewinn.com, empowering you to create tangible projects like these is what we’re all about. Our custom sewing machine designs and deep-dive online resources are all created to help you master these techniques and bring every one of your creative ideas to life.
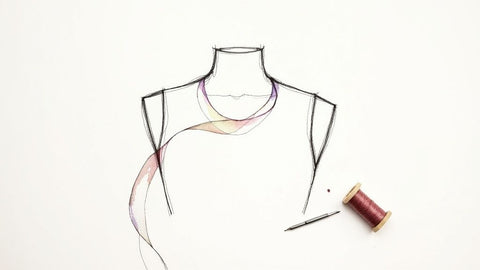
How to Make Your Own Custom Bias Tape
If you're after that perfect, polished finish, nothing quite beats making your own bias tape. This how-to section will walk you through creating a tangible product you can use right away. It’s the secret to getting a flawless fabric match for your main project, or you can go wild and introduce a pop of contrasting color or a unique pattern. It might sound a bit fiddly, but I promise, the process is surprisingly straightforward and incredibly satisfying.
This little skill lets you transform leftover fabric scraps into yards of beautiful, professional-quality binding. It's a fantastic way for any sewist to cut down on waste while adding a truly personal touch to their work.
Step 1: Finding and Cutting the Bias
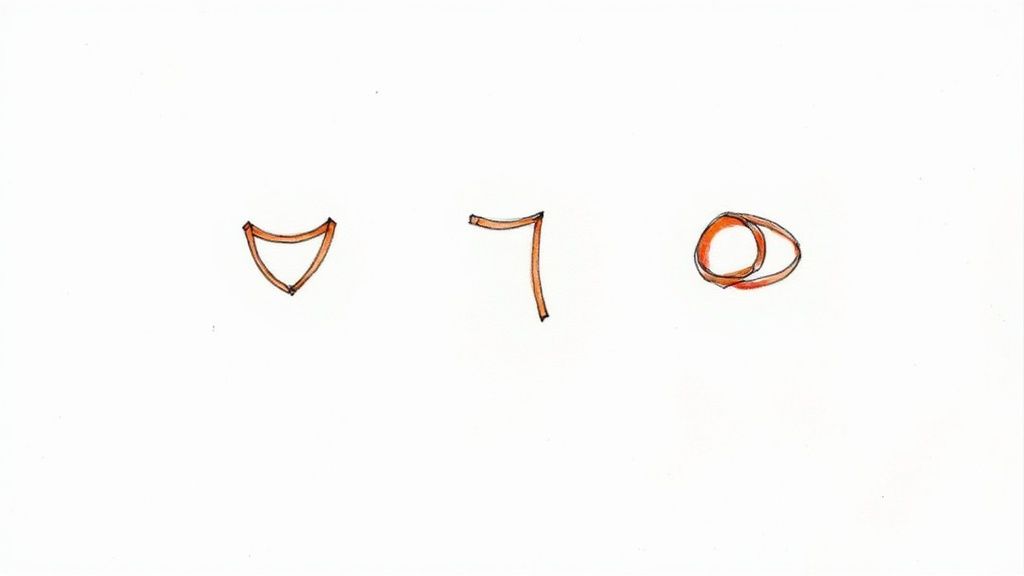
First things first, lay your square or rectangular piece of fabric out flat. To find what we call the "true bias," just take one corner and fold it diagonally until it lines up perfectly with the opposite straight edge. You'll end up with a big triangle.
That diagonal fold you just made? That’s your 45-degree bias line. Give it a quick press with the iron to create a nice, clear crease to follow. For the cleanest cut, grab a quilting ruler and a rotary cutter and slice right along that fold. This first cut sets the perfect angle for the rest of your strips.
Step 2: Cutting Continuous Strips
With that first diagonal edge established, you can now start cutting the rest of your strips parallel to it. How wide you make them is totally up to you and what your project needs. As a general rule, 1.5-inch strips are a great all-rounder size that works for tons of different applications.
To get one super-long, continuous piece, you'll need to join these shorter strips together. Here's how:
- Lay two strips with their right sides together, forming a 90-degree angle. Make sure the pointy ends hang over the edges just a little bit.
- Stitch them together on the diagonal, going straight from corner to corner.
- Trim off the extra seam allowance and press that seam open.
Keep doing this, and you'll be amazed at how quickly you can create a surprisingly long piece of bias tape from just a small bit of fabric.
Making your own bias tape is a gateway to true project customization. It transforms your sewing from following a pattern to creating a one-of-a-kind piece, which is the core of the creative empowerment we champion at bsewinn.com.
Step 3: Folding with a Bias Tape Maker
The final step is getting those neat folds that turn your fabric strip into proper single or double fold tape. You can do this by hand with just an iron, but a handy little gadget called a bias tape maker makes the whole thing faster and practically foolproof.
All you have to do is feed your fabric strip—wrong side facing up—into the wide end of the tool and gently pull it out through the narrow end. As it comes out, the tool magically folds the raw edges in toward the center. Just follow along with your iron, pressing the creases as you go to set them in place.
Once you’ve got this skill down, you’ll never be limited by what the store has in stock again. Our goal at bsewinn.com is to arm you with these kinds of techniques and provide the support you need, through our classes and resources, to bring your unique creative vision to life from start to finish.
Your Bias Tape Questions, Answered
Even after you get the hang of it, bias tape can throw a few curveballs. I've been there! Think of this as your personal troubleshooting guide for those common little hiccups that pop up when you're in the middle of a project.
Nailing these small details is what takes a homemade project and gives it that polished, professional feel. My goal is to give you the practical tips you need to sew with total confidence.
How Do I Stop Bias Tape from Puckering on Tight Curves?
Oh, the dreaded pucker. We've all fought this battle, especially on tricky spots like a baby bib's neckline or a sharp armhole. The secret is to gently stretch the bias tape as you pin it in place, but—and this is important—don't stretch the main fabric you're sewing it to. This little bit of tension coaxes the tape to hug the curve instead of fighting it.
A few other tricks that help are using plenty of pins and taking your time at the machine. Slow and steady wins the race here. I also like to shorten my stitch length to around 2.0 mm. It gives you more stitches per inch, which means more control and a smoother finish around the bend.
Here's my pro tip: shape the bias tape with your iron before you even get to your sewing machine. Gently press it into a curve that mimics the edge you're finishing. This pre-shaping step is a game-changer and does most of the hard work for you.
Can I Use Bias Tape on Straight Edges?
You absolutely can! While its flexibility is what makes it a superstar on curves, bias tape works beautifully on straight edges, too. In fact, that little bit of built-in give creates a softer, less rigid finish than a standard straight-grain fabric strip would.
It’s one of my favorite go-to finishes for things like:
- Finishing Hems: It adds a clean, durable edge without the bulk you get from a traditional double-turned hem.
- Creating Decorative Edges: A pop of contrasting bias tape on a placemat or tea towel is such a simple way to add a custom look.
- Making Casings: It's the perfect shortcut for creating a channel for a drawstring on a simple project bag.
What Is the Best Way to Join Bias Tape Ends?
For that truly invisible, store-bought finish, a diagonal seam is the only way to go. Joining the ends this way distributes the bulk of the seam allowance, making it way less noticeable than a clunky, straight-across join.
It sounds fancy, but it's actually pretty simple. Here’s how I do it:
- Overlap the two ends of your tape at a 90-degree angle, right sides together.
- Grab a ruler and pen and draw a diagonal line from corner to corner where the two strips cross.
- Stitch right on that line.
- Trim the extra fabric about ¼ inch away from your new seam and press it open with your iron.
That's it! You've just created a continuous loop of bias tape that lays flat and blends right in. Mastering these little techniques is what we love to teach at bsewinn.com, because they make all the difference in your finished projects.
Ready to elevate your sewing projects with flawless finishes? At B-Sew Inn, we empower crafters by providing the custom sewing machine designs, extensive resources, and expert training you need to master techniques like applying bias tape. Explore our online classes and tools today and bring your creative vision to life. Visit us at https://www.bsewinn.com to get started.