Ever wonder what gives a shirt collar its perfect crispness? Or how a handmade bag manages to stand up on its own instead of flopping over? The secret ingredient is often fusible interfacing.
Think of it as a hidden support system for your fabric. It's a special type of textile with a heat-activated adhesive on one side. When you press it with an iron, it bonds to your main fabric, giving it stability, body, and strength without a lot of extra bulk.
The Secret Ingredient for Professional-Looking Projects

This simple step is what really separates a project that looks "homemade" from one that looks impeccably crafted and professional. When you iron fusible interfacing onto your fabric, it becomes one with the material, adding structure right where you need it.
At its heart, fusible interfacing is a key component used all over the garment industry to reinforce fabric without adding extra sewing. Back in the day, sew-in interfacings were the only option. This meant carefully stitching another layer into the garment, which really added to the construction time. The game changed in the 20th century with the invention of heat-activated adhesives, which made the whole process faster and easier for both big manufacturers and home sewists like us. If you're curious about the nitty-gritty of how these materials have evolved, you can find some interesting insights on the interlining market here.
Why It's a Game-Changer for Your Sewing
Learning how to use interfacing correctly is one of those fundamental skills that will truly elevate your sewing game. It’s one of the essential sewing notions that provides critical support for all sorts of garments and accessories.
For any crafter who wants that polished, store-bought finish, understanding fusible interfacing is a must. It's the magic behind:
- Crisp collars and cuffs that keep their shape wash after wash.
- Sturdy buttonholes and plackets that won't stretch out or tear with use.
- Tote bags and purses with enough body to stand up on their own.
- Delicate or stretchy fabrics that become stable and much easier to cut and sew.
Once you get the hang of using interfacing, you gain the power to control how your fabric behaves. It ensures every single piece you create looks durable, well-structured, and expertly made.
Here at bsewinn.com, we are committed to empowering crafters. Through our extensive resources, online classes, and training, we offer the support you need to confidently use tools like fusible interfacing. Our goal is to help you turn your creative ideas into beautiful, tangible results with your custom sewing machine designs.
Choosing the Right Type of Fusible Interfacing
Walking into a fabric store and seeing the wall of interfacing options can feel a bit overwhelming, kind of like standing in front of a candy store with way too many choices! But don't let it intimidate you. Just like you wouldn't use a delicate silk thread for heavy denim, the key is matching your interfacing to your fabric. Picking the right one is your first step to getting that crisp, professional finish you're after.
The three main players you'll encounter are non-woven, woven, and knit interfacing. Each one has its own personality and purpose, and understanding how they differ is what separates a good project from a great one.
The Three Main Types Explained
Let's start with non-woven interfacing. Think of it like a really sturdy paper towel. It’s made from fibers that are pressed and bonded together, which means it has no grain direction at all. You can cut it any which way you please without worrying about lining it up with your fabric's grain. This makes it incredibly efficient for quick jobs or reinforcing smaller pattern pieces where you just need some stability without the fuss.
Next up is woven interfacing. This type behaves just like regular fabric because, well, it is woven fabric. It has a distinct grainline that you absolutely need to match to your main fabric's grain. The real beauty of woven interfacing is how it preserves the natural drape and movement of your fashion fabric. It adds stability without making your garment feel like cardboard, making it the perfect partner for projects where you want to maintain a soft, fluid hand.
Finally, we have knit interfacing. Picture your favorite stretchy t-shirt—that's the soul of knit interfacing. It has built-in stretch, designed to move and flex right along with fabrics like jersey, spandex, or other knits. Using this type ensures your finished garment can stretch comfortably without the interfacing causing weird puckers or, even worse, breaking.
To really see what I mean, this little infographic breaks down their key properties like grain and stretch.
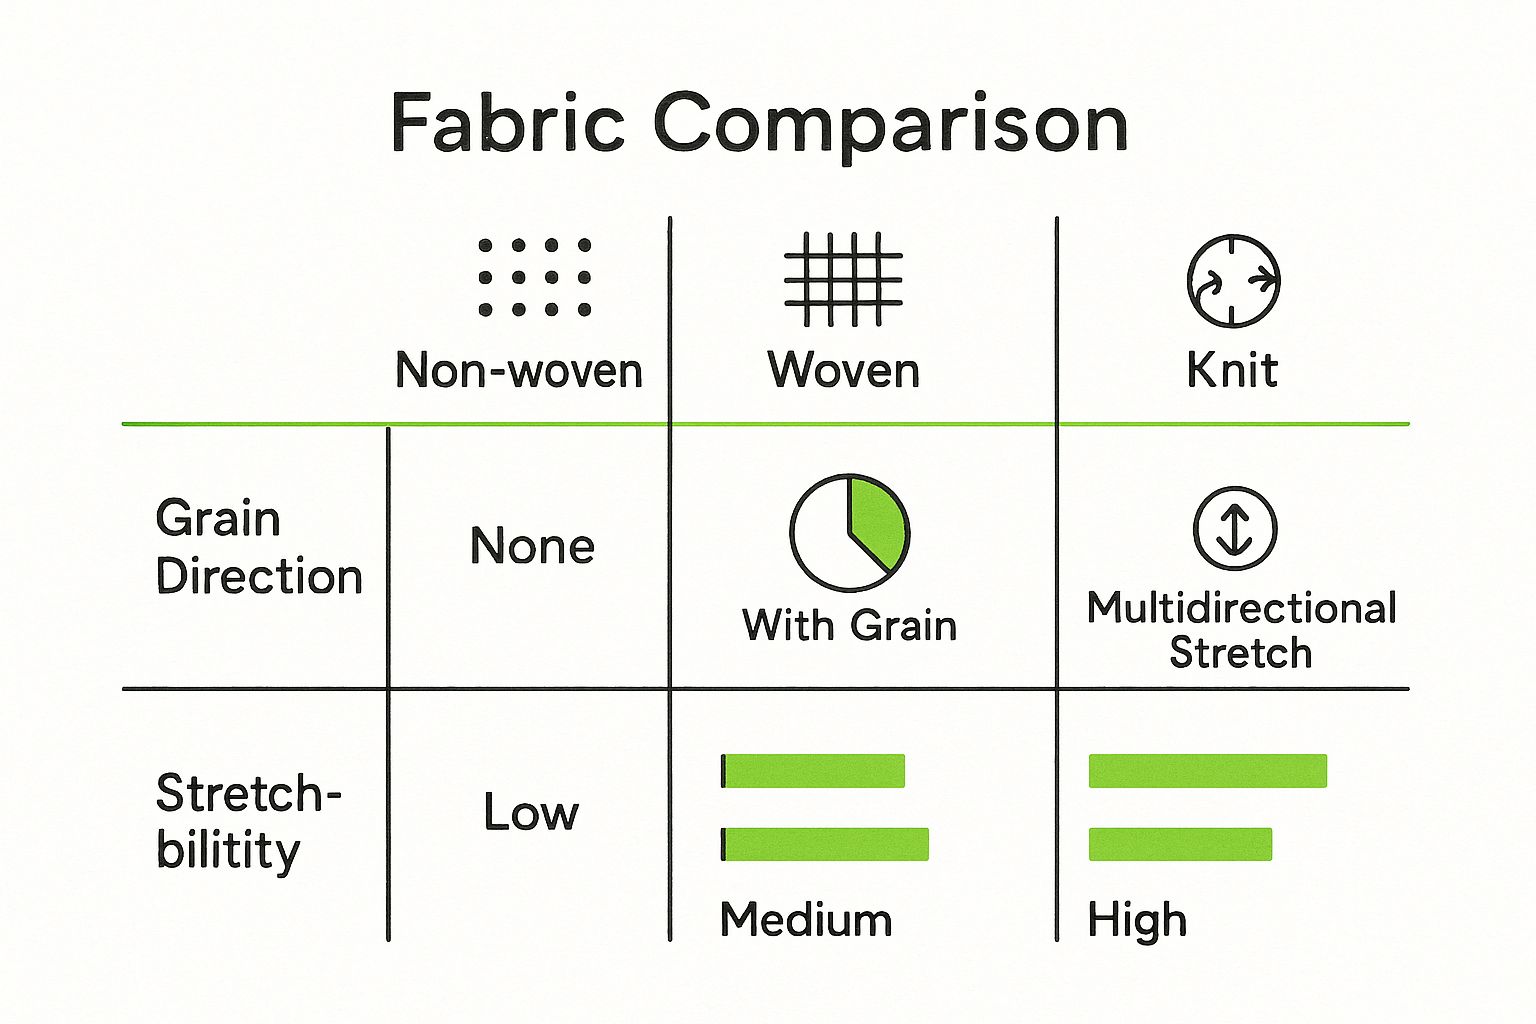
As you can see, non-woven offers zero stretch, woven gives you a little give on the bias, and knit is made for movement. It’s all about picking the right tool for the job.
To make this even easier, I've put together a quick comparison table to help you decide at a glance.
Choosing the Right Fusible Interfacing for Your Project
| Interfacing Type | Key Characteristic | Best For Adding | Ideal Fabric Pairings | Common Projects |
|---|---|---|---|---|
| Non-Woven | No grain, no stretch, paper-like feel | Crispness, body, and structure | Woven fabrics that don't stretch | Collars, cuffs, facings, bags, crafts |
| Woven | Has a grain, drapes like fabric | Soft structure, support without stiffness | Light to medium-weight woven fabrics (cotton, linen, silk) | Blouses, dresses, tailored jackets, waistbands |
| Knit | Built-in stretch, soft and flexible | Flexible support, stabilizing without restricting | Knit and stretch fabrics (jersey, spandex blends, French terry) | T-shirts, knit dresses, activewear, stretchy waistbands |
This table should serve as a handy cheat sheet when you're standing in front of that interfacing wall, trying to make a decision.
Finding the Perfect Weight
Beyond the type of interfacing, you also need to think about its weight. They generally come in three weights: lightweight, medium-weight, and heavyweight. The golden rule is simple: your interfacing should always be slightly lighter than your main fabric.
- Lightweight: This is your go-to for delicate and sheer fabrics like chiffon, voile, or silk. It adds just a whisper of support without messing with the fabric's beautiful drape.
- Medium-weight: The workhorse of interfacing. It’s perfect for all-purpose fabrics like cotton, linen, and poplin, providing noticeable structure for things like collars, cuffs, and button plackets.
- Heavyweight: Save this one for the really sturdy projects. Think tote bags that need to stand on their own, fabric boxes, or the brim of a hat where you need maximum stiffness.
Choosing the right interfacing is a lot like picking a stabilizer; both are all about adding crucial support to get the best results. If you want to dive deeper into that topic, we have a whole article on choosing the right stabilizer for your sewing needs.
Remember, the goal is to enhance your fabric, not overpower it. Always test a small scrap first! Fusing a small piece will tell you everything you need to know about the final feel before you commit to the whole project. This tiny step can save you from a stiff, unwearable garment.
What Interfacing Really Does for Your Sewing
You might be looking at interfacing and thinking, "Do I really need to add another step?" I get it. But trust me, once you understand what fusible interfacing is and how to use it, it’s a total game-changer. It’s the kind of thing that takes your projects from looking pretty good to looking great. And it does so much more than just make fabric stiff.
Think of fusible interfacing as your project's secret weapon. It’s the hidden support system that gives you those high-quality, long-lasting results. We've all been there—you're working with a delicate fabric and it starts stretching out of shape right under the needle. It's frustrating! Interfacing is like a trusted partner that holds everything together exactly as it should.
Get That Professional, Store-Bought Look
One of the first things you'll notice is the crisp, professional finish it gives to the details. That sharp, structured look you see on collars, cuffs, and waistbands that don't wilt or roll over time? That's interfacing at work. Without it, those parts of a garment would just be limp and look, well, homemade.
It also adds crucial strength to areas that see a lot of action. By adding that extra layer of stability, you’re making sure that:
- Buttonholes don’t stretch out, pucker up, or tear after a few uses.
- Zippers lie flat and smooth, without that wavy, warped look in the surrounding fabric.
- Pockets and bag openings keep their shape and can actually handle daily wear and tear.
Interfacing is the invisible detail that makes all the difference. It's what separates a garment that looks handmade from one that looks impeccably tailored, adding quality and longevity you can actually see and feel.
Turning Sewing Frustrations Into Wins
Picture this: you've just finished a gorgeous silk blouse, but the button placket gets all stretched out and gapes open after just one wash. Or maybe you've sewn a super cute tote bag that collapses into a sad, shapeless heap the moment you set it down. These are the exact sewing headaches that fusible interfacing was made to fix.
Here at bsewinn.com, our commitment is to empower you to sidestep these problems. Our extensive training, online classes, and other resources are designed to give you the skills to choose and use the right materials. When you master a tool like this, you gain so much more control over your fabric, ensuring every project you create with your custom sewing machine designs is not just beautiful, but also built to last.
How to Apply Interfacing Without Bubbles
We’ve all been there: you spend ages cutting your pattern pieces perfectly, only to end up with a bubbly, wrinkled mess after fusing your interfacing. It's frustrating! But getting that smooth, professional finish is where the real magic happens.
Thankfully, you can get a flawless result every time by following a few simple but crucial steps. It really all comes down to understanding that applying fusible interfacing isn’t like regular ironing—it’s about pressing, not gliding.
Preparing for a Perfect Bond
Before you even plug in your iron, a little prep work will save you a world of headaches. Always start by pre-washing and drying your fabric. This gets rid of any sizing and pre-shrinks the material so it won't pucker up and ruin your beautiful interfacing job later on.
Next, cut your fabric and interfacing. The interfacing piece should be the exact same shape as your pattern piece. Remember, it has a "right" and a "wrong" side. The adhesive side is the one you want facing your fabric—it usually feels bumpy or has a slight sheen from the little dots of glue.
Lay your fabric piece wrong-side-up, then place the interfacing on top with the bumpy, adhesive side facing down. Double-check this part! Getting it wrong means a sticky, melted mess all over your iron.
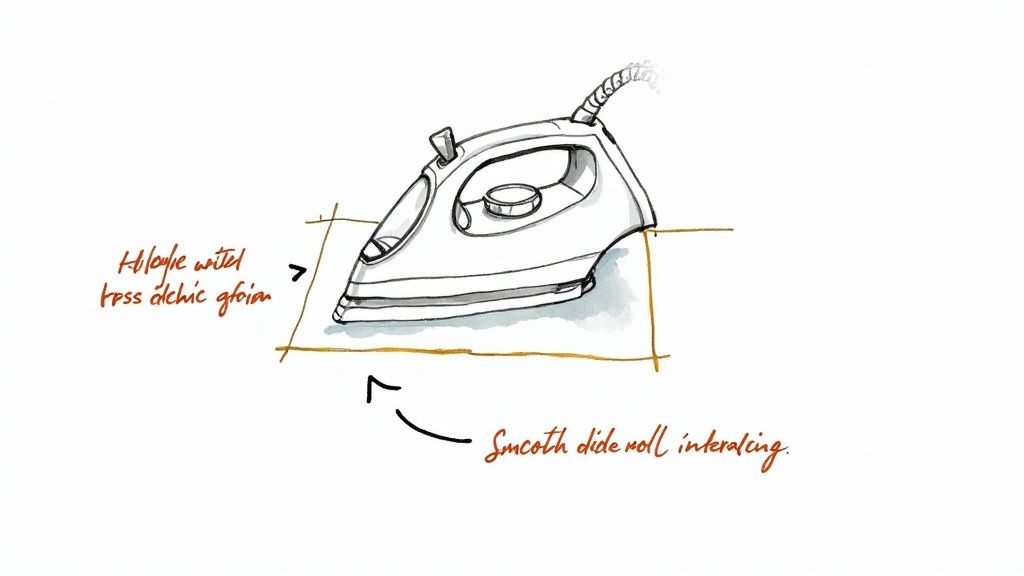
The Correct Pressing Technique
Now for the main event. The single most important rule is to press and hold. Don't slide the iron back and forth like you’re ironing a shirt. That's a surefire way to stretch the fabric and shift the interfacing, which is exactly what causes those annoying bubbles.
Here’s the step-by-step for a perfect application:
- Set Your Iron: Check the manufacturer's instructions for the right temperature. Most interfacing will specify a setting, often with steam.
- Use a Press Cloth: Don’t skip this! A thin, dry piece of cotton muslin or scrap fabric placed between the interfacing and your iron is a must. It protects your project from scorching and prevents any adhesive from getting on your iron plate.
- Press and Hold: Place the iron on one section of the interfacing and press down with firm, even pressure. Hold it still for 10-15 seconds. No wiggling!
- Lift and Overlap: Lift the iron straight up, move it to the next section, and slightly overlap the spot you just pressed. Continue this lift-and-press motion until the entire piece is fused.
The "press and hold" method is non-negotiable for a strong, even bond. It allows the heat to penetrate evenly and melt the adhesive completely, creating a secure attachment without distorting your fabric.
Final Steps for a Flawless Finish
Once you've pressed the entire piece, fight the urge to pick it up and inspect your work right away. Let the fabric cool down completely right there on your ironing board. This cooling-off period is what allows the adhesive to fully set and create that durable bond we’re after.
If you move it while it’s still warm, you risk weakening the glue.
Getting the heat and timing just right is key. For a deep dive into working with heat-activated materials, check out this Your Essential Heat Press Temperature Guide.
Mastering this technique will give you so much more confidence in your sewing. Of course, having the right tools helps, too! A quality iron and a good pressing cloth make all the difference. For more ideas on what to stock in your sewing kit, take a look at our list of the top sewing tools for beginners.
Troubleshooting Common Interfacing Problems
Even when you follow all the steps, sometimes fusible interfacing just doesn't want to cooperate. It’s frustrating, but don't give up! Most of the little hiccups you'll run into are surprisingly easy to fix. Once you know what causes these common problems, you’ll be able to save your project and master this essential sewing skill.
The number one culprit? Bubbling. This is when the interfacing doesn't create a smooth, flat bond with the fabric, leaving you with annoying ripples. This almost always happens from uneven heat or, my pet peeve, sliding the iron instead of pressing it firmly. A weak bond where the interfacing just peels away is another common issue, usually caused by an iron that isn’t hot enough or not holding the press long enough to melt the glue.
Solving Top Interfacing Issues
When things go wrong, a little patience and troubleshooting can get you right back on track. Let's tackle the top issues head-on with some simple, effective solutions I’ve learned over the years.
-
Problem: The Bubbles. You press your piece, and it comes out looking bubbly or rippled.
- The Cause: This usually means the heat was spotty, or you moved the iron around too much. Another possibility is that the fabric wasn't pre-shrunk, so it puckered up the second the heat hit it.
- The Fix: Try pressing the area again with a press cloth, making sure you hold the iron completely still for a full 10-15 seconds. If that doesn’t smooth things out, you might have to carefully peel the interfacing off while it's still warm and start fresh with a new piece.
-
Problem: It Won’t Stick. The interfacing peels right off after it cools down.
- The Cause: Your iron likely wasn't hot enough, or you didn't press down long enough for the adhesive to fully melt and grab onto the fabric fibers.
- The Fix: Double-check the manufacturer's instructions for the recommended heat setting. Turn your iron up just a tad and press the area again, but this time, hold it in place a little longer.
When the Fabric Feels Too Stiff
What happens if the interfacing sticks perfectly, but now your beautiful, drapey fabric feels like a piece of cardboard? This isn't an application error—it's a selection issue. It’s a dead giveaway that the interfacing you chose is too heavy for your fabric.
Unfortunately, there's no magic fix for this one besides removing the interfacing and starting over with a lighter-weight option. It really drives home how important it is to pick the right product from the get-go.
Fusible interfacing is a massive part of the global garment interlining market, which is on track to hit over USD 5.2 billion by 2028. With so many products out there, it's easy to see how you can grab the wrong one. You can read the full research about the interlining market to get a sense of just how big this industry is.
Pro Tip: Always, always, always test your fusible interfacing on a small scrap of your project fabric first. This simple five-minute step can save you hours of frustration and stop you from accidentally ruining a gorgeous cut of fabric.
This is the kind of practical, proactive approach we believe in at bsewinn.com. By arming you with the knowledge to see these challenges coming and solve them, our online classes and extensive resources help you build your skills and sew with total confidence, especially when using our custom sewing machine designs.
Project Ideas to Showcase Your New Skills
Alright, you've got the theory down. Now for the really fun part—making something! This guide serves as a great starting point for creating your own sewing machine designs. Let's walk through a few tangible examples that you can replicate where fusible interfacing isn't just an add-on; it's the star of the show.
These projects are perfect opportunities to practice what we've covered and create something you'll genuinely love to use or wear.
Create a Structured Tote Bag
Ever wondered how some tote bags stand up proudly on their own while others just flop over? The secret is almost always a heavyweight non-woven fusible interfacing. When you apply this to your main fabric panels, it gives the bag the body it needs to hold its shape, even when it’s empty.
This tangible example shows the difference between a simple fabric sack and a sturdy, professional-looking tote—a fantastic project to replicate with your sewing machine.
Sew a Crisp Button-Down Shirt
That sharp, polished look on a button-down shirt? It’s all in the details. By using a lightweight woven interfacing on the collar, cuffs, and button placket, you give those areas just enough structure to stay crisp without looking stiff. It prevents wilting and sagging while letting the rest of the fabric drape naturally.
These small reinforcements are what elevate a garment from homemade to impeccably tailored. They're a testament to quality craftsmanship and a detail that makes your work stand out.
Craft a Tailored Waistband
There's nothing more frustrating than a waistband that rolls, bunches, or collapses. For skirts and trousers, applying a strip of medium-weight woven interfacing to the waistband piece is a game-changer. It provides stability, prevents stretching, and ensures a comfortable, flattering fit that holds up wash after wash.
The demand for these essential materials is huge. In fact, the garment interlining market, which is driven by fusible products, was valued at over USD 3.24 billion in 2022 and just keeps growing. If you're curious, you can learn more about the growth of the bonding materials market here.
Let these ideas get your creative wheels turning! At bsewinn.com, we are all about empowering crafters with this kind of hands-on learning. We're here to offer the support and resources you need—from online classes to custom sewing machine designs—to tackle your next masterpiece with total confidence.
Got Questions About Fusible Interfacing? Let's Get Them Answered.
Even when you've got the basics down, a few practical questions always seem to pop up the first few times you work with a new material. Don't worry, it happens to all of us! Here are some quick, clear answers to the things I get asked most about handling fusible interfacing.
Can I Wash a Garment with Fusible Interfacing?
Yes, absolutely! Most fusible interfacings are made to handle a trip through the washing machine and dryer just fine. That said, it's always a good habit to glance at the manufacturer's care instructions that come with the bolt or package.
For the best, longest-lasting results, I always recommend pre-washing your main fabric before you apply the interfacing. This little step prevents any weird shrinking or puckering down the line. When you do wash the finished piece, a gentle cycle and lower dryer heat will keep that bond strong for years to come.
What Happens If I Iron the Wrong Side?
Oh, the dreaded sticky iron! If you accidentally press the adhesive side of the interfacing directly, you'll have a gooey mess on your hands (and on your iron). First things first: don't panic! Unplug the iron and let it cool down completely.
Once it's cool, you can usually clean off the gunk with a commercial iron cleaner. This is a super common mistake, but it's also easy to avoid. Just get in the habit of double-checking that the bumpy, adhesive side is facing your fabric before you bring the heat.
If I can give you one piece of advice that will save countless projects, it's this: always test on a scrap first. A quick press on a small swatch of fabric and interfacing will confirm your heat settings are right and prevent a project-ruining mistake.
Do I Always Need to Use Steam?
This really boils down to the specific interfacing you're using. Many of the go-to products out there need a good shot of steam to fully activate the adhesive and create that strong, permanent bond. But then you have others that are specially made to be applied with a dry iron.
Your best bet? Always read the instructions that came with your interfacing. They'll tell you the perfect temperature and whether you need steam or not. Following those directions is the secret to a perfect application every time.
Ready to take your projects from good to great with the right tools and support? At B-Sew Inn, we've got everything from top-quality sewing machines to expert training, helping you master skills like applying fusible interfacing with total confidence. Come explore our collection and find the perfect supplies for whatever you're dreaming up next.