

Dipping your toes into the world of digital embroidery can feel like a huge leap, but I promise it's more straightforward than it seems. The best embroidery software for beginners is like a creative director for your sewing machine, giving it a clear, stitch-by-stitch plan to bring your ideas to life. Let's pull back the curtain and turn that feeling of complexity into pure creative confidence.
Your First Step Into Digital Embroidery
Think of embroidery software as the critical link between your imagination and a finished project you can actually hold. It’s the digital command center where you tell your embroidery machine exactly what to do—which colors to lay down, what shapes to form, and how to place every single stitch perfectly. Without it, your machine is just a powerful tool waiting for its marching orders.
Here at B-Sew Inn, we get it. New technology can feel a little intimidating at first. That’s why we’re so passionate about empowering you from your very first click. We’ve built our entire support system to guide you through this learning curve, making sure you feel capable and excited, not overwhelmed. Through our custom sewing machine designs, online classes, and extensive resources, we are committed to helping you succeed.
Why Software Is Your Most Important Tool
Embroidery software isn't just one single program; it's a whole family of tools, each designed for different creative tasks. Some programs are perfect for arranging letters into a beautiful monogram. Others help you mix and match existing designs or resize them to fit your project. And the most advanced software? That lets you turn a hand-drawn sketch into a stitchable file right from scratch.
The key is finding the right tool for the job you want to do.
It’s an amazing time to jump in. The global embroidery software market was valued at an incredible USD 3,167.70 million in 2023 and is expected to keep growing. What does that mean for you? It means more competition, which leads to better, more user-friendly, and more affordable options for hobbyists just like us. It's a win-win!
At its heart, embroidery software is all about giving you control. It lets you see a preview of your work, catch mistakes before a single thread is stitched, and make sure your final project looks exactly like you pictured it. It’s a huge time-saver that cuts down on waste and unlocks your creative potential.
To help you get the hang of things quickly and without frustration, it's useful to understand a little bit about adult learning theory principles. Our approach at B-Sew Inn is built on these ideas. We offer online classes and training that respect your personal pace and learning style, providing the resources and expert backup you need to make your first project a roaring success. We're here to help you turn that initial spark of an idea into a beautifully embroidered reality.
Choosing Your First Embroidery Software
To help you find the right tool for your creative goals, here’s a quick look at the main types of software and what they’re best for.
| Software Type | Primary Purpose | Best For Beginners Who Want To... |
|---|---|---|
| Editing Software | Modify, combine, or resize existing embroidery designs. | ...personalize pre-made designs and get comfortable with basic functions. |
| Digitizing Software | Convert images or drawings into stitchable embroidery files. | ...create completely custom, from-scratch designs from their own artwork. |
| Lettering/Monogramming Software | Create text-based designs using built-in fonts and layouts. | ...add names, initials, and custom text to projects quickly and easily. |
| Utility Software | Convert file formats and manage design libraries. | ...organize their design collection and ensure compatibility with their machine. |
Each type serves a different purpose, so think about what you want to create first. Most beginners start with editing or lettering software before exploring the more advanced world of digitizing.
Decoding The Different Types Of Embroidery Software
Jumping into the world of embroidery software can feel a little like walking into a massive craft store for the first time—you see endless aisles of amazing tools, but which one is actually right for your project? When it comes to software, not everything is created equal. Knowing the main categories is the secret to investing your time and money wisely.
Think of it this way: you wouldn't use a tiny paintbrush to paint an entire wall, and you wouldn't use a giant roller for fine details. The same logic applies here. Each type of software is built for a different job, from dreaming up a design from scratch to just adding a quick personal touch.
Digitizing Software: The Creator's Toolbox
This is the big one, the software that gives you the power to create embroidery designs from the ground up. Have you ever wanted to stitch your child’s sweet drawing onto a blanket or turn your business logo into a professional-looking patch? Digitizing software is how you make that magic happen.
It basically acts as a translator, turning a normal picture (like a JPG or a PNG) into a special stitch file that your machine can actually read and sew. You’re in the driver's seat, telling the program where to put every single stitch, what kind of stitch to use (like a satin, fill, or running stitch), and in what order. While it definitely has the steepest learning curve, it offers total creative freedom. If you want to go deeper, we've got a great post on what embroidery digitizing is all about.
Editing Software: The Customizer's Playground
So, what if you already have a design you bought and love, but you just want to tweak it a bit? That's where editing software shines. It’s perfect for personalizing designs you already own without having to start completely from scratch.
Here are a few common things you can do with editing software:
- Resizing: Making a design bigger or smaller to perfectly fit your hoop or project.
- Combining Designs: Merging a couple of separate designs into one new, cohesive piece.
- Recoloring: Swapping out the thread colors in a design to match your fabric or a specific color scheme you have in mind.
- Rearranging Elements: Moving parts of a design around to create a whole new layout.
This type of software is often much more budget-friendly and is a fantastic starting point for beginners. It lets you get your feet wet and build confidence before you even think about full-blown digitizing.
Lettering And Monogramming Software: The Personal Touch
Last but not least, we have lettering and monogramming software. Just like the name says, this tool is laser-focused on one thing: adding text to your projects. If your main goal is to stitch names on towels, create classic three-letter monograms on tote bags, or sew inspiring quotes onto pillows, this is your perfect match.
This software comes loaded with libraries of pre-digitized fonts that are designed specifically to be stitched out. This is a big deal—it ensures your text looks clean and beautiful, not loopy or messy. It takes all the guesswork out of aligning, spacing, and arranging letters, which can be surprisingly tricky to get right on your own.
This diagram helps visualize how your idea goes from a thought in your head to a finished piece of stitched art, with the software acting as the bridge.
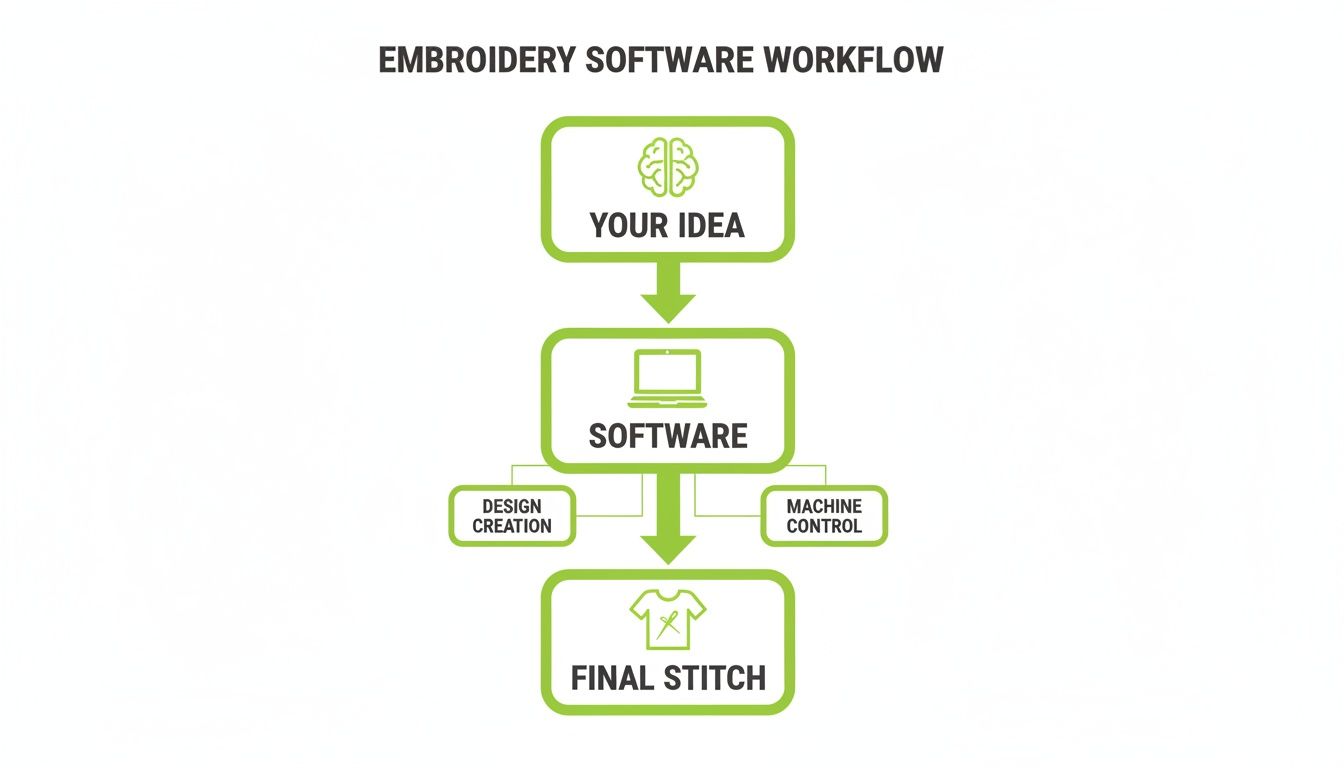
As you can see, the software is that crucial middle step. It translates your creative vision into a language your embroidery machine understands. Choosing the right tool for the job—whether it’s digitizing, editing, or lettering—is what makes that translation a success.
Essential Features Every Beginner Truly Needs
Diving into embroidery software can feel like trying to read a foreign language. The feature lists are often long and packed with technical jargon that's more confusing than helpful. So, let's cut through all that noise. We’re going to focus on the absolute must-have tools you’ll actually use as a beginner.
Getting these fundamentals right from the start means you can learn and grow, instead of getting stuck and frustrated.
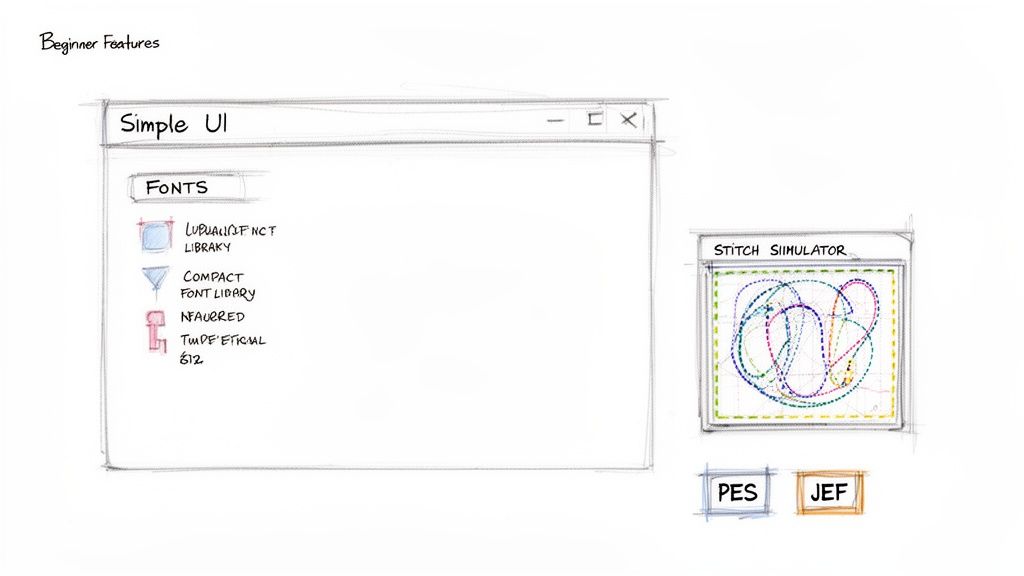
The very first thing to look for is a simple user interface (UI). This just means the buttons, menus, and tools are laid out in a way that makes sense, so you aren't constantly hunting for basic functions. Good beginner software prioritizes clarity, making it easy to open a design, make a quick change, and save it without cracking open a manual.
Your Must-Have Feature Checklist
To make sure your new software truly empowers you, it needs to have a few core functions. Think of this as your practical checklist when you're comparing different options.
-
Robust Font Library: Look for software with a great selection of built-in, professionally digitized fonts. This is the secret to easily adding names, dates, and monograms that stitch out cleanly and look fantastic every time.
-
Basic Editing Tools: You absolutely need the ability to resize, rotate, and mirror designs. These simple tools give you the power to fit any design to your specific project, whether it's a tiny baby onesie or a big tote bag.
-
Design Combining (Merging): This feature lets you take two or more separate designs and blend them into one new creation. It’s an amazing way to get creative and make something totally unique without having to digitize from scratch.
Honestly, these foundational tools will cover about 80% of what most beginners want to do. Mastering them will give you the confidence to tackle a huge range of projects right out of the gate.
The Power of Previewing Your Work
One of the most valuable features in any embroidery software for beginners is the stitch simulator. This little tool is your secret weapon for preventing messes and wasted materials.
Think of the stitch simulator as your digital test swatch. It plays a virtual animation showing you exactly how the design will sew out, stitch by stitch, color by color. You can catch potential issues—like gaps, dense areas, or awkward jumps—before a single thread touches your fabric.
This feature will save you so much time, thread, and frustration. In my book, it's completely non-negotiable for anyone learning the craft.
Another critical piece of the puzzle is file format compatibility. Your embroidery machine speaks a specific language—a file format like .PES for Brother machines or .JEF for Janome. Your software absolutely must be able to "speak" that language by saving files in the correct format. Without this, your machine won't be able to read the beautiful designs you’ve created.
It’s an exciting time to get into embroidery! The demand for custom gear is driving huge growth, with the equipment market expected to grow by USD 172 million between 2024 and 2029. Today's machines have incredible automated features that good software can control, making the whole process much simpler for newcomers. You can discover more insights about the embroidery market growth on Technavio.com.
Here at B-Sew Inn, we do more than just sell you a box. We are committed to empowering you. We guide you to software that not only has these essential features but is also backed by our extensive training and support, ensuring you can use every tool to its fullest potential.
Creating Your First Project: A Step-By-Step Walkthrough
This article serves as a comprehensive how-to guide, and this is where we'll showcase a tangible example that you can replicate. The real magic happens when you stitch something out for the first time. So, let’s walk through a classic beginner project together: a personalized monogrammed hand towel.
This simple project is so satisfying and teaches you the fundamental workflow you'll use over and over again. By the end, you'll have the confidence and the core skills to tackle your next design. At B-Sew Inn, our custom sewing machine designs and online classes are built around this hands-on approach, because doing is always the best way to learn.

Step 1: Launch Software and Select Your Font
First things first, open your embroidery software. The main screen might look a little busy, but for now, we just need to find the text or lettering tool. Look for an icon that looks like the letter "A" or "T." Easy enough.
Once you click it, a list of built-in fonts will pop up. For a classic monogram, you can’t go wrong with a clean, elegant script or a bold serif font. A good embroidery software for beginners comes packed with a variety of these pre-digitized fonts, all designed to stitch out beautifully without any fuss.
Step 2: Arrange Letters and Size Your Design
Now for the fun part. Type the initials for your monogram right onto the digital workspace. You can then click and drag the letters individually or as a group to get the arrangement just right. Many programs even have built-in monogramming templates that make creating those classic three-letter layouts a total breeze.
Next, you have to make sure the design actually fits in your embroidery hoop. Select your entire monogram and use the resizing tool to scale it up or down. A good rule of thumb is to leave at least a half-inch of breathing room between your design and the hoop's edges. This little buffer helps prevent stitching issues and keeps everything looking clean. Once you get the hang of this, you can even learn how to turn your images into embroidery patterns for totally custom projects.
Step 3: Assign Colors and Simulate the Stitch-Out
This is where your design really starts to come alive on the screen. Select your monogram and find the color palette tool. Here, you can assign thread colors that match the spools you plan to use on your machine. It’s an incredibly helpful way to visualize the final product.
Before you even think about saving, use the stitch simulator. This feature is a lifesaver. It gives you a virtual preview, showing you exactly how the machine will sew the design, stitch by stitch. It’s the perfect way to catch potential problems—like awkward jumps or overly dense areas—before you waste a single inch of fabric or thread.
Step 4: Save and Transfer Your File
With your design polished and ready to go, it’s time to save it in a language your embroidery machine can understand. Go to "File," then choose "Save As" or "Export." You’ll see a dropdown menu with a list of file formats.
Pay close attention here, because this step is critical. You must select the correct format for your specific machine brand—for example, .PES for Brother or .JEF for Janome. Saving in the wrong format is probably the most common mistake beginners make, and it’s so easy to avoid!
Finally, transfer that saved file to your embroidery machine, usually with a simple USB stick. Once it's loaded up, you’re ready to hoop your towel, thread your machine, and watch your digital creation become a beautiful, stitched reality. For those who feel the creative spark and want to make even more complex designs from scratch, our guide on how to digitize embroidery designs is the perfect next step.
How B-Sew Inn Supports Your Creative Journey
Choosing the right embroidery software for beginners is a huge step, but the journey doesn’t stop the moment you click “buy.” Honestly, that’s just where the fun begins. Here at B-Sew Inn, we see your purchase as the start of a partnership.
We’re not interested in just selling you a box and wishing you luck. We’re deeply committed to your creative success, which is why we’ve built an entire ecosystem of resources to help you grow. Our goal is simple: to help you turn any initial hesitation into pure confidence and joy by empowering crafters through our custom sewing machine designs and extensive support.
Exclusive Classes And Training Resources
Let's be real—learning new software can feel like a lot. That’s why we offer exclusive online classes and training made specifically for beginners. These aren't just generic tutorials. Our expert instructors walk you through the exact features of your software, using real-world projects you can actually create right alongside them.
Our support includes things like:
- Step-by-Step Video Tutorials: Master everything from basic lettering to tricky editing techniques, all at your own pace.
- Guided Project Walkthroughs: Build your skills and confidence by creating beautiful, finished items with our instructors.
- Troubleshooting Guides: We’ve seen it all, and we have clear, simple solutions for those common little hurdles so you never stay stuck for long.
These resources are designed to help you find all the hidden gems inside your software, turning what looks complex into an easy-to-use tool for your creativity.
More Than A Product—A Creative Community
When you decide to go with B-Sew Inn, you’re not just getting a piece of software. You’re becoming part of a vibrant, supportive community of fellow crafters. This network is an amazing place to share ideas, ask for a second opinion, and celebrate those "aha!" moments. We’ve worked hard to create a space where everyone, from the absolute beginner to the seasoned pro, feels welcome and inspired.
Your growth as a crafter is our top priority. We've built our educational programs to ensure you have everything you need to move from basic edits to creating stunning, complex designs with skill and confidence. We’re here to support you every stitch of the way.
Our commitment is to give you the tools, the knowledge, and the community you need to bring your biggest ideas to life. From helping you choose the perfect program, like the incredibly versatile Baby Lock Palette 11 Embroidery Software, to guiding you through that very first custom design, B-Sew Inn is your creative partner. We truly believe that with the right support, anyone can master the art of digital embroidery.
Common Questions About Embroidery Software
Whenever you pick up a new creative tool, a few questions are bound to pop up. Embroidery software is no different! Let's walk through some of the most common things beginners ask. Getting these answers sorted out will give you the confidence to dive in and start stitching.
Do I Need To Be An Artist To Use Embroidery Software?
Not at all! This is probably the biggest myth I hear about embroidery software for beginners. You absolutely don't need to be able to draw to create beautiful things.
While you can certainly design from scratch if you’ve got that artistic spark, most software is brilliant for personalizing and tweaking existing designs. You can add gorgeous lettering, merge different design elements together, or resize a project—all without a single drawing skill. Many programs even have auto-digitizing features that can turn simple clip art into a stitch file, doing all the heavy lifting for you.
What Is The Difference Between Free And Paid Software?
Thinking about free versus paid software is a bit like choosing between a basic screwdriver and a full-power drill set. Both have their place!
Free software is fantastic for simple, one-off tasks. It’s perfect if you just need to view an embroidery file you downloaded or make a tiny change, like rotating a design slightly. Think of it as your quick-fix tool.
Paid software, on the other hand, is like opening the door to a full workshop. It gives you powerful digitizing tools to build your own custom designs from the ground up, huge libraries of professional fonts, and advanced editing that lets you control every single stitch. For anyone serious about creating truly unique, high-quality projects, investing in a paid program is one of the best moves you can make for your craft.
How Do I Know If Software Is Compatible With My Machine?
This is the big one, but the answer is refreshingly simple: it all comes down to the file format.
Think of it like a language. Every embroidery machine brand "speaks" a specific language, or file format. For example, Brother machines typically understand .PES files, while Janome machines read .JEF files. Your software has to be able to "speak" your machine's language.
Before you hit "buy" on any software, you absolutely have to check that it can save or export files in your machine's native format. This is the most critical step to make sure the beautiful designs you create on your computer can actually be read and stitched by your machine.
Most modern software is built to be multilingual and supports all the major machine brands, but it's always smart to double-check. The experts here at B-Sew Inn can also help you confirm compatibility, making sure you get the right software for your specific machine from day one.
At B-Sew Inn, we're here to support your creative journey with the best tools and know-how in the business. Come explore our huge selection of sewing and embroidery resources today. Visit us at https://www.bsewinn.com to get started.

