

Learning how to sew a zipper is one of those skills that really takes your projects from "homemade" to "handmade professional," and honestly, it's way easier than it looks. The real secret? It all happens before you even start sewing. At bsewinn.com, we’re committed to empowering crafters like you, and this guide will give you tangible examples you can replicate for your own sewing machine designs. With the right tools like a zipper foot and proper fabric prep using interfacing, you'll be amazed at how smoothly everything comes together.
Setting Yourself Up for Perfect Zippers
A flawless zipper installation isn't about some complicated, secret technique. It's all about building a solid foundation. Most of the frustration people feel with zippers comes from skipping the prep steps. Get this initial setup right, and the rest of the process is a breeze.
Here at B-Sew Inn, we're all about empowering you with the knowledge to create amazing things. That’s why we focus so much on the fundamentals in our online classes and extensive resources. A beautifully installed zipper is a true sign of quality craftsmanship, and with our support, you can achieve it on any project, from a simple pouch to a custom-designed garment.
Essential Tools and Notions
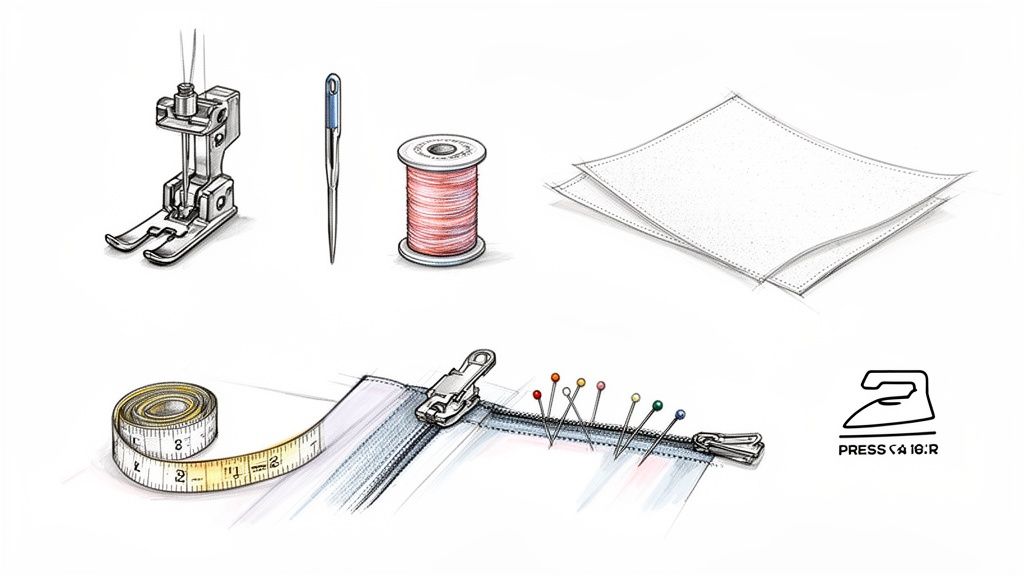
Before you dive in, take a minute to gather your supplies. You don't need a huge collection of gadgets, just the right items for the job. Having these ready to go means you can focus on your sewing without any annoying interruptions.
- Zipper Foot: This is the one tool you absolutely can't skip. A zipper foot is specially designed to let your needle stitch right up against the zipper teeth, giving you a perfectly straight and secure seam.
- The Right Thread: Always try to match your thread to your fabric. For most garment or bag projects, a good quality, all-purpose polyester thread is your best bet.
- Fabric Marking Tools: Whether you prefer a chalk pen or a water-soluble marker, you’ll need something to accurately mark where your zipper goes. The key is using a tool that won't leave a permanent mark.
- Lightweight Fusible Interfacing: This is my personal game-changer tip. Ironing a thin strip of interfacing onto the seam allowance where the zipper will sit stabilizes the fabric. It’s the secret to avoiding that wavy, stretched-out look you sometimes see.
These little supplies, which we call notions, are the building blocks of any sewing project. If you're new to the term, we have a great guide that explains what are sewing notions in more detail.
This simple flow chart breaks down the three critical steps to take before you even think about starting your machine.
It’s a great visual reminder: choose the right zipper, prep your fabric, and grab the correct tools. Nail these three things, and you're golden.
Choosing the Right Zipper
It’s a great time to be a home sewist! The sewing supplies market is booming—it was valued at around $6.2 billion in 2023 and is only expected to keep growing. That explosion in popularity means we have more choices than ever before, especially when it comes to zippers.
Choosing the right zipper for your project is as important as the sewing technique itself. The zipper's type—be it nylon coil, invisible, or metal—directly impacts the final look and function of your creation, from the seamless finish on a formal dress to the rugged durability of a tote bag.
Don't let the variety overwhelm you. It really boils down to a few main types.
Zipper Type and Best Use Cheat Sheet
Here's a quick reference table to help you grab the perfect zipper for your next project, whether you're making a dress, a jacket, or a cute little pouch.
| Zipper Type | Appearance | Common Projects |
|---|---|---|
| Nylon Coil | Small, flexible teeth made of coiled nylon. The most common "all-purpose" zipper. | Skirts, dresses, trousers, pillows, pouches, and bags. |
| Invisible | The teeth are hidden on the backside, creating a seamless look from the front. | Formal wear, dresses, skirts, and fitted garments. |
| Metal | Sturdy metal teeth (brass, nickel) that are visible. Very durable. | Jeans, heavy-duty jackets, and sturdy bags or totes. |
| Molded Plastic | Chunky, individual plastic teeth. Very strong and often used for outerwear. | Coats, parkas, hoodies, and children's clothing. |
| Separating | The zipper comes completely apart at the bottom. Can be coil, metal, or plastic. | Jackets, hoodies, cardigans, and anything that needs to open fully. |
Think about the final look and function you need. Do you want the zipper hidden? Go for an invisible one. Need something that can handle heavy use on a jacket? A separating metal or plastic zipper is your best bet. For most everyday projects, a simple nylon coil zipper will do the trick perfectly.
Alright, you've got your tools sorted and the perfect zipper picked out. It's time to dive in. Two of the first zipper types every sewist should get comfortable with are the centered and lapped styles. Once you get these down, you'll be ready for a massive range of projects, from classy dresses to a good sturdy pair of pants.
These two methods are the bedrock of zipper sewing. It’s why we focus on them so much in B-Sew Inn's online classes—get these right, and your confidence will soar. The whole idea is just about aligning a zipper neatly inside a seam, and when you break it down, it's a lot less scary than it looks.
The Classic Centered Zipper
When you think "zipper," the centered application is probably what comes to mind. The teeth sit right in the middle of the seam, with perfectly even topstitching on both sides. It's a clean, symmetrical look that’s a go-to for the back of dresses, skirts, and even zippered pillow covers.
The secret to getting that crisp, professional finish? It all comes down to one thing: basting. Before you even think about your final stitches, you need to create a temporary seam to hold everything perfectly still.
First, sew your seam with a long basting stitch, but only where the zipper will go. Once you've passed that opening, switch back to a regular stitch length to complete the rest of the seam. Press those seam allowances open nice and flat. This step is key—it creates a perfect little valley for the zipper to sit in.
With the seam pressed, lay your zipper face down right over the top of it. Make sure the zipper teeth are lined up exactly with that basted seam line. You can pin it, but I swear by double-sided basting tape. It's a game-changer for keeping the zipper from wiggling around while you sew.
Stitching Your Centered Zipper
Time to head to the machine. Pop on your zipper foot. This little guy is non-negotiable; it lets you stitch super close to the teeth without the regular foot getting in the way. If you want a deep dive on different feet, our complete sewing machine feet guide has you covered.
Start at the top of one side and stitch down towards the bottom. When you get to the end of the zipper, stop with the needle down, lift your presser foot, and pivot the fabric. Stitch straight across the bottom, just below the zipper stop, then pivot again to head up the other side.
Pro Tip: As you get close to that bulky zipper pull, stop with your needle down in the fabric. Lift the presser foot and just gently slide the pull up past the foot. This is the trick to avoiding a weird bump in your stitch line.
Once it's all sewn, grab your seam ripper and carefully pull out those basting stitches from the front. And just like that, you’ll have a beautifully installed, perfectly centered zipper.
The Professional Lapped Zipper
A lapped zipper is a bit more refined and gives a high-end finish. One side of the fabric overlaps the other, creating a flap that completely hides the zipper teeth. This is the traditional choice for side seams on skirts and is the standard for a trouser fly. It looks clean and adds a layer of durability.
The setup here is a little different. Instead of matching seam allowances, you'll work with an offset. A common one is having a 5/8-inch seam allowance on one side and a 3/8-inch on the other.
First, you'll attach the zipper to the smaller (3/8-inch) seam allowance. Place the zipper face down on the right side of the fabric, lining up the edge of the zipper tape with the fabric's raw edge. Stitch close to the teeth. Flip it over and give it a good press.
Now, lay the garment flat and fold the larger (5/8-inch) seam allowance over to cover the zipper you just attached. This creates the "lap." Pin it or use tape to hold that flap down so it doesn't shift.
From the right side of your project, you'll topstitch the lap down. This stitch line should be about 1/2-inch from the folded edge. Just like with the centered zipper, you'll stitch down one side, pivot at the bottom, and sew across to secure it. This one takes a bit of precision, but the result is a beautifully concealed closure that really shows off quality craftsmanship.
How to Install an Invisible Zipper Seamlessly
If you're after that truly high-end, professionally made look for your dresses, skirts, or trousers, nothing beats an invisible zipper. When you get it right, the zipper completely vanishes into the seam, leaving a clean, uninterrupted line. This is a tangible skill you can master with the right tools and a couple of key tricks, elevating any custom sewing design you create.
The whole secret is getting your stitches tucked in super close to the zipper teeth. And that all starts with one simple prep step you can't skip.

The Most Important Prep Step
Before you even sit down at your machine, grab your invisible zipper, open it up, and press the coils flat. Use your iron on a low, synthetic setting—you don't want to melt anything! The plastic teeth naturally curl inwards, but gently pressing them open reveals a tiny channel or "ditch" right where the teeth meet the zipper tape. That is your target.
Seriously, this one little step makes a world of difference. It allows your needle to get as close as physically possible to the coils, which is exactly what you need to make the fabric meet perfectly when the zipper is closed.
Using the Right Tool for the Job
This is where a dedicated invisible zipper foot becomes your absolute best friend. This little wonder has two small grooves on its underside, perfectly designed to cradle the zipper coils while you sew. One groove guides the left side of the zipper, and the other handles the right.
You'll be working with your fabric right side up and the zipper face down against it.
- Sewing the First Side: Line up one side of the open zipper tape along your seam allowance, with the right sides of the fabric and zipper facing each other. Settle the zipper coils into one of the grooves on the foot and stitch from the top all the way to the bottom. The foot does all the hard work, guiding the needle perfectly into that little ditch you ironed open.
- Sewing the Second Side: Now, pin the other side of the zipper tape to the opposite seam allowance. This is the moment to make sure any intersecting seams, like a waistband, are perfectly aligned. Pop the second set of coils into the other groove on your foot and stitch again, top to bottom.
Trust me, using the correct accessory is non-negotiable for a flawless finish. If you've been struggling with invisible zips, check out the difference a dedicated invisible zipper foot can make.
Finishing the Seam Below the Zipper
Once both sides are stitched, go ahead and close the zipper. It's so satisfying to see it disappear! All that's left is to sew the rest of the seam below where the zipper stops. For this part, you'll need to switch back to your regular zipper foot.
Start your new line of stitching just slightly above and to the side of where your zipper stitching ended. That little bit of overlap is crucial for preventing any gaps. Sew the rest of the seam as you normally would, then press the seam allowances open.
It's amazing how much more accessible techniques like this have become with modern machines. The computerized sewing machine market is expanding quickly, with a projected growth rate of 8.5% CAGR from 2025 to 2033. This means crafters have access to incredible control and consistency, making it the perfect time to learn skills like sewing a perfect zipper.
Using Zippers as a Design Feature
Let’s be honest, zippers are workhorses. But they can be so much more than just a way to close a seam. Think of an exposed or separating zipper as a chance to inject some personality into your project—a pop of color, a bit of texture, or even some industrial-chic flair on a bag or jacket. When you learn to sew a zipper as a feature, you unlock a whole new level of creative control.
Here at B-Sew Inn, we’re big believers in seeing every single component as a design opportunity. We've built our online resources and classes to show you exactly how to turn functional hardware into a real statement piece. These methods are surprisingly straightforward and deliver a huge visual impact for just a little extra effort.

Installing an Exposed Zipper
An exposed zipper gets sewn right onto the face of the fabric, making the zipper tape and teeth part of the main event. It's a fantastic way to add a sporty or modern vibe to tote bags, cushion covers, or even down the back of a simple shift dress. The secret to a killer exposed zipper? Impeccably straight topstitching.
First things first: finish the raw edges of your seam opening. Since they’ll be visible from the inside, you want them neat. Press the seam allowances under to create crisp, finished edges. Don't skip this prep work—it’s what makes the final result look so clean.
Now, place the zipper face-up under that pressed opening, making sure the teeth are perfectly centered in the gap. I can’t recommend double-sided basting tape or fabric glue enough for this step. Pins tend to cause ripples and can lead to wavy stitching, which is exactly what we want to avoid.
Once it's secured, it's time to topstitch. Using your zipper foot, sew a clean rectangle around the entire zipper, keeping your stitch line an even distance from the seam—usually about 1/4-inch to 3/8-inch is perfect. Take it slow and pivot carefully at the corners. That’s how you get that sharp, professional frame.
Perfecting the Separating Zipper
Separating zippers are the MVPs of jackets and hoodies—any garment that needs to open completely. The biggest headache I see people run into is getting both sides to align perfectly at the bottom. A misaligned base is a super common frustration, but it’s thankfully easy to avoid.
Before you even think about sewing, zip the zipper up and use chalk or a fabric pen to mark its placement on both sides of your garment. Pay extra close attention to matching any horizontal seams, like a waistband or a color-blocked panel. Then, unzip it and use those marks to pin or tape each side of the zipper tape to the right fabric edge.
When you sew, stitch one side from the top down. Here's the trick: zip it back up to double-check that the second side is still lined up perfectly before you stitch it down. This one quick check can save you a world of seam-ripping later.
A clean finish at the top of a jacket is a true hallmark of quality work. Fold the top of the zipper tape down and away from the neckline seam at a 45-degree angle before you attach your collar or facing. This little tuck hides the sharp zipper edge, making it comfortable and giving it a beautifully polished look.
Machine Settings for Success
Your machine settings play a massive role in getting that professional finish, especially with the very visible topstitching these applications require. The wrong stitch length or needle can totally sabotage all your careful prep work. To get you started, here are some settings that I’ve found work reliably for me.
Machine Settings for Common Zipper Installations
Think of this table as your starting point. You should always run a quick test on a scrap of your project fabric to dial in the settings perfectly for your specific materials.
| Zipper Type | Fabric Weight | Recommended Stitch Length | Needle Type |
|---|---|---|---|
| Exposed (Nylon) | Medium (Canvas, Denim) | 3.0 - 3.5 mm | Universal 90/14 |
| Exposed (Metal) | Heavy (Duck Cloth, Cordura) | 3.5 - 4.0 mm | Jeans/Denim 100/16 |
| Separating (Plastic) | Medium (Fleece, Sweatshirt Knit) | 3.0 mm | Ballpoint/Jersey 80/12 |
| Separating (Metal) | Heavy (Twill, Wool Coating) | 3.5 - 4.0 mm | Jeans/Denim 100/16 |
You’ll notice the stitch length gets longer for heavier fabrics and for topstitching in general. A longer stitch just looks cleaner and more intentional, which really helps sell the zipper as a deliberate design choice. With the custom sewing machine designs and hands-on training we offer at B-Sew Inn, you’ll have the precision you need to nail these details every time, turning your next project into a true expression of your skill.
Even seasoned pros run into zipper trouble sometimes. It happens. But here’s the good news: just about every zipper snafu is fixable, and even better, totally preventable. Figuring out how to troubleshoot these little hiccups is a huge part of sewing zippers with confidence.
Instead of seeing a wavy seam or a misaligned zipper base as a total failure, try to think of it as a pop quiz. This is the kind of practical, problem-solving mindset we love to foster here at B-Sew Inn. Our online classes and extensive resources are all designed to turn these moments of frustration into real, lasting skills.
Why Is My Zipper Wavy?
A wavy or rippled zipper is probably the most common complaint I hear, especially when people are working with knits or other lightweight, shifty fabrics. The culprit is almost always stretched fabric. This can happen if you accidentally pull or distort the fabric as it goes through the machine, or if the fabric itself is just a bit unstable to begin with.
The best fix is to stop it before it starts:
- Use Interfacing: This is non-negotiable for knits and a lifesaver for most wovens. Before you even think about sewing, iron a thin strip of lightweight fusible interfacing onto the seam allowance where your zipper will go. It instantly stabilizes the area.
- Let the Machine Do the Work: Your job is to guide the fabric gently, not to force it. Don't pull from behind or push from the front. Let your machine's feed dogs do their job—they're designed to pull the fabric through evenly.
- Basting is Your Best Friend: Seriously. Using double-sided basting tape or simple hand-basting stitches to hold the zipper in place before you take it to the machine adds incredible stability and stops things from shifting around.
Fixing Misaligned Seams and Puckers
Ugh, there's nothing more maddening than finishing a zipper installation only to see that the fabric at the base is puckered or the cross-seams (like on a waistband) don't match up. This almost always points back to an issue with how it was pinned or a tension problem.
If the misalignment is minor, you might not have to rip the whole thing out. Sometimes, a careful press with a steam iron can convince small puckers to relax and lay flat. For misaligned waistbands, you can often get away with unpicking just the top few inches of the zipper, realigning those crucial seams perfectly, and re-stitching that small section.
A huge factor in preventing these issues is using quality materials from the start. Your thread choice is just as important as the zipper itself. The Asia-Pacific region currently holds 48% of the global sewing thread market, which gives you an idea of the massive scale of textile production and the universal need for reliable supplies. Crafters everywhere depend on good, consistent materials to get professional results. You can dig into the numbers in the full sewing thread market research.
For more stubborn problems, it’s a good idea to check your machine’s tension. If the top or bottom thread is too tight, it will pull on the fabric and cause it to pucker. This is why you should always test your stitches on a scrap piece of your project fabric before you start sewing the real zipper. It saves so much heartache later
Got Zipper Questions? We've Got Answers
Even with the best step-by-step guide, you're bound to run into a few head-scratchers when you're sewing zippers. Honestly, working through those tricky little details is how you go from just following instructions to truly understanding the craft. This section is all about tackling those common "what if?" and "why is it doing that?" moments.
Think of this as your personal troubleshooting guide. We've pulled together some of the most frequent questions we hear from sewists in our B-Sew Inn community. Our goal, through our custom sewing machine designs and support resources, is to give you practical, no-fuss advice to help you nail your technique and get that polished, professional look every single time.
What's the Best Sewing Machine Foot for Zippers?
This is a great question, but the truth is, there isn't a single "best" foot. It all comes down to picking the right tool for the job. The best foot is the one designed for the specific zipper you're installing.
- Standard Zipper Foot: This is your workhorse for classic centered and lapped zippers. It has notches on both sides, which lets you shift your needle over and stitch right up against the zipper teeth, whether you’re working on the left or the right side.
- Invisible Zipper Foot: If you're installing an invisible zipper, this foot is a non-negotiable game-changer. It has two little grooves on the underside that gently unroll the zipper coils as you sew. This guides your needle perfectly into the ditch for a finish so clean, the zipper truly disappears.
Most modern machines, like the Baby Lock models we love, come with these feet right in the box. Using the correct foot gives you a level of stability and precision you just can't get with a general-purpose foot.
Why Is My Zipper Wavy After I Sew It In?
Ah, the dreaded wavy zipper. Nine times out of ten, this happens because the fabric stretched out of shape as you were sewing. It’s an especially common headache with knits or lightweight wovens that have a bit of natural give. The good news? It’s super easy to prevent.
The #1 fix is to apply a thin strip of lightweight fusible interfacing to the seam allowance where the zipper will go. This one little prep step works wonders by stabilizing the fabric so it can’t stretch.
Also, watch your hands—make sure you aren’t accidentally pulling or pushing the fabric through the machine. Let the feed dogs do their job! For extra insurance, you can baste the zipper in place first, either with double-sided tape or a few quick hand stitches, to keep everything perfectly flat and stable.
Can I Shorten a Zipper That's Too Long?
Absolutely! In fact, it's always better to buy a zipper that's a little too long and customize it. Struggling with a zipper that's too short is a frustration nobody needs. How you shorten it depends on the zipper type.
For nylon coil zippers, all you have to do is sew a dense bartack (a tight zigzag stitch) right over the coils at your desired new length. Once that's secure, you can snip off the extra tape about an inch below your new stop.
For metal zippers, you’ll need to get a little more hands-on. Grab a pair of pliers and carefully pull off the individual metal teeth above your mark. After you've cleared the space, use the pliers to clamp the original metal stopper back on at the new bottom. Always shorten a zipper from the bottom; this preserves the nice, factory-finished top stop.
Key Takeaway: Don't be afraid to modify your notions! Shortening a zipper is a simple skill that gives you the power to get a perfect custom fit for any project. It’s a sign of a resourceful and confident sewist.
How Do I Get My Topstitching to Look Perfectly Even?
Uneven topstitching can make a beautiful project look homemade in a not-so-good way. The secret to perfectly straight lines is simply using a guide. An Edge-Stitching Foot or a blind hem foot is fantastic for this. These feet have a little blade or guide that runs along the seam, keeping your stitch line perfectly parallel.
Don't have a specialty foot? No problem. You can attach a quilting guide bar to your presser foot, or even just lay down a piece of masking tape on your fabric to use as a visual guide. One more pro tip: lengthen your stitch to about 3.0mm. It just looks cleaner and more professional. As always, test your settings on a scrap first to make sure you're happy with the look!
At B-Sew Inn, we believe mastering skills like zipper installation is all about having the right tools, knowledge, and support. From our custom sewing machine designs to our online classes and extensive resources, we're here to empower you every step of the way.
Explore our full range of machines, accessories, and educational resources at bsewinn.com

