Let's be honest, tackling your own Janome sewing machine repairs often comes down to one simple thing: having the right tools on hand before you actually need them. Here at bsewinn.com, our commitment is to empower crafters like you, not just with custom sewing machine designs you can create, but with the knowledge to keep your machine running perfectly. Through our online classes, training, and extensive resources, we want you to feel confident handling any project or repair.
Moving beyond that basic screwdriver that came in the box is the first real step toward confident DIY maintenance. It's what stops a tiny hiccup from turning into a frantic, costly trip to the service center, so you can get back to creating beautiful designs.
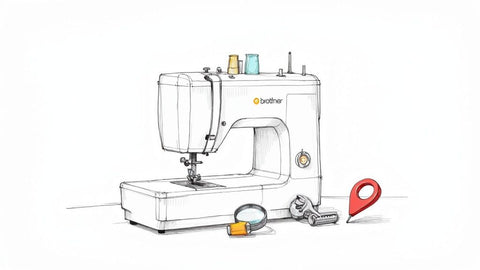
Building Your At-Home Janome Repair Toolkit
Before you can even think about diagnosing a skipped stitch or a clunky-sounding motor, you need a practical toolkit. A well-stocked repair station is all about empowering you to handle the most common maintenance jobs safely and effectively. This isn't about becoming a certified technician overnight; it's about becoming a savvy machine owner who can keep things running smoothly.
Here at bsewinn.com, we're big believers that empowerment comes from education and preparation. Our online classes and resources are all geared toward helping you understand your machine inside and out. Building a personal repair kit is a huge part of that journey, ensuring you can replicate our tangible examples and sewing designs without interruption.
So, what do you actually need? I've broken it down into a simple checklist of must-haves versus nice-to-haves for tackling most common repairs at home.
Essential Janome Repair Toolkit
| Tool | Essential or Advanced | Why You Need It |
|---|---|---|
| Lint Brushes (Various Sizes) | Essential | A small, soft one gets into electronics, while a long, stiff one clears the bobbin case. One size doesn't fit all! |
| Janome-Specific Sewing Machine Oil | Essential | The viscosity is formulated specifically for your machine to prevent gummy buildup. Don't use generic oil! |
| Magnetic Tray or Dish | Essential | Those tiny needle plate screws have a knack for disappearing. This keeps them secure and in one place. |
| Precision Screwdrivers | Essential | A good set of Phillips and flathead screwdrivers is a must for removing covers and plates. |
| Magnifying Lamp | Advanced | Invaluable for spotting tiny burrs on a needle or hook. Saves your eyes a ton of strain. |
| Canned Compressed Air | Advanced | Great for blasting out stubborn lint that brushes can't reach. Use in short bursts, aiming debris out of the machine. |
This toolkit will give you a solid foundation for keeping your Janome in top shape, preventing the small issues from ever becoming big problems.
The Non-Negotiable Essentials
Some tools are just indispensable. Think of these as the absolute foundation of your kit—the things you’ll reach for over and over. Without them, even a simple cleaning job becomes a real struggle.
- Different-Sized Lint Brushes: Seriously, a single stiff brush isn't enough. You need a small, soft brush for the delicate electronics and a long, flexible one to really get into the nooks and crannies of the bobbin case and feed dogs.
- Janome-Specific Sewing Machine Oil: Using a generic oil is one of the most common mistakes I see. It can completely gum up your machine's internals. Stick with the Janome-branded oil; it has the right viscosity and won’t attract extra lint.
- Magnetic Tray or Dish: I can’t tell you how many times I’ve seen those two tiny needle plate screws roll off a table and vanish into thin air. A small magnetic tray is an absolute lifesaver for keeping small metal parts contained.
A well-maintained machine is a quiet machine. The vast majority of strange noises—clicking, clunking, and whirring—are a direct result of lint buildup and a lack of proper lubrication, especially in the bobbin area.
Tools for More Advanced Fixes
Once you've got the basics covered, a few more items can help you tackle slightly more complex issues. These are the tools that give you better visibility and precision, letting you spot problems you might otherwise miss.
A magnifying lamp, for instance, is a game-changer. Trying to find a microscopic burr on a needle hook or thread a tricky spot can be frustrating. A good lamp lights up and enlarges your work area, making those precise adjustments so much easier.
Likewise, a can of compressed air is fantastic for dislodging stubborn lint that your brushes just can't grab. The trick is to use it in short bursts and always direct the debris out of the machine, not deeper into its guts. Pair that with a decent set of precision screwdrivers, and you’ll be ready to handle most routine Janome sewing machine repairs with total confidence.
It’s a tale as old as time: you’re in the zone, happily sewing along, and then… your machine throws a fit. Nothing kills the creative vibe faster than a Janome that’s suddenly skipping stitches, making a tangled bird’s nest of thread, or worse, just plain jamming up.
The good news? Most of these issues are surprisingly simple fixes. The trick is knowing where to look first instead of immediately assuming the worst. We want you to feel empowered to solve these little hiccups yourself, turning a moment of frustration into a real confidence booster.
What to Do About Skipped Stitches
Skipped stitches are probably the most common complaint I hear. Before you start fiddling with tension dials or worrying about service calls, I’ll let you in on a little secret: over 90% of the time, the problem is your needle.
Seriously. Your first move should always be to put in a fresh needle. Needles aren't forever—they get dull, bent, and develop tiny burrs you can't even see. Any of these things will wreak havoc on your stitch quality.
Think about these points:
- The Right Tool for the Job: Are you trying to sew stretchy knit fabric with a Universal needle? That’s a classic recipe for skipped stitches. Swap it out for a Ballpoint or a dedicated Stretch needle.
- Size Matters: A needle that's too fine for your heavy thread or fabric will struggle to punch through and form a proper loop for the hook to grab.
- Is It In Correctly? Double-check that the needle is pushed all the way up into the clamp and that the flat side is facing the back. It sounds basic, but it's an easy mistake to make.
A quick needle change is often all it takes to get you back to sewing in just a couple of minutes.
The Dreaded Bird's Nest Underneath
You flip your fabric over and see it—a giant, tangled mess of thread. We call this "nesting," and while it looks like a bobbin issue, the real culprit is almost always something going on with your upper threading or tension.
When there isn’t enough tension on your top thread, it gets fed down to the bobbin area way too fast, and the hook just wraps it into that frustrating knot.
My Biggest Tip: The number one reason for thread nesting is forgetting to lower the presser foot before you start sewing. When that foot is up, the tension discs are open, meaning your top thread has zero tension. Always, always check that your presser foot is down!
If the foot is down and you're still getting nests, it's time to rethread. Don't just pull the thread through the guides. Take it completely out of the machine, raise the presser foot, and carefully rethread from the beginning, making sure you hear or feel the thread snap securely into the tension discs.
Real-World Scenario: My Janome Memory Craft Is Jamming
Okay, let's walk through a situation I see all the time. You’re working on one of our custom sewing machine designs, perhaps a beautiful quilt, and suddenly your Janome Memory Craft locks up with a loud "clunk." The handwheel is stuck solid. It’s easy to panic, but let’s be methodical.
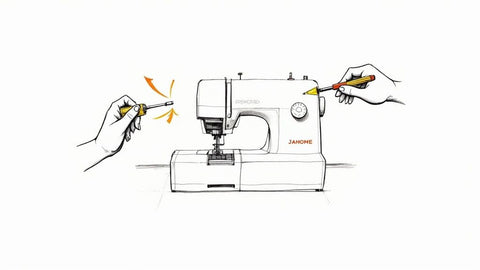
First thing’s first: turn the machine off. Always power down for safety before you start poking around.
Next, change the needle. I know, I sound like a broken record, but even a slightly bent needle can collide with the bobbin case and cause a major jam. This is the simplest and most likely fix.
Now, take out both the top thread and the bobbin. Use a little brush to clear out any lint you see in the bobbin area. With everything cleared out, try turning the handwheel towards you by hand. Does it move freely now? If it does, the jam was almost certainly caused by a thread tangle or a bad needle.
If the wheel moves, you’re in the clear. Just rethread everything carefully and test it out on a scrap of fabric. By following this simple sequence, you can solve the vast majority of jamming issues without having to haul your machine in for professional Janome sewing machine repairs. Learning this logical process is a skill that will serve you well for years to come.
Getting Your Tension and Timing Just Right
Let's be honest, diving into tension and timing adjustments can feel a little intimidating. It's like trying to become a watchmaker overnight. These two settings are the absolute heartbeat of your Janome, and when they're out of sync, your sewing grinds to a halt.
But you don't need an engineering degree to get a handle on them. The trick is knowing what to look for and making small, deliberate changes. Think of it less as a major repair and more like fine-tuning your favorite instrument. We'll walk you through the first steps.
Before you touch a single dial, though, remember the golden rule of stitch problems. This simple three-step check solves the vast majority of issues I see.
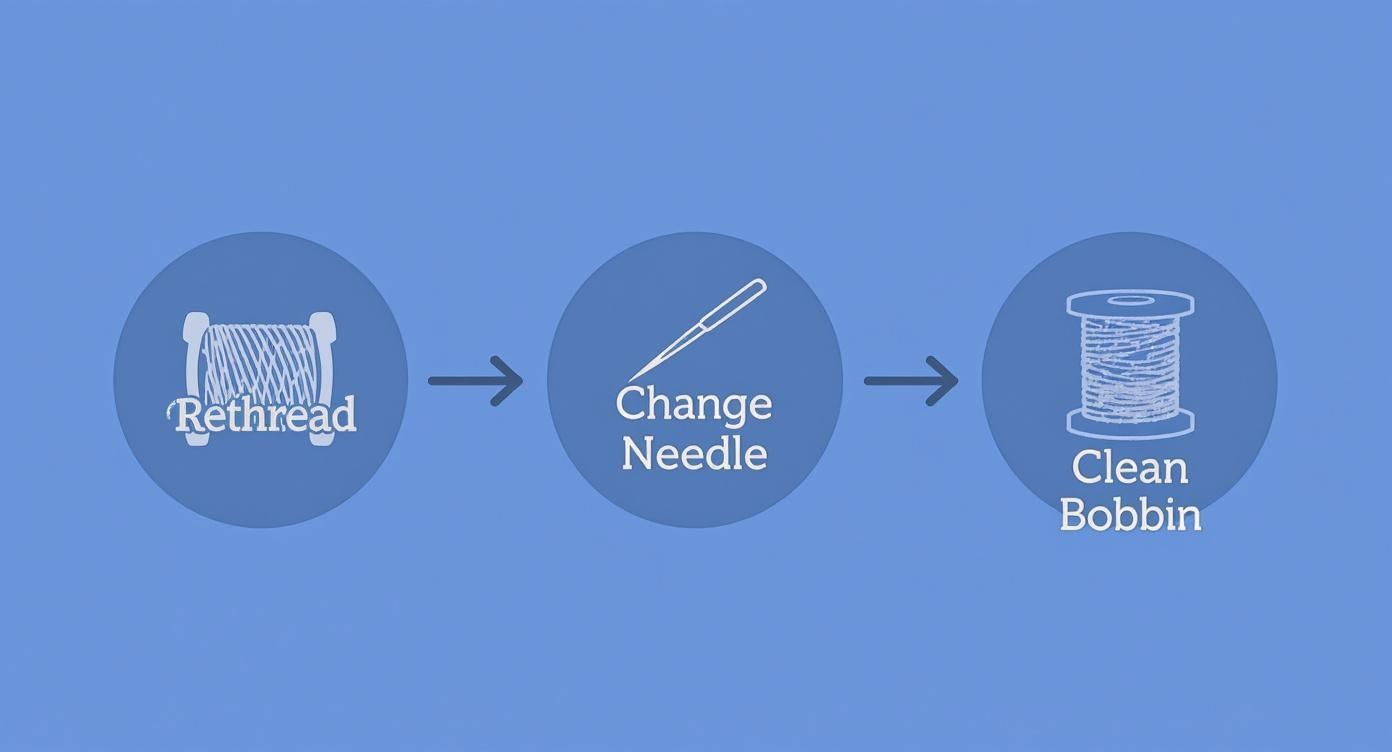
Seriously, before you even think about tension, always rethread your machine, pop in a fresh needle, and clean out the bobbin area. You'd be amazed how often that's all it takes to get back to beautiful stitches.
Taming the Upper Thread Tension
That numbered dial on your machine isn't just for decoration; it's your primary tool for creating a balanced stitch. The goal is a perfect "lockstitch," where the top and bottom threads meet neatly right in the middle of your fabric layers. No peeking through on either side!
If you flip your fabric over and see little loops of the top thread, your upper tension is too loose. On the other hand, if you can see the bobbin thread being yanked up to the top side, your upper tension is too tight.
The key here is to make small adjustments. Turn the dial just a half-number at a time, then sew a test seam on a scrap of the exact same fabric you're using for your project. This is the only way to see the true result.
For a quick reference, here's a little cheat sheet I put together to help you diagnose what's happening at a glance.
Quick Guide to Solving Tension Issues
This table breaks down the most common symptoms you'll see on your fabric and points you toward the most likely culprit and the first thing you should try.
| Symptom | Likely Cause | Your First Fix |
|---|---|---|
| Loops of top thread on the bottom | Upper tension is too loose. | Increase the upper tension number (e.g., from 4 to 4.5). |
| Bobbin thread pulled to the top | Upper tension is too tight. | Decrease the upper tension number (e.g., from 4 to 3.5). |
| "Bird's nests" or thread tangles | Usually incorrect threading. | Completely unthread and rethread the entire machine, top and bottom. |
| Uneven, inconsistent stitches | Old needle, lint, or thread quality. | Change the needle and clean the bobbin area. Try a different thread. |
Remember, this is about finding that perfect balance. Always test on a scrap piece before you go back to your actual project!
What About the Lower Thread Tension?
Here's my best advice: leave your bobbin case tension alone. Seriously. 99% of the time, the problem isn't there. Janome sets that tension at the factory to be perfectly balanced with the average upper tension setting (which is usually around 4).
Before you even dream of touching that tiny screw on the bobbin case, you need to rule out everything else. Have you rethreaded? Changed the needle? Cleaned the machine? Adjusted the upper tension dial through its entire range?
If you've done all that and your stitches still aren't balanced, then—and only then—a tiny tweak to the bobbin tension might be the answer. This sometimes happens if you're using specialty threads that are super fine or extra thick. For a deeper dive into that more advanced process, check out our full guide on tension adjustment on a sewing machine.
Demystifying Your Janome's Timing
Okay, let's talk timing. This is the perfectly synchronized dance between your needle moving down and the hook in the bobbin area rotating to catch the thread. The hook has to swoop in behind the needle at the exact millisecond the needle has risen just enough to create a small loop of thread.
If the hook is too early or too late, it misses the loop entirely. The result? Skipped stitches, or even no stitches at all.
A classic sign of a timing issue is a rhythmic "clunk" or "thud" you can hear and feel as you sew. This often starts right after you’ve sewn over a thick seam or hit a pin, which can physically knock the components out of alignment.
If you hear that sound, stop sewing immediately. Pushing through can cause more damage. While a full timing adjustment is a job for a pro, you can do a quick check at home to confirm your suspicions.
How to Do a Basic Timing Check
This quick check will tell you if it's time to book a professional service for Janome sewing machine repairs. Here’s a simple way to do it on most models.
- Prep your machine. Turn the power off. Remove the presser foot, needle plate, bobbin, and bobbin case so you have a clear view of the hook assembly.
- Put in a new needle. Always start with a perfectly straight, brand-new needle. A slightly bent one will throw everything off.
- Position the needle. Slowly turn the handwheel towards you (never away!) until the needle is at its absolute lowest point.
- Watch the hook. Keep turning the handwheel slowly and watch the needle start to rise. As it comes up about 2mm, the sharp point of the hook should be passing right behind the needle, perfectly centered in the little indentation above the needle's eye (called the scarf).
If the hook point is way above or below the eye, or if it gets there way too early or late, your timing is officially off. For most sewists, this is the definitive sign to stop and call for a service appointment.
Fixing Common Computerized Janome Issues
Computerized Janome models are incredible pieces of engineering, bringing a level of precision and creativity to our craft that was once just a dream. But let's be honest, when something goes wrong, those blinking error codes and sensor warnings on the LCD screen can feel completely cryptic. It's frustrating when you just want to get back to creating!
The good news? Most of these electronic "errors" aren't pointing to a catastrophic failure. Far more often, they're just a communication breakdown between you, the machine, and its network of smart sensors. Learning to speak your machine's language is the first real step to fixing the problem yourself. Here at bsewinn.com, we want to empower every crafter, and that means helping you decode these digital hiccups.
It's why our custom sewing machine designs are supported by so many resources, like online classes and training. We want you to feel confident enough to know the difference between a minor glitch and a real issue that needs a technician.
Decoding Common Error Messages
Think of your Janome's LCD screen as its way of talking to you. When it stops and flashes a message, it's usually trying to protect itself from damage or point out a simple user mistake. It’s a helpful assistant, not a messenger of doom.
Here are a few of the messages I see pop up most often and what they really mean:
- "Check Presser Foot": This is probably the most common one. The machine's sensor simply doesn't see that the presser foot is down. The foot has to be lowered to engage the tension discs before you can start stitching.
- "Bobbin Winder Engaged": You’ve most likely forgotten to slide the bobbin winding spindle back to the left after filling a bobbin. As a safety feature, the machine won't let the needle move. Just push it back into sewing position.
- Motor Lock or Jam Error: This one sounds scary, but it's often caused by a tiny thread jam down in the hook race or bobbin area. The machine smartly stops the motor to prevent it from burning out. The first thing to do is turn it off, carefully clear out any tangled threads, and gently turn the handwheel to make sure everything moves freely before you power it back on.
Pro Tip: When any error message appears, your machine's manual should be your first stop. Every manual has a dedicated section that lists all the error codes and gives you the exact troubleshooting steps Janome recommends.
The Power of a Simple Reset
Have you ever had your phone or computer start acting sluggish for no reason? Sometimes your sewing machine's software gets a little confused in the same way. Before you start thinking about serious Janome sewing machine repairs, just try a simple "soft reset."
For most models, it’s as easy as turning the power switch off, waiting at least 30 seconds (this lets the internal capacitors fully discharge), and then turning it back on. You'd be surprised how often this simple power cycle is enough to clear a temporary software glitch and get you right back to your project.
Troubleshooting Finicky Sensors
These modern machines depend on a whole network of sensors to operate. Just a small piece of lint or a slight misalignment can trick a sensor into thinking there's a major problem. Two of the most common culprits are the automatic needle threader and the buttonhole lever.
If your needle threader isn't lining up quite right, try giving the mechanism a gentle cleaning with a soft brush. If the machine isn't recognizing the buttonhole lever, double-check that you've pulled it all the way down until it clicks firmly into place and that no stray threads are blocking its path.
Knowing When to Call in the Pros
Part of being a confident sewist is knowing what you can fix—and having the wisdom to know when you shouldn't. While many common frustrations can be solved with a fresh needle or a thorough cleaning, some problems are your machine's way of telling you it's time to step away and call for professional Janome sewing machine repairs.
Trust me, trying to tackle a serious mechanical or electrical issue without the right training can quickly turn a solvable problem into a very expensive paperweight. Learning to spot these warning signs will save you a world of frustration (and money) down the line.
Red Flags That Mean "Stop Sewing Immediately"
Some symptoms are more than just a minor hiccup; they're your machine screaming for help from a qualified technician. If you notice any of the following, stop what you're doing right away to keep from causing even more damage. These aren't the kinds of things a simple tweak will fix.
Keep an eye out for these tell-tale signs of a deeper problem:
- Scary Motor Noises: If you hear loud, metallic grinding or a high-pitched screeching from inside the machine's body, it's often a sign of trouble with the motor or internal gears. This is not normal.
- The Handwheel is Completely Stuck: When the handwheel won't turn at all—even after you've checked for the world's worst thread jam—it points to a serious mechanical seizure inside.
- Any Kind of Electrical Issue: This is a big one. Flickering lights, a distinct burning smell, sparks, or the machine refusing to power on are all serious electrical problems. For your safety, these are not DIY repairs.
- You Can See Broken Parts: If you've opened a cover plate for routine cleaning and spot a cracked plastic gear or a bent metal shaft, that's your cue to close it back up and call an expert.
A Word of Caution: One of the most common ways sewists accidentally kill their machines is by trying to disassemble a motor or mess with a circuit board. These systems are incredibly complex, and one misplaced wire or overtightened screw can be the end of the road.
Why Professional Tune-Ups are Worth It
Beyond just fixing things when they break, professional servicing is one of the best things you can do for the long-term health of your Janome. Think of it like taking your car in for a regular oil change and inspection—it’s all about catching small issues before they snowball into major failures. An annual or biennial service is a fantastic investment in your machine's future.
During a professional tune-up, a technician will do things you simply can't do at home. They will:
- Give the machine a deep, thorough cleaning, getting into all the nooks and crannies you can't reach.
- Properly lubricate all the internal metal-on-metal parts that keep things running smoothly.
- Check and recalibrate the timing and tension assemblies to factory specifications.
- Inspect all the belts, gears, and circuit boards for signs of wear and tear.
This kind of preventative care keeps your machine humming along at its best for years to come. If you're wondering what to budget for this, getting familiar with the potential cost of sewing machine repair can help you see the incredible value in preventative maintenance.
At the end of the day, being a smart machine owner means knowing your limits. When you handle the daily maintenance and build a relationship with a trusted technician for the heavy lifting, you're ensuring your Janome will be your reliable creative partner for countless projects.
Your Janome Repair Questions Answered
Even the most well-cared-for machine will have a hiccup now and then. It’s just part of sewing! Think of this section as your first line of defense—these are the questions I hear all the time from fellow crafters, with the simple, straightforward answers you need to get back to your project.
Here at bsewinn.com, we want you to feel totally confident with your machine. That’s why we offer everything from custom designs and projects to online classes and training. It’s all about building your skills so you’re always in control. Let’s tackle a few of those common concerns.
How Often Should My Janome Be Professionally Serviced?
I always tell people to think of it like a car tune-up. If you're sewing a few times a week, a professional service every 18-24 months is a solid plan. A good tech will go way beyond a home cleaning—they’ll recalibrate tension, check the timing, and get oil into all the internal parts you can’t reach.
But if you’re sewing daily, or maybe even running a small business from your sewing room, I’d strongly recommend an annual check-up. It’s the best money you can spend to prevent surprise breakdowns right before a deadline. It keeps your machine running like the reliable partner you need it to be.
Why Did My Janome Suddenly Get So Loud?
A sudden change in sound is your machine’s way of screaming for help. Don't just sew through it! Before you start to worry, check the two most common offenders.
- Swap out the needle. This is the number one cause. A dull, bent, or ever-so-slightly burred needle will make a horrible thumping sound as it hits the fabric and hook assembly. Seriously, even if it looks fine, change it.
- Give it a good cleaning and oiling. You would be shocked at how much lint can pack itself around the bobbin case and feed dogs. That packed-in fluff acts like grit and can make everything sound ten times louder. A quick clean and a fresh drop of oil can make an incredible difference.
Now, if the noise is a harsh, metallic grinding or a heavy clunking, stop sewing immediately. That’s a sign of something more serious, like your timing being off or something getting caught in the gears. That definitely requires a closer look.
A little secret from my years of experience? Always start with the simplest fixes first. I’d bet that over 80% of the time, a weird issue can be solved with a new needle, a complete rethreading of the machine, and a thorough cleaning.
Are Generic Bobbins and Needles Really That Bad for My Janome?
In a word: yes. At least for the bobbins. Using genuine Janome bobbins is non-negotiable for me. Your machine’s tension system is engineered for their exact size, weight, and even the type of plastic they use. A generic bobbin that's just a hair off can send your lower tension into a tailspin and cause endless frustration with your stitches.
With needles, you have a bit more wiggle room. Top-quality brands like Schmetz or Organ work beautifully in Janome machines, and I use them all the time. The key isn't so much the brand name, but making absolutely sure you match the needle type and size to your fabric and thread. Using a ballpoint needle on tightly woven cotton is a recipe for skipped stitches, just like using a tiny needle with thick thread will cause it to shred.
At bsewinn.com, our entire mission is to support your creative journey. Whether you’re diving into a new technique in one of our online classes or dreaming up custom sewing machine designs, we’re here with the tools and inspiration you need. Come visit us to see what our community is all about.
Explore our resources and machines at B-Sew Inn.