

Buy the biggest frame that fits and the fastest head available. That popular advice sounds safe, and it's often wrong. A long arm quilting machine and frame that technically holds a king-size top can still leave no room to load backing, force awkward reaching at the back rail, and turn a pleasant afternoon into sore shoulders and cramped passes.
Fit works on three levels at once. The frame must hold the quilt plus its backing margin, the room must hold the frame plus working clearance, and the setup must match the quilter's reach, stamina, and stitching style. Headline speed settles none of those questions. Measurements do.
Table of Contents
- Frame Sizes and Quilt Capacity at a Glance
- How the Machine and Frame Work Together
- Integrated Systems Versus Separate Frames
- Stitch Regulation, Throat Depth and SPI Settings
- Planning the Room, Ergonomics and Moving Test
- Maintenance and Ownership Costs Before You Buy
- Choose Your Setup and Book a Hands-On Trial
Frame Sizes and Quilt Capacity at a Glance
Frame length sets the widest quilt a setup can hold, but the advertised length isn't the usable quilt-top width. Rollers, clamps, and the backing margin consume part of every frame, so buyers should size from the backing outward rather than from the finished top alone.
| Frame length | Max quilt width | Typical fit | Clearance to plan |
|---|---|---|---|
| 8-foot frame | 78 inches | Home studio, throws and smaller bed quilts | Compact room, check front and rear access |
| 10-foot frame | 102 inches | Queen-size quilts with backing margin | Larger room, confirm loading space |
| 12-foot frame | 126 inches | King-size and large bed quilts | Substantially more clearance for loading and operator movement |
| 14-foot frame | 150 inches | Oversize and commercial quilts | Dedicated space, exact footprint to confirm with the dealer |
Why the Backing Margin Changes the Choice
The APQS quilt-size chart lists maximum quilt widths of 78 inches for an 8-foot frame, 102 inches for a 10-foot frame, 126 inches for a 12-foot frame, and 150 inches for a 14-foot frame. The same chart notes that long-arm backing is typically 6 to 8 inches wider than the quilt top so the machine can stitch beyond the edges and the clamps can keep the backing smooth.
That margin is working space, not waste. It lets the head travel past the top's edge without running out of backing, gives clamps something to grip, and keeps tension even while the quilt advances. A top chosen to match a frame's nominal length leaves none of that room, and edge stitching becomes a fight against the clamps.
Practical rule: Measure the widest finished top, add the 6 to 8 inch backing allowance, then choose the first frame that holds that total width.
Matching Length to Real Projects
An 8-foot frame suits throws, lap quilts, and smaller bed quilts in a home studio where floor space is shared. A 10-foot frame handles queen-size work with the margin intact, which makes it the practical default for many home quilters finishing family quilts.
A 12-foot frame covers king-size and large bed quilts without squeezing the backing. A 14-foot frame serves oversize and commercial pieces, but it demands a dedicated room and confirmed loading clearance. Each step up adds length at both ends and depth in daily use, so extra capacity that goes unused still costs floor space every day.
Capacity should follow the largest quilt made regularly, not the largest quilt imagined once. Quilters who finish one oversize piece a year may be better served by a smaller frame that fits the room well and sending that single piece out, rather than surrendering the studio to a frame that earns its size one week in twelve.
How the Machine and Frame Work Together
A long arm quilting machine and frame divide the work cleanly. The frame holds the quilt top, batting, and backing taut and flat on rollers, while the extended machine head travels across that tensioned surface to place the stitches. Neither half does the other's job, and weakness in one half shows up in the finished quilt.
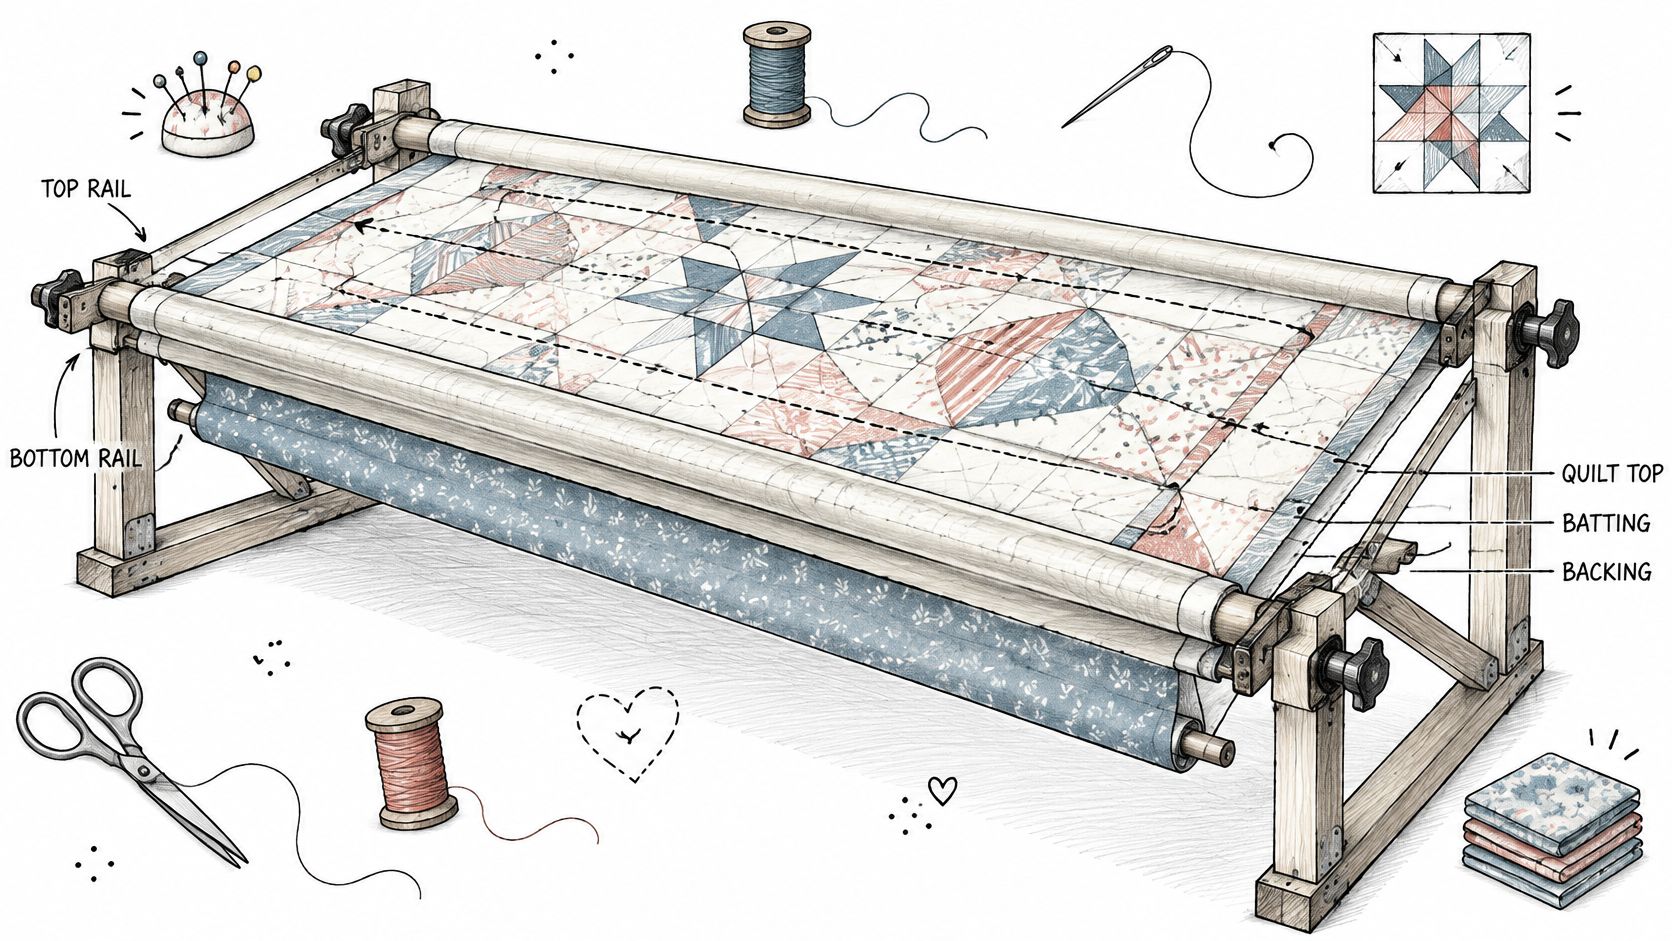
Three jobs run at the same time during every pass:
- The frame controls the quilt: Rollers and clamps keep all three layers smooth and support movement as the quilt advances.
- The rails and carriage control the path: The head rides on a carriage that moves along the frame, giving travel across and along the quilt.
- The motor and controls control the stitch: Speed, regulation, and needle movement determine stitch length and consistency.
That arrangement is what separates a long-arm from a domestic machine. On a domestic machine, the quilter pushes a bulky quilt through a small space under the arm. On a frame, the quilt stays supported and stationary while the head moves, so large tops don't drag, bunch, or pull sideways. The history behind that idea is long. The history of longarm quilting records a first documented quilting machine in 1871, with the design evolving by approximately 1877 toward the modern arrangement in which the machine moves across a stationary, frame-supported quilt.
Modern features sit on top of that same foundation. Stitch regulation, motorized movement, and computerized pattern control refine the basic frame-and-head system rather than replacing it. Computerized options such as Baby Lock Pro-Stitcher 6 Quilting Robotics Software combine computerized quilting and free-motion quilting in the same package, with built-in patterns and editing tools for edge-to-edge designs, blocks, borders, and custom motifs.
The buying consequence is simple. A strong head on a frame with rail drag, carriage play, or flex will still produce wobbly lines and uneven tension. Machine and frame must be judged as one system, tested together, on a full-size quilt sandwich.
Integrated Systems Versus Separate Frames
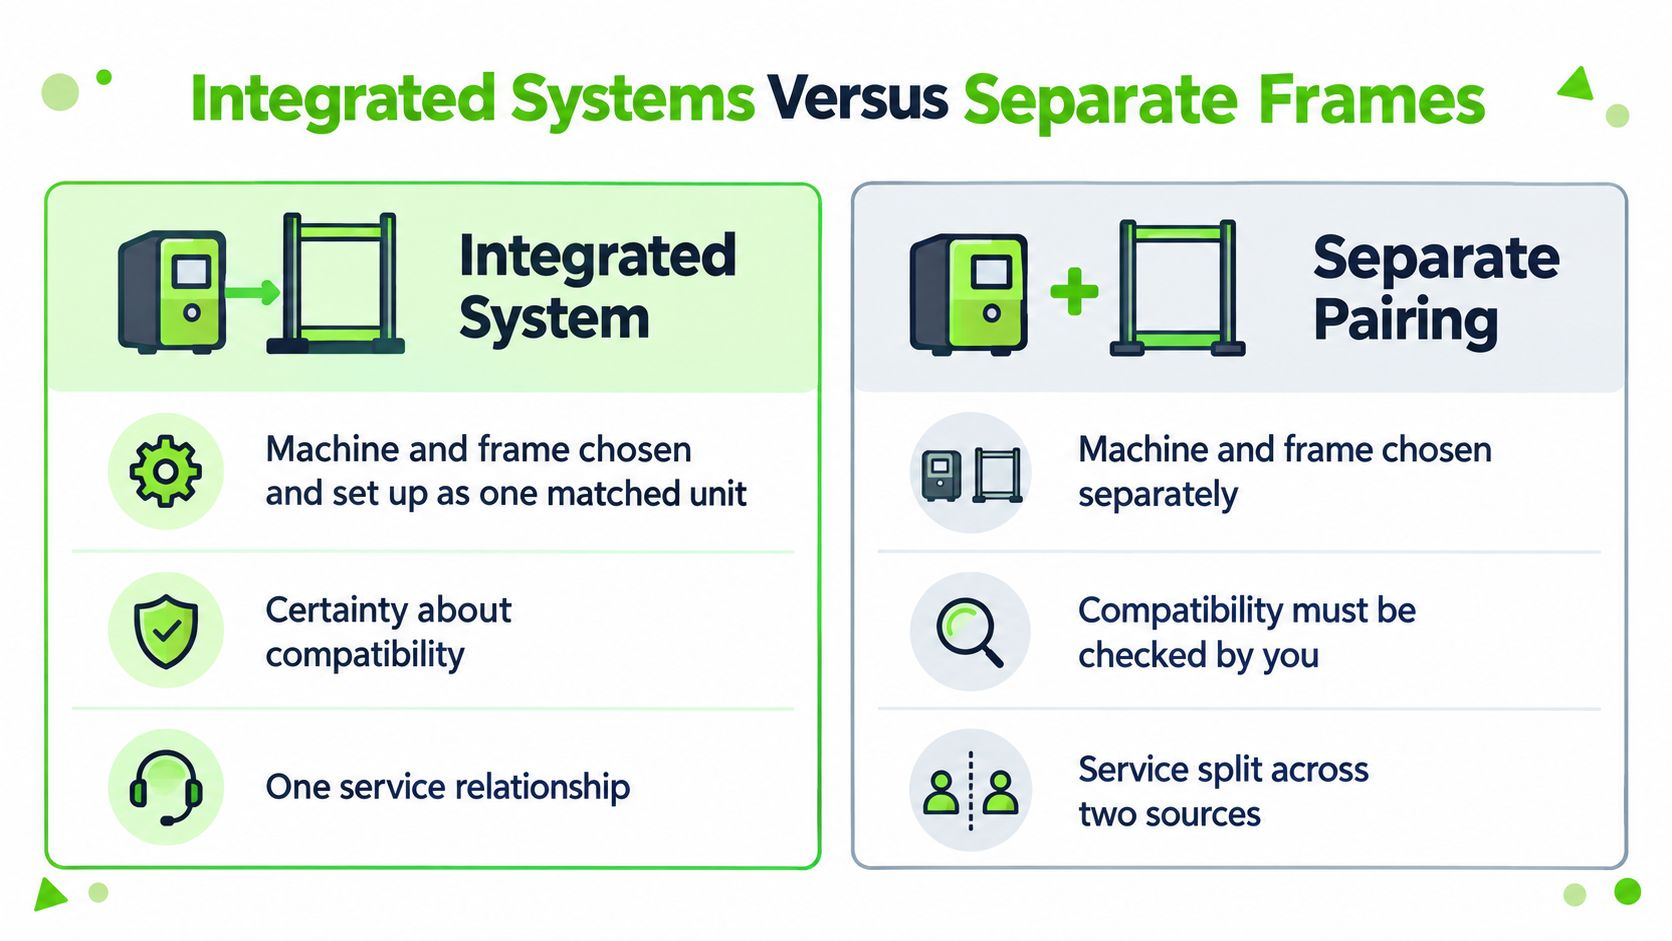
Buyers face two main paths, plus a compact third option for tight rooms. An integrated system pairs machine and frame as one matched unit from the start. A separate pairing matches a head to a frame already owned or bought alongside it, which keeps upgrade paths open but puts compatibility checks on the buyer.
| Setup | How it is built | Best for | Main trade-off |
|---|---|---|---|
| Integrated system | Machine and frame chosen and set up as one matched unit | Buyers who want confidence in compatibility and one service relationship | Harder to swap parts or mix components later |
| Separate machine and frame | Machine chosen to fit a frame already owned or bought alongside it | Quilters who plan to upgrade the head or frame over time | Rails, carriage, encoder and software compatibility must be verified |
| Compact or collapsible frame | Smaller frame that folds, sits low or fits a tighter footprint | Shared rooms and occasional quilting | Smaller quilt capacity and more setup time per session |
Where Each Path Earns Its Keep
Say a quilter finishes several bed quilts every month. Rail smoothness, carriage stability, and predictable service matter more than mix-and-match flexibility, and an integrated system removes doubt about whether the head, carriage, and frame were built for each other. One service relationship also simplifies warranty questions when a stitch problem could sit in either half.
Say instead a quilter already owns a sound frame and wants a better head in two years. A separate pairing protects that earlier investment. The cost is homework. Buyers comparing frame options, including the background covered in this guide to Grace Co quilting frames, still need to confirm fit for the specific head under consideration.
Three checks decide whether a separate pairing works:
- Rail and carriage fit: The head must sit securely and roll without drag or play.
- Encoder compatibility: The sensors that read carriage movement must work with the new head's controller.
- Software fit: Included or planned pattern software must recognize the machine and frame combination.
Compact and collapsible frames solve a different problem. They suit shared rooms and occasional quilting, trading quilt capacity for a footprint that folds away or sits lower. Wall hangings and throws fit that workflow well. Frequent bed quilts don't, because repeated setup and smaller capacity add friction to every session.
Stitch Regulation, Throat Depth and SPI Settings
Stitch regulation is a feedback loop, not a speed dial. An encoder, a small sensor on the carriage tracks, detects how fast the head moves and sends pulses to the controller. The controller raises or lowers motor speed so needle speed matches hand speed, and the selected stitch length holds whether the quilter moves briskly down a border or creeps around a tight curve.
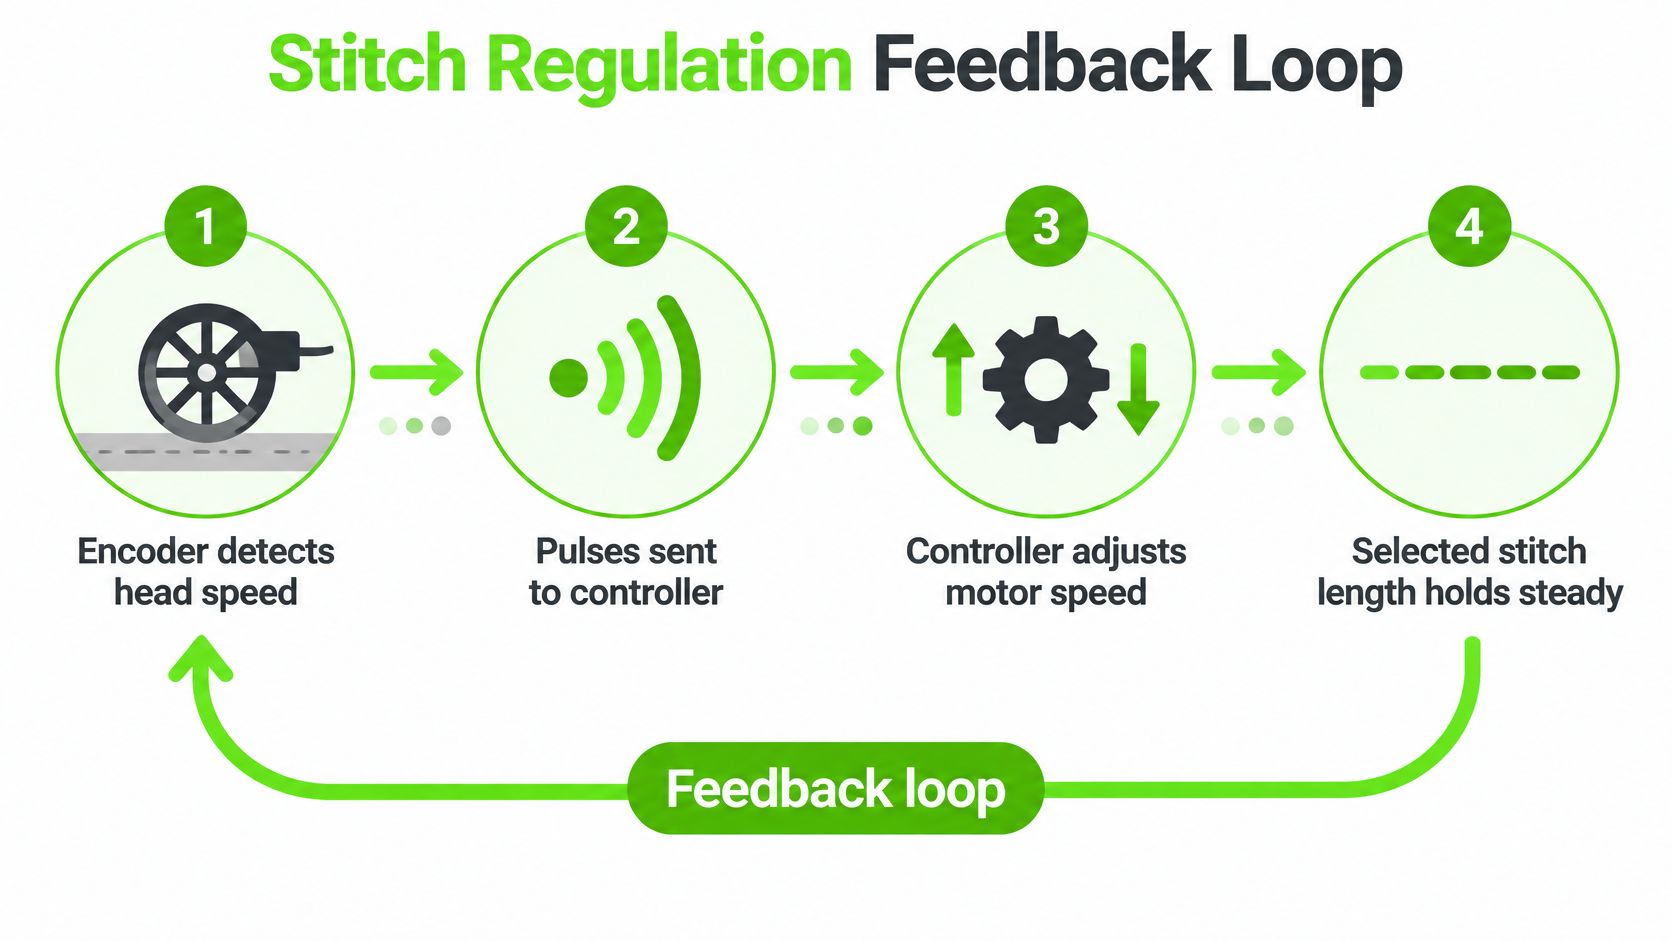
The ABM International/Innova stitch regulation user manual describes encoders on the carriage tracks sending digital pulses to the controller, which increases or decreases voltage to the sewing motor to maintain a selected stitch density. The same manual specifies an adjustable range of 5 to 15 stitches per inch. Background on how regulators behave across machine types appears in this overview of stitch regulators for sewing machines.
Regulated Modes in Plain Terms
Most regulated machines offer two behaviors. Stop-and-start mode pauses the needle when the head stops, which suits ruler work and careful corners where thinking time matters. Cruise mode keeps the needle moving at a minimum speed even when the head pauses, which smooths starts, corners, and direction changes.
Constant-speed and manual modes work differently. The needle runs at a set pace regardless of hand movement, so stitch length depends entirely on how steadily the quilter moves the head. Experienced free-motion quilters sometimes prefer that direct control. Beginners usually get more consistent results from regulation.
Throat Depth and the Quilting Field
Throat depth is the distance from the needle to the back of the machine's arm. It sets the quilting field available in one pass before the quilt must be advanced on the rollers. Deeper throats mean fewer advances and room for larger motifs, but also a longer reach to the back of the field, which matters for posture during long sessions.
SPI and Stitch Length
SPI means stitches per inch. Stitch length equals one inch divided by the SPI setting, so lower numbers produce fewer, longer stitches and higher numbers pack more stitches into each inch. The Baby Lock Regalia documentation identifies settings below 5 SPI as basting territory and states that moving below 5 SPI produces a quarter-inch basting stitch.
| SPI setting | Stitch length | Typical use |
|---|---|---|
| Below 5 SPI | About 1/4 inch | Temporary basting of quilt layers |
| 5 SPI | About 1/5 inch | Open, large-scale stitching |
| 10 SPI | About 1/10 inch | Mid-density all-over designs |
| 15 SPI | About 1/15 inch | Dense detail and small motifs |
Three checks settle most model comparisons. Confirm the minimum and maximum SPI, confirm how basting is selected, and confirm whether the machine offers regulated, constant-speed, and manual modes. A wide SPI range with both regulated modes covers basting, open edge-to-edge work, and dense detail without forcing compromises later.
Planning the Room, Ergonomics and Moving Test
Bigger and faster doesn't mean better at home. A long arm quilting machine and frame needs substantial depth as well as width, and a setup that's hard to walk around, load, or move will frustrate its owner long after the spec sheet is forgotten. Room planning deserves the same care as machine selection.
Discussions in a Reddit thread for long arm quilters highlight that setups can be difficult to move after installation and may be unsuitable for garages because dust and temperature extremes can damage equipment and quilts. The same discussion notes that a heavier machine may improve stability but increase fatigue during operation, which is why the heaviest or fastest machine isn't automatically the best choice for a home quilter.
A Room-Planning Method That Works
- Measure the full footprint: Record frame width and depth, not length alone.
- Add working clearance: Leave room for front and rear access so loading, rolling, and rear pantograph work don't require squeezing past walls.
- Check the support details: Confirm power outlet placement, lighting over the needle area, and nearby storage for thread, batting, and rulers.
- Trace the delivery path: Measure stairways, door widths, and turns before purchase, and confirm the flooring can support a level, stable frame.
A garage deserves special caution. Dust settles into rails and electronics, and temperature swings stress both equipment and stored quilts. A spare bedroom with a wall removed from the plan often beats a larger but harsher space. General layout thinking from these sewing room organization ideas helps, but the frame footprint plus access clearance should be taped on the actual floor before any commitment.
A frame that fits the room on paper can still fail in daily use if nobody can reach the back rail comfortably.
The Ergonomic Moving Test
Rigidity and fatigue pull in opposite directions. A heavier, stiffer setup can feel planted and smooth, yet demand more from shoulders, arms, and grip across a long session. Occasional quilters may never notice. Quilters finishing client work weekly will.
Run this checklist during any in-store trial:
- Reach: Controls, handles, and the back of the quilting field reachable without leaning hard.
- Standing time: At least 30 minutes of guided stitching before judging comfort.
- Wrist position: Neutral wrists on the handles, without gripping to steer.
- Visibility: A clear view of the stitching line without stooping.
- Loading: Pinning, clamping, and rolling a backing without awkward lifting.
Discomfort at minute ten becomes avoidance by month three. The test costs half an hour and protects a purchase measured in thousands of dollars.
Maintenance and Ownership Costs Before You Buy
Routine care for a long-arm is specific, scheduled, and model-dependent. Treating it as an afterthought leads to skipped oiling, lint buildup on rails, and service visits that better habits would have prevented.
The BERNINA Q 16 manual instructs the operator to lubricate the machine once per day or after a prolonged period of non-use, applying one drop of BERNINA oil to the hook race. That manual gives a concrete example of how the routine works:
- Turn the handwheel until the hook race is accessible.
- Apply one drop of oil to the hook race, no more.
- Turn the handwheel two or three times so the oil spreads evenly.
Intervals, oil type, and lubrication points differ between machines, so the manual for the exact model governs. Oiling by ear, whenever a machine sounds dry, isn't a maintenance plan. General habits from this guide to sewing machine maintenance and repair support the routine, but they don't replace model-specific instructions.
Questions to Ask Before Purchase
- Owner tasks: Which cleaning, oiling, and rail-care steps belong to the owner, and how often?
- Professional service: Which adjustments require a technician, and what's the typical service interval?
- Frame care: What schedule applies to the frame, carriage wheels, and rails as a system?
- Consumables: How quickly do needles, oil, and thread add up at the owner's expected volume?
Ownership costs accumulate gradually across those consumables, periodic service visits, and occasional repairs. In-person service, repair, and trade-in options at the selling dealer shorten downtime when something does go wrong, which matters far more on a frame system that can't be carried into a shop under one arm.
Financing options are available through the dealer, and preowned machines enter inventory through trade-ins. Current terms, trade-in values, and preowned availability change often enough that each deserves a direct in-store conversation rather than an assumption.
Choose Your Setup and Book a Hands-On Trial
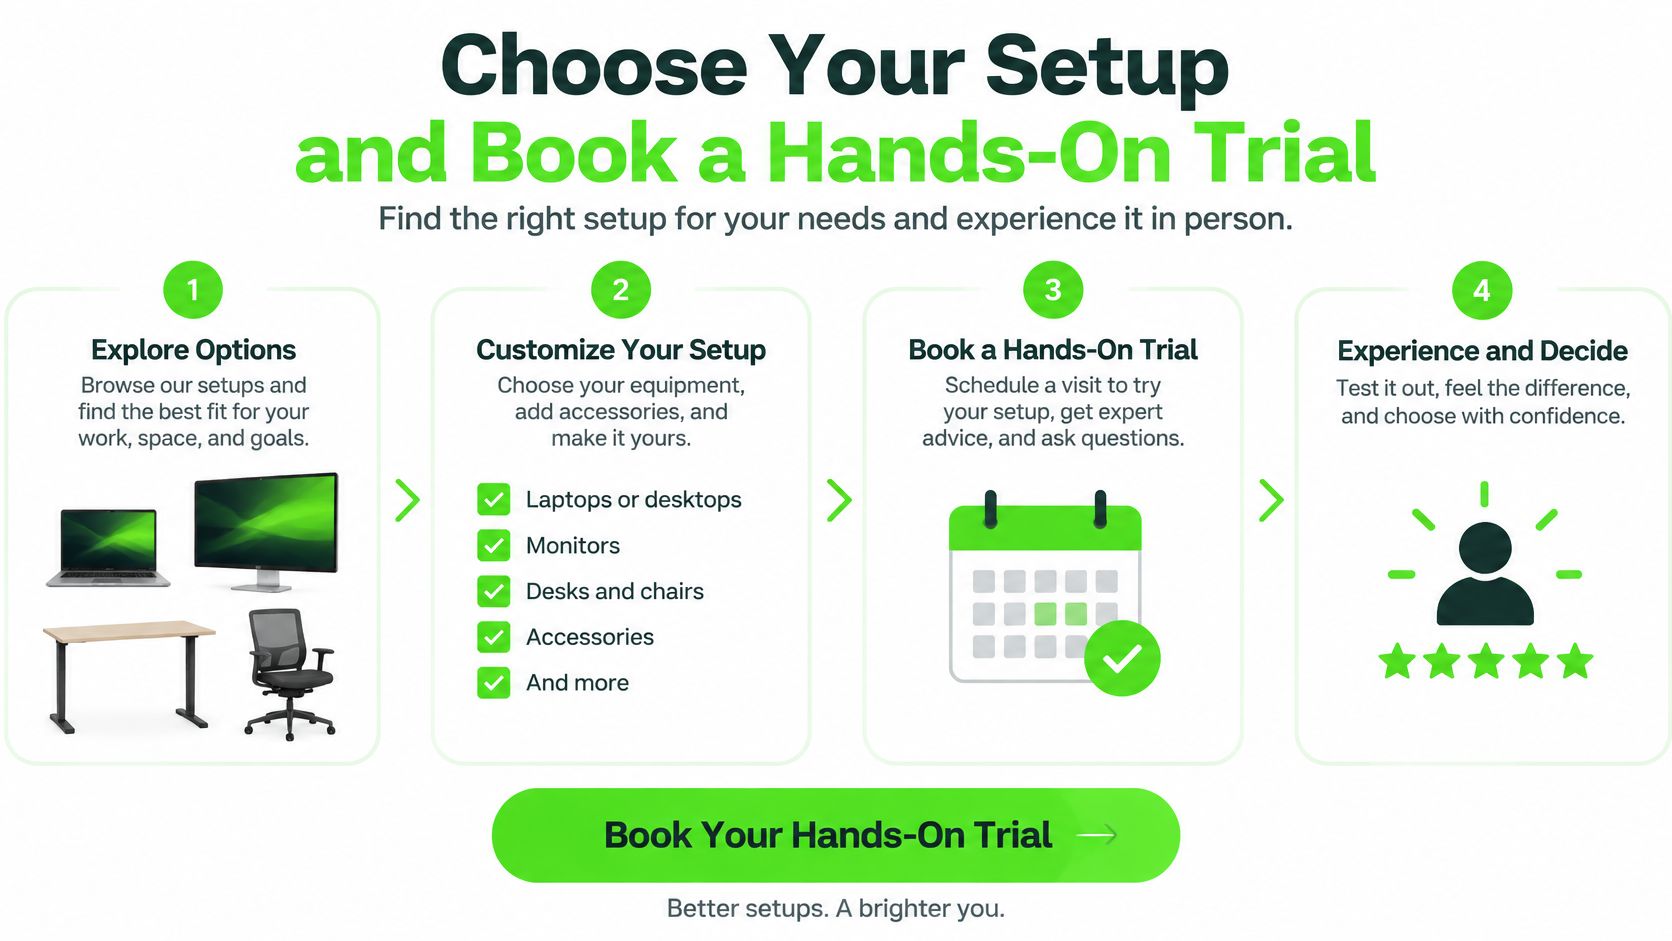
Four common situations point to four different setups. The right direction depends on quilt size, frequency, and room reality, and each one has a specific in-store test that confirms or overturns the paper choice.
| Quilting situation | Setup direction | Test in store |
|---|---|---|
| Occasional bed quilts for family | 10-foot frame with a regulated machine | Load a queen-size backing and try cruise mode |
| King-size and large bed quilts | 12-foot frame, confirmed backing margin and loading room | Roll a full-size backing and check clamp access |
| Frequent edge-to-edge or client work | Computerized quilting on a matched frame, confirmed in store | Run an edge-to-edge pattern and check stitch consistency |
| Small or shared room | Compact or collapsible frame | Set up the frame in the actual footprint and check front and rear access |
Bring the Measurements, Test the System
A productive trial starts with numbers already in hand. Quilters should arrive with the widest planned quilt top plus its backing allowance, the taped room footprint with access clearance, and a short list of required modes such as cruise, stop-and-start, and basting. Price context from this overview of long arm quilting prices helps frame the budget conversation before the visit.
With those numbers settled, the trial itself becomes practical. Load a full-size backing rather than a small practice piece, since clamp access and rolling effort only reveal themselves at real scale. Run cruise mode through corners, switch SPI settings between open and dense stitching, and advance the quilt at least once. Small samples hide exactly the problems that matter.
The deciding test: If loading, stitching, and advancing a full-size quilt feels manageable for a full session, the setup fits. If any step feels like a struggle in the store, it won't improve at home.
Occasional, Frequent, and Client Work
Occasional bed quilts for family point toward a 10-foot frame with stitch regulation. Regulation forgives rusty hands after weeks away, and the frame handles queen-size work without consuming a dedicated room. The in-store test is loading a queen backing and running cruise mode through a simple all-over design.
King-size and large bed quilts justify a 12-foot frame, provided the room measurements confirm loading room at both ends. Rolling a full-size backing in the store and checking clamp access at the far rail exposes reach problems before delivery day.
Frequent edge-to-edge or client work shifts the priority toward computerized quilting on a matched frame. Repeatable patterns, consistent stitching across long passes, and reduced physical guiding all protect both quality and the quilter's body. Running a complete edge-to-edge pattern during the trial shows placement accuracy and stitch consistency under real conditions.
Small or shared rooms call for honesty about footprint. A compact or collapsible frame that sets up in the actual taped space, with front and rear access intact, beats a larger frame that turns the room into an obstacle course. Setup time should be timed during the trial, since a frame that's tedious to assemble gets used less.
Where to Run the Trial
B-Sew Inn stores in Tulsa and Oklahoma City, Oklahoma, Springfield, Missouri, Humble, Texas, and Fayetteville, Arkansas let buyers run a long arm quilting machine and frame together before committing. Hands-on time with real backing, real clamps, and real stitch settings answers questions that product pages can't.
Quilters who want more time before deciding can book an in-person class or machine mastery session at a retail location and build hours on the equipment with guidance. Those sessions also reveal whether standing frame work suits the quilter's body over a full session, which no short demo can show. Browsing the longarm collection online beforehand narrows the candidates, and the store visit settles the choice.
Bring the widest quilt measurement, the taped room footprint, and a list of must-have stitch modes to B-Sew Inn, then visit a store in Oklahoma, Missouri, Texas, or Arkansas to load a full-size backing and test a long arm quilting machine and frame as a complete system. Book an in-person class or machine mastery session for guided time on the equipment, or contact the team about service, trade-ins, and current longarm availability before making the final decision.

