

We've all been there: you're in the groove on a new project, the fabric is perfect, your design is coming to life, and then... clunk. Skipped stitches. Tangled thread. A sewing machine tantrum.
Nine times out of ten, these frustrating moments aren't about your skill. It’s your machine sending out an S.O.S. for a little TLC. A few minutes of simple, consistent care is truly the secret behind every flawless stitch.
The Secret to a Perfect Stitch Is a Healthy Machine
Think of sewing machine maintenance not as a chore, but as part of the creative process itself. This guide will walk you through the easy upkeep that keeps your machine humming, extends its life, and saves you a world of headache (and money!) down the road.
Here at B-Sew Inn, our commitment is to empower crafters like you. We achieve this through our custom sewing machine designs and the extensive support we offer via B-Creative classes, hands-on training, and a wealth of online resources. Let's get you spending less time troubleshooting and more time creating.
Why Routine Care Matters More Than You Think
Ignoring your machine is a bit like driving a car and never changing the oil. Sooner or later, small issues are going to snowball. The number one enemy? Dust and lint. It’s everywhere. That fluffy buildup works its way into the bobbin case, along the thread path, and around the feed dogs, soaking up oil and creating a gunky sludge that gums up the works.
When that happens, the motor has to fight against the gunk, putting extra strain on belts and gears. That's when you start seeing the tell-tale signs that disrupt your flow:
- Skipped or uneven stitches that just ruin the look of a clean seam.
- Constant thread breaks that make you want to pull your hair out.
- Weird grinding or clunking noises that are a sure sign of internal strain.
- Fabric getting snagged or puckered because the feed dogs can't move freely.
A well-maintained machine is like a reliable creative partner. When you give it a little time and care, it works with you, not against you, turning those big ideas into beautiful, finished projects.
The Financial and Creative Benefits of Maintenance
Here's the real kicker: proper care can extend the life of your machine by up to 50%. That’s a huge saving for hobbyists and professionals alike. A study mentioned on cognitivemarketresearch.com found that a shocking 72% of all repairs are caused by neglected lint buildup in the bobbin and hook area.
Think about that. These are the very issues that frustrate beginners working on their first quilt or pros trying to nail edge-to-edge designs. And the best part? You can prevent 80% of these problems with simple habits, like giving your machine a quick wipe-down after every 10 hours of sewing and oiling the key points monthly.
Your Essential Maintenance Toolkit and Routine
Getting into a good maintenance habit starts with having the right tools on hand. You don’t need a fancy workshop to keep your sewing machine purring along; a few simple items are all it takes, and you probably have most of them already. When your toolkit is ready to go, routine care feels less like a chore and more like a quick, satisfying part of your sewing process.
Think of it like prepping your ingredients before you start cooking. Having everything within arm's reach means you can jump on maintenance whenever you have a spare moment. That little bit of prep work pays off big time in your machine's performance and how long it'll last.
Building Your Maintenance Kit
Your core toolkit is refreshingly simple. The idea is to have everything you need to clear out lint, tighten anything that’s come loose, and get a drop of oil exactly where it needs to be. Forget the complicated gadgets—these basics will handle 90% of your machine's upkeep.
Here’s what every sewist should have in their kit:
- Lint Brushes: A small, stiff-bristled nylon brush is your best friend for digging packed-in lint out of the bobbin area and feed dogs. Most machines come with one, but it’s smart to have a couple of different sizes.
- Screwdrivers: You’ll want a small flat-head screwdriver for the needle plate and a Phillips-head for other screws. Trust me, a magnetic tip is a lifesaver for keeping track of those tiny screws.
- Microfiber Cloth: Perfect for wiping down the outside of your machine. It grabs dust without leaving fuzzy bits behind like a paper towel can.
- Sewing Machine Oil: This is the one thing you absolutely can't skimp on. Never, ever use household oils like 3-in-1 or WD-40. They’re way too heavy and will gum up the works, attracting even more lint and eventually seizing up your machine. Only use clear, lightweight oil made specifically for sewing machines.
This simple flowchart really brings it home: consistent upkeep is the most direct path to better stitches and a machine that lasts for years.

It’s easy to see how these small, proactive steps are directly tied to the beautiful results we’re all chasing.
The Core Cleaning and Oiling Routine
Got your kit? Great. Now you can get into a simple, repeatable cleaning routine. You want to focus on the spots where lint and thread bits cause the most drama: the bobbin case, the feed dogs, and the thread path. How often you do this really depends on how much you sew, but a good rule of thumb is to give it a once-over after every 8 to 10 hours of sewing.
First things first: turn off and unplug your machine. Safety first! Then, get the needle, presser foot, and needle plate out of the way for a clear view. Use your lint brush to gently sweep out all the dust and thread fluff from the bobbin housing and around the feed dogs. That area is basically a lint trap, and just like with a dryer, a little buildup can cause big problems.
Once it's clean, it’s time for a little oil. Check your machine's manual to find the specific oiling points, since they can differ from model to model. Usually, you just need one single drop of sewing machine oil right in the center of the hook race—that’s the metal ring your bobbin case sits in.
A Word of Caution: Don't over-oil! More is definitely not better here. One drop is all it takes to cut down on friction. Any extra oil will just become a magnet for more lint and can even stain your fabric, which is the last thing you want.
After adding the oil, turn the handwheel toward you a few times to spread it around. Before you jump back into your project, run a few stitches on a piece of scrap fabric just to catch any stray oil. For a more detailed walkthrough, you can learn more about how to clean your sewing machine in our dedicated article.
Your Routine Sewing Machine Maintenance Schedule
Consistency is everything. A quick clean-up done often is far more effective than a massive deep clean once in a blue moon. To make it a habit, try tying it to something you already do, like changing your needle or wrapping up a big project.
Here's a straightforward checklist you can use to stay on top of things and keep your machine in peak condition.
| Task | Frequency | Why It Matters |
|---|---|---|
| Wipe Down Exterior | After every use | Stops dust from creeping into your machine’s internal parts. |
| Clean Bobbin & Feed Dogs | Every 8-10 hours of sewing | Gets rid of lint buildup, the number one cause of skipped stitches and tension headaches. |
| Change the Needle | Every 8-10 hours of sewing or new project | A dull or bent needle is a top offender for damaging fabric, skipping stitches, and making noise. |
| Oil the Hook Race | After every major cleaning session | Keeps the bobbin mechanism running smooth and quiet, preventing unnecessary wear and tear. |
Sticking to a routine like this will make maintenance feel like second nature.
Here at B-Sew Inn, we really hammer home this foundational knowledge in our classes because we've seen how much it empowers sewists. When you shift maintenance from an afterthought to a regular practice, you ensure your machine is always a reliable partner, ready for whenever creativity strikes.
Solving Common Sewing Problems Yourself
When your machine starts acting up, it's easy to jump to the conclusion that a huge, expensive repair is on the horizon. I see it all the time. But the truth is, most of the day-to-day frustrations we face as sewers are caused by tiny, easily fixable issues. Before you panic, take a deep breath and let's walk through a few simple diagnostic steps. More often than not, you can solve the problem yourself and get back to your project in minutes.
The key is to think like a detective, always starting with the most likely culprits. Don't immediately assume the worst, like a timing issue or a motor failure. Instead, let's look at the common symptoms and their surprisingly simple solutions, just like we would in a B-Sew Inn hands-on training session. This approach empowers you to handle issues confidently and keep sewing.
Diagnosing Tension Troubles and Thread Breaks
Let's paint a picture: your fabric is puckering, your top thread keeps snapping, and you're about to throw the whole project out the window. Sound familiar? This is almost always a sign of a tension imbalance. Your machine creates a stitch by locking the top thread and the bobbin thread together. For that perfect, professional-looking stitch, the lock needs to happen right in the middle of your fabric layers, invisible from either side.
When the tension is off, that lock gets pulled to one side or the other. Here’s how to quickly figure out what's going on:
- See bobbin thread on top? Your top tension is too tight.
- See top thread loops on the bottom? Your top tension is too loose.
But before you even think about touching that tension dial, always re-thread your machine completely. Make sure the presser foot is up when you do this! Lifting the foot opens up the tension discs, allowing the thread to seat properly. A mis-threaded machine is the number one cause of tension problems, hands down. If that doesn't fix it, then you can start making small adjustments to your top tension dial, testing on a scrap of fabric after each little turn.
The Mystery of Skipped Stitches
Skipped stitches are another one of those incredibly common issues that create weak seams and just plain look messy. The good news is, the fix is usually quick and costs next to nothing. The culprit in nine out of ten cases? Your needle.
A needle can become dull, bent, or get a tiny, invisible burr on the tip after just a few hours of sewing. This microscopic damage stops it from piercing the fabric cleanly and forming the thread loop for the hook to catch. It's that simple.
The very first thing you should do when troubleshooting skipped stitches is to put in a fresh needle. Make sure you're using the right type and size for your fabric and that it's inserted correctly—flat side to the back, pushed all the way up into the clamp.
If a new needle doesn't solve it, double-check that your machine is threaded correctly. Also, make sure you aren't pushing or pulling the fabric through the machine. Let the feed dogs do their job! Forcing the fabric can cause the needle to bend just enough to miss the hook, leading to—you guessed it—skipped stitches.
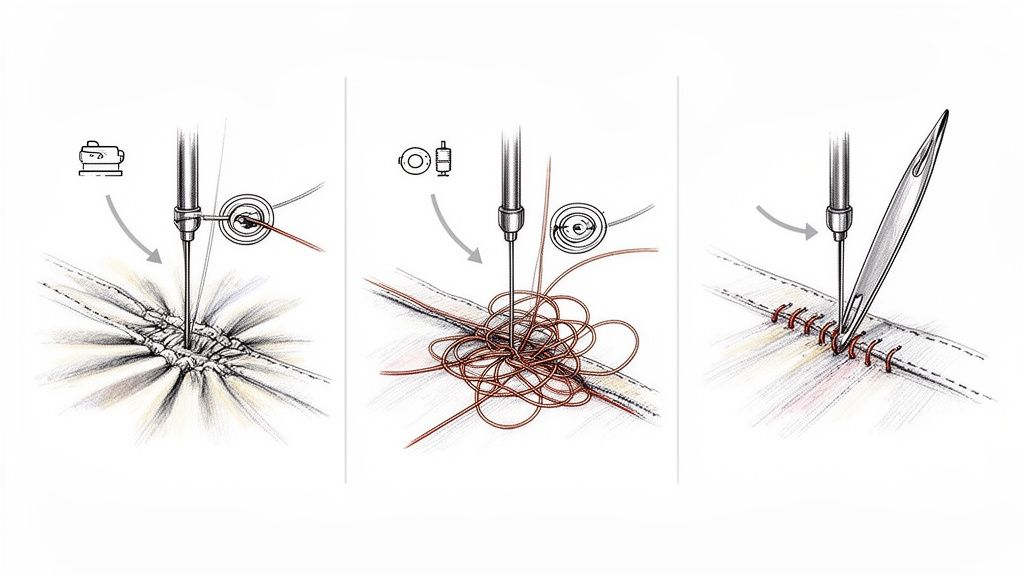
Banishing the Dreaded Bird's Nest
You finish a beautiful seam, lift the presser foot, and find a massive, tangled mess of thread on the underside of your fabric. We've all been there. This is the dreaded "bird's nest." It looks like a bobbin issue, but it's almost always caused by a problem with the top thread.
This happens when the top thread doesn't have the right tension applied from the very first stitch. The most common reason? Forgetting to lower the presser foot before you start sewing. With the foot up, the tension discs are wide open, and the machine feeds a ton of loose thread to the bottom, creating an instant knot. Always, always double-check that your presser foot is down before you hit the pedal. For more advanced diagnostics, check out our complete sewing machine troubleshooting guide.
Honestly, a few basic checks can prevent a huge number of problems. Studies have shown that 65% of sewing machine failures worldwide are preventable through timely tension adjustments and needle changes. In fact, improper tension alone causes 45% of all thread breaks. Following a simple habit, like changing your needle every 8-16 hours of sewing, can save you from the headaches that plague so many sewers.
Interestingly, the logic of diagnosing a machine holds true for other things in your home. When you're facing a malfunction, some of the same principles used for troubleshooting appliance issues can be a big help. The core idea is always the same: start with the simplest, most common solution first.
Advanced Maintenance and Mechanical Checks
So, you've gotten the hang of routine cleaning and basic troubleshooting. That's fantastic! But what about those times when you just know the problem is deeper than a wonky needle or a quick tension adjustment? This is where we start peeking under the hood. We'll look at the parts that really make your machine go—the motor, belts, and timing—but always with a healthy dose of caution and a clear idea of when to call in the pros.
At B-Sew Inn, we're big believers in empowering you with knowledge. Our online classes and training sessions are all about building your skills from the ground up, so you feel just as confident understanding your machine's guts as you do picking out the perfect fabric. Think of this as the next chapter in your sewing journey.
Assessing Your Motor and Drive Belt
Your machine's motor is the heart, and the drive belt is the artery that gets the power where it needs to go. Over thousands of stitches, that belt can start to stretch, crack, or get brittle. A worn-out belt is often the culprit behind a whole host of subtle annoyances, like a sluggish start or an inconsistent sewing speed that you just can't seem to pin down.
Before you even think about looking at the belt, unplug your machine. Seriously. This is non-negotiable when you're working with internal parts. On most machines, removing the handwheel cover or a side panel will give you access.
Once you have a clear view, here’s what to look for:
- Cracks or Fraying: If you see any visible damage, the belt is compromised. It’s time for a replacement, period.
- Glazed or Shiny Surface: A super smooth, shiny look means the rubber has hardened. It's not gripping properly and will likely slip.
- Too Much Slack: Give the belt a gentle press. It should have a tiny bit of give—maybe a quarter-inch—but if it feels loose or spongy, it either needs to be tightened or replaced.
Listen to your machine, too. A high-pitched squeal as you start to sew is a classic sign of a slipping belt. And if you ever smell burning rubber, that's your machine screaming for help. Stop immediately! Industry data shows that motor-related issues make up 28% of service calls, but a simple, proactive belt check can prevent over 60% of those problems. It's a small check that makes a huge difference. You can dive deeper into these trends from market data collected on sewing machines.
Demystifying Sewing Machine Timing
"Timing" is a word that makes a lot of sewists nervous, but the idea behind it is actually pretty straightforward. It’s all about the perfectly synchronized dance between your needle and the hook mechanism down in the bobbin area. For a stitch to form, the hook has to swoop past the needle at the exact right millisecond to grab the thread loop.
When the timing is off, the dancers are out of sync. The hook gets there too early or too late and misses the thread loop entirely. This isn't something you can fix with the tension dial; it's a mechanical adjustment.
Think of it like a perfectly choreographed duet. If one dancer is a fraction of a second off, the entire lift fails. The same precision is required inside your machine for every single stitch.
You can be pretty sure your timing is off if you're seeing these issues:
- The needle is going up and down, but you’re getting long sections of skipped stitches or no bottom thread at all.
- You're breaking needles constantly, and you might even hear a sickening "clunk" as the needle hits the metal hook.
- The machine just seizes up and refuses to form any stitches, no matter what you do.
While actually adjusting the timing yourself is an advanced repair, knowing these symptoms is half the battle. It helps you diagnose the problem with confidence and have a much clearer conversation with a technician, which saves everyone time and prevents you from accidentally causing more damage.
The Unique Needs of Sergers and Specialty Machines
If you have a serger or coverstitch machine, you already know they play by their own rules. With all their loopers, knives, and multiple thread paths, their maintenance needs are a lot more specific. The basic ideas of cleaning out lint and keeping things oiled still apply, but the "where" and "how" are way more complex.
These machines run at incredible speeds, which means they create more lint and use up oil faster than a standard sewing machine. It’s absolutely critical to follow your manual to find all the specific lubrication points. The intricate thread paths are also perfect hiding spots for lint, and a thorough cleaning is the only way to get perfectly balanced stitches.
We offer specialized classes at B-Sew Inn just for these machines because we get their unique quirks. Learning to maintain your serger is just as vital as learning to thread it. Getting comfortable with these advanced checks is a huge step toward becoming a truly self-sufficient sewist, ensuring your machines are always ready for your next project.
When to Trust the Experts at B-Sew Inn
Knowing your limits is just as important as knowing how to re-thread your machine. While tackling common issues yourself is incredibly empowering, some problems are red flags telling you it’s time to call for backup. Pushing through a complex repair can quickly turn a minor, fixable issue into a major, costly one.
Think of it as smart sewing machine maintenance. If your machine is sending out a serious S.O.S., listening is the best thing you can do for its longevity—and your sanity. This is exactly where our certified technicians at B-Sew Inn come in.
Red Flags That Need a Professional
Some symptoms go far beyond a simple DIY fix. They often point to deeper mechanical or electrical problems that need specialized tools, parts, and a whole lot of experience to diagnose and fix safely.
Listen for these warning signs, and if you spot one, step away from the machine:
- Loud Grinding or Seizing Noises: If you hear a sudden, ugly grinding sound or the machine just locks up completely, it often means an internal gear has failed or the timing is so off that metal is hitting metal. Don't try to force it. Just turn it off.
- Electrical Problems: Flickering screens, buttons that don't respond, or that distinct smell of hot electronics are serious warning signs. For your own safety and to avoid frying the machine’s computer, this is a job for an expert.
- Persistent Timing Issues: You've tried all the basic fixes for skipped stitches, changed the needle, and re-threaded a dozen times, but the problem won't go away. The timing is almost certainly off, and that’s a precise adjustment. Getting it wrong can permanently damage your machine's hook assembly.
At B-Sew Inn, we see our repair services and our training classes as two sides of the same coin. We're here to fix the tough problems for you, but we're also passionate about empowering you with the skills to handle everything else with total confidence.
The B-Sew Inn Approach: Service and Education
We believe expert support should be a core part of your creative journey, not just a last resort. Our factory-certified technicians have truly seen it all—from vintage machines needing careful restoration to the latest computerized models with tricky electronics. They don't just patch the immediate problem; they perform a comprehensive service to get every component working in perfect harmony again.
This professional-level care goes way beyond what's possible at home. We diagnose underlying issues you might not even know are there, calibrate settings back to factory specs, and make sure your machine runs as smoothly as the day you brought it home. Understanding what goes into a professional tune-up can also help you budget for care; you can learn more about the typical cost of sewing machine repair in our detailed guide.
Ultimately, our goal is to build your confidence. Whether you bring your machine to us for a complex repair or join one of our B-Creative classes to master your machine, we're your partners in creation. We provide the resources and expertise you need, so you can focus on what you love most—bringing your incredible ideas to life.
Even after you’ve read a whole guide, there are always a few more questions that pop up. That’s perfectly normal! Here are some of the most common things we get asked by sewists just like you, with some quick, straightforward answers.
How Often Should I Get My Sewing Machine Professionally Serviced?
Think of it like a car—how often you need a tune-up depends on how much you drive it. As a general rule, we recommend a professional service every 12 to 24 months.
If you're quilting or embroidering every day, you're putting a lot of mileage on your machine. An annual service is definitely your best bet to keep it humming along in perfect condition. For those who sew a few times a month for fun, bringing it in every two years is usually plenty.
When you bring your machine to B-Sew Inn, our tune-up goes way beyond what you can do at home. Our techs get deep into the machine to clean and lubricate internal gears, run checks on all the electrical parts, and recalibrate the tension and timing back to factory specs. It makes a world of difference.
Is It Safe to Use Canned Air to Clean My Machine?
This is a big one, and we strongly advise against using canned or compressed air. I know it seems like a super-fast way to blast out the dust, but the force actually blows lint and debris deeper into the machine's mechanics. Once it's in there, it mixes with oil and creates a thick, gummy sludge that can really mess up the gears and lead to much bigger problems.
A much better (and safer!) way to clean is with a small, soft lint brush and a mini vacuum attachment made for electronics. This combo actually removes the gunk instead of just pushing it around, which is exactly what you want for those delicate internal parts.
The goal of cleaning is removal, not relocation. Pushing lint deeper into your machine is a common mistake that can turn a simple maintenance task into a reason for a professional repair call.
What Is the Biggest Mistake in Machine Maintenance?
Hands down, the most common and damaging mistake we see is using the wrong kind of oil. Please, never use all-purpose household oils like WD-40 or 3-in-1 oil on your sewing machine! They're way too thick and get sticky over time, which acts like a magnet for lint. Before you know it, your machine’s moving parts can seize up completely, causing some serious damage.
Always, always use a clear, lightweight oil that's specifically made for sewing machines. It's designed to lubricate all those tiny, delicate components without leaving that sticky residue behind. Here at B-Sew Inn, we always have manufacturer-recommended oils in stock to make sure you're using the right product to protect your investment.
Ready to take your sewing skills to the next level or find the perfect machine for your creative projects? Explore our extensive collection of machines, accessories, and online classes at B-Sew Inn. Let us be your partner in every stitch. Visit us today at https://www.bsewinn.com

