

A rag quilt often looks simple right up until the clipping starts. The piecing can move along nicely, the seams can line up, and then the project reaches the stage where every exposed seam allowance needs careful, repeated cuts. That's the point where the wrong tool shows up fast.
For many sewists, the question isn't just which scissors cut fabric. It's which scissors for rag quilts can keep cutting accurately after seam after seam without making the hand, thumb, or wrist miserable. On a small sample, almost any sharp pair may seem fine. On a full quilt, blade shape, handle design, and hand strain matter just as much as sharpness.
Table of Contents
- The Allure of the Rag Quilt Edge
- What Makes a Rag Quilt Tool Different
- Comparing Scissors, Snips, and Rotary Cutters
- How to Choose the Right Blade and Handle
- Maintenance and Safety Essentials
- Proven Cutting Techniques for Perfect Fringe
- Finding Your Tools at B-Sew Inn
The Allure of the Rag Quilt Edge
Halfway through a large rag quilt, the clipped edge stops being a cute detail and starts becoming a real job for the hands. The soft, brushed fringe everyone loves is built one cut at a time, often with the thumb and wrist repeating the same motion for far longer than expected. That physical side of the project gets overlooked, but it shapes the quilting experience as much as color or fabric choice.
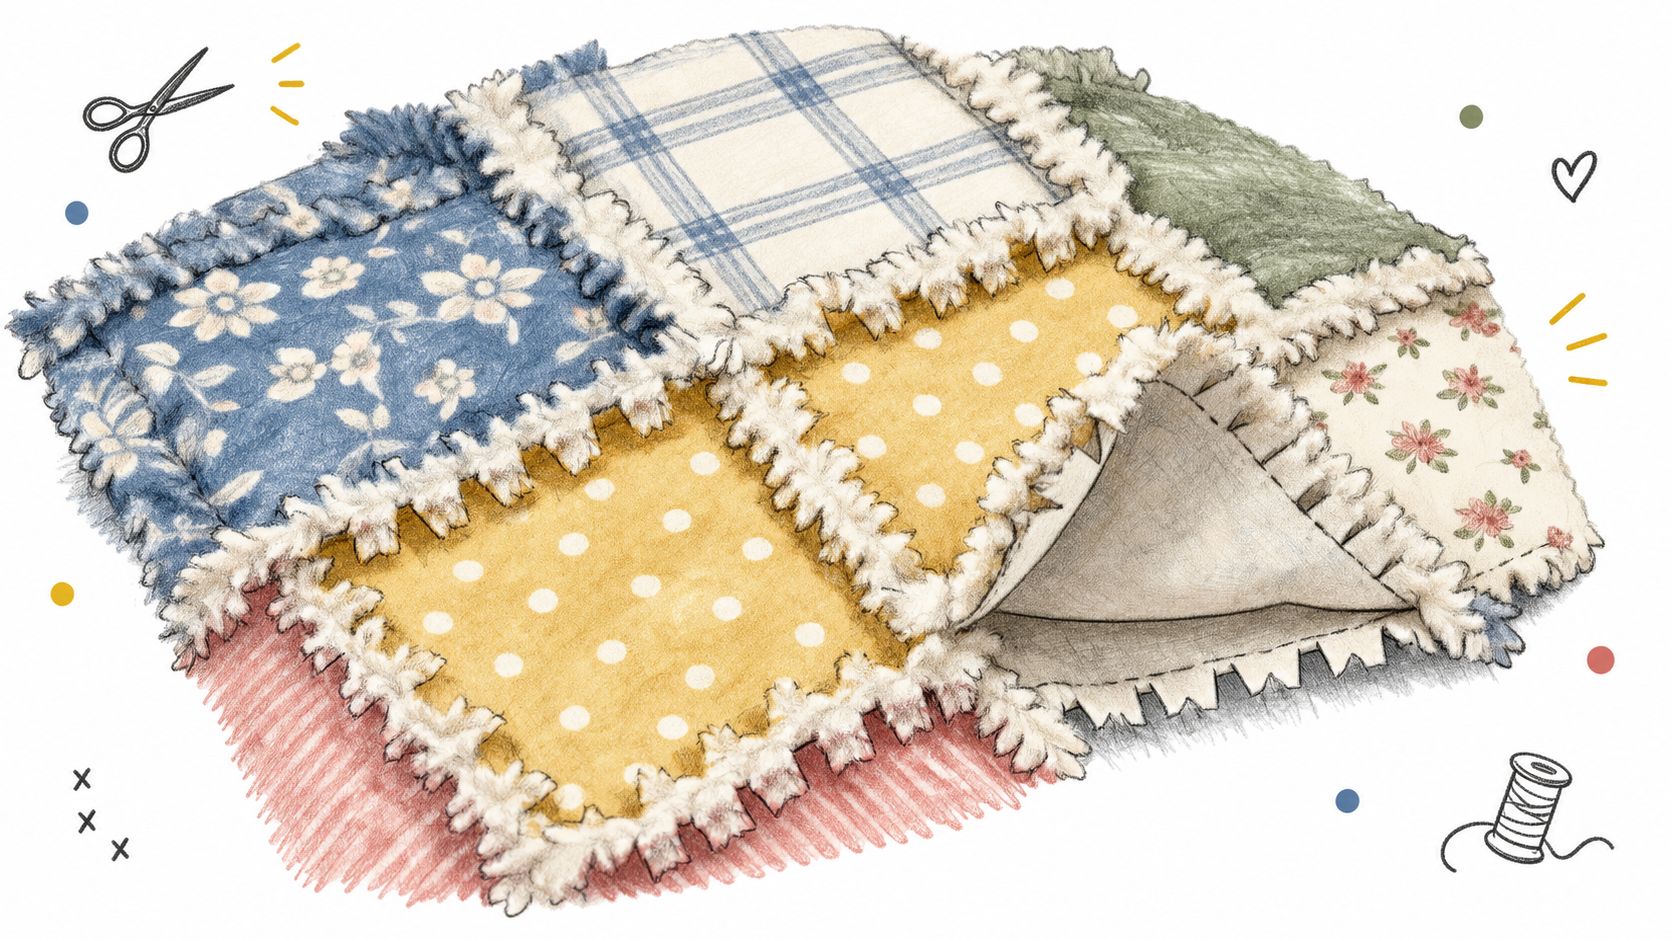
A rag quilt earns its character on the outside. Raised seams, puffed blocks, and that soft frayed border give it a casual look, but the finish is more deliberate than it appears. If the clips are uneven, too shallow, or awkwardly spaced, the quilt can wash up looking patchy instead of soft and full.
The edge is the finish
In a standard quilt, a small cutting flaw may disappear into the construction. In a rag quilt, the clipped seam allowance stays visible and becomes part of the final texture. The tool matters because the finish matters.
Pre-cutting can help at the beginning. A die-cut rag square option from B-Sew Inn can make block prep more consistent, but it does not remove the handwork that creates the fringe. The clipped edge still depends on control, pacing, and a tool that does not wear out the hand before the quilt is done.
Practical rule: Rag quilt texture comes from controlled clipping, repeated consistently.
That trade-off is easy to miss on a small project. On a throw or bed quilt, comfort becomes part of accuracy. Scissors that feel fine for ten minutes can start pinching, forcing the grip tighter and pulling the cuts off rhythm. A good rag quilt edge should look relaxed, and the cutting process should let the hand stay steady enough to produce it.
What Makes a Rag Quilt Tool Different
General fabric shears and scissors for rag quilts solve different problems. Standard shears are built to travel through fabric in longer strokes. Rag quilt tools need to stop and start constantly, reaching toward the seam line without crossing it.
That design difference becomes easier to see once the clipping job begins on a sewn quilt sandwich. The hand isn't making broad cutting motions. It's making the same short motion over and over, while trying to keep spacing consistent and avoid nicking thread.
Short blades matter more than many sewists expect
Rag-quilt scissors are optimized for repetitive seam-allowance clipping, and the key technical requirement is a short, pointed blade that can stop precisely near the stitching line without cutting into it. Instructional guidance also notes that short blades improve control, while spring-loaded handles reduce fatigue during the many small cuts involved in rag-quilt construction. That matters because the clips are typically spaced about 1/4 to 1/2 inch apart to encourage controlled fraying after washing as explained in this rag quilt construction guide.
A long blade can still be sharp and well made, but it asks for more restraint at the tip. On thick seam allowances, that's not always a comfortable trade.
Why notion choice changes the result
A rag quilt clipping tool is a notion, but not a generic one. In sewing, notions are the support tools and accessories that make a technique possible or easier, and rag quilting proves how specific that choice can be. Readers who want a broader overview of that category can see how tools fit into the workflow in this guide to what sewing notions are.
Three details separate useful rag quilt cutters from ordinary household scissors:
- Blade control: A compact blade reaches the seam allowance without overshooting.
- Tip precision: A pointed end helps place each clip neatly beside the previous one.
- Repeat comfort: A spring or easy-action handle supports repeated opening and closing.
A rag quilt tool should feel boring in the best way. It should open, bite, stop, and release the same way on every clip.
When one of those traits is missing, the hand compensates. That usually means squeezing harder, slowing down, or backing away from the seam line and ending up with a weaker fray.
Comparing Scissors, Snips, and Rotary Cutters
Halfway through a large rag quilt, tool choice stops being theoretical. The wrong cutter shows up in the wrist, thumb, and forearm long before the quilt is finished.
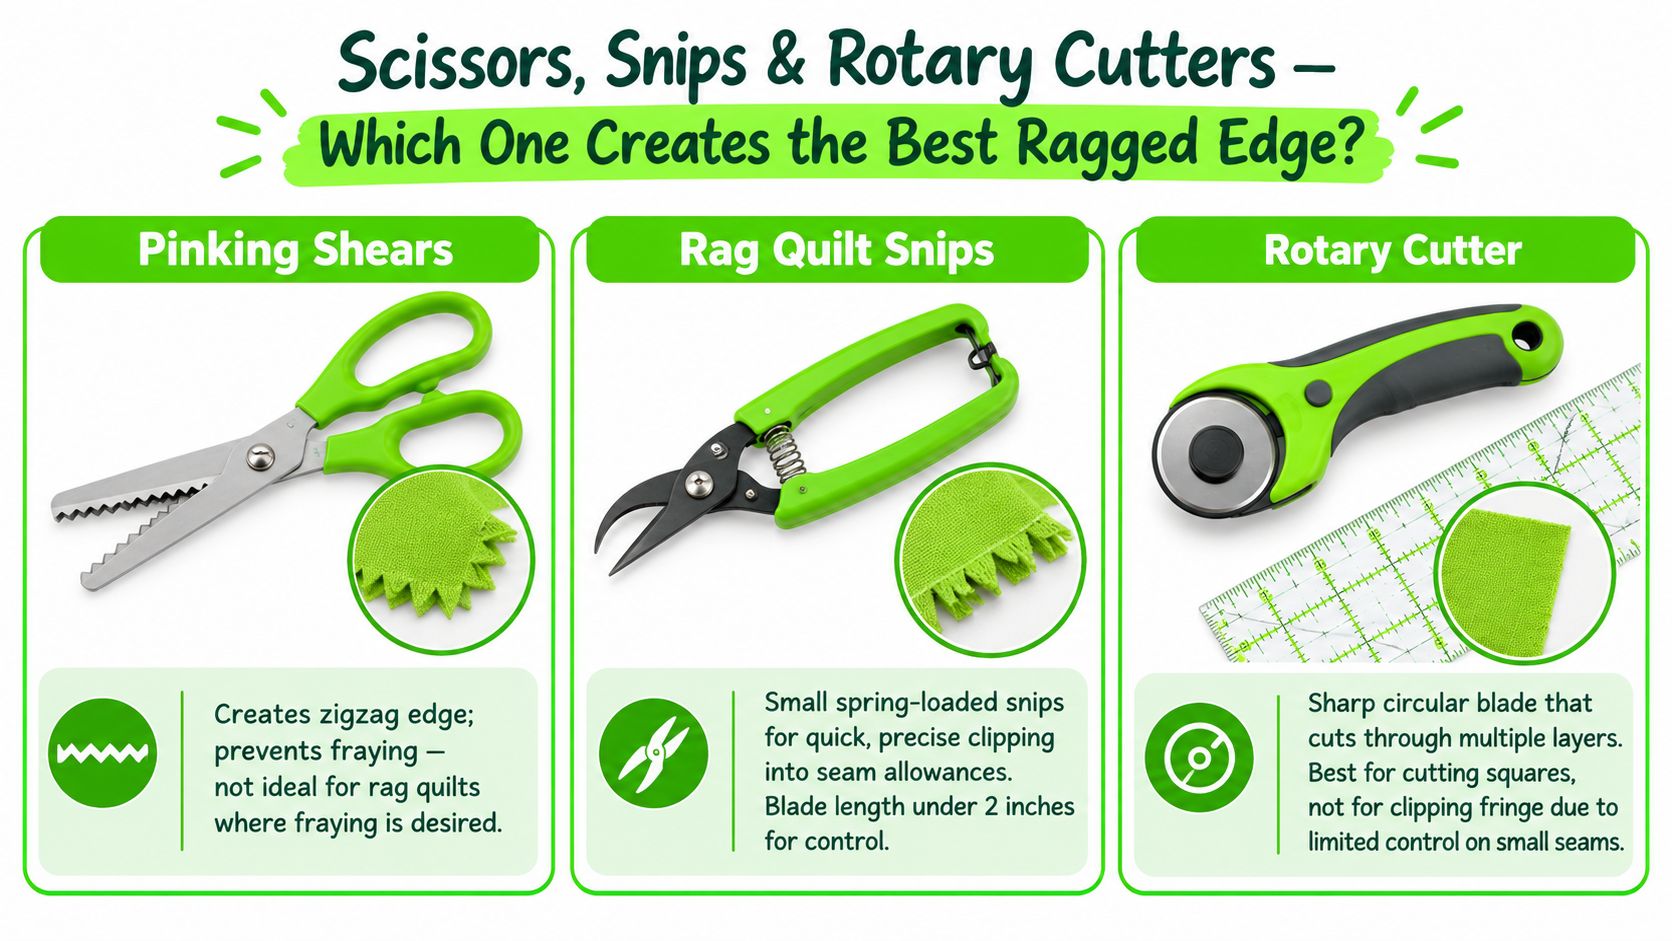
Each tool earns its place in a different part of the job. Rotary cutters handle fabric prep well. Snips handle seam clipping well. Pinking shears fill a narrower role and usually stay out of the main rag quilt workflow.
Pinking shears
Pinking shears cut a decorative zigzag edge, which can be useful on some raw-edge projects. For rag quilt seam clipping, they tend to feel bulky and slow.
The blade shape makes it harder to place short, controlled cuts close together, especially on thick seam allowances. They also ask for more hand effort than many quilters expect once the project gets large. A few seams may feel manageable. A full quilt usually does not.
Rag quilt snips
Rag quilt snips are built for repetition. Short blades are easier to place accurately, and a spring-assisted action reduces how much the hand has to reopen after every cut.
That difference matters on a real project. Hundreds of clips with a stiff pair of scissors can leave the base of the thumb sore and the grip less steady. Once the hand tires, clip spacing gets uneven and the risk of nicking the stitching goes up. Snips help keep the motion smaller and more consistent.
Blade texture also plays a part. A blade with a bit of grip holds layered cotton or flannel in place better than a slick blade, so the cut starts where you intend it to start.
Rotary cutters
Rotary cutters shine during fabric preparation. They make fast, straight cuts on squares, strips, and stacked layers, which is why many quilters use them for the front end of the project. This guide to the benefits of rotary cutting explains why they save time in that stage.
They are not a good substitute for seam clipping. A rotary blade is efficient over distance, but rag quilt clipping calls for tiny, repeated cuts with clear stopping points. That is a control task, not a speed task.
| Tool | Strongest use | Main limitation |
|---|---|---|
| Pinking shears | Decorative edge finishing on select projects | Bulky for tight, repetitive rag quilt seam clips |
| Rag quilt snips | Repeated clipping along exposed seam allowances | Slow for long straight cuts and fabric prep |
| Rotary cutter | Cutting blocks, strips, and stacked fabric pieces | Poor fit for small, controlled seam clipping |
How to Choose the Right Blade and Handle
Halfway through a large rag quilt, the right scissors stop being a shopping question and start being a hand-fatigue question. A tool that feels fine for one block can become a problem after a few hundred clips.
The best choice usually comes down to two parts. The blade needs to stay accurate in layered fabric, and the handle needs to let the hand repeat the same motion without tightening up.
Start with the blade
Shorter blades usually give better control on rag quilt seams. They are easier to place, easier to stop, and less likely to twist as they pass through several layers of cotton or flannel.
Blade edge matters too. Serrated or micro-serrated blades tend to hold the fabric in place better than a polished, slippery edge. That extra grip helps the cut start cleanly instead of skidding across the seam allowance. For rag quilting, that control is often more useful than having a longer blade.
Thickness has a trade-off. A sturdier blade resists flex and feels more stable in dense seams, but it can add weight. For a small baby quilt, that may not matter. On a bed-size project, extra weight adds up in the wrist and forearm.
Then fit the handle to the job
Handle design decides how the work feels after the first hour.
Spring-assisted handles reduce some of the reopening effort, which can be a real help on repetitive clipping. They are often a good match for quilters with thumb soreness, mild arthritis, or reduced grip strength. The trade-off is that some spring-action tools feel bulky in smaller hands, so a lighter manual pair can still be the better choice if the grip shape fits well and the tension is easy to manage.
Small handles are not automatically more comfortable. In practice, cramped finger holes can force the thumb joint to work harder, especially during long clipping sessions. A slightly larger, cushioned handle often spreads pressure more evenly across the hand.
Left-handed quilters should also pay attention to blade orientation and grip shape, not just label claims. This guide to left-handed sewing shears covers what makes a pair more comfortable and easier to control.
Hand-health note: If the hand starts bracing before the seam is finished, the tool is asking too much of the thumb, wrist, or forearm.
A quick fitting checklist
- Choose a short, controlled blade: It places more accurately along clipped seam allowances.
- Look for fabric grip: Serrated edges help keep flannel and cotton from shifting at the start of the cut.
- Check spring tension: The tool should reopen easily without pushing the hand into an awkward rhythm.
- Notice pressure points: Hot spots at the thumb base or inside the fingers usually get worse on a full-size quilt.
- Match size to the project: A tool that feels acceptable on a sample sandwich may feel very different by the end of a large throw or bed quilt.
Maintenance and Safety Essentials
Rag quilt clipping creates lint, loose fibers, and plenty of opportunities for drag if the blades aren't cleaned. A tool that started sharp can feel dull much sooner when flannel fuzz builds up near the pivot or along the blade.
Daily upkeep doesn't need to be elaborate. It just needs to happen before resistance turns into poor cutting habits.
Keep the edge working
Wipe the blades after each session. Brush lint out of the pivot area. If the scissors begin folding fabric instead of slicing it, stop and inspect before forcing the next seam.
High-carbon and stainless blade materials are common in rag quilt scissors for a reason. They're used because they hold up well and resist corrosion better than bargain craft tools. Even then, a good edge lasts longer when it's kept clean and stored closed.
For readers who already have a pair that feels tired, this article on how to sharpen scissors with aluminum foil offers a starting point for home care.
Protect the project and the hand
Safety in rag quilting isn't dramatic. It's mostly about avoiding rushed clipping.
- Support the seam allowance: Hold the quilt so the clipping area is stable, not dangling.
- Aim away from fingers: The pointed tip should travel toward open fabric, not toward the supporting hand.
- Pause when the hand tightens: Fatigue changes accuracy before it feels serious.
- Keep the table clear: Extra rulers, clips, and thread tails around the cutting area increase snagging.
A nicked seam often starts one or two clips earlier, when the hand got tired and the pace stayed the same.
The cleanest rag quilt edges usually come from shorter cutting sessions, not faster ones.
Proven Cutting Techniques for Perfect Fringe
Technique decides whether the finished fringe looks soft and even or patchy and hesitant. The scissors can only do their part if the cut spacing, angle, and stopping point stay consistent.
How to place each clip
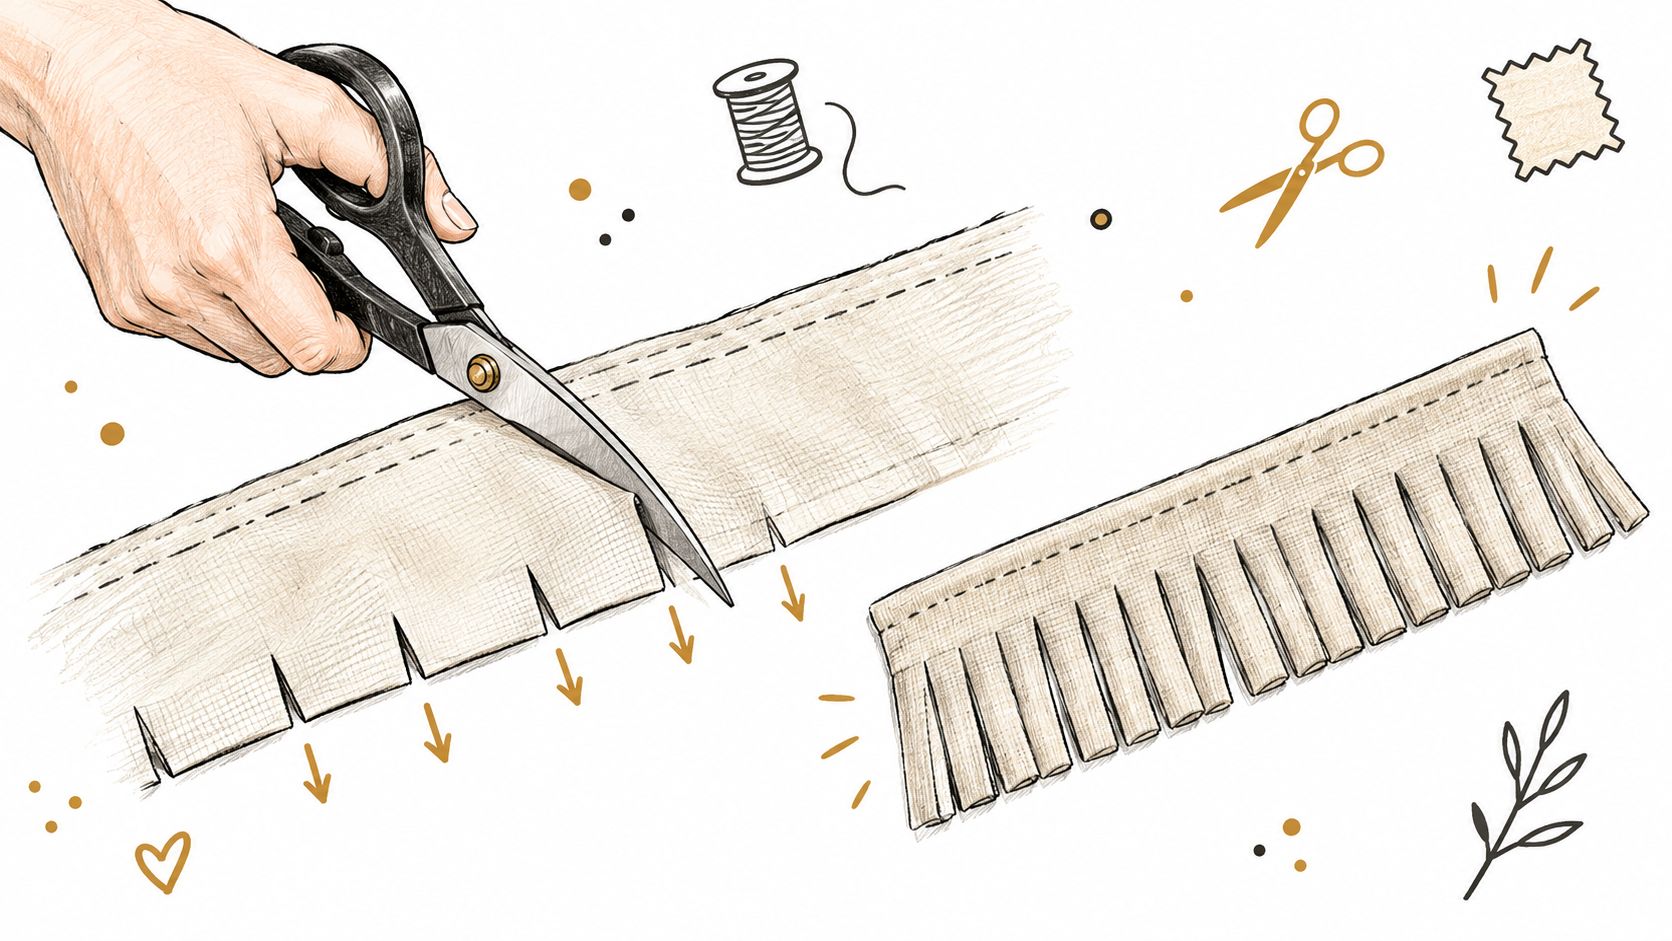
The standard approach is to cut from the raw edge inward, stopping just before the stitching line. The clips are often spaced about 1/4 to 1/2 inch apart, which creates enough release in the seam allowance to encourage fraying after washing, as noted earlier in the construction guidance.
A neat rhythm helps:
- Set the seam allowance flat.
- Open the snips only as wide as needed.
- Cut inward with a straight, controlled motion.
- Stop short of the seam thread.
- Move over and repeat at even spacing.
Practicing this on a scrap seam first helps the hand learn the stopping distance without risking the quilt.
What changes on bulk and curves
Bulky intersections need more patience. Instead of powering through a thick crossing seam, rotate the quilt slightly and approach the seam allowance so the blade enters cleanly. If the fabric bunches, the hand should reset the layers before cutting the next clip.
Curved areas need closer clipping than broad straight runs. The goal isn't to add random cuts. The goal is to let the edge open and soften evenly after laundering.
A few technique checks help keep the fringe uniform:
- If the fringe looks sparse, the clips may be too far apart.
- If the seam feels risky, the blade may be too long or the hand may be fatigued.
- If the fabric slides, a serrated edge usually gives better control.
- If the hand aches early, break the task into sections instead of forcing the full perimeter in one sitting.
Work in sections that end before the hand gets clumsy. Rag quilt clipping rewards steadiness more than speed.
The final wash will do the blooming. The cutting stage prepares the edge so that blooming happens evenly.
Finding Your Tools at B-Sew Inn
Tool choice gets easier when a sewist can open and close the scissors before buying. Handle shape, spring tension, blade weight, and thumb placement don't read well from a label. They make sense in the hand.
That's where an in-person store has a real advantage. B-Sew Inn is an authorized sewing, quilting, and embroidery machine dealer with retail stores in Tulsa, Oklahoma City, Springfield, Humble, and Fayetteville, plus an online store. The company sells and services machines from Baby Lock, Bernina, Bernette, Brother, and Janome, along with sergers, longarm quilting machines, embroidery designs, thread, stabilizer, notions, cabinets, and cutting tables. It doesn't manufacture machines or create custom machine designs.
Why that matters for rag quilt prep
Rag quilting isn't just about scissors. It also depends on a workable cutting setup, the right notions, and enough space to manage bulky quilt sections safely. A work surface such as the Horn Model 7600 Ultimate Storage & Cutting Center gives a dedicated area for laying out blocks, clipping seam allowances, and keeping cutting tools contained between sessions.
For local shoppers, trying tools in person matters even more when hand comfort is part of the decision. Someone making one baby quilt may tolerate a narrower handle than someone planning a large throw or repeated class projects.
Top Rag Quilt Cutting Tools
| Tool Type | Best For | Key Feature |
|---|---|---|
| Rag quilt snips | Repetitive seam clipping | Short blade with controlled tip |
| Spring-assist shears | Users who need easier reopening action | Reduced hand strain during repeated cuts |
| Rotary cutter | Cutting squares and strips before assembly | Smooth long cuts on flat yardage |
Readers who want to compare notions, test handle styles, look at cutting furniture, or ask about in-person classes can do that at a store location instead of guessing from photos alone.
For rag quilts, the right cutting tool should protect both the seam line and the hand that's doing the work. B-Sew Inn offers sewing and quilting machines, notions, cutting tools, furniture, in-person classes, and store support across Oklahoma, Missouri, Texas, and Arkansas, so readers can compare options that fit their project and their grip. Visit a store to handle scissors in person, or browse online to build a rag quilt setup that's comfortable enough to finish.

