

The seam is going fine, then the top thread snaps right at the needle. The machine is threaded. The bobbin seems fine. A fresh start lasts a few inches, maybe less, and then the same break happens again. That specific kind of failure is frustrating because it feels random, but it usually isn't.
When thread keeps breaking at the needle, the problem is usually happening in a very small, high-friction zone. The thread passes through the needle eye under tension, at speed, while the needle moves through fabric and seams. If anything in that path is too tight, too rough, slightly bent, or slightly out of alignment, the thread starts shredding before it finally pops.
That's good news in one sense. This is often a setup and wear issue, not a mystery and not a sign that the fabric itself is impossible to sew. A careful single-change test will usually reveal the culprit.
Table of Contents
- Why Your Thread Snaps Right at the Needle
- Quick Checklist to Stop Breakage Fast
- Needle and Thread Compatibility That Prevents Shredding
- Tension Thread Path and Spool Fixes That Actually Work
- Hidden Burrs Timing and When to Book Service
- Keep Your Machine Stitch Ready and Your Next Step
Why Your Thread Snaps Right at the Needle
You start a seam, get a few decent stitches, then the top thread pops right at the needle again. In the repair shop, that pattern usually points to one spot first. The thread is getting damaged as it passes through the needle eye or as it brushes a rough surface next to it.
That matters because this kind of breakage is often very specific. A general rethread may help, but the faster way to diagnose it is to isolate the abrasion point. Change one thing at a time, test on scrap, and watch the thread near the eye. If you see fuzzing before the break, the thread is being rubbed, squeezed, or pulled harder than it should be.
In practical terms, the usual causes are:
- A needle eye that is too small for the thread
- A bent, dull, or nicked needle
- Upper tension that is tighter than the fabric and thread need
- A threading error that keeps the thread out of the tension system
- A burr on the needle, needle plate, hook area, or presser foot opening
I see one mistake more than any other. Sewists keep changing tension dials when the problem is a damaged needle or a thread-to-needle mismatch. A heavier thread needs more room in the eye. Metallic, topstitch, and some decorative threads need even more clearance, which is why the right needle style matters just as much as needle size.
Here is the clean test sequence I use at the counter. Put in a new needle that matches the thread and fabric, rethread with the presser foot up, then sew a short sample. If it still breaks, switch only the thread. If it still breaks, inspect the needle eye and the plate opening for a burr by running your fingernail or a strand of thread over the edges. One change at a time tells you where the damage starts.
If you need to rule out a threading mistake before changing parts, use this guide on how to thread a sewing machine. A machine threaded with the presser foot down can act like the tension is far too tight, and the break often shows up at the needle first.
At B-Sew Inn, this is the point where we usually match the fix to the setup. Universal needles work for many everyday seams, but denim, microtex, embroidery, topstitch, and stretch needles each solve a different kind of friction problem. The trade-off is simple. The wrong needle may still form a few stitches, but it will keep shaving, heating, or stressing the thread until it snaps.
Quick Checklist to Stop Breakage Fast
You sew six inches, the top thread frays, then it snaps right at the needle again. At that point, random adjustments usually waste time. A short, controlled test is faster because it tells you where the abrasion starts.
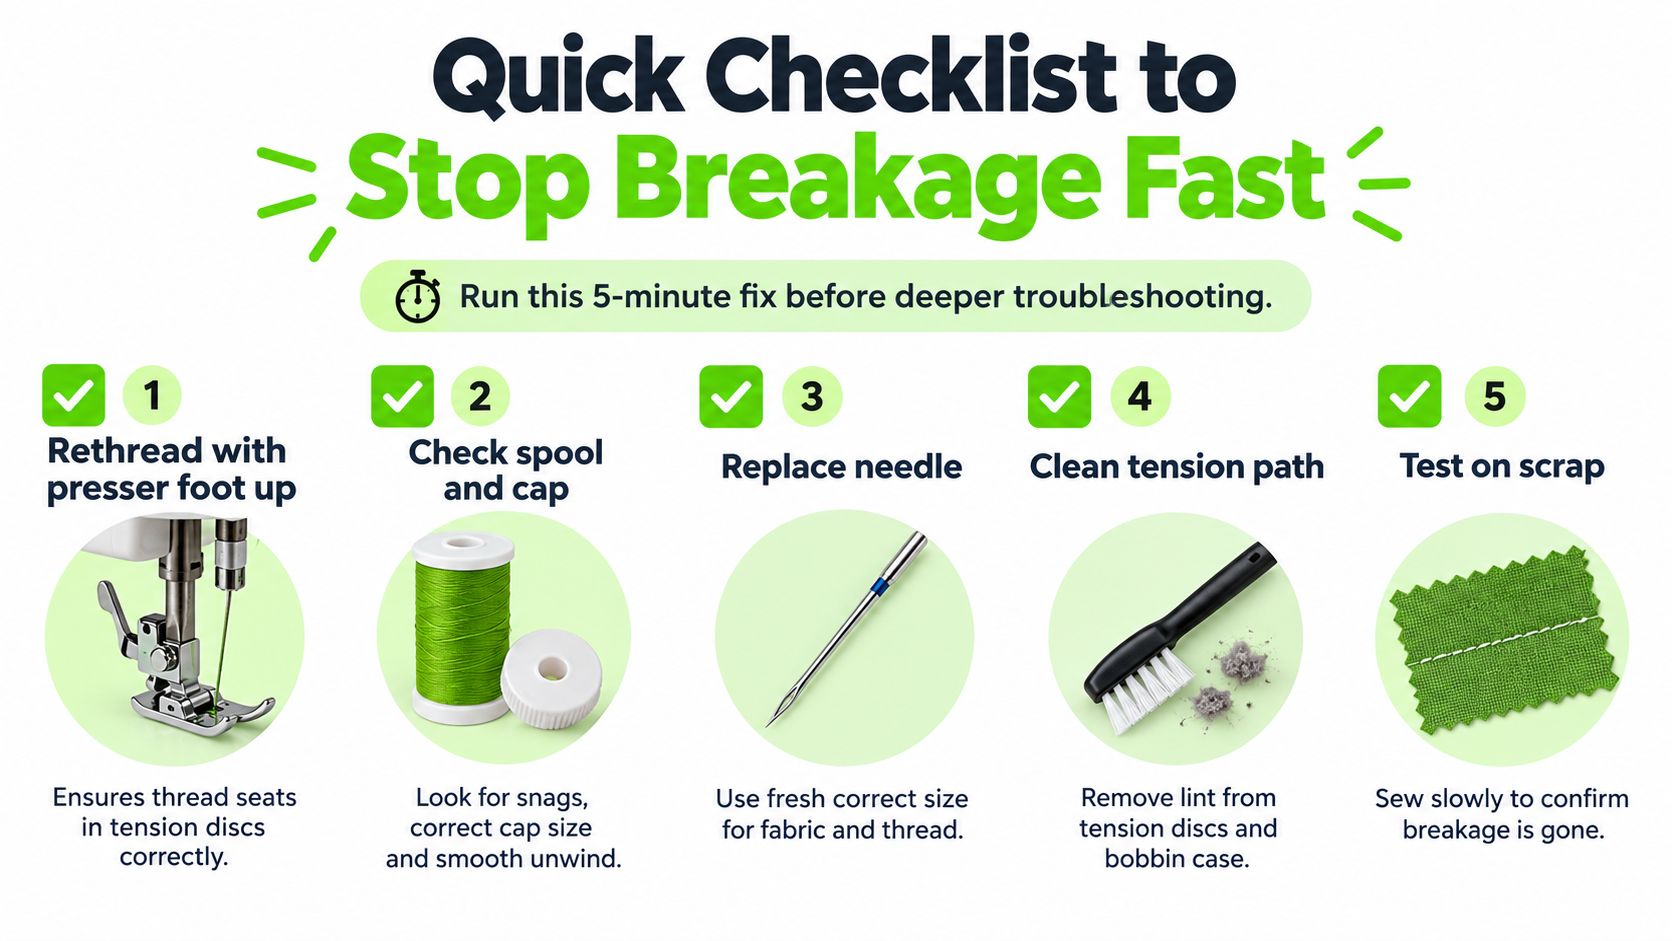
The five-minute sequence
Use one change at a time and test on the same scrap after each step.
-
Raise the presser foot and rethread completely.
The thread needs to drop fully between the tension discs. If it misses that spot, the machine can pull the thread so tight that the first visible failure shows up at the needle. -
Check how the spool is feeding.
Watch for a notch catch, a cap that is too loose or too tight, or a spool that hops and jerks. If the feed is uneven, the thread arrives at the needle already under stress. -
Install a fresh needle, then test once before changing anything else.
I do not trust a needle just because it looks fine. A slight bend or a rough eye is enough to shave thread. If the thread is a little heavier or has more body, try one reasonable step up such as 75/11 to 90/14 only if that matches the fabric and thread you are using. -
Check for rough spots where the thread passes last.
Run your fingernail or a strand of thread across the needle eye, the front of the needle, and the needle plate opening. A tiny burr can cut thread fast, especially at higher speed. -
Brush out lint from the needle plate area and upper thread path.
Packed lint adds drag and can push thread out of its normal path. -
Sew slowly on scrap and watch the thread at the needle.
Slow stitching lets you see whether the thread fuzzes first, tightens suddenly, or breaks only when the needle enters a thick spot.
Keep the sequence clean. If you rethread, change the needle, adjust tension, and swap thread all in one round, you lose the clue that would have pointed to the actual fix.
What to watch during the test seam
A good test seam shows more than whether the thread held.
- Fuzz building right above the eye: friction at the needle, often from the wrong needle type, a damaged eye, or a burr nearby
- A snap after a sharp tug: upper path tension or a spool feed problem
- Clean stitches until a seam allowance hump: the setup handles flat fabric but creates extra heat and drag at thickness changes
- Breakage only at higher speed: the thread is surviving, but not gliding freely enough to handle sustained motion
If you want a broader step-by-step reference while you test, B-Sew Inn has a sewing machine troubleshooting guide for common stitch and thread problems. If the thread still breaks after this sequence, bring in the machine, the thread, and the fabric. We can match the problem to the right needle, thread path setup, or service fix at the counter.
Needle and Thread Compatibility That Prevents Shredding
A lot of thread breaks that look like tension trouble are happening at one tiny contact point. The thread is getting abraded in or just above the needle eye.
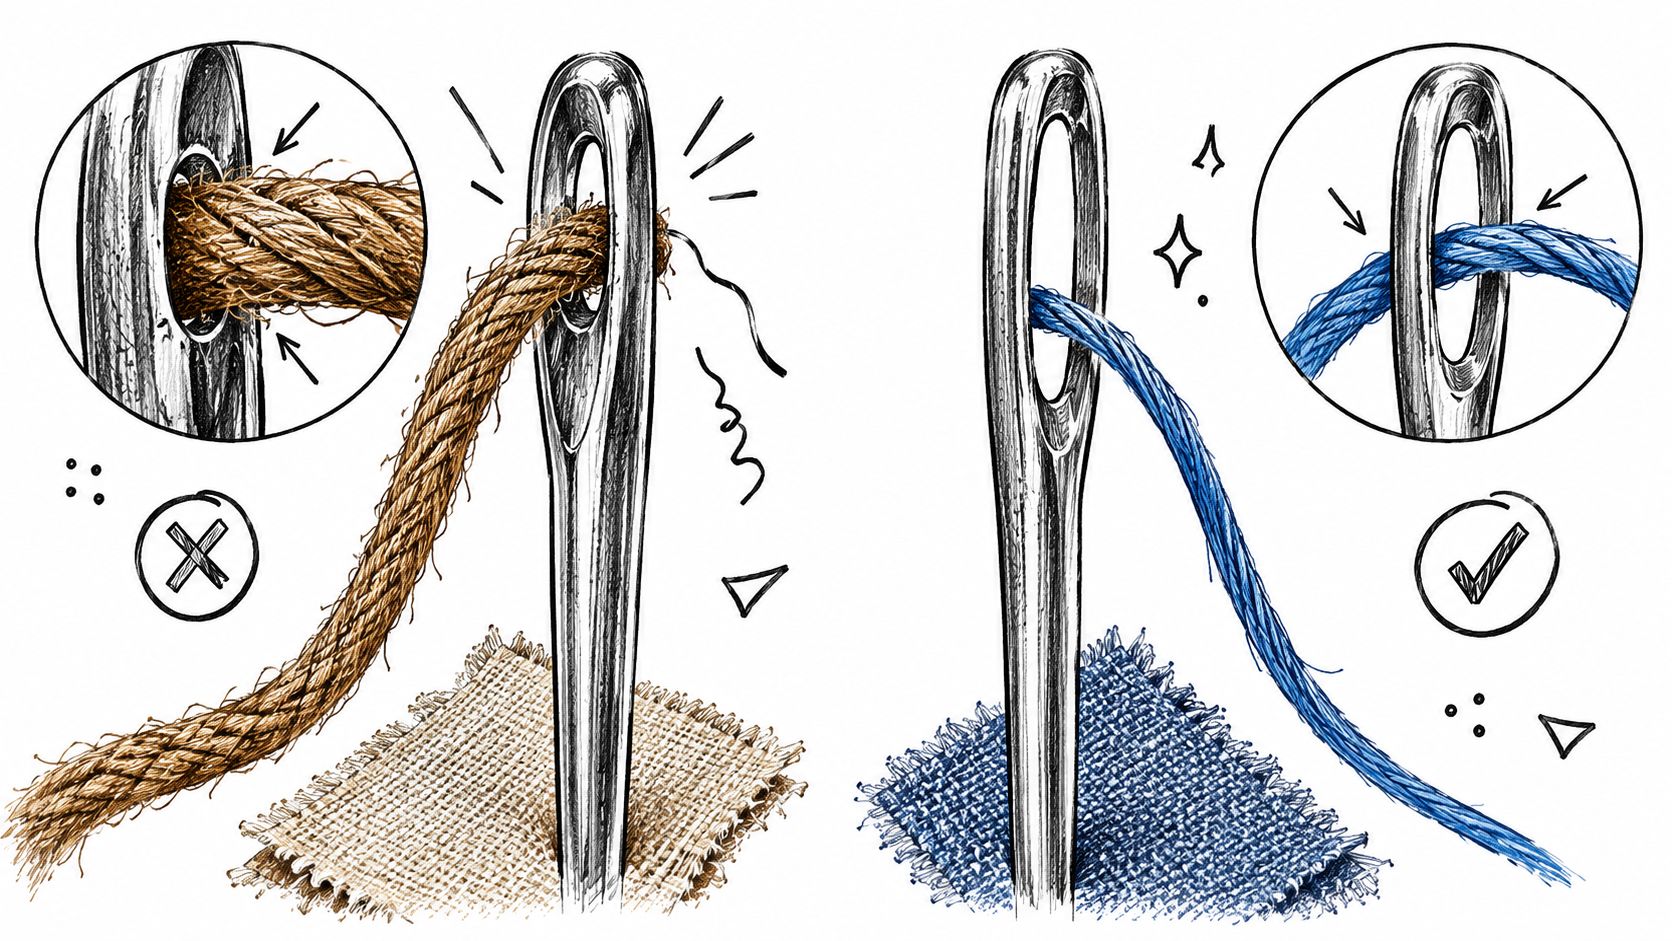
If I want a fast answer at the service counter, I change one thing first. I keep the same fabric, same thread, and same machine setup, then install a fresh needle in the next appropriate size or type. That single-change test tells you a lot. If the fuzzing stops or the seam gets farther before breaking, the abrasion point was the needle, not the bobbin or the upper path.
Why the eye matters so much
The needle eye has to let the thread pass cleanly at speed, through heat, fabric resistance, and repeated flexing. If the eye is too small, rough, or the wrong shape for that thread, the strand starts to flatten, fuzz, and shred. You often see it first right above the eye.
Heavier all-purpose thread, topstitch thread, metallics, and some embroidery threads need more room and a needle built to protect the thread. A setup that looks close on the package can still fail in actual sewing, especially at seam intersections or higher speed.
A burr matters too. Run a fingernail or a strand of nylon thread across the needle eye. If it catches, replace the needle immediately. That tiny rough spot can cut thread long before you see damage anywhere else.
Signs the needle and thread are mismatched
These clues point to compatibility trouble at the needle instead of a general machine problem:
- Fuzz collects near the eye before the thread snaps
- The machine starts the seam, then breaks after a few stitches
- Breakage shows up faster on thicker spots
- A fresh spool behaves the same way
- Switching to a new needle changes the result right away
Bent and dull needles raise the odds of shredding because the thread no longer enters and exits the eye in a straight, clean line.
If the thread is fraying before it breaks, inspect the needle first.
Choosing the right needle type for the thread
Needle size matters, but eye design and point style matter just as much. The wrong point can add drag in the fabric. The wrong eye can scuff the thread every stitch.
| Sewing task | Needle style to consider | Why it helps |
|---|---|---|
| Everyday woven sewing | Universal needle | A good starting point for standard all-purpose thread |
| Crisp woven fabrics and precise piecing | Microtex needle | Sharp penetration reduces deflection and helps the thread track cleanly |
| Machine embroidery | Embroidery needle | Built with an eye and scarf that reduce stress on embroidery thread at high speed |
If you want help matching the needle to the job, this guide to types of sewing machine needles is a solid reference.
In the store, we usually map the fix this way. Standard sewing thread on woven cotton often behaves well in a fresh universal 80/12. A heavier thread may need a 90/14 or a topstitch-style option. Embroidery thread usually does better in an embroidery needle than in a general-purpose needle, even when the size number looks similar.
Products that make diagnosis cleaner
Good testing depends on removing extra variables. Use a fresh needle, quality thread, and a bobbin that is clean and undamaged. If you are embroidering, stabilizer is part of the setup too, because fabric movement can pull the thread hard against the eye and make a correct needle look wrong.
B-Sew Inn carries needles, thread, stabilizer, bobbins, and machine-specific supplies for Baby Lock, Bernina, Bernette, Brother, and Janome. That makes it easier to test the actual combination your project needs instead of guessing with whatever is in the drawer. If you bring in the thread and fabric that are giving you trouble, we can usually narrow it down to the right needle family and size in a few minutes.
Tension Thread Path and Spool Fixes That Actually Work
The machine may be threaded correctly and still feed thread into the needle eye at the wrong angle. That is a common reason thread frays, fuzzes, or snaps right at the needle instead of farther up the path.
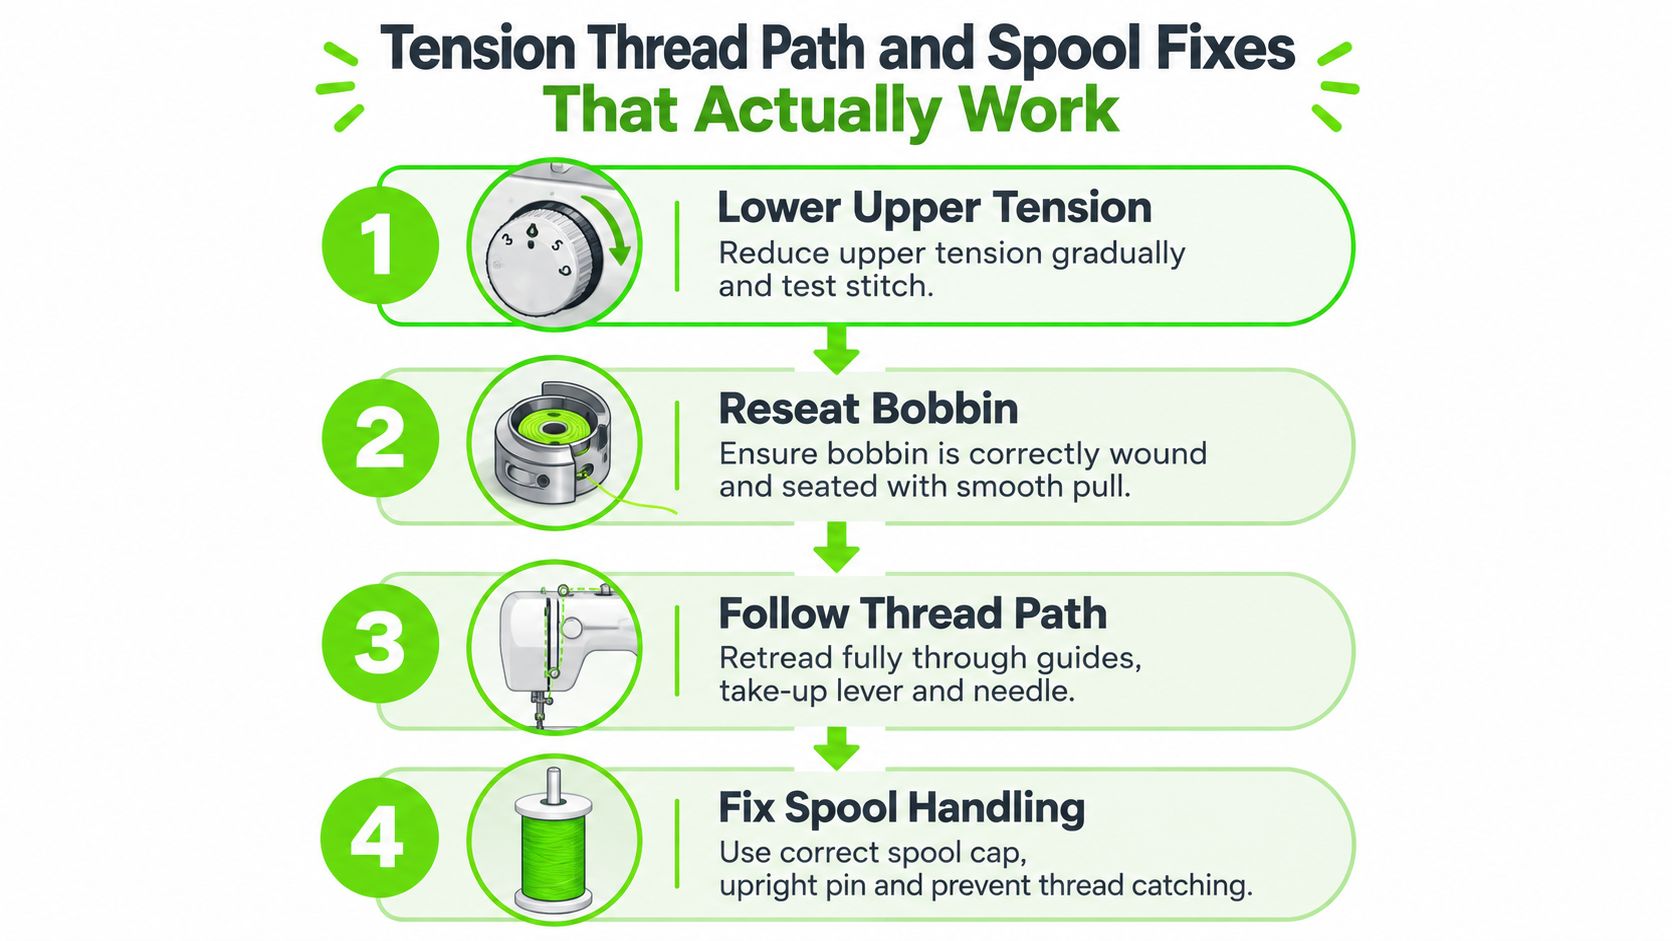
I see this a lot at the counter. A customer changes the needle, rethreads, and still gets breakage because the problem is thread delivery. The spool jerks, the cap is the wrong size, or one guide was missed, so the thread enters the needle under side stress and starts sawing at the eye.
Run a one-change test sequence
Change one variable at a time and sew a short line on scrap after each change. That makes the abrasion point easier to isolate.
Start with the spool.
- Check spool orientation. Cross-wound thread usually feeds best from a vertical pin. Stacked thread usually behaves better on a horizontal pin with the right cap.
- Match the spool cap to the spool. A cap that is too small lets the spool hop. A cap that is too large can rub the thread and create drag.
- Add a net for slippery thread if your machine allows it. Metallic, rayon, and some embroidery threads often feed more evenly with a thread net.
- Watch the spool while hand-turning the machine. If the spool twitches, stalls, or over-spins, fix that first.
Then check the upper path for angle, not just placement.
- Confirm every guide is being used. One missed guide can change the thread angle into the take-up lever and needle.
- Make sure the take-up lever has full control of the thread. If the thread is not seated there correctly, the stitch cycle gets jerky fast.
- Pull the thread through by hand with the presser foot up. You want steady resistance, not a catch-release feel.
Use the single-change test to find the exact trouble spot
If the thread keeps breaking at the needle, switch only one thing and test again. Keep the same fabric, speed, and stitch. For example, keep the same needle and thread but swap only the spool cap. If the breakage improves, you just found a delivery problem rather than a needle-size problem.
If nothing changes, keep the same setup and move to one path correction. Rethread carefully, making sure the thread is fully seated in each guide and the take-up lever. If it still breaks in the same place, stop and inspect the needle eye and the thread itself for fuzzing. That frayed spot tells you where abrasion is happening.
Spool and thread path problems that show up as needle breakage
These patterns are easy to miss because they look like a tension issue at first glance:
| Symptom | Likely cause | Practical fix |
|---|---|---|
| Thread breaks after a sharp snap sound | Spool catching, then releasing | Change spool cap, spool orientation, or pin setup |
| Thread looks fuzzy just above the needle | Side-pull into the needle eye | Recheck guides and needle alignment |
| Breakage starts only at higher speed | Spool overrun or uneven unwind | Slow down, stabilize the spool, test with a thread net if suitable |
| Trouble appears with one spool only | Rough spool notch, old thread, or inconsistent winding | Try a fresh spool of quality thread |
| Metallic or embroidery thread shreds quickly | Feed path too abrupt for delicate thread | Use the machine's specialty thread path or vertical spool setup if available |
That last row matters. Specialty threads often need a different path than all-purpose polyester. Many newer machines include extra guide positions or spool options for decorative and embroidery threads. Use them. They are there to reduce twist, drag, and heat before the thread ever reaches the needle eye.
If you need help reading stitch balance after you correct the spool setup, this guide to tension adjustment on sewing machine is a useful next reference.
At B-Sew Inn, we usually test this in-store with your actual thread, spool, and fabric. That helps us match the fix to the machine feature that solves it, whether that is a different spool cap, a vertical pin setup, a thread stand, or a machine-specific guide path.
Hidden Burrs Timing and When to Book Service
You swap in a fresh needle, rethread carefully, test on scrap, and the thread still snaps right at the eye. At that point, I stop changing several things at once and isolate the abrasion point.
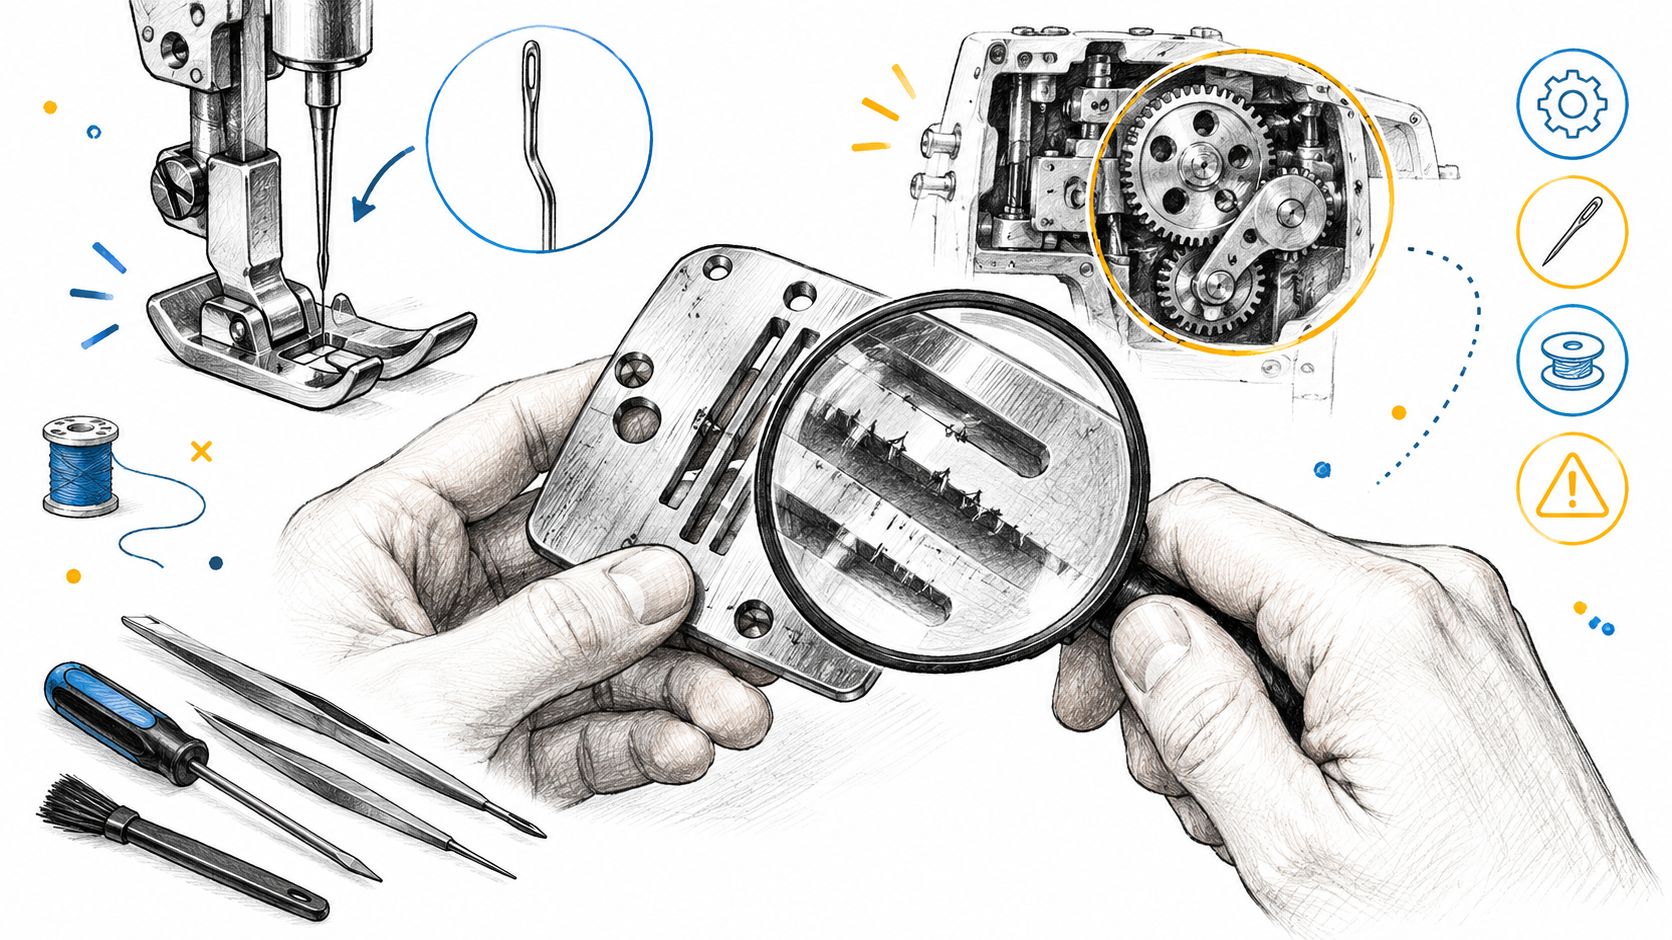
A clean way to diagnose it is a single-change test sequence. Sew a short line with one fabric, one thread, and one speed. Change only the needle. If the breakage stays in the same spot above or at the eye, try the same thread with one size larger needle, then try a smoother quality thread in the same setup. When the symptom survives those controlled changes, the machine itself moves higher on the suspect list.
Burrs versus ordinary needle wear
A burr is a tiny rough spot that cuts or scrapes thread as it passes under tension. I see it most often after a needle strike, especially on the needle plate, presser foot, hook area, or the needle itself. The thread may not break every stitch. It may fuzz first, then shred, then snap once speed or density goes up.
Use this quick pattern check:
| Symptom pattern | More likely setup or consumable issue | More likely service issue |
|---|---|---|
| Problem stops with a different needle size or type | Yes | Less likely |
| Breakage follows one old, dry, or uneven spool | Yes | Less likely |
| Thread frays at the same point with multiple fresh needles | Less likely | Yes |
| Several thread types break in the same area | Less likely | Yes |
| You hear a tick after a past needle hit | Less likely | Yes |
That last clue matters. A tiny nick at the needle hole can act like sandpaper on thread.
How to check for a hidden rough spot safely
Good light helps more than force. Raise the needle, remove it, and inspect the likely contact points without taking the machine apart.
- Needle eye and groove: look for scoring, peeling finish, or a bent shaft
- Needle plate hole: check for scratches or a sharp edge from a needle strike
- Presser foot underside: feel gently with a fingernail or a strand of thread for a catch point
- Hook area: look for nicks, stray thread wrapped in the race, or packed lint
- Thread path near the needle bar: make sure no guide is bent or rubbing the thread sideways
A fingernail test works well here. If your nail catches, thread can catch too.
When timing is the real problem
Timing shows up differently from a burr. The hook has to meet the needle scarf at the right moment to grab the loop cleanly. If that relationship is off, the machine may skip, pop, or break thread under load because the stitch is being forced instead of formed cleanly.
Home checks should stop before loosening timing screws or opening assemblies that affect hook position. Timing correction is a bench job. So is polishing a damaged plate or hook without removing too much metal.
If your machine still breaks thread at the needle after the single-change test, or if you can see damage from a needle strike, book a sewing machine service and repair appointment. At B-Sew Inn, we can test the exact combination that is giving you trouble, then match the fix to the machine and materials. That may be a fresh topstitch needle for heavier thread, an embroidery needle for fragile rayon or poly, a plate replacement, hook cleanup, or a timing adjustment if the hook and needle are no longer meeting correctly.
Fast embroidery machines, sergers, and heavily used sewing machines usually show these faults sooner because they put more heat and friction on the thread path. In the store, that is why we like to see your actual thread, needle pack, and fabric. It shortens the diagnosis and helps us confirm whether the break starts at the eye, below the plate, or during loop formation.
Keep Your Machine Stitch Ready and Your Next Step
The easiest thread break to fix is the one that never starts. Most needle-area breaks build slowly from wear, lint, poor matching, or a small setup change that went unnoticed.
Habits that prevent repeat problems
A steady routine helps more than dramatic troubleshooting:
- Change needles regularly. A needle can look acceptable and still sew badly.
- Clean lint before it packs in. The tension path, needle plate area, and hook area all matter.
- Store thread so it stays clean and smooth. Dusty or damaged thread won't feed consistently.
- Test on scrap after any adjustment. A few controlled stitches are faster than redoing a project.
- Slow down at dense sections. Seam intersections and heavy embroidery place more stress on the thread path.
Modern machines are capable of sewing and embroidering at impressive speeds, but speed always magnifies a weak setup. Balanced tension, a clean path, and the right needle do more for stitch quality than forcing a machine through resistance.
Matching maintenance to the kind of sewing being done
Garment sewing, quilting, and embroidery don't stress the machine in exactly the same way. Quilters often notice breakage at bulky joins. Embroiderers may see it during dense fills or frequent color changes. Anyone working toward neat specialty results may also benefit from outside technique examples, such as this guide to clean embroidery on caps, because clean stitch formation always starts with stable materials and a smooth thread path.
In-person help still makes a big difference when the issue won't stay solved. Home sewists often know the basics already. What they need is hands-on confirmation that the needle, thread, machine settings, and project setup belong together.
For the next step, the most useful move is to gather the exact supplies that support a clean test. Fresh needles, quality thread, the right stabilizer, and a proper service check are often what turn a recurring break into a solved problem.
Need help narrowing it down? B-Sew Inn offers sewing machine service, repair, trade-ins, in-person classes, and hands-on help with needles, thread, stabilizer, and machine selection for sewing, quilting, and embroidery. Visit a store to try machines in person or reach out if the thread keeps breaking at the needle after the basic fixes.

