

Welcome to the ultimate guide for finally making sense of all the different types of sewing machine needles. It’s wild to think that this tiny, inexpensive little tool has the single biggest impact on your stitch quality. Get it right, and it's the secret to preventing skipped stitches, mangled fabric, and snapping thread. Choosing the right one is what turns potential frustration into a flawless finish.
Why the Right Needle Is Your Most Important Tool
It’s so easy to overlook the sewing machine needle. It’s small, seems pretty basic, and feels like a minor detail next to your gorgeous fabric or fancy thread. But honestly, that’s the number one reason beginners get tripped up on what should be straightforward projects. The needle isn't a "one-size-fits-all" part; it’s a highly specialized tool, engineered for very specific jobs.
Think of each needle type as a unique key, precision-cut to unlock your sewing machine's potential for a particular fabric. A needle made for denim needs a sharp, tough point to pierce through those dense weaves. But a needle for jersey knits? That one has a rounded tip designed to slide between the fibers without snagging them and causing runs.
Using the wrong needle is like trying to jam the wrong key into a lock. Best case scenario, it just won’t work. Worst case? You damage the lock (your fabric) and the key (the needle) in the process. This is exactly why getting a handle on needle selection is such a game-changer.
From Hobbyist to Confident Creator
Once you understand the different types of sewing machine needles, you'll feel a huge shift in your craft. This knowledge gives you the power to tackle any project—from a slinky silk blouse to a rugged canvas tote—with the confidence that you’ve got the right tool for the job. You’ll find yourself spending way less time troubleshooting pesky problems and more time just enjoying the creative process.
Here at bsewinn.com, we are committed to empowering crafters like you on this journey. We believe that true confidence in your craft comes from mastering these small but crucial details. To help you create beautiful designs, we offer extensive support:
- Custom Sewing Machine Designs: Our machines are built to be workhorses, and pairing them with the perfect needle is the first step to bringing your tangible project examples to life.
- Online Classes and Training: We offer expert-led instruction to help you understand all the little nuances of your machine and its accessories, guiding you through projects from start to finish.
- Extensive Resources: For a deeper dive, you can always explore our in-depth article on choosing the right needle to build on everything you learn here.
Consider this guide your foundation for making smarter choices, dodging those common sewing headaches, and unlocking a whole new level of precision in your work.
A Crash Course in Needle Anatomy and Sizing
To really get the hang of picking the right needle, you have to understand the tool itself. I always tell people to stop thinking of a sewing needle as just a pointy piece of metal. It’s more like a tiny, specialized key. Every single part of it—the grooves, the cuts, the curves—is engineered to work with a specific "lock," which is your fabric and thread combo. Once you know the parts, you'll understand why certain needles are absolute non-negotiables for certain jobs.
Each little component has a huge role in creating that perfect stitch. If any one part isn't right for the job, you’re in for a world of frustration—skipped stitches, shredded thread, or even snagged and ruined fabric. Learning the anatomy isn't just trivia; it's a foundational skill for anyone who's serious about sewing.
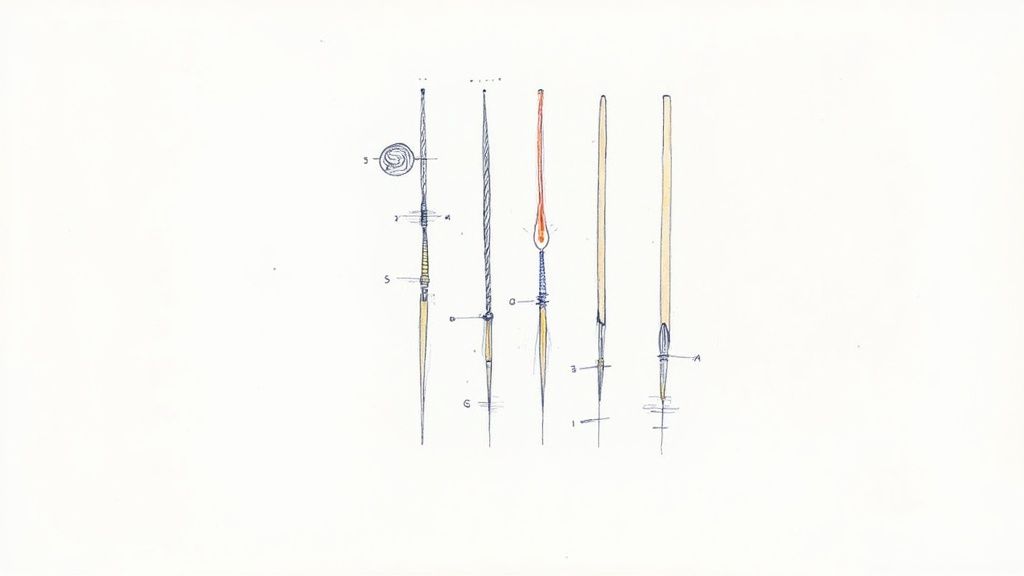
Let's Decode the Parts of a Needle
Breaking down the needle from top to bottom makes it all click. Understanding how these parts work together is an instant confidence booster.
- Shank: This is the beefy part at the top that you slide into your machine. One side is flat, and that always faces the back. This simple design makes it nearly impossible to put it in wrong.
- Shaft: This is the long, main body of the needle. The thickness of the shaft is what determines the needle's size. A thicker shaft means a bigger hole in your fabric. Simple as that.
- Groove: See that little channel running down the front? That’s the groove. Its job is to cradle the thread, protecting it from friction and shredding as it zips down to the eye at high speed. It's a tiny detail that makes a huge difference.
- Scarf: On the back of the needle, right above the eye, there's a small scoop or indentation. That's the scarf. It allows the machine's hook to get super close to the needle, snagging the thread loop perfectly every single time to form a stitch. No scarf, no stitch.
- Eye: This one's easy—it's the hole the thread goes through. But the size and shape of the eye change depending on the needle type. An embroidery needle, for instance, has a much larger eye to handle thicker, more fragile threads without a fight.
- Point: This is the business end. The shape of the point—whether it's razor-sharp, slightly rounded, or even chiseled—is the single most important part that determines which fabric that needle is made for.
The Two Sizing Systems, Finally Explained
Okay, let's talk about those numbers on the needle pack, like 80/12. They can seem confusing, but the system is actually pretty straightforward once you know the code. You'll almost always see two numbers.
The first number is the European size (like 60, 80, or 100). The second is the American size (like 8, 12, or 16). For both systems, the rule is exactly the same: the smaller the number, the finer the needle.
A size 60/8 needle is incredibly fine, the kind you'd want for delicate silks or chiffon. On the flip side, a heavy-duty 110/18 needle is thick and tough, built to punch through denim or canvas without even thinking about breaking.
Choosing the right size is all about matching the needle's thickness to the weight of your fabric. If you use a big, chunky needle on fine fabric, you'll be left with ugly, visible holes. Try to use a delicate needle on thick fabric, and you'll just end up with a broken needle and a lot of frustration. It's all about finding that perfect balance.
The needle is truly the star of the show; it drives the quality of every single stitch. In fact, needles are such a big deal they make up 27.40% of the revenue in the sewing machine components market as of 2025. With the market expected to grow from USD 2.7 billion in 2025 to USD 5.0 billion by 2035, you can bet that needles will continue to be where all the action is.
One last critical piece of the puzzle is the relationship between your needle and your thread. This is a partnership! Your needle's groove and eye have to be big enough for your thread to pass through without getting squeezed or shredded. Getting this right is just as important as choosing the best thread for quilting.
To dive deeper into matching your thread to your needle, check out our handy sewing thread size guide.
A Guide to Everyday Sewing Machine Needles
Now that we've covered the anatomy of a needle and how to decipher its size, let’s get to the fun part: meeting the workhorses of your sewing room. These are the everyday heroes you’ll reach for on most of your projects. Getting to know these core types is the biggest step you can take toward sewing with confidence and getting that professional-looking finish we all crave.
Think of it like a chef's kitchen. They have a few essential knives they use constantly, and then a drawer full of specialty blades for specific jobs. This section is all about your essential “chef’s knives”—the Universal, Ballpoint, and Sharps needles. Each one is engineered for a different kind of fabric, and using the right one is the secret to flawless stitches.
The Universal Needle: The Dependable All-Rounder
If you’ve ever bought a pack of needles without thinking too much about it, you probably picked up Universals. This needle is the true jack-of-all-trades, designed with a slightly rounded point that can handle both woven fabrics and some knits reasonably well. Because it’s so versatile, it’s the default needle that comes packaged with most new sewing machines.
Universal needles are fantastic for a huge range of common woven fabrics like cotton, linen, and flannel, making them the perfect starting point for many beginner-friendly projects.
Project Example: A Simple Cotton Tote Bag
Imagine you're making a classic cotton tote bag, a tangible project you can replicate at home. The fabric is a stable, medium-weight woven cotton—nothing too tricky. A size 80/12 Universal needle is the perfect partner for this job. It will pierce the cotton cleanly without leaving huge holes or fighting against the fabric’s weave. On a custom machine from a place like bsewinn.com, this combination ensures every stitch is perfectly formed, giving you strong, durable seams that can handle the weight of groceries or books.
This incredible adaptability is why Universal needles absolutely dominate the market. They are, by far, the most widely used category, accounting for the largest market segment simply because they handle so many different fabrics so well. Home sewers and professionals alike love them, and their affordability and compatibility make them the go-to for countless sewing tasks. You can learn more about these market trends and their steady growth.
The Ballpoint Needle: The Knit Fabric Specialist
Okay, let's talk about knits—those wonderfully stretchy fabrics used for t-shirts, leggings, and all our favorite comfy clothes. If you try to sew a knit fabric with a sharp-pointed needle, you're pretty much setting yourself up for disaster. A sharp point will actually pierce and tear the delicate looped fibers, causing skipped stitches and, even worse, runs in your fabric.
This is where the Ballpoint needle swoops in to save the day. It has a rounded, ball-like tip designed not to pierce the fabric but to gently push the fibers aside. It slides right between them to form a stitch without causing any damage. It’s the key to getting a smooth, pucker-free finish on any stretchy material.
Project Example: A Stretchy Jersey T-Shirt
For a jersey t-shirt project, a size 75/11 Ballpoint needle is absolutely essential. That rounded tip will glide through the knit structure of the jersey, preventing the tiny holes and skipped stitches that a Universal needle might cause. When you pair this with the consistent feed system of a good machine, the Ballpoint needle helps you create a professional-looking stretch seam that moves with the fabric instead of fighting against it. This is a perfect design to try, and our online training can show you how.
Using a Ballpoint needle on knits isn't just a recommendation; it's a golden rule for quality sewing. It protects the integrity of your fabric and is the single best way to avoid the frustration of skipped stitches. This one small change makes a massive difference in the final garment.
The Sharps and Microtex Needles: The Precision Experts
When your project demands crisp, perfectly straight stitches, you need a needle with an exceptionally sharp point. This is the domain of Sharps, also known as Microtex needles. Unlike the slightly rounded Universal needle, a Sharps needle has a very fine, acute point designed to pierce woven fabrics with incredible precision.
This razor-sharp point creates a clean, straight stitch line, making it the ideal choice for topstitching, edge stitching, and working with very fine or high-thread-count fabrics like silk, microfiber, and poplin. The needle enters and exits the fabric cleanly, preventing any puckering and ensuring a flawless finish.
Project Example: Crisp Topstitching on Linen
Let's say you're sewing a linen button-down shirt and have reached the final step: topstitching the collar and cuffs. This is where you want your stitches to be perfectly straight and look totally professional. A size 70/10 Sharps needle will deliver that result. Its slender, sharp point will create beautiful, precise stitches that sit perfectly on the linen, giving your handmade garment a high-end, store-bought look you can proudly replicate.
Making the right needle choice often comes down to the fabric's weight. This simple visual can help you decide whether you need a smaller or larger needle size.
As the infographic shows, the core principle is simple: lighter fabrics require smaller, finer needles, while heavier fabrics demand larger, stronger ones.
Unlocking Projects with Specialty Needles
Once you've gotten the hang of the everyday needles, a whole new world of creative sewing opens up. This is where specialty needles come into play. I like to think of them as the problem-solvers in my sewing kit, each one engineered to handle a specific challenge that would make a Universal or Ballpoint needle throw in the towel.
These are the tools that give you the confidence to tackle tricky fabrics and take on those ambitious projects you've been dreaming about. From slinky performance wear to rugged leather bags, the right specialty needle is your secret weapon for a flawless, professional-looking finish. This kind of know-how is exactly what we champion at bsewinn.com, giving you the tools and training to bring your boldest ideas to life.
The Stretch Needle for High-Performance Fabrics
While a Ballpoint needle is a solid choice for your average knits, fabrics with a high percentage of Lycra or spandex demand something more. I'm talking about swimwear, athletic wear, and lingerie fabrics. This is where the Stretch needle shines. It has a point that’s a little less rounded than a Ballpoint's, a deeper scarf, and a specially designed eye, all working together to prevent those infuriating skipped stitches.
- Its Special Power: That deeper scarf is key. It lets the machine's hook get extra close to the needle, reliably catching the thread loop even on ridiculously elastic materials.
- Why It Works: This unique design means that even when the fabric is stretching and moving all over the place, the needle forms a perfect stitch, every single time.
Project Example: Let's say you're sewing a pair of leggings with four-way stretch performance fabric. A size 75/11 Stretch needle is what you'll want to reach for. It creates a secure, flexible seam that stretches with the fabric, putting an end to the skipped stitches and popped threads you’d get with the wrong needle.
The Quilting Needle for Perfect Layers
Quilting means stitching through a "sandwich" of three distinct layers: the top, the batting, and the backing. This presents a unique challenge that requires a purpose-built needle. A Quilting needle is designed with a stronger, tapered shaft and a slightly rounded point so it can pass smoothly through all those layers without shredding the fabric or the batting.
Project Example: When you're machine quilting a beautiful pieced quilt top, a size 90/14 Quilting needle is your best friend. Its reinforced shaft prevents it from bending or breaking as it punches through the thick layers. At the same time, its tapered point glides through everything, creating beautiful, even stitches without any snagging or puckering.
At bsewinn.com, we know that passionate quilters are all about precision. Our online classes and extensive resources are designed to help you master techniques just like this, ensuring your custom machine and the right needle work in perfect harmony to create heirloom-quality quilts.
The Embroidery Needle for Delicate Threads
Machine embroidery is a whole different ball game. It involves dense, rapid stitching with specialty threads that are often more fragile than your standard sewing thread. An Embroidery needle is designed with a larger, polished eye and a wider groove specifically to protect these delicate threads from shredding or breaking under all that stress.
Its point is also slightly rounded to avoid damaging the fabric during dense stitch-outs. This thoughtful design allows metallic, rayon, and other decorative threads to flow smoothly, resulting in a clean, gorgeous embroidered design.
The Leather Needle for Tough Hides
Trying to sew leather with a standard needle is a recipe for disaster. Trust me. The needle will probably break, and you'll be left with ugly, torn holes in your expensive material. A Leather needle is completely different; it has a chisel-like point (often called a wedge point) designed to cut or slice through leather and other non-woven materials like vinyl and suede.
This cutting action creates a clean hole for the thread to pass through without tearing the material. The result? A strong, durable, and professional-looking seam.
Project Example: For crafting a stylish leather tote bag, you’ll need a robust needle like a size 110/18 Leather needle. Its sharp, cutting point will effortlessly pierce the tough hide, creating clean stitch holes and a seam that is both beautiful and built to last. This is a replicable design that showcases what the right tools can do.
The Denim Needle for Heavy-Duty Weaves
Finally, when you're working with heavy-duty woven fabrics like denim, canvas, or twill, the Denim (or Jeans) needle is the undisputed champion. It has an incredibly sharp, strong point and a stiff shank that lets it penetrate dense fabric weaves without deflecting—which is a common cause of skipped stitches or broken needles.
Project Example: Hemming a pair of thick denim jeans? A size 100/16 Denim needle is an absolute must. Its strong construction will power right through the multiple layers of thick fabric at the seam, creating a perfect stitch line and a durable hem that looks like it came from the factory.
The demand for specialized tools like these, particularly ball point and stretch needles, keeps growing. This is especially true in areas with strong sportswear manufacturing, which reflects the rising popularity of knit and stretch fabrics in modern fashion. You can dig deeper into these market trends and see how different types of sewing machine needles are evolving on Growth Market Reports.
Keeping Your Needle in Tip-Top Shape
Picking out the right needle is a massive win, but even the perfect tool is useless if it’s old, bent, or put in wrong. I like to think of a sewing machine needle like a tire on a race car—it’s built for high performance, but it wears out and needs to be replaced regularly to keep everything running smoothly. A little bit of needle maintenance is honestly one of the simplest ways to sidestep a whole world of sewing headaches.
Here’s the golden rule: change your needle after every 8 to 10 hours of sewing. That's my go-to advice for just about everyone. If you’re tackling something really stitch-intensive, like a big machine embroidery design or some heavy-duty free-motion quilting, you might even swap it out more often. A fresh needle is the cheapest insurance you can buy for good-looking stitches and happy fabric.
Telltale Signs Your Needle Is Done
Your sewing machine is pretty good at telling you when your needle has had enough. If you learn to listen for these little hints, you can save yourself from some major frustration down the road. It’s time for a change if you start noticing:
- A "thumping" or "punching" sound: This is the unmistakable noise of a dull point ramming its way through the fabric instead of piercing it cleanly. Ouch.
- Shredded or skipped stitches: When a needle gets old, the tiny eye can develop rough spots or burrs that snag and shred your thread.
- Puckered or pulled seams: A dull needle doesn't cut through the fibers; it pushes them down into the throat plate, which is a classic cause of puckering.
- Visible fabric damage: See any tiny snags, pulls, or runs in your fabric? Your needle is almost always the culprit.
How to Properly Change Your Needle
Getting your needle installed correctly is just as important as picking the right type. If it's not seated all the way up in the clamp, you're going to get skipped stitches, or worse, you could damage your machine. Don't worry, it's a super simple process.
- Loosen the Needle Clamp Screw: Just give that little screw on the side of the clamp a small turn, enough to release the old needle. You definitely don’t need to take it all the way out.
- Remove the Old Needle: Gently pull the old needle straight down and out.
- Insert the New Needle: Here’s the key part—with the flat side of the shank facing the back of the machine, push the new needle up into the clamp as far as it will possibly go.
- Tighten the Screw: Hold the needle in place and securely tighten the screw. I always give it a final little check to make sure it’s snug before I start sewing.
This simple, two-minute task is one of the most effective troubleshooting steps you can take. At bsewinn.com, we're all about building these foundational skills, because they empower you to solve problems on your own and sew with way more confidence.
A Fresh Needle: The Ultimate Quick Fix
Before you start tearing your hair out re-threading your machine or messing with the tension dials, always check your needle first. It's amazing how many common sewing problems trace right back to that tiny piece of metal.
If you’re dealing with skipped stitches, weird thread loops, or fabric snagging, a quick needle change is often all you need. For those trickier issues that a new needle can't solve, our comprehensive sewing machine troubleshooting guide has step-by-step solutions to get you back to happy stitching.
Common Questions About Sewing Machine Needles
Even after you've got a handle on the different needle types, questions always pop up right in the middle of a project. We get it. Think of this part as your go-to FAQ for those little puzzles that can trip up even experienced sewists. Getting these details right is what takes your sewing from good to great.
These are the questions we hear all the time at bsewinn.com. Our whole approach, from our custom sewing machine designs to our online classes and training resources, is built on giving you practical answers so you can sew with confidence and joy.
How Often Should I Really Change My Needle?
The golden rule is to pop in a fresh needle after every 8 to 10 hours of actual sewing time. We're talking about the time the needle is physically stitching, not just the hours your machine is humming along. A new needle is your best friend—it's sharp, glides through fabric like a dream, and honestly prevents a ton of common sewing headaches.
If you're doing something with a lot of dense stitching, like machine embroidery or free-motion quilting, you'll want to change it even more often. A dull needle doesn't pierce the fabric; it punches it. This can damage your beautiful work and put unnecessary strain on your machine.
Can I Just Use a Universal Needle for Everything?
Oh, if only it were that simple! While it's tempting, the answer is a firm no. A Universal needle is a fantastic workhorse for a lot of basic woven fabrics (think cotton poplin or your favorite linen), but it's not a one-size-fits-all solution.
Try using one on a knit fabric, and you'll likely end up with a classic case of skipped stitches because its point snags the delicate fibers. On the flip side, for super fine fabrics like silk or tough guys like denim, a Universal needle is just the wrong tool for the job. It can leave gaping holes in delicates or just snap when it hits a heavy weave. For that truly professional finish, you've got to match the needle to the fabric.
A specialized needle isn’t a luxury; it’s a necessity for getting the best performance from your fabric and machine. This small detail elevates your work from homemade to beautifully handcrafted.
What Happens If I Use the Wrong Size Needle?
Using the wrong size is just as much of a troublemaker as using the wrong type. If your needle is too big for your fabric, it's going to leave behind permanent, noticeable holes. This is especially true on fine or lightweight materials. It can also cause the fabric to pucker and pull along the seam, which is never the look we're going for.
On the other hand, a needle that's too small for a heavy fabric is just asking for a headache. It will probably struggle to get through the material, causing it to bend or deflect, leading to skipped stitches. In a worst-case scenario, the needle will just snap. That's not just frustrating—it can be a safety hazard and potentially damage your machine.
Why Is My Thread Breaking or Shredding?
Shredded thread is a super common frustration, and nine times out of ten, the needle is the culprit. Here are the usual suspects:
- A Dull or Damaged Needle: An old needle can get a tiny burr on its tip or around the eye. You might not even see it, but it acts like a little file, shredding your thread with every stitch.
- An Undersized Eye: You might be trying to force a thread that’s too thick through the needle's eye. That constant friction is a recipe for fraying and breaking.
- Incorrect Installation: Make sure that needle is in there correctly! If the flat side isn't facing the back, it can throw off the machine's timing and cause the thread to snag.
And for anyone who finds threading to be a constant battle, specially designed tools like easy threading needles can be a real game-changer.
At B-Sew Inn, we believe that truly mastering your tools is the key to unlocking your creative potential. From our custom machine designs to our library of online resources, we're here to support every stitch you make. Explore our full range of machines, supplies, and educational events to elevate your craft at https://www.bsewinn.com.

