

If you’ve ever admired a quilt where the blocks seem to gently puff up, perfectly defined and flawlessly finished, you’ve likely seen the magic of stitch in the ditch. It’s a classic quilting technique where you sew directly in the seam line—the little ‘ditch’—where two pieces of fabric meet.
This simple act creates a strong, nearly invisible stitch from the front of the quilt. It’s the secret sauce for securing your quilt top, batting, and backing together without cluttering up your beautiful piecing work. At B-Sew Inn, we're dedicated to empowering crafters like you with custom sewing machine designs and the know-how to use them. Through our online classes and extensive resources, we provide the support you need to master techniques just like this one.
The Secret to a Professional Quilt Finish
Think of stitch in the ditch as the hidden scaffolding that makes your quilt blocks the star of the show. By stitching right in that seam, you compress the batting along the piecing lines. This gives each block a subtle, almost three-dimensional texture that takes your entire design to the next level. For example, imagine a simple nine-patch quilt block; using stitch in the ditch will make each of the nine squares pop, creating a beautifully textured and professional-looking final piece that you can easily replicate.
It’s one of those foundational skills that can truly transform a project from looking homemade to looking handmade with professional polish. Here at B-Sew Inn, our goal is to empower you with the skills, custom machine designs, and support to get that perfect finish every time.
Why Quilters Love This Technique
Once you get the hang of it, you'll find yourself turning to this method again and again. It’s a favorite for a few really good reasons:
- It’s Practically Invisible: When you nail it, the stitches sink right into the seam and disappear from the front. It’s quilting without stealing the spotlight from your fabric choices and piecing.
- It Adds Gorgeous Definition: The quilting lines trace your patchwork perfectly, making each block and pattern pop. It’s a fantastic way to honor the work you put into piecing.
- It’s Super Efficient: Compared to elaborate free-motion designs, it provides a structured and often much faster way to quilt an entire project.
It’s the perfect technique for projects meant to be loved and used, like cozy cotton throw blankets, because it creates a durable quilt that’s also beautifully finished.

Whether you're tackling your very first quilt or your fiftieth, mastering stitch in the ditch is a total game-changer. Through our online classes, training, and extensive resources, B-Sew Inn is here to cheer you on every step of the way, helping you build the confidence to create projects you’re truly proud of.
How a Sewing Machine Staple Was Born
To really get why stitch in the ditch is such a big deal, you have to look back at where it came from. The technique really took off right alongside the home sewing machine back in the late 19th century. Before that, everything was hand-quilted—absolutely beautiful, but incredibly slow and painstaking work.
The sewing machine was a total game-changer, bringing a whole new level of speed and precision to quilting. Suddenly, stitching perfectly down a narrow seam wasn't just a dream, it was something you could actually do. Quilters could tackle more intricate designs and finish projects faster than they ever thought possible.
A Craft Transformed by Technology
This technique’s rise coincided with the explosion of sewing machines that completely reshaped home crafting. You can even see the dawn of this new era preserved at the Smithsonian Institution: the earliest known machine-sewn quilt, a little crib-sized piece from 1879. It’s a perfect example of when stitching right along the seam lines became a practical reality.
This leap from hand-sewing to machine precision was huge, with some estimates from the time suggesting it cut quilting time by as much as 80%. You can dive deeper into the history of machine quilting with this resource from Murray State University's digital commons.
This piece of history really drives home a key truth for all of us who create: having the right tools has always been the key to unlocking our creativity and pushing the boundaries of our craft.
That evolution is still happening today. Here at B-Sew Inn, we are committed to empowering makers with not just the latest custom sewing machine designs, but also the friendly support, online classes, and training to truly master them. We help you use today's technology to bring your own creative ideas to life—just like those first sewing machines did for quilters over a century ago.
Getting the Right Tools for a Flawless Finish
If you want a truly invisible stitch-in-the-ditch, your technique is only half the battle. Having the right gear is what really sets the stage for success. Before you even think about stitching, you need to set up your sewing machine with a presser foot that will keep your quilt sandwich from shifting, bunching, or puckering. This is absolutely non-negotiable for a professional look.
Your two best friends for this job are a Walking Foot or a specialized Stitch-in-the-Ditch Foot. Think of a walking foot as an extra set of hands; it has its own feed dogs that work in tandem with your machine's, evenly guiding all three layers—top, batting, and backing—through at the exact same pace. The result? Smooth, pucker-free quilting every time.
Essential Machine Settings and Tools
Once your foot is sorted, the next things to dial in are your machine settings and thread. It’s funny how the wrong combination can make your supposedly "invisible" stitches shout from the rooftops. Taking a moment to fine-tune your setup before you start is one of the best habits a quilter can have.
Here are the key things to get just right:
- Ideal Stitch Length: Go for a slightly longer stitch, somewhere in the 2.5mm to 3.0mm range. It’s long enough to be strong and secure the layers without being so tiny that it pulls on the fabric.
- Needle Position: This is all about precision. You’ll want to adjust your needle position so it lands exactly where you want it—either dead center in the seam or just a hair to the "low" side of the ditch.
- The Right Thread: Your thread choice is make-or-break for invisibility. The best options are either a clear monofilament thread that just disappears into any color, or a high-quality cotton thread that’s a perfect color match to your fabric.
At B-Sew Inn, we've seen firsthand how getting these foundational elements right can transform a project from good to gorgeous. It's all about setting yourself up for a win. If you're looking to add a specialized tool to your collection, you can explore the benefits of a dedicated Stitch-in-the-Ditch Foot on our website. It’s designed with a handy little guide that practically forces your stitches to stay perfectly in the seam.
Recommended Machine Settings and Feet
To make things even easier, here's a quick reference table to help you get your machine dialed in perfectly for stitching in the ditch.
| Tool or Setting | Recommendation | Why It's Important |
|---|---|---|
| Presser Foot | Walking Foot or Stitch-in-the-Ditch Foot | Prevents layers from shifting and eliminates puckers by feeding fabric evenly. |
| Stitch Length | 2.5mm - 3.0mm | Provides strength without pulling or distorting the fabric, helping stitches sink in. |
| Needle Position | Center or slightly to the "low" side of the seam | Ensures stitches are hidden perfectly within the ditch for an invisible finish. |
| Thread | Monofilament or color-matched cotton | The key to invisibility—either blends in with all colors or matches one perfectly. |
| Needle | 80/12 or 90/14 Quilting or Topstitch | A sharp, strong needle cleanly penetrates all three layers without snagging. |
Keep this little chart handy, and you'll have a great starting point every time you're ready to tackle this technique. It takes the guesswork out of the setup so you can focus on the fun part—the quilting
Your Step-by-Step Guide to Perfect Stitching
Alright, let's bring this technique to life at your sewing machine. Following these steps will help you nail that perfect stitch in the ditch, giving your quilts that clean, polished look we all strive for. Think of this as your personal mini-class from us here at B-Sew Inn, designed to build your skills and confidence one seam at a time.
First things first: preparation is everything. I can't stress this enough. Taking a moment to properly press your seams makes all the difference. For the cleanest possible ditch, press your seams to one side. This creates a natural little valley for your needle to follow—it's like giving yourself a roadmap for your stitches.
The Quilting Process From Start to Finish
Once your quilt top is pressed and ready, it's time to build your quilt sandwich—that classic trio of backing, batting, and your beautiful quilt top. Make sure every layer is smooth and happy, with no wrinkles in sight. After you've basted it all together, you're ready for the fun part.
- Start in the Middle: I always tell my students to begin quilting from the center of the quilt and work their way out. It’s a simple trick, but it’s crucial. This method pushes any extra fabric or fullness toward the edges, which is the best way to prevent those frustrating puckers from popping up in the middle of your project.
- Aim for the "Low" Side: As you guide your quilt sandwich under the needle, you want to aim for the "low" side of the seam. This is the side without the seam allowance pressed underneath it. Your needle should sink just a thread’s width away from the seam itself. Getting this placement just right is what makes the stitch practically vanish into the ditch. A walking foot is your best friend here for keeping all the layers moving together smoothly.
- Lock Your Stitches: When you start and finish a line of quilting, you've got to secure those threads. A few tiny backstitches or using your machine’s built-in lock stitch function will make sure all your hard work doesn’t come unraveled down the road.
This little diagram shows the three key players you'll need for the job.
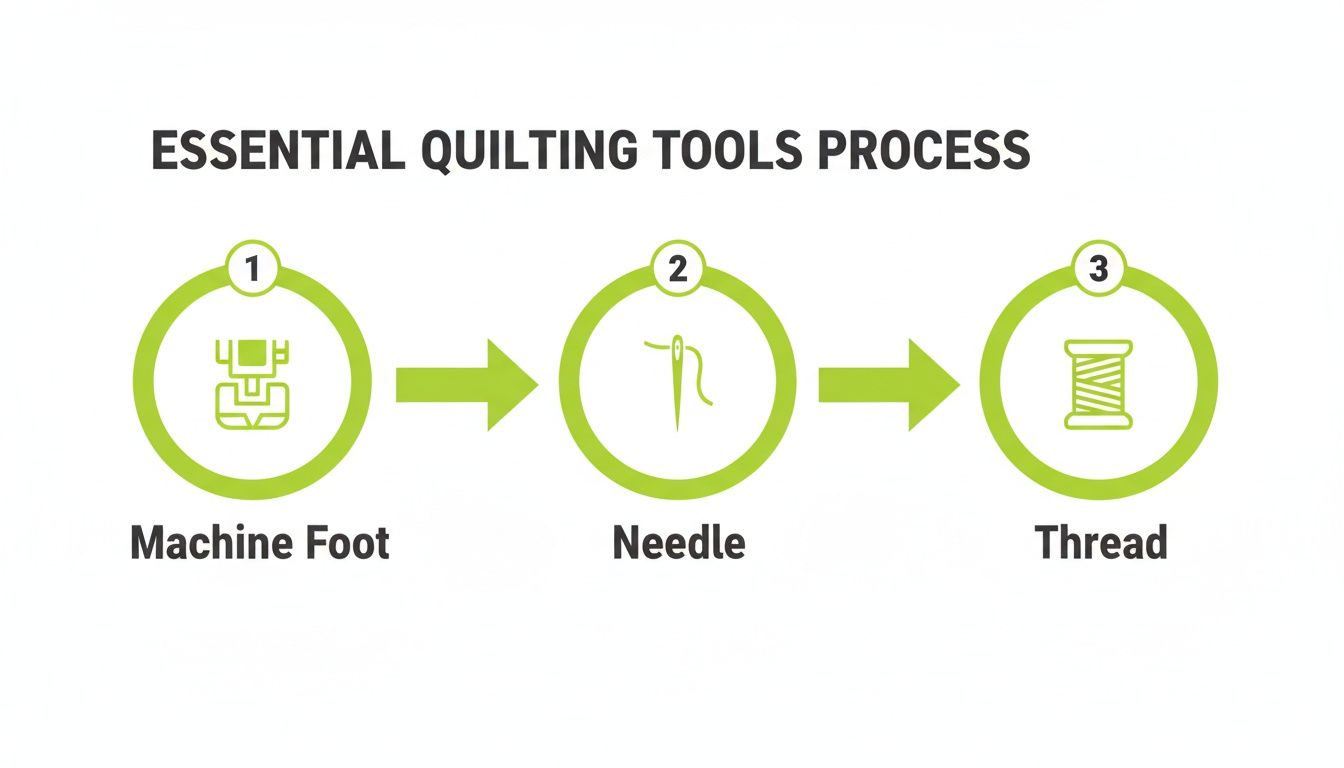
It really highlights how your machine foot, needle, and thread all work in harmony to create that flawless, invisible finish.
Here's a pro tip for you: Instead of bulky knots, try using micro-stitches to lock your threads. Just set your stitch length to nearly zero for the first and last few stitches. It secures the thread beautifully right inside the fabric layers.
For the absolute best results, press those seams to one side and use tiny micro-stitches (25-30 per inch) to lock everything in place. It's a technique that can slash your finishing time by as much as 50% compared to some free-motion methods. This technique is incredibly versatile; try it on a placemat or table runner project first. Outline the main patchwork seams to see how it adds definition before committing to a larger quilt. This type of hands-on practice is what our B-Sew Inn online classes are all about—building skills through tangible, repeatable projects.
Troubleshooting the Tricky Bits
Let's be honest, even quilters with years of experience hit a snag every now and then. Getting the hang of stitch in the ditch is all about practice, but knowing how to fix the little things that go wrong is what really builds your confidence. Think of these hiccups not as mistakes, but as opportunities to get to know your machine and technique even better.
One of the most common frustrations is seeing your bobbin thread peeking through on the top of your quilt. It’s like a little unwanted guest at the party! This is almost always a sign that your machine's tension needs a quick tweak. When the top and bobbin threads are perfectly balanced, they’ll meet and lock right in the middle of your fabric layers, staying completely out of sight.
Another frequent visitor is fabric puckering along your stitch line. If you spot tiny tucks or your fabric looks wavy, it's a dead giveaway that your quilt layers are shifting around while you sew. This usually means your quilt sandwich could have used a little more secure basting, or that a walking foot is needed to help all those layers move together in harmony.
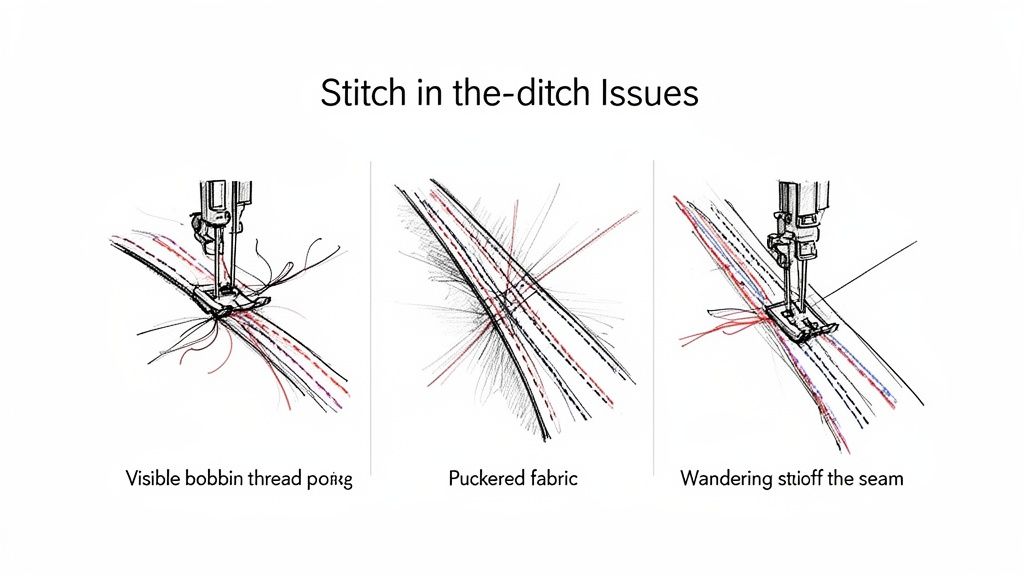
Solving Stitching Setbacks
And then, of course, there are those dreaded wandering stitch lines that decide to hop right out of the ditch. Ugh. This one really comes down to control and guidance. Trying to sew too fast is a common culprit, as is not using a specialized foot with a guide to help you stay on the straight and narrow.
Here are a few quick fixes to get you back on track:
- Visible Bobbin Thread: This is your machine telling you to check its tension. Getting it just right is a skill worth learning, and our guide on tension adjustment on a sewing machine can walk you through it.
- Fabric Puckering: Go back to your basting. Don't be shy with the pins or basting spray—you want that quilt sandwich snug and secure before you start. A walking foot is your best friend here, truly a game-changer for preventing shifting.
- Wandering Stitches: Take a deep breath and slow down. Speed will come with practice. For pinpoint accuracy, nothing beats a stitch-in-the-ditch foot. The little blade runs right in the seam and practically forces your stitches to stay perfectly hidden.
Got Questions? We’ve Got Answers.
Now that we’ve covered the basics, let’s tackle some of the questions that pop up all the time when quilters are getting the hang of stitch in the ditch. These are the practical, real-world things we hear from beginners and seasoned stitchers alike, and getting them sorted will make your next project so much smoother.
Think of this as the friendly advice you'd get leaning over the counter at B-Sew Inn. We love helping you move from learning to doing!
Do I Have to Press My Seams to One Side?
While pressing to one side is definitely the easiest route, especially for beginners, you can absolutely stitch in the ditch with seams pressed open. It just requires a bit more precision.
When your seams are open, you’re aiming to sink your stitches right into that center line. This is where a stitch-in-the-ditch foot with a center guide becomes your best friend—it’s a game-changer for keeping your stitches perfectly straight. For anyone new to this, sticking with seams pressed to one side and stitching on the “low” side is the fastest way to get that invisible finish.
Can I Do This by Hand?
You bet! Long before our beloved machines were on every sewing table, stitching in the ditch was a go-to hand-quilting technique. It’s a beautiful, traditional approach.
To do it by hand, you’ll use a small, even running stitch (often called a quilting stitch) and guide it deep into the ditch so it disappears from view. Machine stitching is obviously much faster, but there's a meditative, classic quality to hand stitching. It's a wonderful choice for smaller projects or for anyone who really cherishes that 100% handmade look.
What's the Best Thread to Use for Invisible Stitches?
The whole point is to make your quilting stitches vanish, so the right thread is key. You really have two fantastic options here: a high-quality thread that’s a perfect color match to your fabric, or a clear monofilament thread.
Monofilament is a super-fine, transparent nylon or polyester thread that just blends in with whatever color it’s on. This makes it a quilter’s secret weapon, especially for quilts with lots of different fabrics and colors.
Here’s a little pro tip: when using monofilament thread, switch to a smaller needle, like a 70/10, and try lowering your machine's top tension just a tad. This simple tweak helps the thread glide through the fabric beautifully and prevents any puckering, ensuring your stitches stay invisible and your finish is flawless.
At B-Sew Inn, we believe that mastering foundational skills like stitch in the ditch opens up a whole world of creative possibilities. From providing the right machine to offering expert training, we are here to support every step of your crafting journey. Explore our resources and start your next project with confidence at https://www.bsewinn.com.

