

Popular buying advice treats the best longarm quilting rulers as a shopping list: thick acrylic, a non-slip back, and a kit full of specialty shapes. That list skips the two questions that change the quilt. What size will the motif stitch once the hopping foot is in the path, and which area of the quilt are you working in?
A clear, grippy template can still quilt a circle larger than the label. A long straight edge can save resets on a border and fight you inside a small block. Choose for finished size and for the area under the needle. Feature lists come after that.
Table of Contents
- Why Longarm Quilting Rulers Are Built Differently
- Comparing Ruler Shapes and Their Best Jobs
- Sizes, Thickness, and Edge Designs That Matter
- Finished Sizes and Foot Compensation Explained
- Matching Rulers to Your Skill Level and Projects
- How to Evaluate Ruler Control and Stability
- Caring for Your Rulers and Buying With Confidence
Why Longarm Quilting Rulers Are Built Differently
A ruler can cut fabric accurately and still be unsafe beside a longarm needle. A thin acrylic straightedge may work well with a rotary cutter, but it does not give a hopping foot a tall, stable edge to follow. The difference matters in the stitches: if the foot rides over the ruler, the needle can strike the acrylic.
Rotary cutting changed how quilters prepared fabric. Before it became common, quilters traced templates, added a 6.4 mm (0.25 inch) seam allowance, and cut pieces with scissors. Layered fabric could then be cut against a rigid ruler, giving quilters a consistent reference edge. Those templates were made for cutting, though. Longarm ruler work adapted the idea of a fixed edge for guiding free-motion stitching.
A quilting ruler has to stay in contact with the foot while the machine moves. Its height and stability affect how confidently you can guide a line and how cleanly the stitching follows the template. Longarm quilting uses rulers to guide lines, curves, waves, and scallops across layered fabric. Learn more about what longarm quilting involves before choosing templates for your setup.
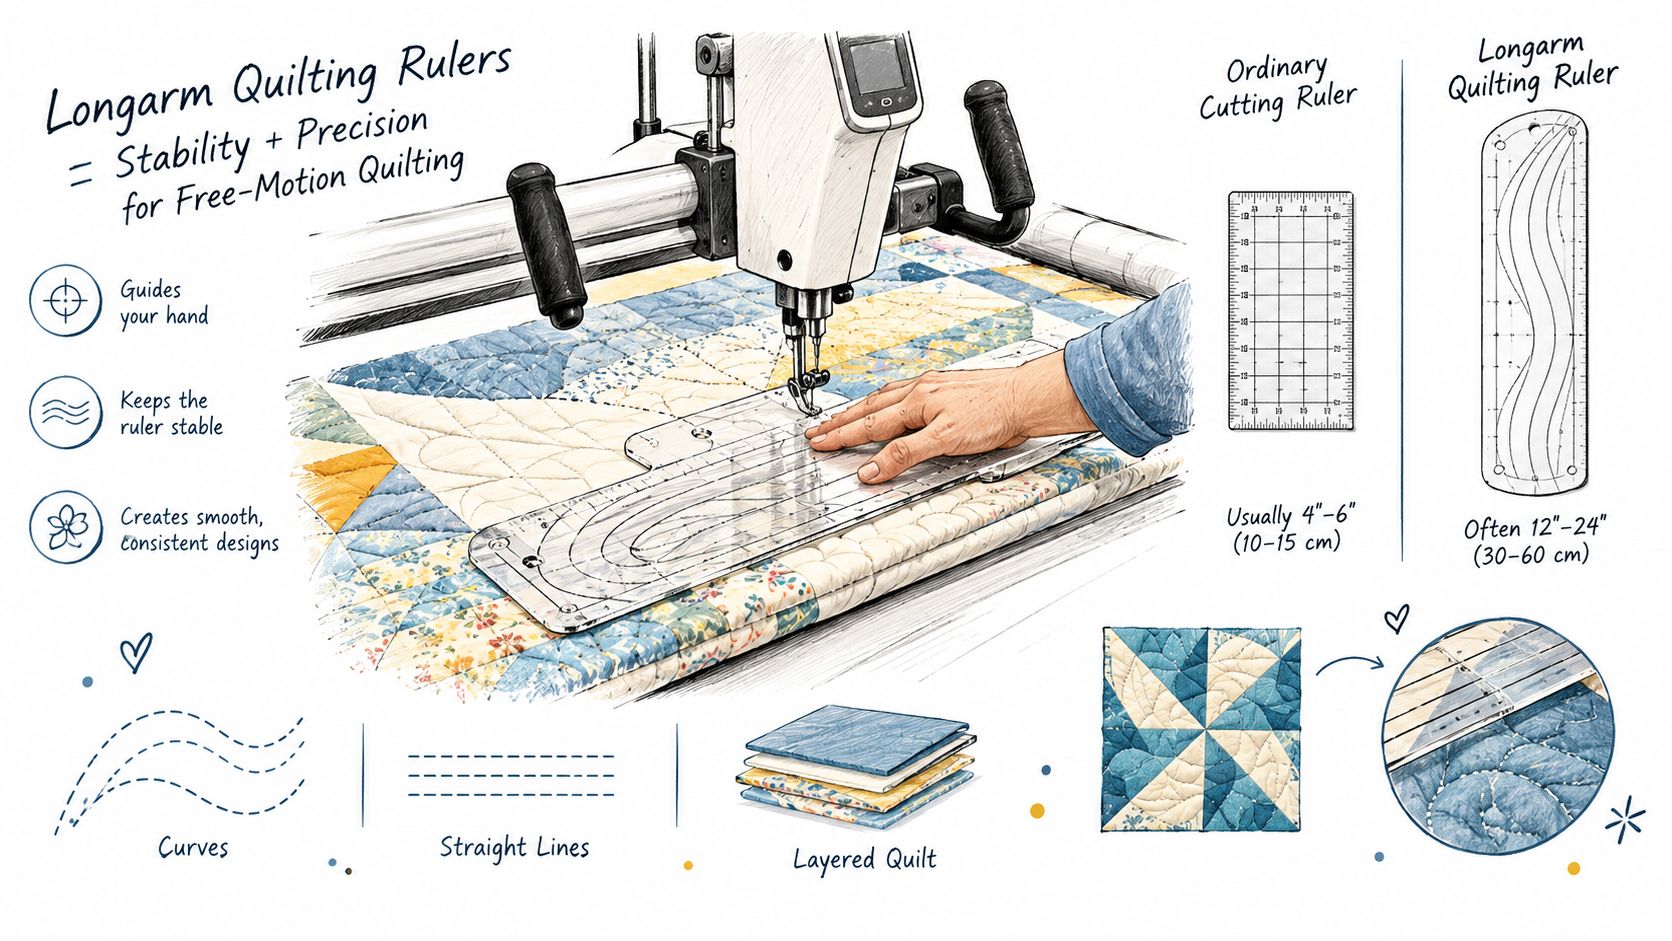
A cutting edge is not a quilting edge
A measuring ruler and a longarm ruler do different jobs. One guides a cut; the other must stay engaged with a moving foot.
Choose a ruler that suits the machine's foot clearance and the area you plan to quilt. A template that feels steady on a large open section may be awkward in a small block, even if its shape looks useful. Judge its practical value by the stitching path it allows and the motif size you can produce, not by how many shapes come in a kit.
Comparing Ruler Shapes and Their Best Jobs
A ruler's best shape depends on the quilting area and the motif you want to stitch. Judge it by the path the hopping foot can follow and the finished size the design will occupy, not by the template's outline alone. A shape that works neatly in a block may be awkward across a wide border.
Straight rulers suit stitch-in-the-ditch work and parallel channels. Their long edge helps keep lines consistent across a block or down a border. They are less useful when the design needs to turn. Forcing a straight edge around a curve creates flat spots and may require restarting. Straight lines are a practical place to build hand control because the guide stays steady.
Curved arcs work for continuous curves, repeated feather sweeps, and flowing borders. A gentle arc is easier to follow when you guide the machine without pushing it away from the line. A tighter curve across a wide border may call for frequent repositioning. Try arcs after straight-line movement feels controlled.
Circles and specialty wedges make repeatable bubbles, orange peels, clamshells, and fan sections. They suit blocks where the motif needs to recur at a consistent scale. A template can feel cumbersome if it is too large for the block or needs turning for every petal. Check that the hopping foot can stay against the edge through the full path.
Transitional shapes combine a straight run with a mild curve. They let you move from channel work into softer fill without changing templates. They are less suited to a motif that must close into a complete circle.
Ruler shapes matched to quilting jobs
| Ruler shape | Best quilting job | Typical skill level |
|---|---|---|
| Straight edge | Ditch work and parallel channels | Beginner through advanced |
| Curved arc | Continuous curves and flowing borders | Comfortable beginner to intermediate |
| Circle or wedge | Repeatable motifs and fans | Intermediate |
| Straight-to-curve | Moving between channels and soft fills | Intermediate |
Hand-guided shapes are not the only way to repeat a design. Some computerized longarm systems can place edge-to-edge designs, blocks, borders, and custom motifs automatically. Rulers remain useful for lines and shapes you want to control manually, while computerized placement can handle full designs with minimal repositioning.
For help distinguishing cutting templates from shapes made for machine quilting, see this guide to quilters' rulers and templates.
Sizes, Thickness, and Edge Designs That Matter
A ruler's printed size and edge are only useful if the tool stays stable against the ruler foot and fits the space you are quilting. Check thickness first. Longarm templates commonly measure about 1/4 to 3/8 inch thick, giving the foot enough edge to track while limiting flex. Rotary-cutting rulers are thinner and are not a substitute. For a typical longarm setup, a 1/4-inch ruler is a common working reference, but follow your machine manual for the required thickness and clearance. Check that the ruler base or extension table sits flat beneath the quilt sandwich.
Length, marks, and the edge you feel
Choose ruler length for the area you quilt. A short ruler is easier to handle in a small block or tight ditch; a longer one reduces stops along a border but can be awkward when space is limited. Markings should suit the work, too. One-inch marks are quick to read, while quarter-inch references help when echoing a seam.
High-contrast lines make the path easier to follow as the machine moves. Feel the edge before buying: a smooth, consistent edge tracks cleanly, while a nick or uneven spot can catch and interrupt the stitching. Thickness, markings, and edge quality all affect control, but none makes a ruler right for every quilting area.
The 3/16" Basic Ruler Set- Low Shank includes three rulers for low-shank machine quilting and requires a separate low-shank ruler foot. Its profile is for that setup, not a replacement for a 1/4-inch longarm template. Confirm both shank type and foot clearance before using any ruler.
If a ruler can slide under the foot, do not use it on the longarm, even if its markings are accurate for cutting.
Finished Sizes and Foot Compensation Explained
The label on a circle is not the circle you quilt. The hopping foot sits between the acrylic and the needle, so the stitch lands inside the physical edge. Most roundups stop at thickness, grip, and a ruler base. They rarely say what the motif will measure when it is done.
A longarm forum example makes the gap concrete. A template marketed as a 2-inch circle may quilt a 2.5-inch circle unless the template is built to compensate for the foot. A compensated template may measure only 1.5 inches across and still produce a true 2-inch result, as discussed in this longarm ruler thread. The same offset shows up on arcs and clamshells. Comparing two rulers by the number printed on the acrylic can rank the wrong one first.
How to tell if a ruler compensates
Read the product notes for finished size, not only the cut size. A compensated circle often looks smaller in your hand than the motif it claims to quilt. An uncompensated circle looks like the number you want and then stitches larger.
Know that feet aren't identical. A true 1/4-inch foot, an open-toe ruler foot, and a domestic low-shank foot don't share one offset. A template that is right on one machine can miss on another.
Stitch a scrap before the quilt. Layer a small sandwich, mark the center, and quilt the circle or arc once. Measure the stitched shape, not the acrylic. If a "2-inch" circle lands at 2.5 inches, either switch to a compensated template or plan the block around the larger result.
Write both numbers on a piece of tape and stick it to the ruler: physical size, and stitched size on your foot. That note saves a whole border of surprises.
Matching Rulers to Your Skill Level and Projects
The useful ruler is the one that fits the quilting area under your needle. A short straight edge stays manageable inside a small block, while a longer ruler can reduce stops along a broad border. In a tight space, that extra length can overhang seams and make the tool harder to control. Match the ruler to the work area, not the size of the kit. A basic 6-inch straight ruler often earns more use than a specialty shape. Circles and curves add more decisions: check the markings and confirm the template suits your foot.
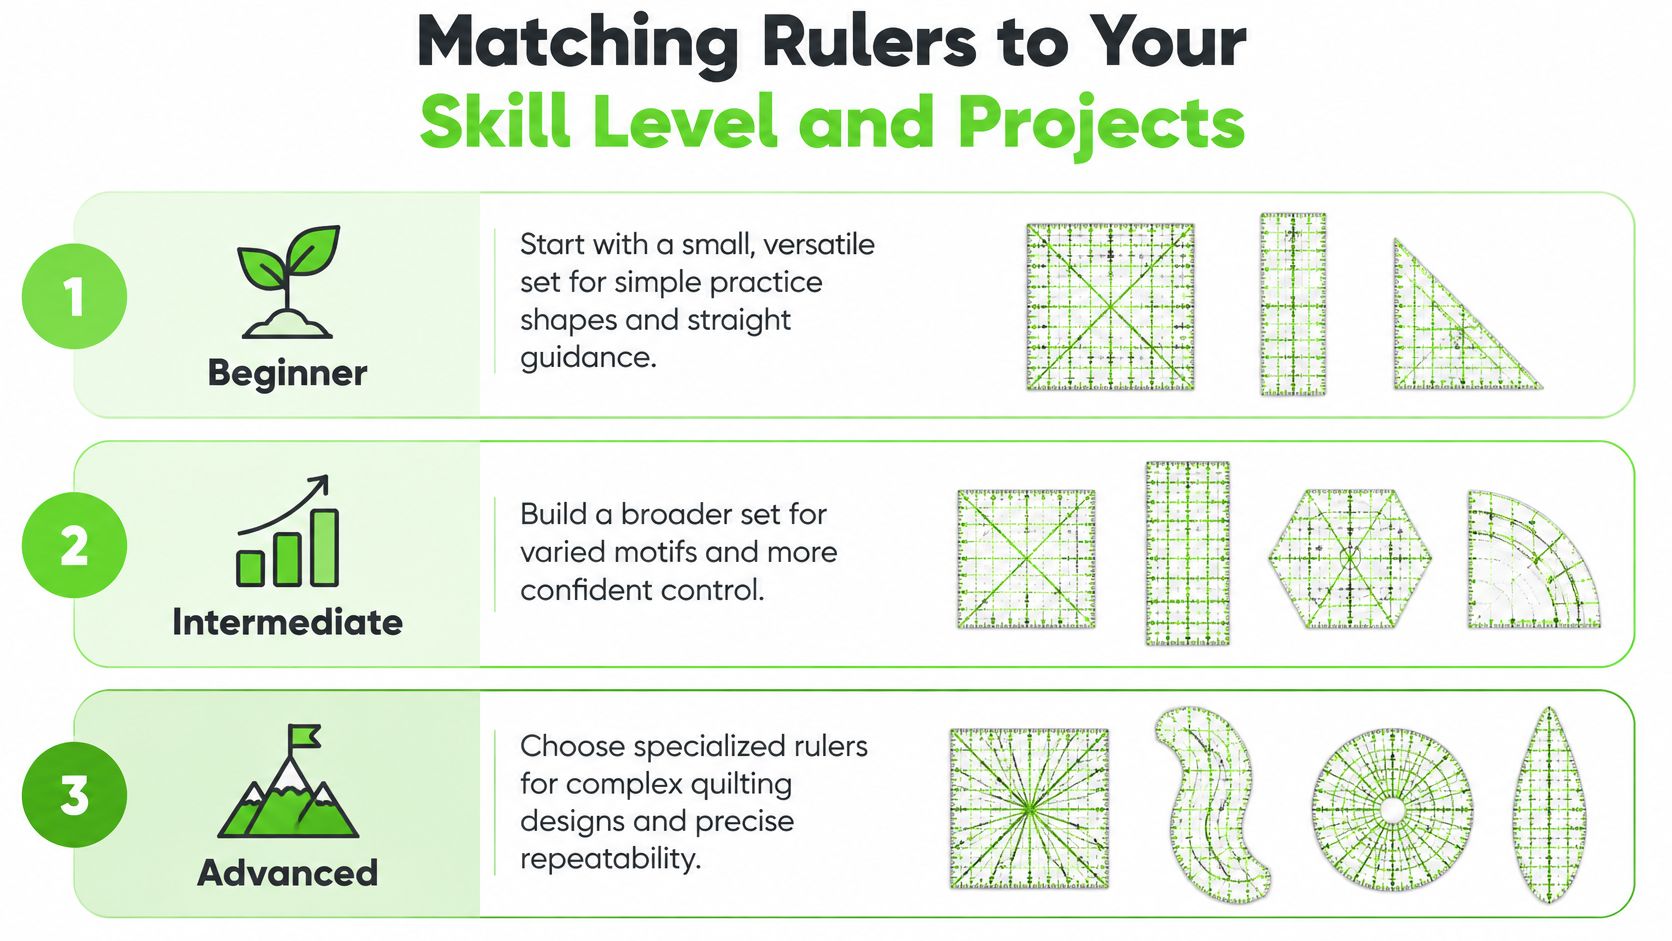
Three realistic setups
A first longarm, mostly practice sandwiches and simple blocks. Start with a small straight ruler, a circle compensated for your foot, and a gentle curve sized for the block. Together, they cover ditch work, a basic motif, and a soft fill. Leave hearts, feathers, and waves for a project that calls for them. A small set keeps practice focused and is easier to handle.
Borders, block motifs, and a growing design book. Add a longer straight edge for sashing and border channels, plus another arc for wider curves. Keep the small straight ruler for pieced blocks. An 18-inch tool can overhang seams in a 6-inch block, while the same length can reduce stops along a long border. Choose based on the section beneath the needle, since length helps one job and hinders another.
Quilts finished for other people, on a deadline. Build a wider working set: straight edges in two lengths, a circle suited to your foot, a gentle curve, and a wedge you can repeat confidently. Efficient stitching comes from fewer shape changes and a ruler base that stays put, not from owning every silhouette. Add specialty shapes when a client's design calls for them.
A useful starter set is often a small straight ruler, a circle matched to your foot, and a gentle curve, rather than the largest kit available.
Choose rulers, bases, and feet as a working setup so the pieces fit together. This longarm quilting supplies guide can help you plan those choices together.
How to Evaluate Ruler Control and Stability
Judge a ruler by the stitched result, not claims on the packaging. Its edge should stay against the hopping foot without making you clamp down. Grip, shape, thickness, and hand position all affect control, but the useful test is the motif the ruler produces after the foot's clearance is accounted for, in the quilting area you work in.
A reliable three-point hold keeps the ruler against the hopping foot, uses machine pressure against the ruler, and applies light downward pressure toward the ruler base. As the machine advances, walk your hand along the template rather than reaching for the far end. Keep the thumb and forefinger aimed toward the foot, and choose an underside that provides enough friction to prevent skating without dragging the quilt. Heavy pressure can impede movement; light, steady contact keeps the ruler flat and the stitching on course.
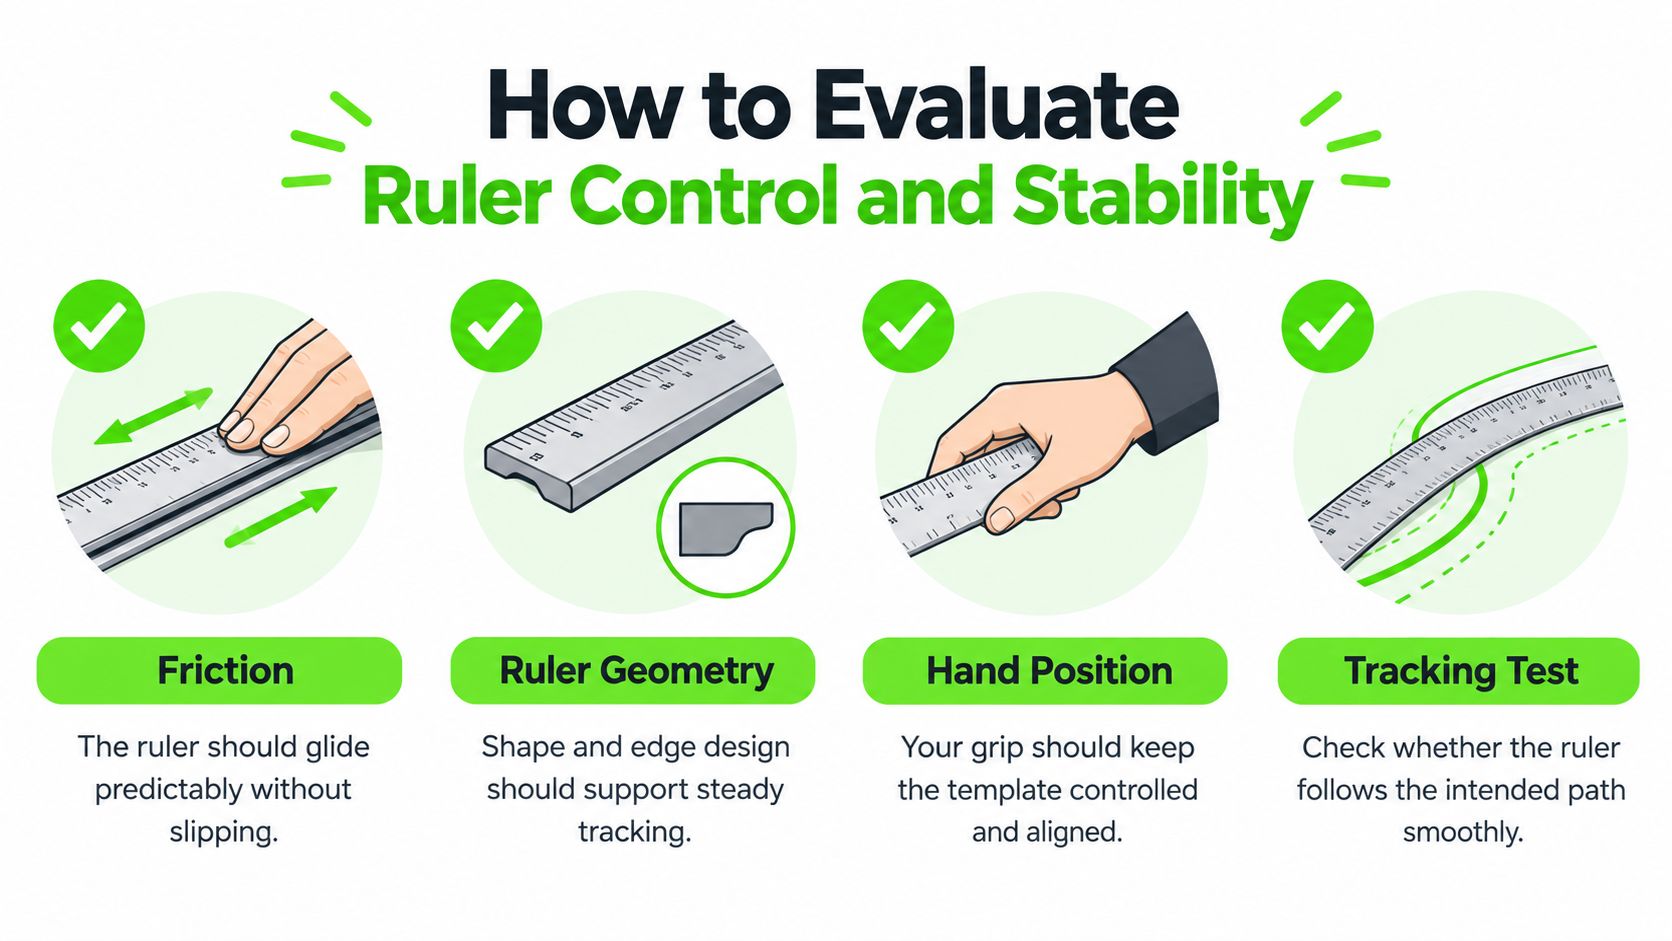
A four-check pass before you buy
Friction: Move the ruler over the machine base with your usual hand pressure. It should respond when you guide it, yet resist sliding when the foot meets its edge. A ruler that sticks or skates makes accurate stitching harder.
Geometry: Place the foot against a straight edge, then a curve. Check that contact stays even. A bump, thin spot, or shape that is awkward to brace can pull the line off course.
Hand position: Hold the ruler with your thumb and forefinger toward the foot, then advance your grip while quilting. If you must reach and twist, the ruler may be too long for that quilting area, or its markings may be hard to follow.
Tracking: Stitch a short line on a scrap. Check that the stitch remains a consistent distance from the edge without a hard push. If you have to clamp down to hold the path, try another template.
Run these checks at a store table or on your own frame. Then stitch the motif you plan to use and measure the finished size, including the space taken by the hopping foot. A curve that looks right on the ruler may stitch too small for a wide quilting area, while a long template can be cumbersome in a compact block. For a practical guide to operating the machine while maintaining ruler control, see how to longarm quilt.
Caring for Your Rulers and Buying With Confidence
Acrylic stays accurate only if the edge stays true. Store rulers flat, not leaned in a hot window or stacked under books that can bow a thin spot. Wipe the edge before a session so thread fuzz and spray don't change the glide. Recheck friction dots or tape when the ruler starts to skate. Refresh marks you added with tape when they peel, and don't trust a chipped corner for ditch work.
A damaged ruler limits a quilt the same way a worn foot does. If the foot clearance is wrong, or the base rocks, no amount of careful holding fixes the stitch. Service on the machine and a hard look at the ruler belong in the same habit. Clean the foot area, confirm the ruler foot is the one the template was sized for, and retest a circle on a scrap after any foot change.
Where to try the setup in person
B-Sew Inn sells and services longarm quilting machines and carries sewing, quilting, and embroidery equipment, notions, and cutting tables. Readers can see, test, and try rulers and machines at retail stores in Tulsa OK, Oklahoma City OK, Springfield MO, Humble TX, and Fayetteville AR. Hands-on time matters before a longarm purchase. Bring the questions from this guide: thickness, foot match, and the size of the circle it stitches. For day-to-day handling once the rulers are home, how to use quilting rulers walks through the motions that keep those edges useful.
B-Sew Inn helps quilters match longarm rulers to the hopping foot and the quilting they do, and the team sells and services longarm machines plus the notions that support ruler work. Visit a store in Oklahoma, Missouri, Texas, or Arkansas to test thickness, foot clearance, and stitched motif size before you buy. Start at B-Sew Inn to browse longarm equipment, ask about in-person classes, or book a look at ruler and foot compatibility.

