

If you've ever marveled at a quilt with perfectly straight lines and crisp, matching corners, I'll let you in on a little secret: it's not magic. The real hero is the humble quilting ruler.
Learning to use one comes down to three things: proper alignment, stable pressure, and a confident cut. When you pair the right ruler with the right task, every piece of fabric is cut with perfect accuracy. That's the foundation for a flawless quilt top.
Your Foundation for Flawless Quilting Starts Here
Welcome to the world of precision quilting! Mastering these simple tools is what takes a project from looking homemade to looking professionally crafted, ensuring every block fits together like a puzzle. A quality ruler, a sharp rotary cutter, and a self-healing mat—that's the trio that turns fabric cutting from a chore into a deeply satisfying process.
This skill is absolutely fundamental, and it's something we're passionate about at B-Sew Inn. We believe in empowering crafters at every level, whether you're making your first nine-patch or tackling a king-sized masterpiece. Our custom sewing machine designs are built to help you succeed, and we back them up with extensive resources, online classes, and hands-on training. You'll see that practical, supportive spirit woven throughout this guide.
Why Rulers Are Non-Negotiable
Think of quilting rulers as the architectural blueprints for your project. Without them, your foundation is shaky. With them, every piece is exact, leading to a stronger, more beautiful quilt.
Here’s why they are so essential:
- Unmatched Accuracy: Rulers give you precise measurements down to 1/8 of an inch. This kicks guesswork to the curb and ensures your quilt blocks are perfectly square.
- Safety and Control: A thick acrylic ruler isn't just for measuring; it acts as a safety barrier for your fingers, guiding the rotary blade for a perfectly clean cut.
- Cutting Efficiency: Forget cutting one layer at a time. Rulers let you accurately slice through multiple layers of fabric at once, which drastically speeds things up.
It's no surprise the global quilting ruler market is booming—it's projected to hit $500 million by 2025. This surge reflects just how vital these tools have become for the 9-11 million active quilters in the U.S. alone. You can explore more about these market trends and their impact on the craft.
At B-Sew Inn, we've seen it firsthand. The moment a quilter masters their ruler is the moment they unlock a new level of creativity. It's when they realize they can bring any design to life because they finally have control over the most critical step—the cut. Our online classes and training are designed to get you to this "aha!" moment faster.
Our goal is to get you excited about the fundamentals that underpin every beautiful quilt. By understanding how to use these rulers, you’re not just cutting fabric; you’re building the confidence to tackle any project that inspires you. Let's get started.
Choosing Your Perfect Quilting Ruler Companion
Walking into the quilting ruler aisle for the first time can feel a bit like staring at a wall of hieroglyphics. So many lines, angles, and sizes! But don't let it intimidate you. The secret is to start small and build a versatile collection that can handle just about anything you throw at it.
Think of these rulers as your core cutting crew. You don't need every single one right away. It's about picking the right tools to ensure accuracy and, honestly, to make the whole process of cutting fabric a lot more fun and efficient.
The Must-Have Rulers for Every Quilter
For the vast majority of quilting projects, you really only need a couple of key rulers to get the job done right. Here at B-Sew Inn, we always advise new quilters to master the essentials before jumping into specialty tools. It builds a solid foundation without cluttering up your sewing space.
Start with these two workhorses:
- The Long Ruler (6x24 inch): This will be your absolute go-to. It's perfect for cutting long, straight strips from yardage and for squaring up large pieces of fabric. Its length is ideal for slicing across the entire width of your fabric when it's folded in half off the bolt.
- The Square Ruler (12.5x12.5 inch): You'll wonder how you ever lived without this one. It’s absolutely essential for squaring up finished quilt blocks, making sure every single block is the perfect size before you start piecing them together. It’s also a dream for trimming up half-square and quarter-square triangles.
Believe it or not, with just these two rulers in your toolkit, you can confidently tackle an enormous range of patterns. They are the true bedrock of any well-equipped quilting studio.
Exploring Materials and Must-Have Features
Not all rulers are created equal, and the material and little details can make a huge difference in your day-to-day use. Most quilting rulers you'll see are made from durable acrylic, but there's a wide spectrum of quality out there. You want to look for features that are designed to make your life easier.
A high-quality ruler should feel like an extension of your hand—stable, clear, and totally reliable. We always say that features like non-slip grips aren't luxuries; they're essential for safety and precision. They prevent the tiny slips that lead to wonky cuts and, heartbreakingly, wasted fabric.
When you're shopping, keep an eye out for these game-changers:
- Material: Go for a sturdy acrylic ruler that's at least 1/8-inch thick. That thickness gives your rotary cutter a safe, solid edge to glide against.
- Markings: Look for laser-etched markings. Unlike printed lines, they won't wear off over time, which means your measurements will stay dead-on accurate for years of quilting.
- Non-Slip Grips: This is a big one. Many modern rulers have a built-in non-slip coating or come with little grips you can add yourself. This feature is crucial for stopping the ruler from shifting an inch while you're in the middle of a cut.
When to Use Specialty Rulers
Once you've got the hang of your basic rulers, you'll start to see a whole world of specialty rulers open up. These are the tools designed for specific shapes and techniques, and they can be incredible time-savers for complex cuts, unlocking all sorts of new creative doors.
You definitely don't need them all at once, but it’s good to know what’s out there for future projects. To help you figure out what you might need down the road, we put together a guide on choosing the best ruler for cutting fabric. It’s a great resource for deciding which specialty tool is worth the investment.
Here's a quick look at some of the most common specialty rulers you'll encounter.
Essential Quilting Rulers And Their Primary Uses
This little chart is your quick-reference guide to the most common rulers and what they're best used for.
| Ruler Type | Common Size | Best For | B-Sew Inn Pro Tip |
|---|---|---|---|
| Triangle Rulers | Varies | Cutting equilateral triangles, half-square triangles, and flying geese. | Look for a ruler with a blunted tip to automatically trim those pesky "dog ears." |
| Curved Rulers | Varies | Creating scallops, waves, and gentle arcs for borders or quilting. | Perfect for adding a bit of movement and softness to an otherwise geometric quilt design. |
| Circle Rulers | Nested sizes | Cutting perfect circles for appliqué or creating fun, modern quilt designs. | Use a smaller rotary cutter (like a 28mm) for better control as you navigate the curves. |
| Template Rulers | Shape-specific | Fussy cutting specific motifs or cutting shapes like hexagons and diamonds. | Clear templates are fantastic because they let you perfectly center a design element before making a single cut. |
Think of your rulers as your fabric's best friend. They're what stand between you and crooked edges, ensuring every piece is cut with precision. For beginners, a classic 6x12-inch acrylic ruler is a fantastic starting point—it's typically non-slip, has laser-etched markings for 1/8-inch increments, and is ideal for trimming half-square triangles, a component found in about 70% of beginner patterns. Hobbyists, who make up 70% of the market, actually rely on these core rulers for about 80% of their cutting tasks. The payoff? Using a proper ruler can reduce fabric waste by up to 25% compared to trying to cut freehand.
Mastering the Fundamentals of Ruler Placement and Cutting
Once you've got the right rulers in hand, you're ready for the part where precision is everything: the actual cutting. This is where your technique and muscle memory start to build, leading to perfectly sized pieces for your quilt. I like to think of it less as cutting and more as scoring the fabric with surgical-like accuracy.
This is a hands-on skill that, once it clicks, gives you a massive confidence boost. Here at B-Sew Inn, we love seeing a new quilter's face light up when their first few cuts slide apart perfectly. It’s one of those "aha!" moments that tells you you're really getting it. Our classes focus on providing these tangible experiences.
Squaring Up Your Fabric for a Perfect Start
Before you can even think about cutting accurate strips or shapes, you need a perfectly straight edge to measure from. We call this squaring up, and it’s non-negotiable. It gives you a reliable baseline and, just as importantly, ensures your cuts follow the fabric's grainline. Cutting on the grain is what keeps your pieces from stretching and warping down the road.
Start by folding your fabric in half, matching up the selvage edges (those are the tightly woven factory edges). Smooth out any wrinkles on your cutting mat. Now, grab your long 6x24 inch ruler and place it along the folded edge. The key here is to make sure a horizontal line on the ruler is perfectly lined up with the fabric fold. This alignment is your secret to a straight cut.
Trim just a tiny sliver off that raw, folded edge. Boom. You've just created a clean, 90-degree angle from the fold, giving you a perfect starting line for all your other cuts.
This visual guide is a great reference for seeing how different rulers are essential for specific cuts, from long strips to square blocks and specialty shapes.
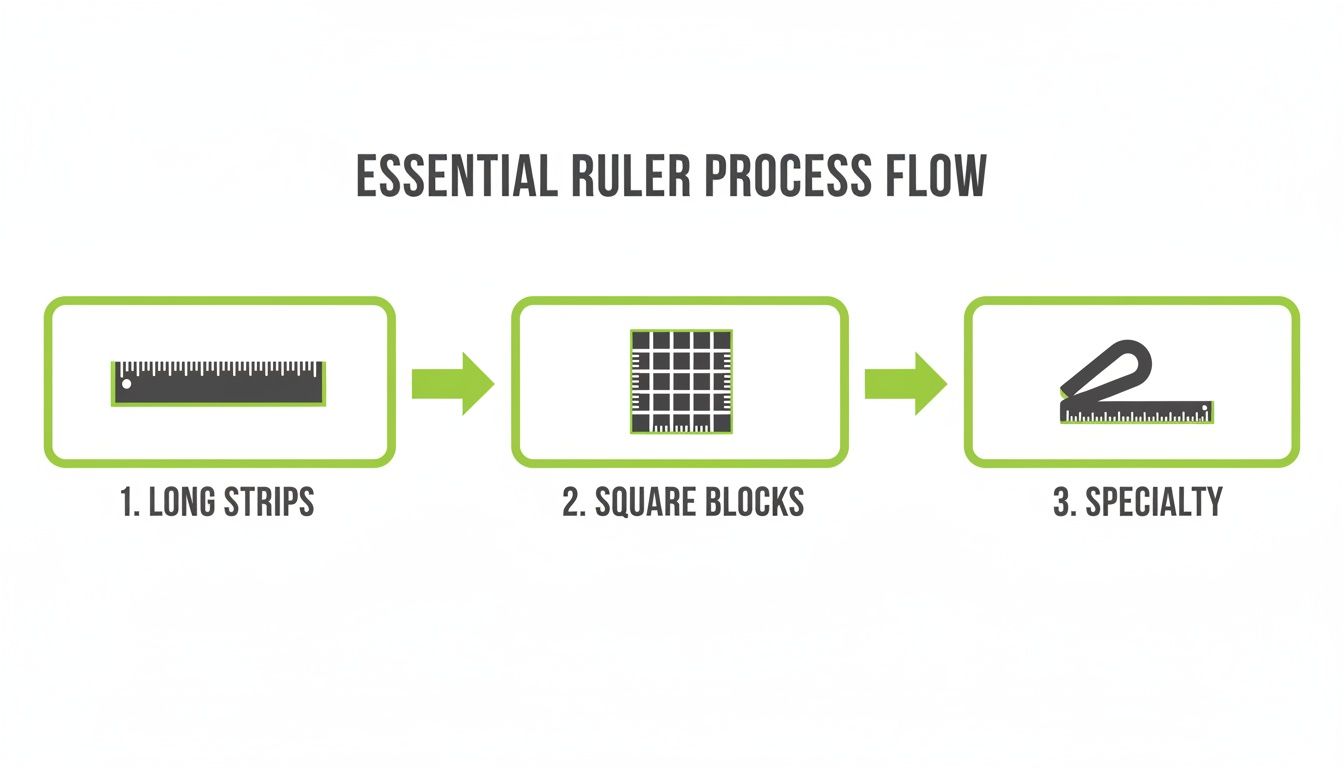
Think of the flowchart as a quick decision-maker, visually connecting the most common cutting tasks to their ideal ruler buddies.
Achieving Perfect Alignment and Stability
Accuracy lives and dies by your alignment. Once you have that squared-up edge, line it up with the zero mark on your cutting mat. Now, let’s say you want to cut a 2.5-inch strip. You’ll place your ruler over the fabric so the 2.5-inch line on the ruler itself sits directly on top of your freshly cut edge. A common beginner mistake is to place the edge of the ruler at the 2.5-inch mark on the mat—always, always trust the lines on your ruler for precision.
Just as important as alignment is stability. Your non-cutting hand is your anchor.
- Spread your fingers wide across the ruler to distribute pressure evenly.
- Make a "spider" or "starfish" hand, keeping your fingertips safely away from the edge.
- Apply firm, consistent downward pressure so that ruler doesn't budge an inch. For longer rulers, you might need to "walk" your hand up the ruler as you cut.
The real secret is consistent pressure. Think of your hand as a clamp holding everything securely in place. If you press too lightly, the ruler will slip. Press too hard, and you won’t be able to glide the rotary cutter smoothly. It’s a balance you’ll find with just a little practice.
Executing a Clean and Safe Cut
With your fabric squared and your ruler held down tight, it’s showtime. How you hold and move your rotary cutter is crucial for both safety and a clean cut. And please, keep that blade guard on until the very second you're ready to slice.
Hold the rotary cutter like you’d hold a pizza cutter, with your index finger extended along the handle for better control. Make sure the blade is perpendicular to your mat, not angled. Cutting at an angle can make the fabric bunch up or give you a beveled edge, which will throw off your seam allowances later.
Apply steady, even pressure and push the cutter away from your body in one smooth, confident motion. Never, ever pull the cutter toward you. If you don't cut all the way through on the first go, it's much safer to leave the blade in the fabric, reposition your hand for more pressure, and finish the cut. Resist the urge to "saw" back and forth. For a deeper look at blade handling, check out our complete guide on how to use a rotary cutter.
Let's put this into practice. Imagine you're cutting strips for a "jelly roll race" quilt, which needs a whole bunch of 2.5-inch strips.
- Square Up: First things first, square up your yardage just like we talked about.
- First Strip: Line up the 2.5-inch mark on your ruler with that perfect squared-up edge and make your cut.
- Chain Cutting: Now for the fun part. Without moving the fabric, just slide your ruler over and line up the 2.5-inch mark with the new clean edge you just made. Keep repeating this across the width of your fabric.
This kind of repetitive motion is fantastic for building muscle memory. Before you know it, you won't even have to think about the alignment and pressure; your hands will just know what to do. This is the foundation of fast, efficient, and joyful quilting—turning the prep work into a satisfying part of the creative journey.
Using Rulers on Domestic and Long-Arm Machines
Did you know your quilting rulers can do more than just help you cut fabric? They can completely transform your machine quilting game. This is a technique we call ruler work, and it’s all about guiding your sewing machine with a ruler to create incredibly precise lines, perfect curves, and geometric patterns that are tough to nail with free-motion quilting alone.
Think of it like tracing with your sewing machine. You get the creative freedom of moving the fabric yourself, but with the steady hand of a ruler ensuring every stitch is exactly where you want it. Here at B-Sew Inn, we've seen so many quilters' confidence skyrocket once they give ruler work a try. With our custom sewing machine designs and supportive training, crafters can replicate these beautiful patterns at home.
The Ruler Foot: A Non-Negotiable Tool
Before you even dream of putting a ruler next to your needle, you absolutely must have a ruler foot installed. I can't stress this enough—it's not just an accessory, it's a critical piece of safety equipment.
A ruler foot has a high, thick circular base that acts as a guardrail. It prevents the ruler from ever slipping under or over the foot and crashing into the needle. Trying to use a ruler with a standard darning or free-motion foot is asking for trouble. It can lead to a broken needle, a damaged machine, or even an injury. Seriously, don't do it.
Why Ruler Thickness Matters
It's also vital to know the difference between your cutting rulers and your quilting rulers. The acrylic rulers you use with your rotary cutter are typically 1/8-inch thick. Rulers made specifically for machine quilting are much beefier, coming in at 1/4-inch thick.
This extra thickness is designed to work perfectly with the high wall of your ruler foot, creating a secure channel for the foot to glide along.
Think of the ruler foot and the 1/4-inch thick ruler as a lock-and-key system. They're engineered to work together to keep you safe and your stitches beautiful. Never, ever use a thin cutting ruler at your machine.
Starting Out with Straight-Line Rulers
The best place to begin your ruler work adventure is with a simple straight-line ruler. They are workhorses and perfect for creating foundational designs that give any quilt a polished, professional finish. Here's a tangible design you can replicate:
- Stitch-in-the-Ditch: This is where you stitch right in the "ditch" of your seam lines. A straight ruler is your best friend here, keeping those lines perfectly hidden and straight, which is a lifesaver on long seams.
- Grids and Crosshatching: Want a clean, modern look? Use your ruler to stitch evenly spaced parallel lines, first in one direction and then the other. The markings on your ruler make it simple to get that spacing just right.
- Echo Quilting: You can outline your quilt blocks or appliqué shapes with straight lines that "echo" the original shape. For a simple nine-patch block, try stitching a ¼-inch echo inside each square to make the design pop. This is a fantastic way to add texture.
When you're holding the ruler, spread your fingers out to apply gentle, even pressure. You want it to be stable, but not pressed down so hard that you can't move your quilt sandwich smoothly. It’s a bit of a balancing act, but you'll get the hang of it quickly. If you're ready to jump in, the Baby Lock Ruler Kit is a fantastic starter set for high-shank and long-arm machines.
Moving on to Curves and Arcs
Once you've mastered straight lines, the world of curved rulers opens up. These tools are amazing for adding soft, flowing designs that contrast beautifully with the sharp geometry of a quilt top.
- Clamshells: This classic motif looks so intricate, but it’s surprisingly easy with a curved ruler. By simply repositioning the ruler over and over, you can create rows of gorgeous, interlocking clamshells.
- Wavy Lines and Arcs: A ruler with a gentle curve is perfect for quilting wavy lines across a quilt or adding elegant arcs in your borders and sashing. A tangible project is to use a curved ruler to stitch a simple "baptist fan" design across a baby quilt for a classic, elegant finish.
Here’s a little insider tip: if you find the glare from your sewing light distracting, you can lightly "frost" your rulers with a fine-grit sandpaper or specialized product. This can reduce glare and might even improve your accuracy by 15% under bright lights. As quilting tools evolve, we're seeing more ergonomic and multi-functional rulers hit the market, making it easier than ever to achieve professional results. If you're curious about these industry shifts, you can check out the latest research findings.
Safety First and Common Mistakes to Avoid
In quilting, getting those perfectly straight, accurate cuts is incredibly satisfying. But let's be honest: that rotary cutter is sharp. Precision and safety really are two sides of the same coin, and building good habits from the start means you can focus on the fun part without any nasty surprises. Here at B-Sew Inn, we've seen it all, and we want to make sure your quilting journey is a joyful—and injury-free—one.

If there's one rule to live by, it's this: respect your rotary cutter. That blade is as sharp as a scalpel and needs your undivided attention. Make it a reflex to engage the safety guard the second you finish a cut. It’s a tiny action that prevents the most common accidents.
Creating a Safe Cutting Zone
Your cutting setup is just as critical as your technique. Your self-healing mat is more than a surface protector; it's your designated safety zone, giving your fabric a stable, non-slip foundation.
Here are the absolute non-negotiables for a safe setup:
- Mind Your Fingers: Get into the habit of using the "starfish" or "spider" hand position on your ruler. Spread your fingers wide to apply even pressure, but always keep your fingertips at least an inch back from the ruler's edge. Never let them dangle over the side.
- Always Cut Away from Your Body: This one is huge. Position yourself so you’re always pushing the rotary cutter away from you. Cutting towards yourself is asking for trouble—one little slip can lead to a serious injury.
- Stand Up and Use Good Posture: Cutting while standing gives you so much more control. You can use your body weight to apply steady, downward pressure on both the ruler and the cutter, which leads to cleaner cuts and less strain on your wrists and back.
A sharp blade is a safe blade. It sounds backward, I know, but a dull blade forces you to push harder, making it way more likely to slip or jump the ruler. A fresh, sharp blade glides through the fabric with barely any effort, giving you a much cleaner and safer cut every time.
In fact, studies have shown that simply using the right techniques can prevent up to 90% of cutting-related accidents. This really drives home how important it is to use a good self-healing mat and to change your rotary blade regularly—think after every 200 cuts or so, though this can vary with your fabric. Our in-store experts and online resources are always available to help you build these safe habits.
Troubleshooting Common Cutting Problems
Even the most seasoned quilters make a wonky cut now and then. Don't get frustrated! Think of these little hiccups as learning opportunities. Here are a few of the most common issues I see and how to fix them.
The Slipping Ruler This is probably the #1 culprit behind crooked cuts. If your ruler is shifting while you cut, it usually comes down to pressure and grip.
- The Fix: Make sure you're applying firm, even pressure with your non-cutting hand. If your ruler is a bit slick, do yourself a favor and add some non-slip adhesive dots to the back. They are a total game-changer for keeping things locked in place.
Bunched or Puckered Fabric Ever have the fabric bunch up in front of the blade instead of slicing cleanly? That's almost always a sign that your blade is dull.
- The Fix: Stop what you're doing and change your rotary blade. Seriously, you'll be amazed at the difference. A sharp blade should slice through the fibers, not push them around.
Veering or Curved Cuts You aimed for a perfectly straight line, but it came out with a slight curve. What gives? Your cutter angle is likely off.
- The Fix: Hold your rotary cutter so it's perfectly perpendicular to the cutting mat—straight up and down. If you lean it to one side or the other, the blade will undercut the fabric and create a beveled or curved edge. Concentrate on a smooth, straight motion from start to finish.
Common Quilting Ruler Questions Answered
Even when you've got all the right tools, questions are bound to pop up. Every quilter has been there! Think of this as your go-to spot for those little head-scratchers that can make a big difference. We get these questions all the time at B-Sew Inn, and we believe the best way to build your quilting confidence is to tackle these issues head-on.
Why Are My Fabric Strips Uneven Or V-Shaped At The Ends?
Oh, the dreaded wonky strip. Don't worry, this happens to everyone, especially when you're starting out! This little problem almost always points back to one of two culprits: a ruler that’s slipping or a rotary cutter that’s leaning.
When your ruler scoots even a tiny bit mid-cut, it throws the whole line off, leaving you with that frustrating V-shape. To combat this, really focus on how you're holding that ruler. Apply firm, even pressure straight down with your non-cutting hand. Try spreading your fingers out wide—I call it the "starfish grip"—for the best stability.
The other thing to check is your rotary cutter angle. It’s so easy to let it lean without realizing it, but that causes the blade to undercut the fabric and create a beveled, uneven edge. Always keep your cutter perfectly vertical. And a quick tip: a fresh, sharp blade is your best friend. A dull one just pushes and drags the fabric instead of slicing cleanly through it.
Can I Use The Same Ruler For Cutting And Machine Quilting?
This is a big one, and the answer is a firm no. It is strongly recommended that you do not mix and match these rulers. It all comes down to one crucial detail: thickness.
- Rulers for Rotary Cutting: These are typically just 1/8-inch thick. They’re perfect for guiding your rotary cutter on a mat.
- Rulers for Machine Quilting: These are a beefier 1/4-inch thick for a very important safety reason.
That extra 1/8-inch of thickness on a machine quilting ruler is designed to act as a barrier against the high shank of a ruler foot. It prevents the ruler from ever slipping over the foot and getting hit by the needle. That kind of accident can snap a needle in a heartbeat and cause some serious, expensive damage to your machine. Always, always have a dedicated set of 1/4-inch thick rulers and the proper ruler foot before you do any ruler work on your machine.
Think of it this way: your cutting ruler is for the prep work on the cutting mat. Your quilting ruler is a specialized guide that works with your machine. They have different jobs, and using the wrong one is a risk you just don't want to take.
How Should I Clean And Care For My Acrylic Rulers?
Taking good care of your rulers is easy and makes a huge difference in how long they last. If you're gentle with them, their markings will stay crisp and their edges true for years.
All you really need is a soft, lint-free cloth and a little lukewarm water. If you’ve got some stubborn grime from adhesive spray or just lots of use, a single drop of mild dish soap will do the trick.
What you don't want to use is just as important. Steer clear of hot water, anything with ammonia, and abrasive sponges or scrubbers. These will absolutely damage the acrylic, leaving behind tiny scratches and eventually wearing away those precious measurement lines. When it comes to storage, either lay them flat or hang them up on a ruler rack to keep them from warping over time.
What Is The Best Way To Read The Lines On My Ruler?
Precision starts with how you see the lines. The single most important habit to build is this: align the line on the ruler directly over the edge of the fabric, not just next to it. So, if you're cutting a 2 ½-inch strip, you want that 2 ½-inch line to completely cover the raw edge of your fabric.
Another little pro-tip is to watch out for "parallax error." That’s just a fancy term for what happens when you look at the measurement from an angle, which makes the line appear to be in a different spot than it really is. To avoid it, make sure you’re looking straight down, directly over the ruler. Of course, none of this matters if you can't see! Good, bright lighting in your sewing space is non-negotiable for reading those tiny lines and saving yourself from a headache.
At B-Sew Inn, we’re here to support you at every stage of your creative journey. Our commitment is to empower crafters through our custom sewing machine designs, extensive online classes, and hands-on training. Whether you’re just getting started or you're a seasoned pro, we have the tools and friendly advice to help bring your quilting visions to life.
Explore sewing machines, classes, and resources at bsewinn.com

