

So, you’re thinking about diving into the world of sewing machine quilting? Let me tell you, it’s a game-changer. At its heart, it’s the art of using your trusty sewing machine to stitch together the three layers of a quilt: the top, the batting, and the backing.
Compared to traditional hand quilting, using a machine gives you an incredible boost in speed, precision, and creative freedom. It turns that familiar machine on your table into a powerhouse for creating gorgeous, durable quilts with designs that are as simple or intricate as you can dream up.
Your Journey into Sewing Machine Quilting Starts Here
Welcome to the club! Think of your sewing machine as an artist's brush, ready to "paint" with thread. Quilting has been around for centuries, and it all boils down to joining three essential layers to create one cozy, beautiful textile. While our grandmothers might have spent months doing this by hand, a sewing machine makes this timeless craft more accessible and exciting than ever before.
This how-to guide is your roadmap, designed to take the mystery out of the process, especially if you're just starting out. We’ll walk through how modern machines can help you create stunning designs that you can replicate at home. It’s all about turning a traditional craft into your own unique form of self-expression.
The Famous "Quilt Sandwich"
Every quilt, no matter how simple or complex, is built from the same three layers. In the quilting world, we affectionately call this the "quilt sandwich." Getting to know these layers is the first real step to mastering the craft.
- The Quilt Top: This is the star of the show! It's the decorative top layer, often pieced together from different fabrics to create a beautiful pattern or picture. This is where your design comes to life.
- The Batting: Tucked inside, the batting is the fluffy, cozy middle layer. It's what gives a quilt its warmth, insulation, and that lovely puffy dimension. You can find it in cotton, wool, polyester, or a blend of fibers.
- The Backing Fabric: This is the bottom layer of your quilt. It's usually a single large piece of fabric, but sometimes quilters piece the back, too, for an extra bit of flair.
The real magic happens when you stitch through all three layers, locking them together for good. This quilting process not only holds everything in place but also adds texture and another layer of design right on top of your piecing.
Ready to Unlock Your Creativity?
Here at bsewinn.com, we are committed to empowering every crafter. Our custom sewing machine designs are engineered to give you the power to create, whether you're stitching simple straight lines or venturing into more elaborate, artistic patterns.
One of the most expressive techniques out there is free-motion quilting, which lets you basically draw with your sewing machine. It’s an amazing feeling. If you're curious to learn more about this specific method, you can dive deeper into what free motion quilting is and see the world of possibilities it opens up.
Through our extensive resources, online classes, and hands-on training, we're here to offer the support you need to bring your ideas to life. This guide will walk you through the essential tools and techniques, helping you feel confident and inspired to start your quilting adventure. Let's get sewing!
Choosing Your Quilting Path
Every great quilting adventure starts with a choice. Think of it like standing at a trailhead, ready to start your hike up the mountain of sewing machine quilting. One path is straight, steady, and guided. The other is a winding, expressive trail where you make your own way. These two paths are walking foot quilting and free-motion quilting.
Getting to know the difference between these two approaches is the key to unlocking your potential and finding the perfect technique for your project. Your choice will shape the final look of your quilt, the skills you pick up along the way, and the creative journey you're about to take. Let's dig into both so you can figure out which path is calling your name.
The Guided Precision of Walking Foot Quilting
Imagine you’re driving a car with an amazing all-wheel-drive system, where every wheel moves in perfect sync. That's the best way to think about walking foot quilting. The walking foot is a chunky presser foot with its own set of feed dogs. It works together with your machine's built-in feed dogs to pull all three layers of your quilt sandwich through evenly.
This synchronized movement is a game-changer. It keeps the layers from shifting around, which means no more frustrating puckers or bunching. It’s the go-to method for creating crisp, clean, geometric designs.
- Straight Lines and Grids: Perfect for classic crosshatching or evenly spaced parallel lines that give your quilt a timeless look.
- Stitching in the Ditch: This is where you stitch right in the seams of your pieced top. It hides the stitches and really makes your patchwork pop.
- Gentle, Sweeping Curves: While it’s the king of straight lines, a walking foot can also handle large, graceful curves with incredible accuracy.
This little flowchart helps visualize when quilting becomes the main event, separating it from everyday garment sewing.
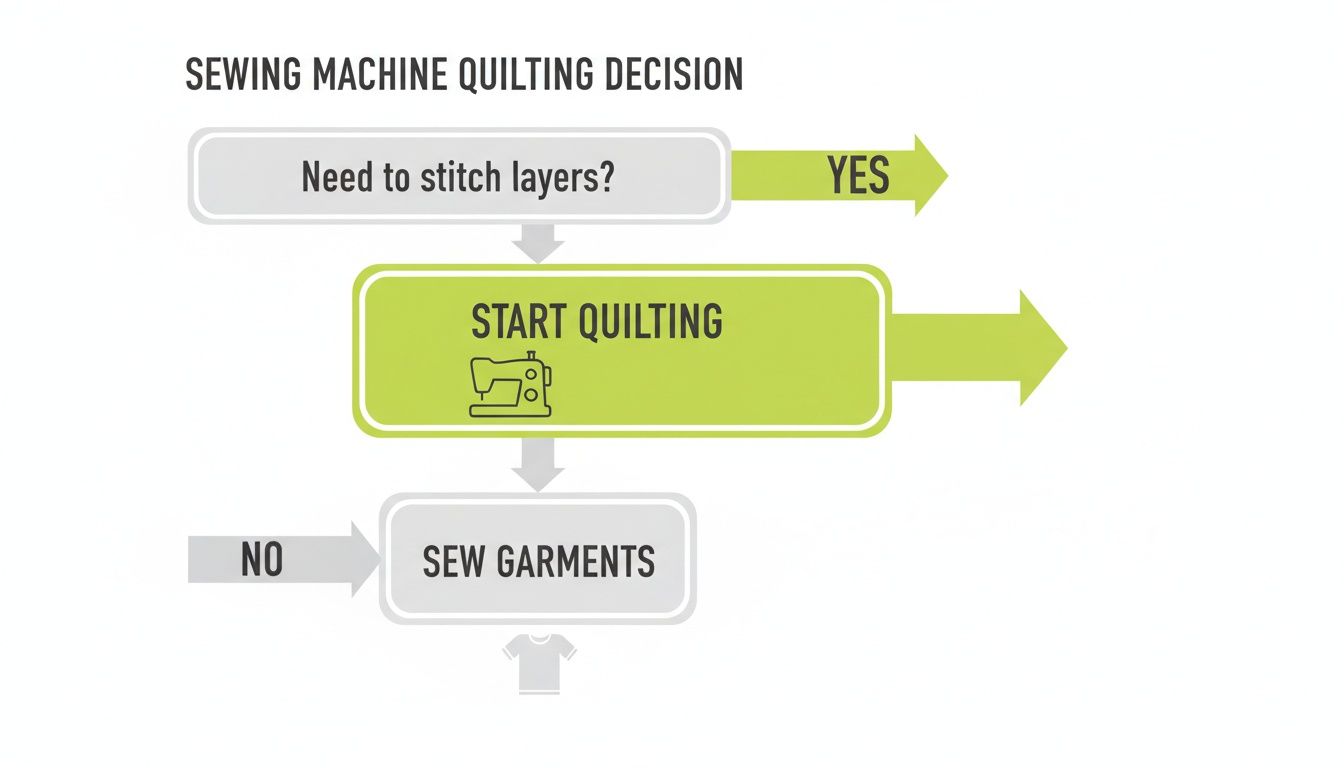
As you can see, the whole point of quilting is stitching those layers together, which is a totally different goal from just sewing a single seam on a dress.
The Artistic Freedom of Free-Motion Quilting
Now, let's wander down that other path—the one that’s all about creative freedom. Free-motion quilting (FMQ) is like trading your car for a pen and a blank sheet of paper. You drop (or cover) your machine’s feed dogs and pop on a darning or free-motion foot. With this setup, you're in the driver's seat, guiding the fabric any which way you please to literally "draw" with thread.
This technique transforms your sewing machine into an artist's tool, allowing for unparalleled creativity. It's where you can truly let your personality shine through in your stitches, creating one-of-a-kind textures and designs that are impossible with any other method.
This freedom opens up a world of intricate, organic patterns. You can start with simple stipples and loops to add that wonderful crinkly texture, or you can dive into complex feathers, floral designs, and even custom lettering. It definitely takes some practice to get the rhythm down—moving the fabric and controlling the machine speed—but the results are breathtakingly personal and unique.
Walking Foot vs Free-Motion Quilting at a Glance
Feeling a bit torn between the two? This quick comparison should help you decide which method fits your project and comfort level.
| Feature | Walking Foot Quilting | Free-Motion Quilting |
|---|---|---|
| Primary Use | Straight lines, grids, gentle curves, stitching in-the-ditch. | Intricate, custom designs like stipples, feathers, florals. |
| Machine Setup | Feed dogs engaged, walking foot attached. | Feed dogs disengaged, darning/FMQ foot attached. |
| Fabric Movement | The machine moves the fabric for you. | You move the fabric freely in any direction. |
| Skill Level | Beginner-friendly and easy to master. | Requires practice to develop a smooth, consistent rhythm. |
| Look and Feel | Creates structured, geometric, and clean designs. | Results in organic, artistic, and free-form textures. |
| Best For Projects | Modern quilts, grid patterns, beginners' first quilts. | Art quilts, heavily textured pieces, personalized designs. |
Ultimately, you don’t have to stick to just one! Many quilters use both techniques on the same quilt to get the best of both worlds.
The quilting world is absolutely booming. In fact, the global sewing and quilting market is projected to skyrocket from USD 5.8 billion to USD 10.5 billion by 2033. It’s clear that more and more people are falling in love with this craft.
As you start your journey, remember there are tons of resources out there. Exploring flexible online study options can be a great way to build your skills at your own pace. Here at bsewinn.com, we’re all about empowering you with our own online classes and training for both walking foot and free-motion techniques. We truly believe that with the right guidance, anyone can create something beautiful.
Gathering Your Quilting Tools and Supplies
Every great quilt starts long before you sew the first stitch. It begins with gathering the right tools. Think of it like a chef prepping their ingredients before starting a recipe—having everything ready makes the entire process smoother, more creative, and a whole lot more fun.
Putting together your quilting toolkit isn't hard, but every single item plays a part in turning a simple quilt top into a finished piece you can be proud of. Let's walk through the gear that will set you up for success.

The Absolute Essentials
Some tools are simply non-negotiable. These are the workhorses of your sewing room, specifically designed to handle the unique challenge of stitching through three layers of fabric and batting.
- Quilting Needles: Whatever you do, don't just grab a universal needle from your pincushion! Quilting needles are built differently—stronger, sharper, and slightly tapered to punch through thick layers without shredding your fabric or causing skipped stitches. A fresh needle is your best friend; a size 90/14 is a great starting point.
- Quality Thread: This is literally what holds your quilt together, so don't skimp here. A 100% cotton thread in a 40 or 50 weight is the go-to for most quilters. Pro-tip for beginners: pick a neutral color like light gray or beige. It blends in beautifully and hides any little wobbles in your stitching.
-
Basting Supplies: Before you can quilt, you have to secure your "quilt sandwich." You've got a few options:
- Safety Pins: Look for curved basting pins. That little curve makes them so much easier to open and close.
- Basting Spray: A temporary adhesive that holds the layers together. It’s a game-changer because you don't have to worry about pins getting in your way as you quilt.
- Fusible Batting: This is batting that has a light, heat-activated adhesive on it. You just iron it, and your layers stick together.
Game-Changing Accessories
Once the basics are covered, a few extra tools can make a huge difference in your quilting experience. These aren't just fancy gadgets; they're designed to give you better control and make the process feel less like a wrestling match and more like a creative dance.
A tidy space is just as important. To get into a good quilting rhythm, you need an organized workspace. There's a fantastic guide on how to organize your craft supplies that can help you create a setup where your tools are right where you need them, letting your creativity flow without interruption.
Essential Machine Feet and Attachments
Of all the accessories, the right presser foot is probably the most critical. It’s what controls how your fabric moves under the needle, and in quilting, that’s everything.
- A Walking Foot: This is the #1 must-have for straight-line or gently curved quilting. It has its own set of feed dogs that work with your machine's feed dogs, gripping the top and bottom layers of your quilt and pulling them through evenly. No more puckers!
- A Darning or Free-Motion Foot: This is your ticket to free-motion quilting. The foot hovers just over the fabric, which allows you to move the quilt in any direction and literally "draw" with thread.
- An Extension Table: This is a simple attachment that slides around your machine to create a large, flat surface. It supports the weight of your quilt so you aren't fighting gravity, which leads to much smoother stitches and way less strain on your arms and shoulders.
For a deeper look into all the tools that will get you started on the right foot, check out our complete guide on quilting supplies for beginners.
Having the right tools isn't about spending a lot of money; it's about investing in a smoother, more successful creative process. The right foot, needle, and a well-basted quilt can make the difference between a frustrating afternoon and a beautifully finished project you're proud of.
Key Machine Features for Better Quilting
You can absolutely start quilting on a basic sewing machine, but I'll tell you from experience—certain features can completely transform the process. It's the difference between taking a road trip in a compact car versus a spacious SUV. Both will get you to your destination, but one is just built for the long haul, making the journey smoother and way more enjoyable.
Think of these features as your quilting co-pilots. They help you stay precise, work more efficiently, and get those beautiful, professional-looking results you're dreaming of. Whether you're in the market for a new machine or just want to explore what your current one can do, knowing what to look for is half the battle.
Generous Throat Space
First things first: throat space. This is the open area to the right of your needle, and for a quilter, it's priceless real estate. The more room you have here, the easier it is to maneuver your quilt sandwich. It’s like trying to frost a big cake on a tiny plate versus a proper cake stand—one is a struggle, the other gives you room to create.
When you’re wrestling a big quilt through a small opening, your stitches get uneven, your shoulders get sore, and the fun just drains right out of the project. A bigger throat space lets you glide the fabric smoothly, giving you the control you need for both straight-line and free-motion quilting. It's a must-have if you plan on making anything bigger than a baby quilt.
Needle Up/Down Function
This feature sounds so simple, but trust me, it’s a total game-changer. The needle up/down function lets you program the machine to stop with the needle in the fabric. Why is that so great? It acts like a third hand, holding your work perfectly in place.
When you get to a sharp corner or a curve, you can stop with the needle down, lift your presser foot, pivot the whole quilt, and then keep going without ever losing your spot. No more wobbly points or misaligned lines. It's the secret to crisp, accurate quilting.
For anyone serious about creating clean, sharp quilting designs, the needle up/down button is non-negotiable. It’s a small feature that delivers a massive improvement in control and accuracy, turning tricky pivots into effortless motions.
Stitch Regulation and Speed Control
If you're ready to jump into free-motion quilting, a stitch regulator will be your best friend. This clever piece of tech uses a sensor to make sure every single stitch is the same length, no matter how fast or slow you move the fabric. It takes all the guesswork out of getting that beautiful, even texture and solves one of the biggest frustrations for new free-motion quilters.
Don't have a stitch regulator? No problem. A machine with speed control is the next best thing. It’s usually a little slider that lets you set a maximum speed. This way, you don't have to worry about a lead foot on the pedal sending your machine racing out of control. It helps you find a comfortable, steady rhythm, which is key for detailed work.
Additional Workflow Wonders
Beyond those big three, a few other features will make your quilting life so much easier.
- Automatic Thread Cutter: One push of a button, and snip—both the top and bobbin threads are cut. This saves an incredible amount of time and keeps you from constantly pulling your quilt out to find your scissors.
- Powerful Motor: You're asking your machine to punch through three layers of fabric and batting, over and over again. A strong motor handles that bulk without skipping stitches or straining, giving you consistent power from start to finish.
- A Quality Walking Foot: A good walking foot is non-negotiable for straight-line quilting. It pulls the top layer of fabric through at the same rate as the bottom layer, preventing puckers and shifting. To really master it, check out our guide on how to use a walking foot.
It’s no surprise that as home sewing gets more popular, quilters are looking for machines that can keep up. The global sewing machine market is expected to grow from USD 5.59 billion to USD 7.26 billion by 2029, and a lot of that is driven by crafters like us demanding better features. Discover more insights about sewing machine market growth on researchandmarkets.com. Here at bsewinn.com, we’re committed to offering machines with these game-changing features, empowering you through our custom designs and extensive online training resources.
Ready to Start Quilting? Here Are a Few Fun Projects
All the theory in the world is great, but let's be honest—the real fun is in the making. It’s time to take what you've learned and turn it into a tangible example that you can replicate and be proud of. We’re going to walk through three projects designed to build your confidence, one stitch at a time.
Think of these as more than just practice runs. You’ll end up with real, usable items to show for your efforts. We'll kick things off with simple placemats to get your straight-line quilting down pat. Then, we’ll move on to a baby quilt for your first adventure in free-motion, and finally, a decorative pillow that pulls both skills together. With the custom designs and support from bsewinn.com, including our online classes and extensive resources, you have a whole community cheering you on.
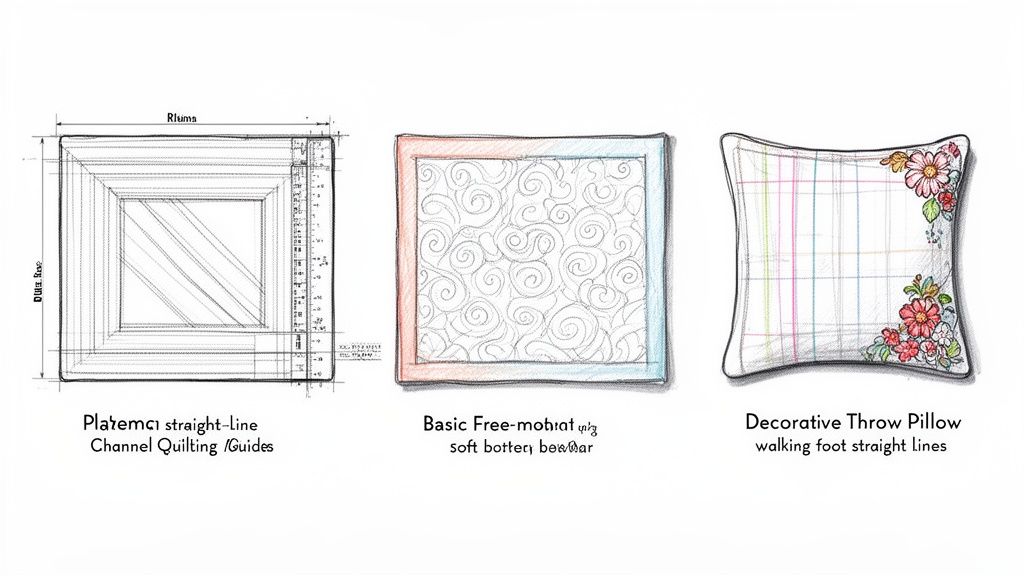
Project 1: Simple Quilted Placemats
This is the absolute perfect starting point. Placemats are small, totally manageable, and a fantastic tangible example for getting comfortable with your walking foot. You get all the experience of making a quilt sandwich and stitching through layers without wrestling a giant quilt around your machine.
The name of the game here is clean, satisfying straight lines. You can go for a classic grid or stitch parallel lines—often called channel quilting—for a sleek, modern vibe. Just focus on keeping your spacing even and your stitches smooth.
What You'll Need:
- Fabric Scraps or Fat Quarters: Enough for the top and backing of four placemats.
- Batting: A small piece of low-loft cotton batting will do the trick.
- Thread: 50 wt cotton thread that plays nicely with your fabric colors.
- Walking Foot: This is non-negotiable for preventing puckers and shifting!
How to Quilt It:
Start by stitching one line straight down the middle of your placemat. From there, work your way out to one edge, using the guide bar on your walking foot to keep every line perfectly parallel. Once one side is done, flip it around and repeat for the other half. Quilting from the center out like this is a core skill that keeps your fabric from bunching up.
Project 2: A Sweet and Simple Baby Quilt
Ready to give free-motion quilting a try? A baby quilt is the ideal next step. It’s large enough to feel like a real quilt but small enough that it won't feel intimidating. This is your chance to replicate a basic meander stitch, which looks a bit like a soft, loopy puzzle.
A meander is a beginner's best friend because it's so forgiving. Seriously, there's no right or wrong way to do it! The only goal is to fill the space with one continuous, curving line that never crosses over itself. It’s all about finding that smooth rhythm between your hands and the machine's speed.
What You'll Need:
- Baby Quilt Top: A pieced top around 36 x 48 inches is a great size.
- Backing Fabric and Batting: Make sure these are cut at least 4 inches larger on all sides than your top.
- Free-Motion/Darning Foot: You'll need this specific foot to let the fabric move freely.
- Quilting Gloves: These are a game-changer for getting a good grip and controlling the fabric.
How to Quilt It:
Once you’ve basted your quilt sandwich, drop your machine's feed dogs and pop on your free-motion foot. Start somewhere in the middle of the quilt and just… go for it! Don't worry about perfection. The goal is to get a feel for consistent stitch length and a relaxed, flowing motion. The more you relax your shoulders, the smoother your curves will be.
Think of it like doodling with thread. The trick is to keep the needle moving while you guide the fabric. This first quilt is all about building muscle memory, not creating a museum piece.
Project 3: A Decorative Pillow Combining Both Techniques
Okay, time to put it all together. A decorative throw pillow is a brilliant little project for mixing the clean precision of your walking foot with the creative freedom of free-motion. Combining the two adds so much texture and makes your work look incredibly professional, creating a tangible example of your new skills.
For example, you could use your walking foot to stitch a simple grid in the background or to frame a central block. Then, switch over to your free-motion foot to fill that block with a simple floral swirl or a dense stipple pattern. This project proves you don't have to pick a side—you can use both techniques to make your designs pop.
What You'll Need:
- Pillow Top Fabric: An 18 x 18 inch square is a standard throw pillow size.
- Batting and Backing Fabric: Just enough for the front quilted panel.
- Pillow Form: An 18-inch pillow insert.
- Both Feet: Have your walking foot and your free-motion foot ready to swap out.
These projects show that you can absolutely create beautiful quilted items right from the start. Here at bsewinn.com, we’re all about giving you the tools, online classes, and patterns to help you succeed. Every stitch you make is another step on your quilting journey.
Wrestling with Common Quilting Glitches
Even the most seasoned quilters hit a snag every now and then. It’s so easy to get frustrated when your project starts acting up, but trust me, most of these issues are surprisingly simple to fix. Just think of it as part of the quilting journey—every problem you solve makes you that much more of a pro.
So, before you let a little hiccup ruin your creative vibe, let's play detective. From tangled threads to stitches that just won't cooperate, there’s almost always a clear-cut reason and a simple fix to get you back on track.
Taming Puckers and Wavy Fabric
One of the biggest complaints I hear is about puckering, where your quilt top gets those annoying little tucks or waves as you stitch. This is a classic sign that the three layers of your quilt sandwich aren't moving through the machine together. Imagine three people trying to walk while holding hands, but one of them is speed-walking—it's just not going to work!
The solution almost always comes down to getting your fabric to feed evenly and dialing in the right tension. Here are the first things I’d check:
- Grab Your Walking Foot: This is the #1 fix for straight-line quilting. It’s a game-changer because it pulls the top and bottom layers through at the exact same speed.
- Revisit Your Basting: Is your quilt sandwich basted securely? Any loose or baggy areas are an open invitation for the layers to shift around. You might need more pins or a more thorough spray job.
- Ease Up on the Pressure: If your machine has an adjustment for it, try lowering the presser foot pressure. Sometimes, the foot can be a little too aggressive and stretch the top fabric while you sew.
Dealing with Skipped or Uneven Stitches
Nothing ruins a beautiful quilting design faster than skipped stitches or stitches that are all over the place in length. This is a dead giveaway that something's wrong with your needle or thread path. Before you do anything else, stop, take a deep breath, and completely re-thread your machine. While you're at it, pop in a brand new needle.
Seriously, a dull, bent, or wrong-sized needle is the culprit more than 80% of the time. For machine quilting, you really need to be using a quilting needle—a size 80/12 or 90/14 is a great place to start. They’re designed with a special tapered point to slice through those thick layers without a fight.
A simple needle change is often the magic wand for a whole host of quilting headaches. Never underestimate its power—it's the quickest and cheapest repair you can make.
Banishing the Dreaded Thread Nests
Ah, the "thread nest." That gnarly bird's nest of thread on the bottom of your quilt. It’s maddening, but here’s a secret: it’s almost always caused by a problem with your top thread, not your bobbin. This happens when the top thread tension is way too loose, letting it form messy loops on the underside with every stitch.
To fix this, first make sure you threaded the machine with the presser foot up. This is critical because it opens up the tension discs and lets the thread sit where it's supposed to. If it’s still happening after that, try nudging your upper thread tension up a little bit at a time until the nests disappear.
Your Sewing Machine Quilting Questions Answered
Even after you've got the basics down, a few questions always pop up when you're starting something new. Let's tackle some of the most common ones I hear about machine quilting. Getting these answers straight will help you quilt with a lot more confidence.
What Is the Best Stitch Length for Machine Quilting?
When you’re quilting, a longer stitch is your best friend. You probably pieced your quilt top together with a tiny, tight stitch (maybe around 2.0 mm), but you'll want to lengthen that for the actual quilting part.
I find a good starting point is somewhere between 3.0 mm and 4.0 mm. This longer stitch just looks so much cleaner and more professional on the finished quilt. More than that, it’s practical—it puts less stress on that thick quilt sandwich, which is your best defense against dreaded fabric puckering.
Can Any Sewing Machine Be Used for Quilting?
Absolutely! You can get started with pretty much any standard sewing machine you have at home. While those fancy, specialized quilting machines with tons of throat space are amazing for big projects, you definitely don't need one to make a beautiful quilt.
It's really all about having the right accessories. If you can get a walking foot for nice, straight lines and a darning foot for free-motion quilting, you can turn your everyday machine into a quilting workhorse.
How Do I Manage a Large Quilt on a Small Machine?
Wrangling a big quilt on a regular home machine can feel like a bit of a workout, but it’s totally doable! The key is to manage all that bulk. My best advice is to always start quilting in the very center of your quilt and work your way out to the edges.
As you go, roll up the side of the quilt that has to pass through the machine's arm and secure it with quilting clips or even just some simple binding clips. Make sure the rest of the quilt is supported on a large table or an extension table—you don't want the weight of it dragging everything down. That drag is what causes tension problems and skipped stitches. It takes a little muscle, but the result is always worth it!
Ready to put these answers into practice? B-Sew Inn is committed to empowering crafters like you. We have the machines, the online classes, and all the extensive resources you need to get going on your quilting journey, right from that very first stitch. Check out our collection and start creating your masterpiece today at https://www.bsewinn.com.

