

Picking out your first embroidery machine feels like a huge decision, but it really boils down to finding one that’s easy to learn, has the features you'll actually use (like a clear screen and a USB port), and matches what you’re excited to create. Modern machines are incredibly welcoming to newcomers, making it simpler than ever to bring your design ideas to life, right from your own craft room.
Starting Your Embroidery Journey with the Right Machine
Welcome to the incredibly fun and rewarding world of machine embroidery! If you've ever admired a perfectly monogrammed towel or a cool, decorated jacket and thought, "I wish I could do that," I’m here to tell you: you absolutely can. The days when embroidery took years of painstaking practice are long gone. Today's machines are built to help you get amazing results, even on your very first try.
But this journey is about more than just picking a machine; it's about finding a partner. Here at bsewinn.com, we’re committed to empowering crafters just like you. We don't just send you home with a box. We provide the foundation for your creativity to really take off, with extensive resources like online classes and expert training to build your confidence, one stitch at a time.
Why Now Is the Perfect Time to Start
Everyone wants to add a personal touch to their belongings, and that trend has pushed home embroidery machines to become better and more accessible than ever. The single-head models, which are perfect for home use, are a booming part of the market. For a beginner, this is fantastic news—it means more powerful, affordable, and user-friendly options are available than ever before.
This accessibility makes embroidery one of the most exciting hobbies you can get into right now. You can:
- Personalize Gifts: Add custom monograms to towels, thoughtful designs to baby clothes, or names to tote bags.
- Upgrade Your Wardrobe: Put your own unique flair on jackets, jeans, and t-shirts.
- Create Home Decor: Design custom pillows, wall art, and table linens that are 100% you.
Embroidery is more than a craft; it's a way to make everyday items uniquely yours. It transforms simple fabric into a canvas for personal expression, and with the right machine, this creative power is at your fingertips.
Ready to figure out what machine will fit perfectly in your space? You might find our guide on choosing an embroidery machine for home use really helpful. And if you're looking to explore other creative passions, there are some wonderful online courses for hobbyists that can help you expand your skills.
So, What Actually Makes a Great Beginner Machine?
Stepping into the world of embroidery can feel a bit like learning a new language. You're suddenly hit with a wave of technical terms and features that don't mean much… yet. But don't worry. The goal is simple: find a machine that feels like a creative partner, not a complicated piece of equipment. Let's break down what really matters.
Your first big decision is choosing between an embroidery-only machine and a combination sewing-and-embroidery model. Think of it like this: are you buying a specialized tool or a multi-tool? An embroidery-only machine is streamlined for one job and does it beautifully, which often makes it a fantastic, straightforward choice for beginners.
A combo machine, on the other hand, gives you the flexibility to sew garments, quilt, and embroider all in one. It’s incredibly versatile, but sometimes that means a slightly bigger learning curve. Here at bsewinn.com, we can help you figure out which path is right for you, with amazing options from trusted brands like Baby Lock that nail both categories.
Key Features You Shouldn't Ignore
Okay, beyond the type of machine, there are a few features that will genuinely make or break your early embroidery experience. Getting these right sets you up for success and helps you skip the usual beginner frustrations.
These are the things I tell every new embroiderer to look for:
- Hoop Size (Your Creative Canvas): This dictates the biggest design you can stitch out at one time. A standard 4"x4" hoop is perfect for monograms and small accents on baby clothes. But a 5"x7" hoop? That opens up a whole new world of larger, more impressive projects right from the start.
- Built-in Designs (Your Instant Art Library): Having a collection of designs ready to go is a huge confidence booster. It means you can start stitching the moment you get home, without having to search for patterns online. Look for a good mix of fonts, frames, and fun motifs.
- USB Port (Your Gateway to Unlimited Designs): This is a non-negotiable. A USB port lets you import thousands of custom sewing machine designs you find or buy online. It ensures your machine will grow with you as your style and skills evolve.
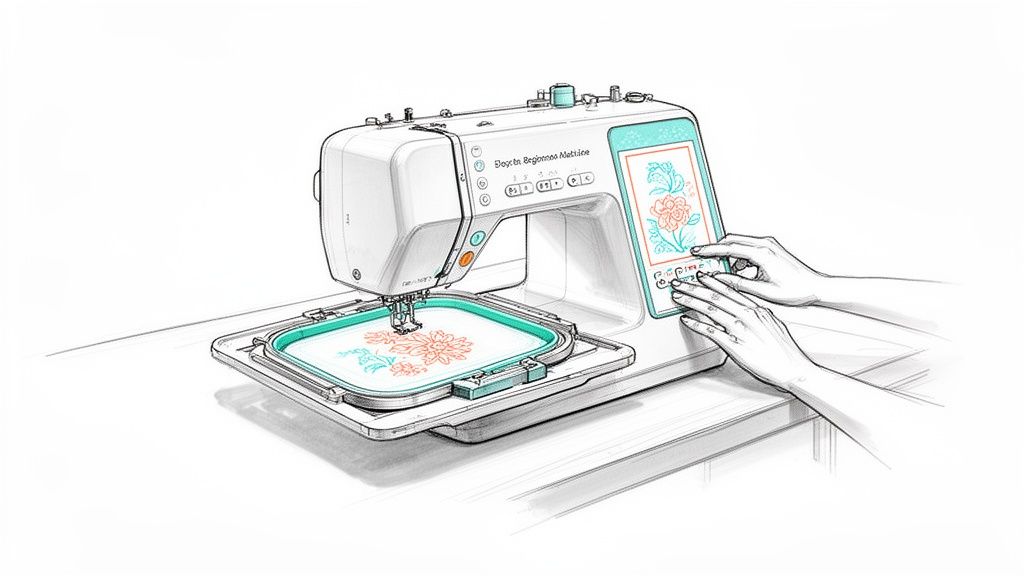
The real magic of modern embroidery is how approachable the technology has become. A user-friendly LCD screen isn't just a fancy add-on anymore—it's essential. It lets you see your design, position it perfectly, and make changes with a simple touch. It takes the guesswork out of the equation, which is exactly what you want when you're learning.
Before you start shopping, it's helpful to know what to prioritize. This table breaks down the most important features and why they matter for someone just starting out.
Essential Features of an Embroidery Machine for Beginners
| Feature | Why It Matters for Beginners | What to Look For |
|---|---|---|
| Hoop Size | A larger hoop (like 5"x7") gives you more creative freedom for bigger designs without needing to re-hoop, which can be tricky at first. | A machine that includes at least a 5"x7" hoop, or has the option to add one later. |
| User-Friendly LCD Screen | An intuitive touchscreen makes it easy to position designs, preview colors, and make edits on the fly, reducing mistakes and frustration. | A clear, responsive color LCD screen that shows you the design, stitch count, and time remaining. |
| USB Connectivity | This feature is your ticket to a limitless world of designs beyond what's built into the machine. You can buy or download files and easily transfer them. | A standard USB port for a flash drive is a must-have. Wi-Fi connectivity is a fantastic bonus. |
| Built-in Designs & Fonts | A good starter library lets you begin creating immediately, helping you learn the machine's functions with fun, ready-to-go projects. | At least 50-100 built-in designs and a handful of lettering fonts to get you started on personalization. |
| Automatic Thread Cutter | This feature automatically snips the top and bottom threads between color changes, saving you tons of time and cleanup. It's a true game-changer. | A button on the machine (often with a scissors icon) or an automatic setting that cuts jump stitches. |
Having a machine with these core features creates a much smoother and more enjoyable learning experience, letting you focus on creativity instead of wrestling with your equipment.
The Power of a Smart Machine
Honestly, the best thing to happen to this craft is the rise of computerized machines. They've become the standard for a reason! These machines handle the tricky parts for you, like keeping stitch quality perfect and cutting threads automatically.
The embroidery machine market was valued at a huge USD 1.25 billion in 2024 and is expected to more than double by 2035. What does that mean for you? It means that even entry-level machines are now packed with powerful, user-friendly features that used to be reserved for top-of-the-line models. You can read more about these embroidery market trends and projections to see just how fast things are moving.
This kind of automation lets you focus on the fun part: picking colors, choosing designs, and watching your ideas come to life.
Your First Stitch: A Step-by-Step Project Guide
Reading about features is one thing, but there's nothing like seeing your very first project come to life. The real confidence boost comes from turning all that theory into a beautiful, finished piece. This comprehensive "how-to" guide will walk you through creating a tangible example that you can replicate today.
We’re going to kick things off with a classic beginner project: stitching a simple monogram on a tea towel. It’s perfect for a first go because tea towels are usually a stable, non-stretchy cotton, which is incredibly forgiving when you're just starting out.
Getting Your Machine and Supplies Ready
Before a single stitch is made, you need to get your machine prepped and ready to go. Think of this as laying the foundation for a great project.
- Threading the Machine: Grab your manual and follow the threading path. I promise it’s not as scary as it looks! Most modern machines have numbered guides, and some even have automatic needle threaders that feel like pure magic.
- Winding the Bobbin: Your machine needs thread from the top spool and thread from the bobbin underneath. You'll want to use the special, thinner bobbin thread for this. A good bobbin is wound smoothly and evenly—no weird lumps or loose loops.
- Attaching the Embroidery Unit: If you have a sewing and embroidery combo machine, now’s the time to slide on the embroidery arm. This is the part of the machine that will move the hoop around to create the design.
Once your machine is threaded, gather your supplies: a plain cotton tea towel, your chosen color of embroidery thread for the top, and a piece of stabilizer.
The Secret to Great Embroidery: Stabilizer
What is stabilizer? Honestly, it's the unsung hero of machine embroidery. Think of it as a temporary scaffolding for your fabric. Fabric naturally wants to shift, stretch, and pucker under the pull of thousands of stitches. Stabilizer’s job is to hold everything perfectly still so your stitches come out crisp and clean.
For a tea towel project like this, a tear-away stabilizer is your best friend. It gives the fabric all the support it needs while stitching, but then you can gently tear the excess away from the back when you're done. Your towel stays soft and flexible, just like it should be.
How to Hoop Your Fabric Correctly
If there's one skill to master right away, it’s proper hooping. I'm not kidding when I say that bad hooping is the number one cause of puckered, sad-looking designs. The goal is to get your fabric taut like the top of a little drum, but—and this is key—not stretched.
First, separate the two rings of your embroidery hoop. Lay your piece of tear-away stabilizer on a flat table, place the tea towel on top, and then position the outer ring over the spot you want to embroider. Now, gently press the inner ring down into the outer one, sandwiching the fabric and stabilizer. Smooth out any wrinkles and tighten the screw on the hoop until it’s nice and snug.
A perfectly hooped project is your best insurance against frustration. Taking an extra minute here to ensure the fabric is smooth and taut—without being warped or stretched—will save you from so much disappointment later. This single step has the biggest impact on the final quality of your embroidery.
This flowchart breaks down the key features we talked about earlier, giving you a simple visual for your decision-making process.
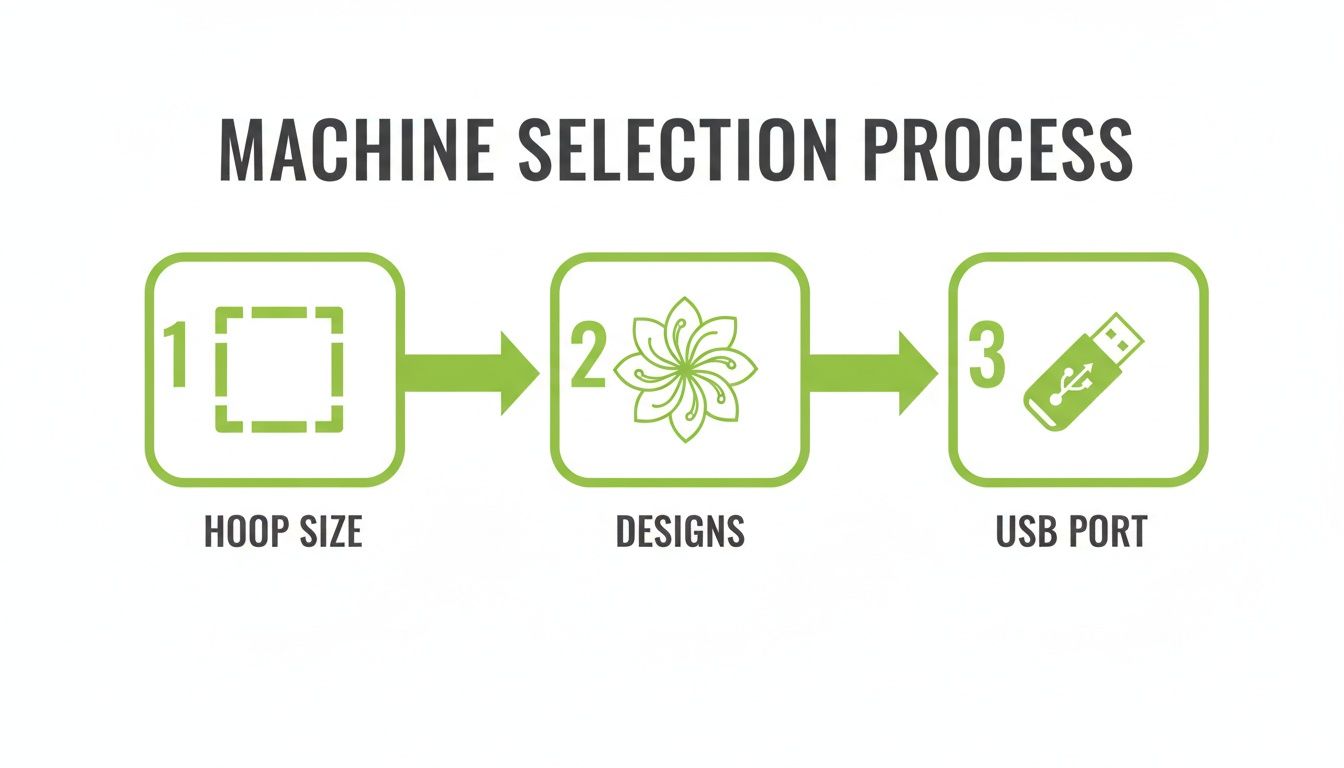
As you can see, focusing on hoop size for your future projects, built-in designs for instant fun, and a USB port for unlimited possibilities really simplifies choosing the right machine.
Stitching Your First Design
Okay, here comes the fun part! Slide your hooped fabric into the machine and lock it in place. Using your machine’s LCD screen, browse through the built-in designs and find the font section to select a monogram style.
Pick the letter you want to stitch, use the controls to position it exactly where you want it on your towel, and make any size adjustments. Once it looks perfect on the screen, lower the presser foot and hit the start button.
Now you can sit back and watch the magic happen! The machine takes over from here, stitching out the design all by itself. It's mesmerizing. While it's working, you can get inspired for your next project by checking out our guide on how to create embroidery designs.
When the machine stops and chimes that it's finished, raise the presser foot and remove the hoop.
The Finishing Touches
Your monogram is stitched! A few quick final steps will take it from "homemade" to "handmade-with-love."
- Remove from Hoop: Carefully loosen the screw and take your project out of the embroidery hoop.
- Trim Jump Stitches: See those little threads on the front where the machine "jumped" between sections? Use a small pair of curved embroidery scissors to snip them off.
- Remove Stabilizer: Flip the project over. Gently tear away the excess stabilizer from around the back of your design.
- Press Your Project: Lay your tea towel face down on a thick, fluffy bath towel. Using a warm iron, press the back of the embroidered area. The bath towel protects your beautiful stitches from getting squashed flat!
And that’s it! You’ve just completed your first machine embroidery project. You not only have a beautiful, personalized tea towel but, more importantly, you have the hands-on experience and confidence to tackle your next creative adventure. Congratulations
Building Your Essential Embroidery Toolkit
A great embroidery machine for beginners is a fantastic start, but just like any artist, you'll need the right tools to really bring your vision to life. Walking into a craft store or browsing online can be overwhelming—there are so many options! The key is to start with the absolute essentials that will give you the best results from day one, without wasting money on gadgets you just don't need yet.
Think of your supplies as the supporting cast for your machine. They play a huge role in the quality of every single project, making sure your stitches are clean, your fabric stays flat, and your final piece looks like it was done by a pro. At bsewinn.com, we empower crafters by not only supplying the tools but also offering comprehensive support through our extensive online resources and training to help you master them.
Understanding Embroidery Stabilizers
If there is one non-negotiable supply in your toolkit, it’s stabilizer. This stuff is your secret weapon. It acts as a temporary foundation for your fabric, preventing it from stretching, shifting, or puckering while the machine lays down thousands of stitches. Choosing the right one can be the difference between a beautiful design and a frustrating mess.
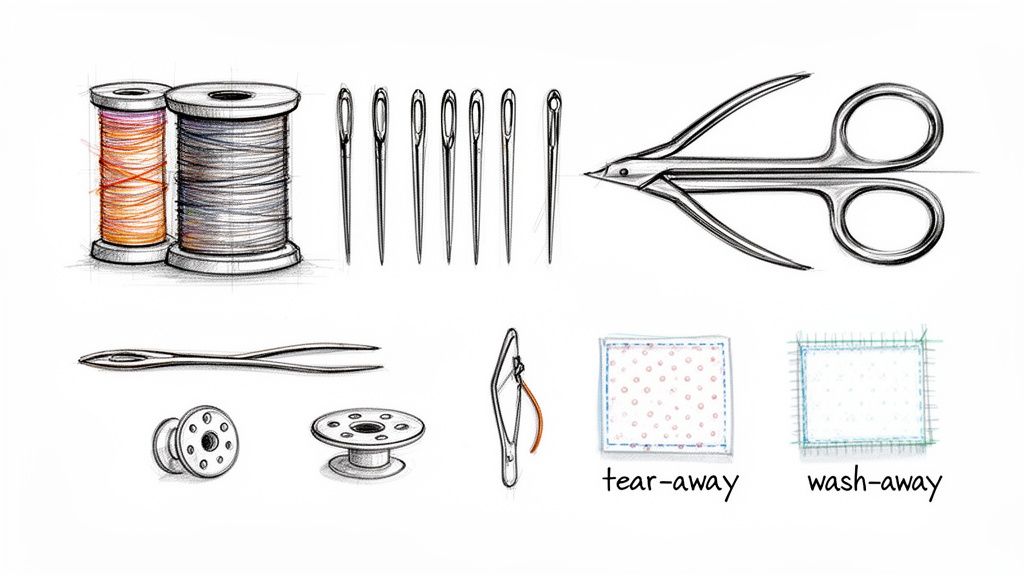
There are three main types every beginner should get to know:
- Cut-Away Stabilizer: This is your best friend for anything stretchy, like t-shirts and fleece. It provides permanent support, and you simply trim the excess away from the back of the design when you're finished.
- Tear-Away Stabilizer: Perfect for stable, woven fabrics like cotton, denim, or even tea towels. Just like the name says, you can gently tear the extra stabilizer away after stitching, leaving the fabric nice and soft.
- Wash-Away Stabilizer: This type dissolves completely in water. It's ideal for delicate fabrics like organza or for using as a "topper" on piled fabrics like towels to keep your stitches from sinking in and getting lost.
Getting a feel for which stabilizer to use will completely change your embroidery game. To really dive in, check out our complete guide on how to use embroidery stabilizer for different fabrics.
The Right Thread and Needles Matter
It’s so tempting to think any old thread will do, but there's a huge difference between sewing thread and embroidery thread. Embroidery thread is designed to run at incredibly high speeds without shredding, and it has a beautiful sheen that makes designs pop. Using standard sewing thread will almost certainly lead to constant thread breaks and a dull, lackluster finish.
The right thread and needle combo is like using the right paint and brush. You can make a mark with just about anything, but the proper tools are what create a masterpiece with vibrant color and crisp lines. Investing in good embroidery thread and the correct needle for your fabric is a small step that pays off in a big way.
Along the same lines, embroidery needles aren't the same as regular sewing needles. They have a special scarf and a slightly rounded point designed to pass through fabric without causing snags or pulls—a must-have for dense stitch patterns. Here’s a pro tip: start every new project with a fresh needle. It’s an inexpensive habit that prevents a ton of common frustrations.
Must-Have Accessories for a Beginner
Beyond the core supplies, a few key accessories will make your embroidery life so much easier and more enjoyable. These are the little things that help with prepping your project and adding those perfect finishing touches.
Here are a few items you’ll find yourself reaching for again and again:
- Small, Curved Scissors: Often called appliqué or embroidery scissors, their curved tip lets you snip threads super close to the fabric without accidentally nicking your project. They're perfect for trimming those little jump stitches between letters or design elements.
- Good Quality Bobbin Thread: This is a thinner, lighter thread that goes in your bobbin. It reduces bulk on the back of your design and helps the top thread pull through just right for a clean, professional look.
- Fabric Marking Pen: A water-soluble or air-erasable pen is a lifesaver for marking the center of your design on your fabric. It ensures you get perfect placement every single time.
Building your toolkit is one of the most exciting parts of the journey. By focusing on these high-impact essentials first, you’ll set yourself up for successful, beautiful projects right from the very start.
Solving Common Beginner Embroidery Problems
Let's be honest, every single person who starts machine embroidery hits a few snags. It’s a rite of passage! But those first few hiccups can be frustrating if you don’t know what’s causing them. So, think of this as your friendly "what-went-wrong" guide.
The good news? When a stitch-out goes sideways, it almost always comes down to one of three things: the needle, the thread tension, or how you’ve prepped your fabric in the hoop. Once you know what to look for, the fixes are usually surprisingly simple. Let's dig into the most common frustrations.
Ugh, My Thread Keeps Breaking!
This is probably the number one complaint I hear from new embroiderers. One minute you're stitching along, the next you hear that dreaded "snap" and everything stops. It can feel like the machine has a personal vendetta, but it's usually just trying to tell you something.
More often than not, it's one of these culprits:
- A Tired Old Needle: Needles aren't meant to last forever! A good rule of thumb is to pop in a fresh needle after about 8 hours of actual embroidery time. A dull or burred needle will snag and shred your thread instead of sliding smoothly through the fabric.
- A Simple Threading Mistake: Don't feel bad, it happens to all of us. Sometimes we miss a single guide. The best thing to do is take a deep breath, unthread the machine completely, and re-thread it from scratch. Always make sure the presser foot is up when you do this!
- Bargain-Bin Thread: It might seem like a good deal, but using old or low-quality thread is just asking for a headache. Invest in good-quality embroidery thread made to withstand high speeds—it makes a world of difference.
Why Is My Fabric All Puckered and Wrinkly?
You’ve just finished a design, you unhoop it with excitement, and… the fabric around your beautiful stitches is a mess of wrinkles and puckers. Ugh. This is almost always a sign that your foundation wasn't quite right. Your fabric needs a firm, stable base to handle the pull of thousands of stitches.
The fix here is all in the setup. Make sure your fabric and stabilizer are hooped together so they're taut like a drum—but not stretched out of shape. Choosing the right stabilizer for your fabric (like a cut-away for stretchy knits) is also a game-changer. It gives the fabric the support it desperately needs.
Think of every stitch-out like a little science experiment. Your fabric, thread, needle, and stabilizer are all variables. When something goes wrong, just change one of those variables at a time. This simple process of elimination turns troubleshooting from a frustrating guessing game into a straightforward solution.
At bsewinn.com, we know that getting the hang of these things is all part of the fun. That's why we're committed to empowering crafters through our extensive online classes and training resources. Our experts are here to help you turn those early challenges into "aha!" moments, giving you the confidence to tackle any project you can dream up.
While hobbyists are discovering the joy of embroidery in record numbers, the big industrial side of things faces its own challenges, like competition from digital printing (-1.1% impact) and high machine maintenance costs. That’s precisely why starting with a quality embroidery machine for beginners from a dealer who will stand behind you is so critical. We’re here to protect your investment with real support, expert training, and even financing options to ensure your creativity can flourish for years. You can learn more about trends in the industrial embroidery machine market and see for yourself why having a great support system matters so much.
Empowering Crafters with Bsewinn.com Support
Picking out your first embroidery machine is just the beginning of what I promise is an amazing creative adventure. That box is full of potential, but the real fun starts when you have the support and ideas to really take off. Here at bsewinn.com, we see your purchase as the start of our relationship, not the end. Our commitment is to empower crafters long after they've unboxed their new machine.
We've worked hard to build a community that helps you go from "I'm not sure what I'm doing" to "Look what I just made!" It’s never just been about selling machines for us; it’s about giving you the training, the tools, and the high-fives you need to succeed. That's at the core of what we do, so you'll always have a partner as your projects get bigger and bolder.
Unlock Your Potential with B-Creative Membership
If you're really looking to jumpstart your skills, you have to check out our B-Creative membership program. Think of it as your all-access pass to a library of exclusive classes and tutorials designed to get you stitching like a pro. It's your personal treasure trove of expert advice, ready whenever inspiration strikes.
Your membership gets you into a whole world of resources, including:
- Online Classes and Workshops: Learn everything from mastering stabilizers to tackling complex multi-hoop designs, all from the comfort of your own sewing room.
- Inspiring Project Tutorials: Our step-by-step guides walk you through real projects, helping you build practical skills while making gorgeous things.
- Events Led by Industry Experts: Get the inside scoop and learn advanced tricks from some of the biggest names in the sewing and embroidery world.
The most valuable tool you have isn’t the machine—it's your confidence. Our community is built to help you grow that confidence, turning "I'm not sure how" into "I can't wait to try that!"
Your Long-Term Crafting Partner
Our support doesn't stop with classes. We get it—your creative needs are going to evolve. Once you’ve got the basics down, you might start dreaming of a machine with a bigger hoop or more bells and whistles. We're here to help you make that leap when you're ready.
We offer flexible financing options to make upgrading your machine a little easier on the wallet. Plus, we always have fantastic deals on expertly serviced preowned machines, which is a great, budget-friendly way to get into more powerful equipment. From your very first stitch to your most ambitious future masterpiece, we want to be your trusted partner every step of the way.
Your Top Embroidery Questions, Answered
Jumping into a new hobby always brings up a few questions. I’ve been there! Think of this as your personal cheat sheet for those "what if" moments that pop up when you're just getting started. It's a quick way to clear up the common hurdles so you can get back to the fun part—stitching!
Let's dive into some of the things new embroiderers ask us all the time.
Quick Answers for New Embroiderers
To make things even easier, here's a quick-glance table with the essentials. It's perfect for when you need a fast answer without digging through paragraphs.
| Common Question | The Short Answer |
|---|---|
| Can I use regular sewing thread? | No, it's a bad idea. Embroidery thread is specially made for the job. |
| What's the #1 feature for a beginner? | A big, user-friendly LCD touchscreen. It's your control center. |
| Do I really need stabilizer? | Yes, 100%. It’s the foundation for every good stitch-out. |
| How often should I change my needle? | After every 8-10 hours of stitching. A fresh needle is your best friend. |
These are the highlights, but let's break down the "why" behind each of these points. Understanding the reasoning will make you a much more confident embroiderer.
Can I Use Regular Sewing Thread?
This is probably the first question everyone asks, and I get it! But the answer is a firm no, and here's why. Embroidery thread and sewing thread are built for completely different tasks. Embroidery thread is designed with a beautiful sheen and engineered to handle the lightning-fast speeds of your machine without snapping.
If you try to use standard sewing thread, you’ll spend more time fixing thread breaks than actually embroidering. Your finished design will also look flat and dull, completely missing that vibrant, professional pop. Do yourself a favor and stick with a quality 40wt polyester or rayon embroidery thread.
What Is the Most Important Feature for a Beginner?
While there are lots of bells and whistles, the single most important feature for someone new to embroidery is a user-friendly LCD screen. This screen is your command center! It’s where you’ll pick your designs, make simple edits like resizing or rotating, and—most importantly—get helpful error messages when something goes wrong.
A clear, intuitive screen removes so much of the initial guesswork. Being able to see your design on the screen before you hit "start" makes the learning curve way less intimidating and the whole process a lot more fun right from the get-go.
The goal is to spend your time creating, not fighting with your equipment. A great beginner machine anticipates your needs with helpful on-screen guides and simple controls, letting you focus on bringing your ideas to life.
Do I Really Need Stabilizer for Every Project?
Yes, you absolutely do! Think of stabilizer as the foundation of a house—you can't build a solid structure without it. Fabric, especially anything with a bit of stretch, wants to pucker and move around under the pull of thousands of stitches. Stabilizer’s job is to hold that fabric perfectly still.
Without it, you're pretty much guaranteed to get puckering, gaps, and misaligned stitches. Learning to use the right type of stabilizer (like cut-away, tear-away, or wash-away) is a non-negotiable step for getting crisp, professional-looking embroidery every single time.
How Often Should I Change the Needle?
This is such a simple habit, but it makes a world of difference. A great rule of thumb is to put in a fresh needle after every 8 to 10 hours of actual stitching time. I also make it a personal rule to start any big or important project with a brand-new needle, just in case.
Needles get dull over time, and they can even develop tiny burrs you can't see. These little imperfections will shred your thread and can even snag your fabric. A fresh needle is the cheapest insurance policy you can buy against frustrating thread breaks and skipped stitches.
Ready to start your creative journey with the right machine and a supportive community behind you? At bsewinn.com, we have everything you need, from beginner-friendly machines to expert-led classes.
Explore our collection of embroidery machines and get started today!

