

Buying the machine with the highest stitch speed won't automatically produce the most finished work. That's the popular advice worth challenging. In fast frame embroidery, the clock runs during hooping, frame changes, alignment checks and repositioning, not just while the needle moves. A frame that's slightly smaller, holds fabric more securely and loads in seconds can beat a larger, faster sounding setup on real projects. Judging a purchase by completed, saleable pieces per hour gives a clearer answer than chasing a headline speed.
Table of Contents
- What Fast Frame Embroidery Means and How It Works
- Check Machine and Frame Compatibility Before You Buy
- Real Throughput Measured in Finished Pieces per Hour
- How to Set Up a Magnetic Fast Frame Step by Step
- Fabric and Stabilizer Problems and How to Fix Them
- Project Ideas That Suit Fast Frame Work
- Try a Fast Frame in Store Before You Buy
What Fast Frame Embroidery Means and How It Works
Fast frame embroidery is a productivity focused way of working within computerized, multi-needle embroidery. It isn't a separate craft tradition. It pairs a fast stitching machine with a frame built for quick, repeatable hooping, so the operator spends less time wrestling fabric into position between pieces.
Imagine a quick release bike wheel. The wheel matters, but it only helps if the brakes, gears and frame keep up. The same logic applies here. Speed depends on the stitching head, the frame geometry, the fabric and whether the design stays in registration from first stitch to last.
The Brother PR1060W product information describes a six-needle platform reaching 1,000 stitches per minute (SPM) and accelerating to that rate in approximately 7 seconds, with speeds as low as 400 SPM for flat items and optional cap or cylinder frames. Modern semi-professional machines commonly specify that same 1,000 SPM maximum, with variable ranges beginning around 400 SPM.
Three Parts to Identify on Any Machine
- The stitching head: Check the full SPM range, not just the maximum.
- The frame: Look for standard screw-adjusted hoops, magnetic frames, or larger cap or cylinder frames.
- The design field: Confirm the field shown in software matches the installed frame.
At 1,000 SPM, a 10,000 stitch design needs about 10 minutes of needle motion. That figure excludes trims, thread changes, hooping, acceleration and repositioning. Advertised SPM is therefore a ceiling, not a finished piece rate.
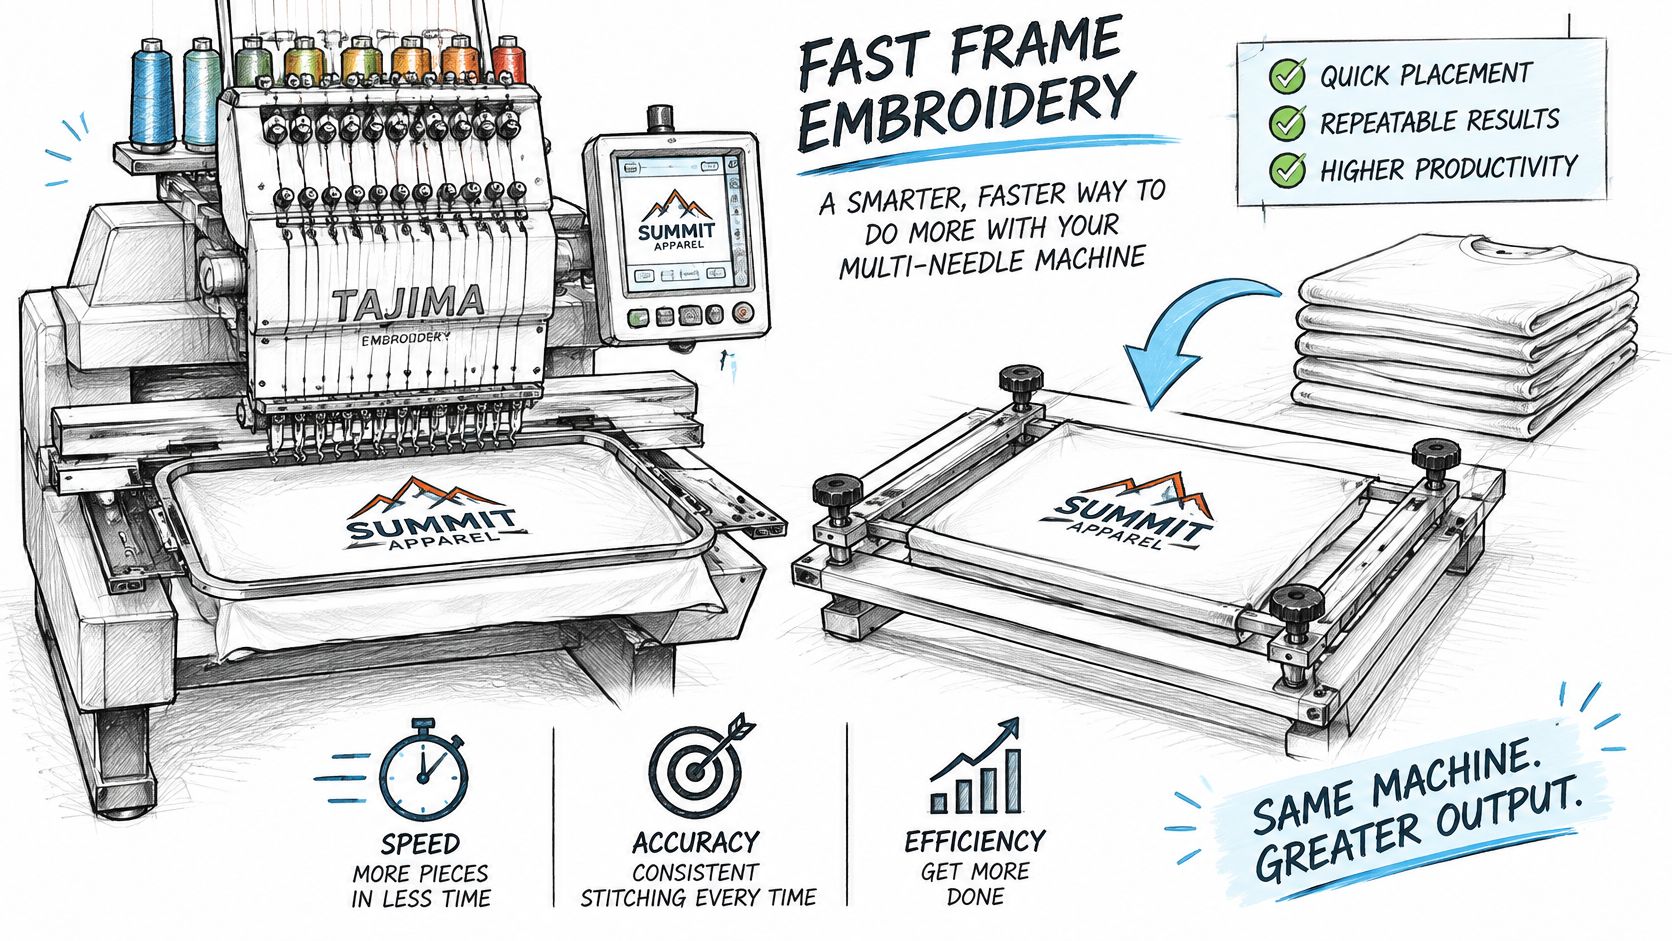
Design preparation matters just as much as machine speed, whether sizing a motif for a frame field or preparing designs for DTF printing for a different decoration method. A clean file, sensible density and a frame that fits the placement prevent most slowdowns before stitching starts.
Practical rule: Balance stitch speed against fabric type, stitch density and registration accuracy. Faster needle motion doesn't correct a loose setup.
Check Machine and Frame Compatibility Before You Buy
Confirm compatibility for the exact model. Frame systems vary within Baby Lock, Brother, Janome, Bernina and Bernette lines, and a frame that ships with one machine can be optional or unavailable on another. The check that protects your budget is simple: match the frame mounting, size and machine recognition to the model you plan to use, then time the hooping and frame exchange. That is where finished pieces per hour are won or lost.
| Setup type | Typical frame | What to confirm | Test before buying |
|---|---|---|---|
| Standard home embroidery machine | Screw-adjusted hoop | Hoop size matches the design field and attachment | Test with your usual fabric and stabilizer |
| Semi-professional multi-needle machine | Magnetic frame sized to the machine field | Included versus optional frame sizes and attachment method | Low-density test design through a full hooping cycle |
| Machine with a magnetic frame option | Frame listed for that model | Automatic frame-size detection and recognition | Install the frame and run a test stitch |
| Any machine used for cap or cylinder work | Cap or cylinder frame | Throat clearance and frame recognition | Test-stitch on a cap or scrap tube |
How Magnetic Frames Change the Buying Check
Magnetic frames can speed loading, but compatibility still depends on mounting, field size, and machine recognition. A frame that drops onto the carriage quickly but requires two repositioning steps can be less efficient than a smaller frame that completes the design in one hooping. Consider those steps before paying for extra size.
A representative format is the Versatile Magnetic Frame and Frame Holder. Use it to frame the questions you ask about your own machine: how the holder attaches, what field the frame covers and whether the machine recognizes that frame size. For a broader comparison of hoop formats, review this guide to embroidery hoops for sewing machines.
Four-Point In-Store Checklist
- Match listed frame sizes to the exact model: Ask for the frame size in the machine's field, not a generic hoop label.
- Check throat clearance: Bring or describe the garment style you stitch most often, especially sleeves, totes and caps.
- Separate included from optional: Ask which magnetic frames ship with the machine and which cost extra.
- Verify frame recognition: Install the intended frame and confirm the screen shows the correct field.
A store visit lets you see the frame seated on the carriage, feel how the holder locks and judge whether frame exchange is quick enough for your volume. That hands-on check is hard to replicate from a specification sheet.
Choose the smallest frame that covers your most common design and loads cleanly. Add a larger frame only when oversized or cap work becomes regular and the extra repositioning time is justified.
Real Throughput Measured in Finished Pieces per Hour
Finished pieces per hour is the only number that justifies a frame purchase. Needle time is arithmetic: stitch count divided by stitches per minute. Published maximum speeds describe a machine running a clear field with no trims, and no frame gets you anywhere near that ceiling on real work.
| Design case | Stitch count | Theoretical needle time | Practical time note |
|---|---|---|---|
| 10,000-stitch design at 1,000 SPM | 10,000 | About 10 minutes | Adds trims, hooping and repositioning |
| 10,000-stitch design at 400 SPM | 10,000 | About 25 minutes | Lower end of the working range |
| 118,000-stitch design with 25 color changes at 1,000 SPM | 118,000 | About 118 minutes | Illustrative estimate of 197 minutes including interruptions |
The third row carries the point. Twenty-five color changes stretch 118 minutes of pure needle motion into an illustrative 197 minutes once stops, trims, jumps and acceleration are counted. A frame cannot shorten that stitching block. What it changes is how much handling sits on either side of it.
Six overheads sit outside needle time: hooping fabric and stabilizer squarely, exchanging frames between sizes, repositioning to a second spot on one garment, test stitching for density and registration, confirming alignment before a full run, and finishing. I count trimming jump stitches and removing stabilizer as a real cost, because on a run of twenty it often exceeds the stitching time of a single piece.
Use this formula. Completed pieces per hour equals 60 divided by total minutes per piece. Total minutes means hooping, frame exchange, repositioning, test stitching, stitching and finishing added together.
Say stitching takes 14 minutes and hooping, testing, repositioning and finishing add 9 minutes. Each piece runs about 23 minutes, which lands near 2.6 pieces per hour. A faster machine that saves three minutes of needle time moves that figure to roughly 3 pieces per hour, while a frame that cuts five minutes of handling does about the same. That trade-off decides whether the money goes into speed or into hooping.
Frame size follows the same logic. A large frame wins when it holds the whole design in one hooping and eliminates a repositioning pass on every piece. A smaller frame wins on left-chest logos, sleeves, pockets and caps, where the fabric is awkward to load and a big frame only forces more clamping and more chances to shift. Shops evaluating capacity against purchase price can compare these per-piece figures with guidance on choosing an embroidery machine for small business work. Standardized throughput testing is thin, so the most reliable evidence is a stopwatch on the first five pieces of your own typical job.
How to Set Up a Magnetic Fast Frame Step by Step
A first run often fails at step one: the design field is larger than the installed frame, and the machine either refuses to start or stitches outside the clamped area. The Brother Celeste CX1e leaflet lists a 300 × 180 mm frame with a 2 mm clamping limit and automatic frame-size detection. Those two numbers set the boundary for every step below.
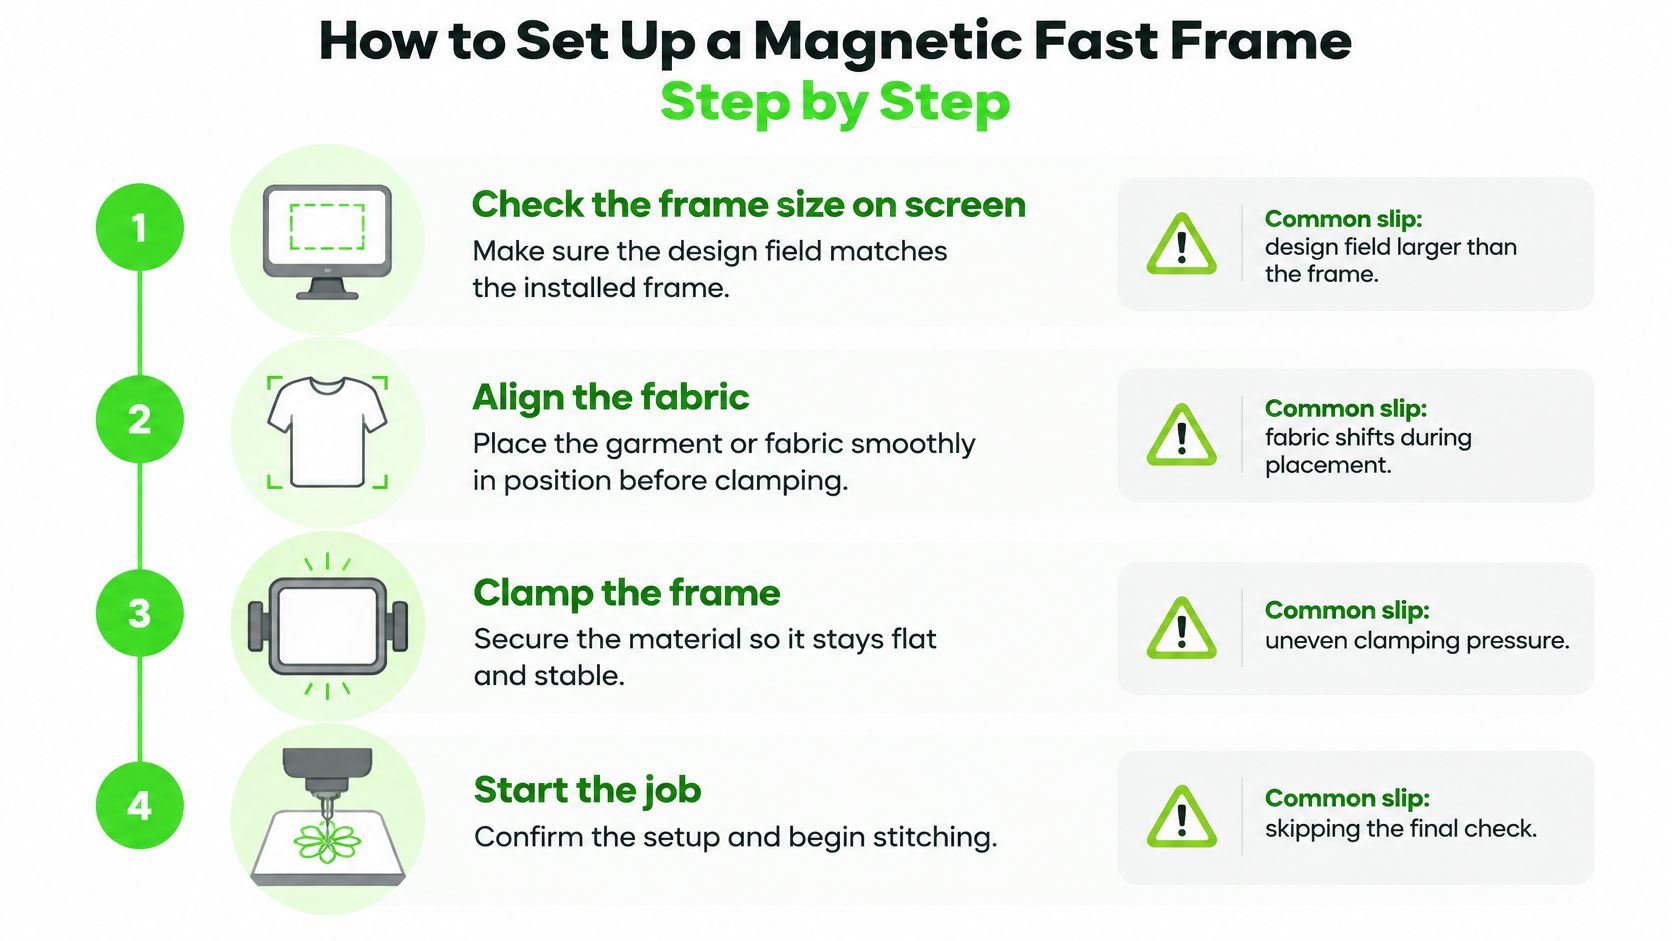
- Check the frame size on screen. The design field must match the installed frame. Loading a design field larger than the frame is the common slip.
- Place stabilizer in the frame. Put paper side up when using a paper-backed tear-away. Wrong side up leaves the design unsupported.
- Lay fabric over the stabilizer and smooth it flat. Don't pull it taut. Stretched fabric distorts once released.
- Set the magnetic frame down and let the magnets seat. Stay within the frame's clamping limit. Hooping over bulky layers invites shifting.
- Attach the frame to the carriage. Confirm the machine recognizes it before tracing. An unrecognized frame means stopping and reseating it.
- Stitch a low-density test design. Check registration at all four corners. Skipping the test risks finding drift halfway through a full run.
- Stitch the full design, then remove and trim. Wait until trims finish before pulling the piece free.
A standard hoop and a magnetic frame solve different problems, and this comparison of an embroidery hoop for a sewing machine explains the difference before you switch formats.
A clean first run looks uneventful: fabric stays smooth, corners register, and no hoop marks appear after removal. Setup time is production time; every minute spent reseating or rehooping comes out of finished pieces per hour. If the result falls short, check stabilizer, clamping and clearance first.
Fabric and Stabilizer Problems and How to Fix Them
Puckering at full speed usually traces back to stabilization that was already marginal at half speed. A design that sits flat on woven cotton can wave on jersey, pull in dense satin columns and shift on bulky garments even when the frame technically fits. Faster stitching magnifies every weak point in the backing, the clamping and the garment support, and a rehoop costs more time than the speed gained.
| Symptom | Likely cause | Fix |
|---|---|---|
| Puckering on knit or stretch fabric | Weak stabilization for the stretch | Use a stable stabilizer and lower the stitch density |
| Hoop marks on pile or surface-sensitive fabrics | Hooping pressure | Clamp with a magnetic frame and add a tearaway or sticky stabilizer |
| Design drift on bulky quilted or garment layers | Weight and vibration in the garment | Support the garment under the frame and check clearance |
| Misregistration after a frame change | Frame not recognized or misaligned | Confirm the frame size on screen and re-check alignment |
| Pulled satin columns | Dense stitching on unstable fabric | Reduce density and add a floater layer under the hoop |
On knits and performance fabrics, weight is the variable that often separates two fabrics that feel identical in the hand. understanding fabric weight in GSM helps when comparing them before a run, because a lighter knit with the same stretch can need a different backing and a lower stitch density.
A larger frame only raises output when it removes a rehoop. If every knit needs rehooping after puckering, I would rather run a smaller frame with stable backing and finish more pieces per hour.
Three Checks Before the Frame Goes On
- Throat clearance: Slide the garment over the arm and confirm it moves freely.
- Needle and thread: Match needle size and thread weight to fabric weight and stitch density.
- Pressure marks: Test clamping on scrap before using surface-sensitive fabrics.
A sticky tearaway such as Floriani Perfect Stick Tearaway 15" x 10 yds handles seams and materials that mark under hoop pressure. It holds the item flat without hoop tension, then tears away after stitching. For a broader comparison of backing weights and types, see how to use embroidery stabilizer.
Most fixes need one test stitch to confirm. Keep a labelled swatch for each fabric and note the backing, needle and density that worked, so the next run starts from a known setup rather than a guess.
Project Ideas That Suit Fast Frame Work
Twelve tote bags for a craft fair change the math. Placement has to repeat, loading has to stay quick, and the motif has to land in the same spot every time. That batch is where a magnetic fast frame earns its keep, because completed pieces per hour depends on handling time as much as stitch time.
The workflow below shows that kind of repeat production in a home studio setting.
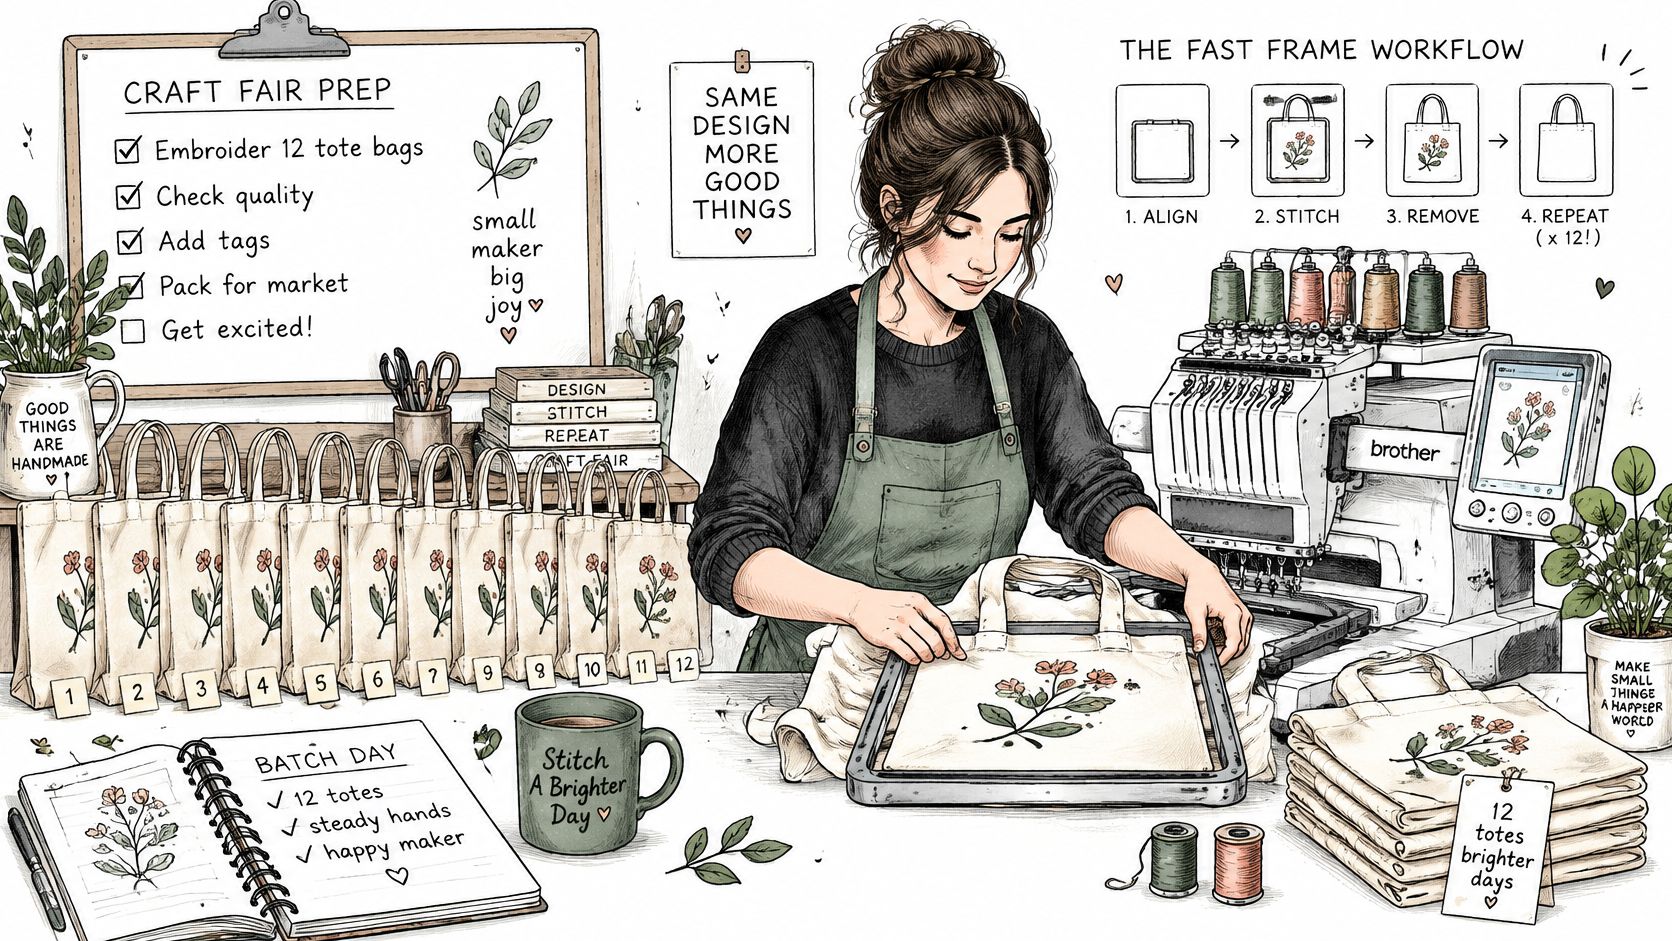
Flat totes and placemats make a practical first run. The fabric sits flat, placement is easy to check, and frame exchange stays fast between pieces. Small chest logos and children's garments reward a different choice. I recommend a smaller field there, since less repositioning keeps registration tight and output per hour higher than a large frame worked half empty. Caps and cylinders call for their own purpose built attachment. Personalized robes show the same placement discipline on a larger garment, as illustrated by Get Spliced's monogrammed robe guide, where positioning and fabric handling shape the finished result.
More starting points are collected among these embroidery machine project ideas, which help match design size to frame field with margin left on every side.
For every project, run a lower density version first, then a test on scrap at final size. Density must suit both fabric and stabilizer.
The video below demonstrates design placement and stitch-out flow before a full batch begins.
A sensible sample project is a tote bag with a 4 inch motif. Test it on scrap, adjust density once, then run the batch without changing settings.
Try a Fast Frame in Store Before You Buy
The fastest frame in the store is rarely the one that finishes the most pieces. Judge a fast frame by the full cycle: hoop the fabric, seat the frame, stitch the design, unhoop, reload, and reposition for the next item. A larger frame wins when the design fills it. On left-chest logos and small motifs, a smaller frame often beats a larger one because it cuts reload time and keeps placement tight.
A hands-on demo is where that trade-off becomes clear. B-Sew Inn sells machine accessories such as presser feet, hoops and frames, and machine extension tables. The business also sells embroidery designs from OESD, Purely Gates, Kimberbell, and Floriani, and offers Machine & Software Tutorials. Bring a scrap of the fabric you sew most and one design you plan to stitch. Run the full cycle twice. The second run is the honest one: it shows whether the frame exchange, magnetic hold and repositioning stay consistent after the first piece comes off.
Three Next Steps
- Compare hoop and frame categories on bsewinn.com before you handle a frame in person.
- Use Machine & Software Tutorials to see how a frame and machine pair in practice.
- Bring the exact machine model and frame size to the demo so the fit is confirmed before you buy.
Start with B-Sew Inn to compare hoops, frames, stabilizer and thread, then test the frame on real fabric with the design you will run. Confirm the machine model and frame size before the demo.

