

A beautiful embroidery project starts long before you even thread your needle. It all begins with a clean, accurate pattern transfer. This first step is your foundation—it dictates where every single stitch will go, making sure your final design looks polished and intentional. Honestly, learning how to transfer embroidery patterns is the secret to taking your craft from a fun hobby to true art.
Your Foundation for Perfect Stitches
Embroidery is all about precision and patience, and getting that pattern onto your fabric correctly sets the entire stage for success. Think of the transferred design as your roadmap. It guides your needle and thread, helping you create flawless lines, smooth curves, and tiny details. Without a clear guide, even the most experienced stitcher can end up with a wonky or lopsided design.
Here at B-Sew Inn, we are deeply committed to empowering crafters with not just the tools, but the know-how to really shine. Through our custom sewing machine designs, extensive resources, and supportive online classes, we provide tangible examples and training to help you replicate beautiful projects. This guide will walk you through the different ways you can get your design from paper to fabric, whether you're a fan of old-school techniques or the pinpoint accuracy of modern digital tools. We'll help you find the perfect fit.
Choosing the Right Path for Your Project
So, where do you start? More often than not, your fabric will make the decision for you. Picking the right transfer method for your material is a game-changer. If you're stitching on a garment, something like a blank unisex tank top can be a great canvas to work with.
A few key things to keep in mind:
- Fabric Color and Weight: Lighter, smooth fabrics are a dream for simple tracing methods. But for darker or heavily textured fabrics, you'll need a little help from transfer aids like stabilizers.
- Design Complexity: Got a simple line drawing? Tracing is probably your best bet. For something with tons of intricate detail, you might want to look at printable stabilizers or even digital machine transfers to save yourself a headache.
- Available Tools: What you have on hand matters. Your options will naturally be shaped by your equipment, whether it's a simple light-activated pen or a fully computerized embroidery machine.
This little decision tree gives you a quick visual for that first choice, based purely on your fabric's color.
As you can see, light-colored fabrics are perfect for tracing. When you're working with dark or thick materials, though, transfer papers or stabilizers are going to be your best friends. If you need a deeper dive, we have a whole article on choosing the best stabilizer for embroidery.
Choosing Your Embroidery Transfer Method
To make things even easier, here's a quick comparison table of the most popular transfer methods. It’ll help you select the best option based on your specific project needs.
| Method | Best For | Fabric Suitability | Removability |
|---|---|---|---|
| Tracing | Simple designs, line art, quick transfers | Light-colored, smooth, thin fabrics (cotton, linen) | Varies by pen type (air/water soluble, heat erasable) |
| Transfer Paper | Detailed designs on dark or thick fabrics | Dark, thick, or textured fabrics (denim, felt) | Rubs or washes away, can be messy |
| Soluble Stabilizer | Intricate patterns, stretchy fabrics, towels | Any fabric, especially knits, terry cloth, darks | Dissolves completely in water |
| Iron-On | Reusing patterns, clear and dark lines | Cotton, linen, non-stretchy synthetics | Permanent, must be covered by stitches |
| Lightbox/Window | Simple to moderately complex designs | Light-colored, lightweight to medium-weight fabrics | Varies by pen type |
Ultimately, the best method is the one that gives you a clear, easy-to-follow guide for your stitches. Don't be afraid to experiment with a few different techniques on scrap fabric to see what you like best
Mastering Classic Tracing and Marking Methods
Long before we had digital files and fancy specialty papers, stitchers relied on good old-fashioned light and a steady hand to bring their designs to life. These classic tracing methods are still incredibly effective, super budget-friendly, and a wonderful way to connect with the long history of this craft. If you're just learning how to transfer embroidery patterns, especially onto lighter fabrics, this is the perfect place to start.
The simplest method uses something you already have: a sunny window. Just tape your paper pattern to the windowpane, then position your fabric right over it. The daylight shines through, turning the window into a natural lightbox and letting you trace the lines directly onto your material. It’s a beautifully simple trick that costs absolutely nothing.
Of course, you can't always count on a sunny day. For more control and consistent light, a dedicated lightbox is a fantastic tool to have in your studio. It gives you a bright, even surface that makes it easy to see even the faintest pattern lines through fabrics like cotton or linen.
Choosing Your Marking Tools
The pen or marker you pick is just as crucial as your tracing method. Your choice really comes down to your fabric and how you plan to remove the lines once you're done stitching.
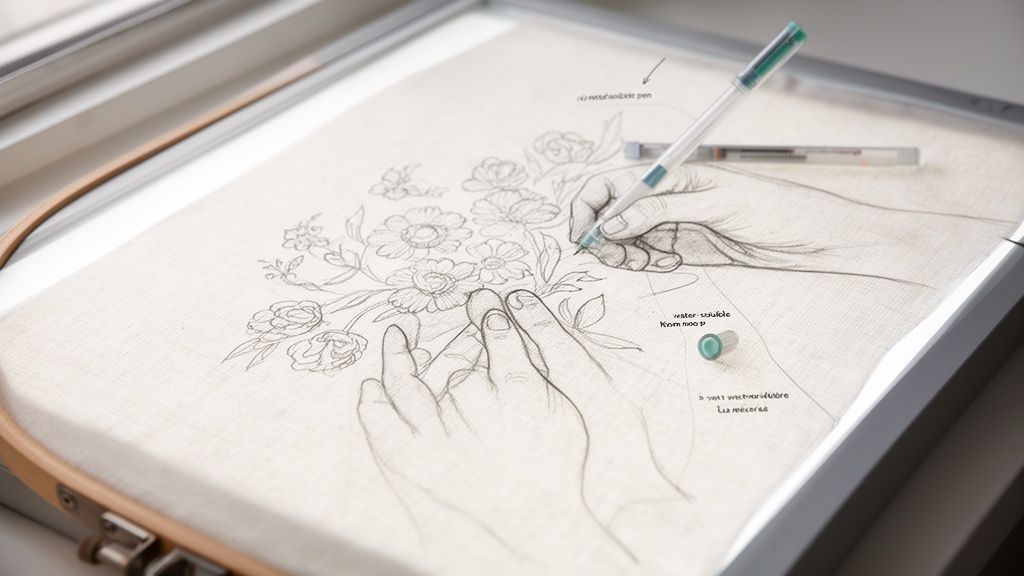
- Water-Soluble Pens: These are my go-to for most projects. They leave crisp blue or purple lines that vanish with a quick spritz of water or a dab from a damp cloth. Super easy.
- Heat-Erasable Pens: An absolute lifesaver for fabrics that you’d rather not get wet. The marks from these pens disappear like magic with the heat from an iron. A word of caution: always test on a scrap piece first, as the ink can sometimes reappear in very cold temperatures!
- Air-Soluble Pens: These are great for quick, weekend projects you know you’ll finish in a day or two. The ink literally fades away on its own over 24-48 hours, so you have to stitch with a bit of a deadline in mind.
When you're tracing, the key is a light, steady hand. If you press too hard, the ink can bleed into the fabric fibers or become a pain to remove later. Make sure your fabric is smooth and taut—but not stretched out—as stretching will distort your beautiful design. Using a properly sized hoop helps keep the tension just right; our embroidery hoop size chart can help you find the perfect one for your project.
The Pouncing Method for Dark Fabrics
So what do you do with dark or textured fabrics like denim or velvet where you can't see a traced line to save your life? This is where a centuries-old technique called "pouncing" comes to the rescue. It's a clever method that uses chalk or charcoal powder to transfer a design.
The tradition of transferring embroidery designs dates back centuries. Historical evidence from 18th-century workshops shows that crafters used chalk for dark fabrics and charcoal for light ones, applying them through perforated paper patterns to mark the cloth.
To try pouncing yourself, you first need to perforate your pattern by poking small, close-together holes all along the design lines with a needle or pounce wheel. Next, lay the perforated pattern on your fabric and gently rub a chalk pounce pad over it. The fine chalk dust falls through the holes, creating a perfect dotted outline of your design on the fabric. You can then connect the dots with a chalk pencil for a more solid line to follow.
This technique is a game-changer for materials that are otherwise impossible to mark. It's a great reminder that sometimes, the old ways really are the best ways, ensuring you get a clear and accurate guide for your stitching on even the trickiest surfaces.
Using Transfer Aids for Unbeatable Precision
Sometimes, simple tracing just won't cut it. For those tricky fabrics or incredibly detailed designs, transfer aids are your secret weapon for getting a flawless pattern onto your material. Think of them as the pros' trick for perfectly crisp, accurate lines every single time.
Let's say you've got your heart set on embroidering a complex floral pattern onto a dark denim jacket or a stretchy jersey t-shirt. Trying to trace directly onto those surfaces is a recipe for frustration. This is exactly where tools like specialty papers and stabilizers come in. They bridge the gap between your paper pattern and the fabric, making sure your vision comes to life without getting distorted.
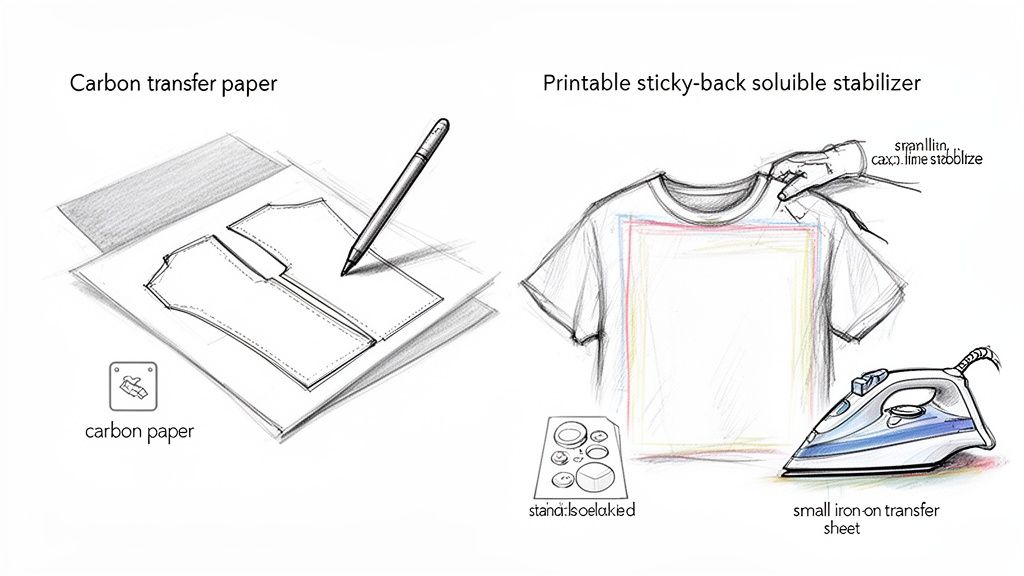
Carbon-Style Transfer Paper for Dark Fabrics
Carbon-style paper, which you might know as dressmaker's carbon, is a classic for a reason. It's my go-to for marking dark or thick fabrics where a pencil line would just disappear. It works like the carbon paper you remember, but it uses a chalk or wax-based pigment that won't permanently stain your project.
Using it is like making a little sandwich. First, lay your fabric on a hard, flat surface. Next, place the transfer paper on top, making sure the colored side is facing down. Finally, position your paper pattern over it. Then you just trace over the design lines with a stylus or even a dull pencil. The pressure does all the work, leaving a fine, colored line on your fabric.
Here's a tip from experience: pick a transfer paper color that really pops against your fabric. White or yellow is fantastic for dark denim, while a light gray works well on medium-toned fabrics. I also recommend using a stylus instead of a pen or sharp pencil; it keeps you from accidentally tearing your paper pattern so you can use it again.
The Magic of Embroidery Stabilizers
Stabilizers are absolute game-changers, not just for machine embroidery but for hand stitching, too. They give your fabric some backbone, preventing it from puckering or stretching while you work. For pattern transfers, the printable, water-soluble stabilizers are pure genius.
These products are amazing because they combine the transfer and stabilization steps into one easy process. You print your design right onto a sheet of this fabric-like material, which usually has a peel-and-stick backing.
Here’s the breakdown:
- Print your design: Just load a sheet into your regular home printer and print your pattern directly onto it.
- Stick it on: Peel off the paper backing and press the stabilizer firmly onto your fabric, right where you want to stitch.
- Stitch right through it: Hoop everything up and embroider your design as you normally would, stitching through both the fabric and the stabilizer.
- Wash it away: Once you're done, a quick soak in warm water is all it takes. The stabilizer completely dissolves, leaving just your beautiful stitching behind.
This method is foolproof for intricate, multi-color designs on fabrics that are normally a nightmare to work with, like knits or terry cloth. There’s no tracing, no marking, and your fabric behaves perfectly.
Iron-On Transfers for Speed and Durability
Iron-on transfers are another fantastic way to get a design onto fabric quickly and precisely. You can find pre-printed patterns, or you can create your own using special transfer pens and pencils. To make your own, you'll trace your design onto tracing paper with the pen, then place it ink-side down on your fabric and press it with a hot iron.
The heat transfers the ink, leaving a very clear, and often permanent, outline. This permanence is both a blessing and a curse. The lines are bold and won't rub off as you stitch, but you have to be confident that your stitches will cover them completely. For a deeper dive into modern heat-transfer methods, a DIY guide to iron on clothing decals and heat transfer vinyl has some great insights.
Always, always test your iron-on pen on a scrap piece of the same fabric first. This helps you nail the right heat setting and ensures the lines transfer cleanly without smudging.
The Modern Approach to Digital Pattern Transfers
If you’ve got a computerized embroidery machine, you’re holding some serious power in your hands. This is where we leave the pens, paper, and tracing methods behind and step into the world of digital precision. It’s a complete game-changer, allowing you to send intricate, complex designs directly to your machine with just a few clicks. Honestly, it’s the future of embroidery, right in your craft room.
Here at B-Sew Inn, we are passionate about empowering crafters with custom sewing machine designs and the training to use them. Our goal is to help you replicate professional-quality projects at home. This digital approach is a perfect example of how the right tools can elevate your work, making those once-daunting projects feel totally achievable.
From Digital File to Stitched Design
Everything starts with a digital embroidery file. You can find these everywhere—online design libraries, independent creators, or you can even make your own. If you’ve ever sketched something and thought, "I wish I could stitch that," you totally can. We've got a great walkthrough on how to digitize embroidery designs if you want to dive into creating your own files.
These design files come in a bunch of different formats, and they're usually specific to the machine's brand. You’ll get used to seeing these extensions:
- .PES for Brother and Baby Lock machines
- .JEF for Janome machines
- .DST a common commercial format
- .EXP for Bernina machines
Once you have your file, you'll need to get it over to your embroidery machine. For many machines, this is as simple as popping it onto a USB drive. But lots of the newer models are even slicker, offering Wi-Fi connections so you can send designs straight from your computer without getting up.
This kind of innovation has a long history. Back in the Georgian period (1714-1830), things like tambour embroidery—a faster hook-based technique—completely changed the game for pattern transfer. For businesses like ours serving today’s stitchers, it’s just another chapter in a long story of evolving methods to help people create amazing things.
Positioning Your Design with Precision
After you’ve loaded the file, the real fun begins. Your machine's screen becomes your command center, letting you place the design on your hooped fabric with incredible accuracy. This is where digital transfers really leave the old manual methods in the dust.
Modern machines give you some amazing tools to nail the placement:
- Built-in Grids: Most machines show a digital grid on the screen that mirrors the hoop. It makes lining things up perfectly a breeze.
- Onboard Cameras: This is a feature I absolutely love on higher-end machines. You get a live video feed of your hooped fabric right on the screen, so you can literally drag and drop the design exactly where you want it. No more guessing!
- Placement Stickers: Some systems use little stickers you place on your fabric. The machine’s camera recognizes them and automatically aligns the design to that precise spot.
The best part is that all the guesswork is gone. You can resize, rotate, and even combine different designs right on the screen. You see a perfect preview before the first stitch is ever made, giving you the confidence to tackle just about any project you can dream up.
Once your design is loaded and your fabric is perfectly positioned, all that’s left to do is hit "start." Then you can sit back and watch your machine bring your vision to life, stitch by flawless stitch.
Troubleshooting Common Pattern Transfer Issues
Even with the best intentions and the right tools, some days your pattern transfer just doesn't want to cooperate. It happens to all of us. A slightly crooked line, a stubborn iron-on that won’t stick… these little frustrations are just part of the creative process.
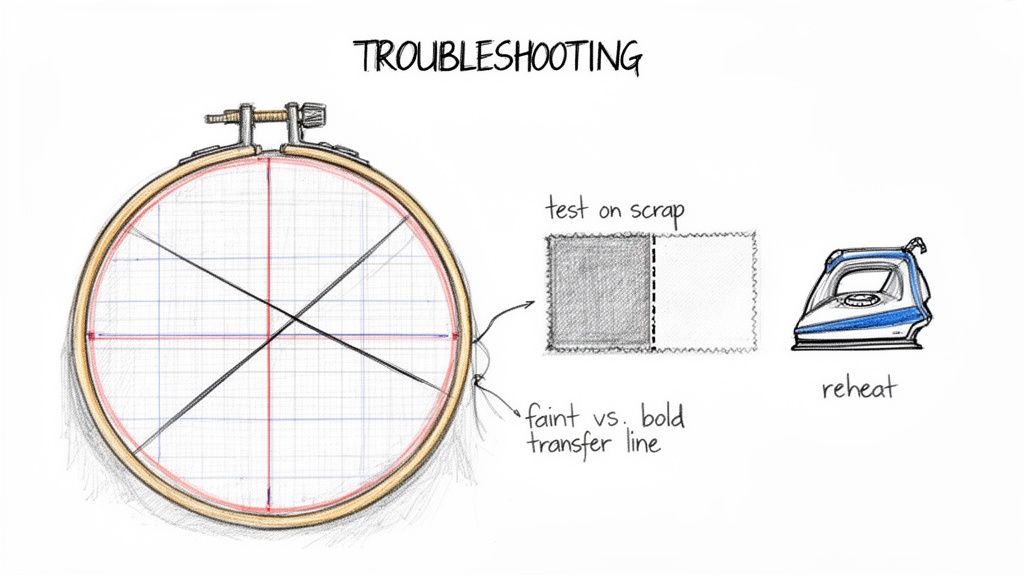
Before you even touch your main project, I have one tip that will save you a world of hurt: always test your marking tool on a scrap of your project fabric. This is my non-negotiable first step. It’s a quick way to see if your lines will show up clearly and, more importantly, if they’ll wash or erase away completely without leaving a ghost of a mark behind.
Common Problems and Quick Fixes
Let's walk through some of the most frequent headaches I see. The good news is that most of these have a simple solution, turning a potential disaster into a minor speed bump.
- My lines are too faint! If you're using carbon paper, this usually comes down to not using enough pressure. Try going over the lines again with a stylus, applying firm, even strokes. If you're tracing with a lightbox, your pen might just be on its last legs. A fresh pen can make all the difference.
- My lines are bleeding or too thick! This is a classic sign of pressing too hard, especially with a brand-new, inky pen. Lighten up your touch. If you’re still getting bleeding, you might be using the wrong pen for your fabric’s weave. Try switching to a marker with a finer tip.
- The whole pattern is crooked! Ah, the dreaded distortion. This is incredibly common with stretchy knits. It means the fabric was stretched out while you were tracing. The key is to let the fabric lie completely flat and relaxed. Never pull it taut. Honestly, for knits, your best bet is to use a sticky-backed stabilizer to hold everything perfectly in place.
Tackling Tricky Fabrics
Not all fabrics play nice. Some, like velvet or anything with a high pile, are nearly impossible to trace on directly—the texture just won't let you draw a clean line. For these challenging materials, a water-soluble stabilizer is really the only way to go.
When a transfer goes sideways, try not to see it as a failure. Think of it as your fabric telling you what it needs. Every project teaches you something that makes you a smarter, more experienced stitcher.
Iron-on transfers have their own set of quirks. If your design isn't sticking, nine times out of ten it's a heat problem. Either your iron wasn't hot enough, or you didn't apply firm pressure for long enough. Don't give up! Cover the area with a press cloth and try again, slowly increasing the heat or how long you press. A little patience is all it takes for a solid transfer.
Got Questions About Transferring Patterns?
Even with the best guides, sometimes you just run into a specific problem. It happens! Let's walk through some of the most common questions I hear from fellow stitchers to get you unstuck and back to creating.
Can I Make My Own Reusable Embroidery Transfers?
You absolutely can, and it's a great way to save time! My go-to method for this is using a heat-transfer pen or pencil on tracing paper.
Once you've traced your design, you can iron it onto fabric several times before the ink gives out. This trick is a lifesaver for projects with repeating motifs or for those favorite patterns you use over and over again. Just keep in mind that these transfer lines are usually permanent, so you'll need to make sure your stitches cover them completely.
What’s the Best Way to Transfer a Pattern to Dark Fabric?
Getting a design onto dark or thick fabrics like denim or felt can feel impossible—you can't see a thing through them! This is where you have to switch up your technique.
Your best bets are either a carbon-style transfer paper (in a light color like white or yellow) or a water-soluble stabilizer. Personally, I find the stabilizer gives the cleanest result. You just stick it on, stitch right through it, and wash it away when you're done. No residue, no fuss.
How Do I Handle Very Delicate or Stretchy Fabrics?
Working with delicate materials like silk or stretchy knits requires a much gentler approach. Trying to trace or press too hard can easily damage the fibers or pull your whole design out of shape.
For these fabrics, a sticky, water-soluble stabilizer is the only way to go. It does double duty by preventing the fabric from stretching as you stitch and lets you skip drawing on the material altogether. It’s the safest way to protect your project.
It’s amazing how far pattern transfer has come. The first pattern books showed up in Germany way back in the 1520s, but it took until around 1770 for patterns to be mass-produced and widely available. If you're a history buff, you can learn more about this journey and the history of embroidery samplers from the V&A Museum.
Here at B-Sew Inn, we are committed to empowering your creativity. Our comprehensive guides, custom sewing machine designs, and extensive support resources are all designed to help you replicate beautiful projects with confidence. We’re here to support you with the best tools, online classes, and training to make every project a joy. Stop by and see everything we have for your next creation at B-Sew Inn.

